Introduction to Orange Creamsicle Dream Bars
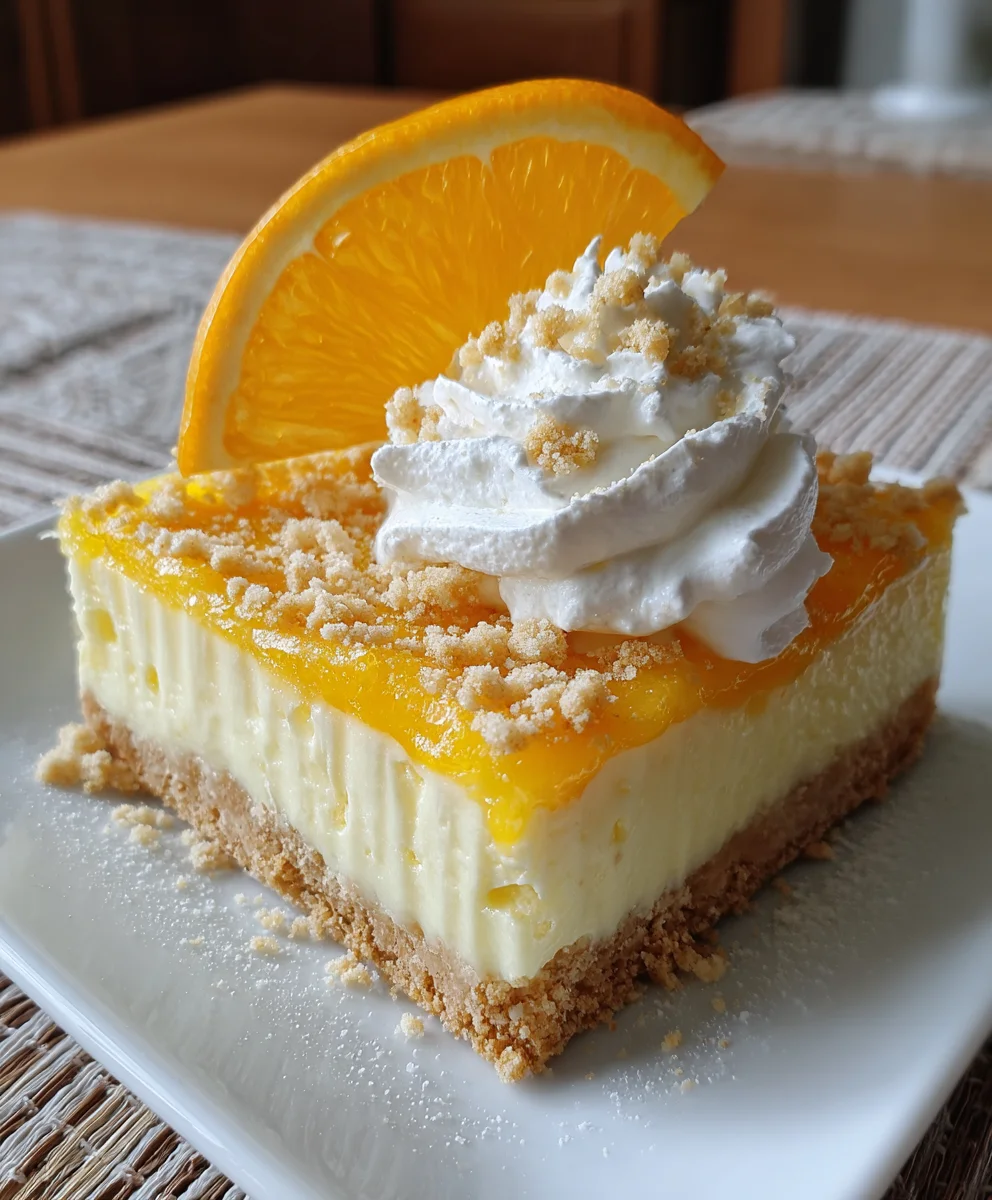
Summer is the perfect time to indulge in something sweet, and I can hardly think of anything more delightful than Orange Creamsicle Dream Bars. These bars are a beautiful combination of creamy cheesecake and refreshing orange flavors, making them a quick solution for those busy days when you want to impress your loved ones. Whether it’s a picnic, a family gathering, or just a sunny afternoon on the patio, these dessert bars are bound to bring smiles to everyone’s faces. Trust me, you’ll be savoring every bite while enjoying the fun of summer!
Why You’ll Love This Orange Creamsicle Dream Bars
If you’re short on time but still crave a dessert that wows, these Orange Creamsicle Dream Bars are for you. They come together quickly and require no baking, saving you precious minutes in the kitchen. With their creamy, dreamy texture, and refreshing orange flavor, they feel indulgent without the hassle. Plus, they’re a crowd-pleaser, guaranteed to bring joy to family gatherings and summer celebrations!
Ingredients for Orange Creamsicle Dream Bars
To create these luscious Orange Creamsicle Dream Bars, you’ll need a handful of simple ingredients that work perfectly together. Here’s a quick rundown:
- Graham Crackers: These serve as the crunchy base, adding texture and a hint of sweetness.
- Plain Flour: Just a touch to help stabilize the crust while baking.
- Caster Sugar: This fine sugar blends seamlessly into the crust for a smooth sweetness.
- Unsalted Butter: Melted butter brings the crust together, offering richness and flavor.
- Cream Cheese: The star of the cheesecake layer, ensuring a creamy and delightful texture.
- Powdered Sugar: Sweetens the cream cheese while helping achieve a silky smooth filling.
- Vanilla Extract: Just a splash enhances the overall flavor profile of the dessert.
- Whipped Topping: For that light and fluffy texture that just screams summer!
- Orange Jelly Powder: This brings that classic creamsicle flavor and a vibrant orange hue.
- Boiling & Cold Water: Used to prepare the jelly powder correctly, giving it the right consistency.
- Orange Extract: Pack in that zesty aroma and flavor, making it extra refreshing.
- Orange Food Coloring: Optional for that bright, eye-catching look.
- Whipped Cream: Optional, but who can resist a dollop on top for extra indulgence?
For exact measurements, you can find all the details at the bottom of the article, handy for printing out that perfect shopping list!
How to Make Orange Creamsicle Dream Bars
Now that we’ve gathered all our ingredients, let’s dive into making these delicious Orange Creamsicle Dream Bars. The process is straightforward, and I promise you’ll love how easy it is to whip this up! Follow these simple steps, and let’s get cooking!
Step 1: Prepare the Crust
First things first, let’s create that delightful crust! Start by placing the graham crackers in a food processor and blend them into fine crumbs. If you don’t have a processor, a rolling pin and a sturdy bag work just as well.
Next, add in the plain flour and caster sugar. Pulse those together until they are mixed well. Then, pour in the melted butter. Pulse it once more until the mixture resembles wet sand. Trust me, you’ll get a great aroma as you go!
Transfer the crumb mixture into a 23 x 33 cm pan. Using your hands or the bottom of a glass, press it down firmly into an even layer. Set this beautiful base aside while we move to the cheesecake layer.
Step 2: Make the Cheesecake Layer
Time for the cheesecake! In a large mixing bowl, beat the softened cream cheese until it’s nice and smooth. I usually use an electric mixer for this, but a good whisk works fine too if you’re feeling strong!
Add in the powdered sugar and vanilla extract, then beat until everything is fully combined and creamy. Once that’s done, gently fold in the whipped topping. Take your time here to ensure it blends well and remains fluffy.
Spread this lovely cheesecake mixture evenly over your prepared crust. You want it to be as even as the summer sun—a nice, even layer for the perfect bite!
Step 3: Prepare the Orange Gelatin
Next, let’s bring in that vibrant orange flavor. In a medium saucepan, bring water to a boil. Once boiling, add in the orange jelly powder and whisk until it’s fully dissolved. It’s like magic as the color and aroma fill your kitchen!
Then, stir in the cold water to cool down the gelatin. After that’s done, pop it in the refrigerator for about 10 minutes. This step is crucial; we want it to chill without setting just yet.
Step 4: Combine Orange and Cheesecake Mixtures
Once your gelatin is cool, it’s time to combine! In another mixing bowl, beat more softened cream cheese, powdered sugar, orange extract, and orange food coloring until it’s smooth like a summer breeze.
Slowly pour the cooled orange gelatin into this mixture while continuously mixing. This helps create the perfect orange cream filling. You’ll see the beautiful color transform as you mix. Spread this orange cream gently over the cheesecake layer with a spatula.
Step 5: Chill and Serve
The final step involves patience, but it’s worth it! Carefully place your pan in the refrigerator and let it chill until both layers are set. This usually takes about 3 hours, but good things come to those who wait!
When you’re ready to serve, cut into squares, and feel free to top with whipped cream for an extra touch of indulgence. Enjoy your Orange Creamsicle Dream Bars under the sun—summer doesn’t get much better than this!
Tips for Success
- Make sure your cream cheese is at room temperature for easy mixing.
- For a fluffier cheesecake layer, mix gently to keep the air in.
- Allow each layer to chill well before adding the next for the best texture.
- Create a stunning presentation by adding fresh orange slices on top.
- Swap out the orange jelly for strawberry or lemon for a fun twist!
Equipment Needed
- Food Processor: For crumbs, but a rolling pin works wonders too!
- Baking Pan (23 x 33 cm): Any rectangular or square pan will do.
- Mixing Bowls: A large bowl for the cheesecake and a medium one for gelatin.
- Whisk or Electric Mixer: For all that creamy mixing action.
- Spatula: Essential for spreading layers evenly.
Variations on Orange Creamsicle Dream Bars
- Chocolate Orange: Add a layer of chocolate ganache on top for an exciting twist that balances the citrus flavor.
- Gluten-Free Option: Use gluten-free graham crackers to create a base that’s as delicious as the original.
- Fruit-Infused: Mix in fresh fruit like raspberries or diced mango for bursts of flavor and color.
- Dairy-Free Version: Substitute cream cheese with vegan cream cheese and use coconut whipped cream for a dairy-free delight.
- Lower Sugar: Replace caster and powdered sugars with a sugar alternative like Stevia or monk fruit to reduce sugar content.
Serving Suggestions
- Pair your Orange Creamsicle Dream Bars with a refreshing iced tea or lemonade for a perfect summer treat.
- For a playful presentation, serve on a colorful platter with fresh orange slices and mint leaves as garnish.
- Consider drizzling some chocolate sauce over the top for an elegant touch.
- Scoops of vanilla ice cream alongside would create a delightful dessert duo.
FAQs about Orange Creamsicle Dream Bars
Can I make Orange Creamsicle Dream Bars ahead of time?
Absolutely! These bars can be made a day or two in advance. Just store them in the refrigerator, and they’ll be even more delicious as the flavors meld. Perfect for prepping for parties or family get-togethers!
Can I freeze Orange Creamsicle Dream Bars?
Yes, you can freeze them! Just make sure to wrap them tightly in plastic wrap or foil. They will keep well in the freezer for up to a month, making them a great make-ahead option. When you’re ready to enjoy, simply thaw in the refrigerator overnight.
What can I use instead of graham crackers for the crust?
If you want to switch things up, consider using crushed cookies like digestive biscuits or even chocolate wafers. They’ll add a unique flavor twist to your Orange Creamsicle Dream Bars while maintaining that delightful crunch!
Are there any dietary substitutions I can make?
Yes! For a gluten-free option, choose gluten-free graham crackers. To make it dairy-free, use vegan cream cheese and coconut whipped cream. These substitutions keep the essence of the dessert without sacrificing taste!
How should I store leftover Orange Creamsicle Dream Bars?
Store any leftovers in an airtight container in the refrigerator. They should stay fresh for about five days. Just make sure they’re chilled well, so they retain that creamy goodness!
Final Thoughts on Orange Creamsicle Dream Bars
As summer breezes in, these Orange Creamsicle Dream Bars become a celebration of sunshine and joy. Every bite is a delightful reminder of those carefree childhood days spent enjoying frozen treats on warm afternoons. The creamy cheesecake harmonizes effortlessly with that zesty orange layer, bringing refreshment and nostalgia in each square. Whether you’re enjoying them at a gathering or sneaking a piece after dinner, these bars are sure to create sweet memories. So gather your loved ones, share this treat, and bask in the happiness that this simple dessert brings to your summertime adventures!
Print
Orange Creamsicle Dream Bars
- Total Time: 3 hours 25 minutes (including chilling)
- Yield: 16 servings 1x
- Diet: Vegetarian
Description
A delightful summer dessert combining creamy cheesecake and refreshing orange flavors.
Ingredients
- 2 packages graham crackers
- 2 teaspoons plain flour
- 120 grams caster sugar
- 170 grams unsalted butter, melted
- 450 grams cream cheese, softened
- 240 grams powdered sugar
- 2 teaspoons pure vanilla extract
- 480 millilitres whipped topping, thawed
- 170 grams orange jelly powder (2 x 85g boxes)
- 355 millilitres water, boiling
- 355 millilitres water, cold
- 450 grams cream cheese, softened
- 60 grams powdered sugar
- 4 teaspoons orange extract
- 16 drops orange food colouring
- Whipped cream, for serving (optional)
Instructions
- Place graham crackers in a food processor and blend into fine crumbs. Add flour and sugar, pulsing to combine. Pour in the melted butter and pulse until the mixture resembles wet sand.
- Transfer the crumb mixture to a 23 x 33 cm pan and press firmly into an even layer. Set aside.
- In a large mixing bowl, beat softened cream cheese, powdered sugar, and vanilla extract until smooth. Gently fold in the whipped topping until fully incorporated. Spread this mixture evenly over the prepared crust.
- Boil water in a medium saucepan. Add orange jelly powder and whisk until fully dissolved. Stir in the cold water. Place the mixture in the refrigerator for 10 minutes to cool completely without setting.
- In a separate large bowl, beat softened cream cheese, powdered sugar, orange extract, and orange food colouring until smooth and well blended.
- Slowly pour the cooled orange gelatin into the orange cream mixture while continuously mixing to ensure a smooth, homogeneous consistency.
- Spread the orange cream mixture gently over the cheesecake layer.
- Refrigerate dessert until fully chilled and the orange cream layer is set.
- Top individual portions with whipped cream before serving, if desired.
Notes
- Ensure the cream cheese is softened to room temperature for easy mixing.
- Allow the layers to chill thoroughly for best texture and flavor.
- Prep Time: 25 minutes
- Cook Time: 0 minutes
- Category: Dessert
- Method: Refrigerate
- Cuisine: American
Nutrition
- Serving Size: 1 bar
- Calories: 300
- Sugar: 25g
- Sodium: 150mg
- Fat: 20g
- Saturated Fat: 10g
- Unsaturated Fat: 8g
- Trans Fat: 0g
- Carbohydrates: 30g
- Fiber: 1g
- Protein: 3g
- Cholesterol: 50mg