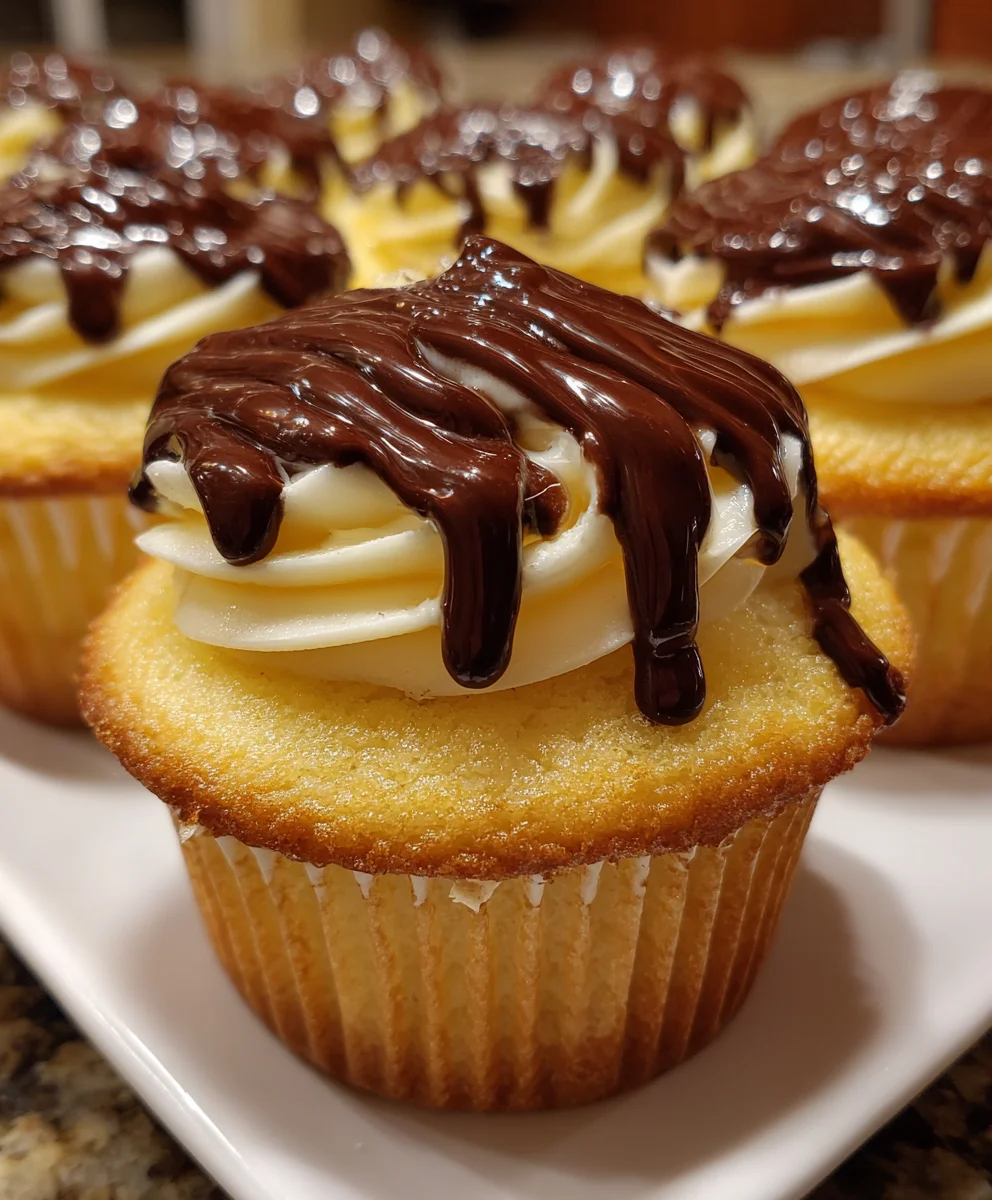
Introduction to Boston Cream Pie Cupcakes
There’s something truly delightful about Boston Cream Pie Cupcakes. They capture all the charm of the classic dessert in a fun, bite-sized treat. I know how hectic life can get—between juggling work, family, and social obligations. That’s why I love this recipe. It’s an easy solution when you want to impress your loved ones without spending hours in the kitchen. These cupcakes are packed with a rich pastry cream, so every bite feels like a mini celebration! Trust me, you’ll want to keep this recipe handy for whenever you need a sweet pick-me-up.
Why You’ll Love This Boston Cream Pie Cupcakes
There’s a joy that comes from indulging in a treat that’s both delicious and easy to make. These Boston Cream Pie Cupcakes deliver on all fronts! The moist cupcake paired with a creamy filling is a flavor combination that never disappoints. Plus, they’re quick to whip up, meaning you can satisfy your sweet tooth without dedicating an entire afternoon to baking. Everyone will be begging for seconds!
Ingredients for Boston Cream Pie Cupcakes
Gathering the right ingredients is the first step to baking these delightful Boston Cream Pie Cupcakes. Each component plays its part in creating that perfect flavor and texture. Here’s what you’ll need:
- Unsalted Butter: Adds richness and moisture. I find that softer butter creams better with sugar.
- Sugar: Sweetens the batter and helps the cupcakes rise. Feel free to substitute half with brown sugar for a deeper flavor.
- Vanilla Extract: A must for that warm, comforting flavor. Always opt for pure vanilla for the best taste.
- Eggs: They bind everything together, giving your cupcakes structure. Use room-temperature eggs for better blending.
- Flour: This is the base of your batter. All-purpose flour works great, but you could try cake flour for a lighter texture.
- Baking Powder: The leavening agent that makes your cupcakes rise. Ensure it’s fresh for the best results.
- Salt: Just a pinch enhances the sweetness and balances the flavors.
- Buttermilk: This keeps the cupcakes moist and adds a subtle tang. If you’re out of buttermilk, mix milk with a splash of vinegar or lemon juice as a substitute.
- Egg Yolks: These enrich the pastry cream filling. Use fresh yolks for the creamiest consistency.
- Milk: Essential for your pastry cream. Whole milk is preferred for creaminess, but you can use any milk you have on hand.
- Granulated Sugar: Sweetens the pastry cream. You might want to reduce the amount if using sweetened chocolate.
- Cornstarch: This thickens your pastry cream and gives it that velvety texture we all love. It’s a handy ingredient for sauces, too!
- Vanilla Extract (for the pastry cream): A double dose of vanilla is never a bad idea; it enhances the overall flavor!
- Semi-Sweet Baking Chocolate: For that luscious ganache. You could also use dark chocolate if you prefer a richer taste.
- Heavy Cream: This is what makes your ganache smooth and silky. Don’t skimp on the cream—you’ll be glad you didn’t!
For those who love to cook with precision, exact measurements are at the bottom of this article and available for printing. Now, let’s get our hands a little dirty and dive into the delicious world of baking!
How to Make Boston Cream Pie Cupcakes
Now that we’ve gathered our ingredients, it’s time to whip up these delightful Boston Cream Pie Cupcakes. Follow along as I guide you step-by-step through the process. Let’s get baking!
Step 1: Prepare the Cupcake Batter
Start by preheating your oven to 350°F. In a large mixing bowl, cream together the softened butter and sugar until it’s light and fluffy. This usually takes about 4 to 5 minutes. Scrape the sides of the bowl occasionally to ensure even mixing.
Add in the vanilla extract, and then add the eggs, one at a time, beating well after each addition. The secret to a great batter is to incorporate air, which you achieve by creaming the butter and sugar properly.
In another bowl, whisk together flour, baking powder, and salt. This step ensures that your leavening agent is evenly distributed. Now, slowly alternate adding the flour mixture and buttermilk to the creamed mixture, beginning and ending with the flour. Beat just until combined; overmixing will lead to tough cupcakes.
Step 2: Bake the Cupcakes
Line a lightly greased muffin pan with cupcake liners. Fill each liner about ¾ full with the batter. This allows room for the cupcakes to rise beautifully!
Bake your cupcakes for 18 to 25 minutes. To check for doneness, insert a toothpick into the center; if it comes out clean or with a few crumbs, you’re good to go. Once baked, allow the cupcakes to cool in the pan for about 10 minutes before transferring them to a wire rack to cool completely.
Step 3: Make the Pastry Cream Filling
While the cupcakes cool, let’s focus on the pastry cream. In a medium bowl, beat the egg yolks until they’re smooth. Gradually stir in the milk until everything is well blended.
In a large saucepan over medium-low heat, combine sugar, cornstarch, and salt. Gradually whisk in the milk mixture, stirring constantly to avoid lumps. Keep stirring until the mixture thickens and just reaches a low boil—it usually takes about 20 minutes.
Remove from heat and place the saucepan in a large bowl filled with ice water, continuing to stir. This helps cool down the cream quickly. Once it’s cooled slightly, stir in the vanilla extract. Cover the cream with a piece of plastic wrap directly on the surface to prevent a skin from forming and refrigerate.
Step 4: Create the Chocolate Ganache
For the ganache, finely chop your semi-sweet chocolate and place it in a mixing bowl. Heat the heavy cream in a saucepan until you just see steam rising; don’t let it boil. Pour the hot cream over the chopped chocolate.
Let it sit for a minute to melt the chocolate, then whisk until smooth and glossy. The key is to let it cool slightly but not harden; you want a luscious, pourable consistency for dipping!
Step 5: Assemble the Cupcakes
Once your cupcakes are completely cool, it’s time to fill them with that delicious pastry cream. Use a piping bag fitted with a filling tip to inject cream into the center of each cupcake.
Next, dip the top of each filled cupcake in the chocolate ganache, allowing any excess to drip off. I like to place them on a wire rack for this step, so the excess ganache doesn’t pool underneath. Let them sit for about 30 minutes to an hour for the ganache to set.
And there you have it! Your Boston Cream Pie Cupcakes are ready to impress. Store any leftovers in the refrigerator to keep them fresh; but I won’t judge if you finish them all in one go!
Tips for Success
- Make sure to use fresh ingredients for the best flavor.
- Allow cupcakes to cool completely before filling them with pastry cream.
- Use a filling tip to make injecting pastry cream easier and neater.
- Double-check that your baking powder is fresh for fluffy cupcakes.
- Store any leftover cupcakes in the refrigerator to keep them moist.
Equipment Needed
- Mixing Bowls: Use large bowls for combining ingredients; glass or stainless steel works best.
- Electric Mixer: A stand or hand mixer speeds up creaming butter and sugar.
- Muffin Pan: Regular or silicone pans are perfect for baking your cupcakes.
- Piping Bag: Essential for filling cupcakes; you can substitute with a zip-top bag if needed.
- Food Processor: Handy for chopping chocolate finely; a knife will do if you’re careful.
Variations of Boston Cream Pie Cupcakes
- Gluten-Free Option: Substitute all-purpose flour with a 1:1 gluten-free baking blend for a busting flavor without the gluten.
- Chocolate Cupcakes: Swap out the vanilla batter for a chocolate cake mix for an extra chocolatey twist.
- Fruit-Filled Cupcakes: Add a layer of fresh berries or fruit preserves between the pastry cream and ganache for a fruity kick.
- Dairy-Free Version: Use dairy-free butter and coconut milk to make the cupcakes and pastry cream without dairy.
- Nutty Twist: Incorporate finely chopped nuts into the cupcake batter or use nut butter in the filling for added texture and flavor.
Serving Suggestions for Boston Cream Pie Cupcakes
- Serve with a dollop of whipped cream on top for an extra touch of indulgence.
- Pair with a hot cup of coffee or tea to balance the sweetness.
- Garnish with chocolate shavings or fresh berries for a beautiful presentation.
- Place them on a decorative platter to showcase your baking skills at gatherings.
- Enjoy alongside a scoop of vanilla ice cream for a delightful dessert experience!
FAQs about Boston Cream Pie Cupcakes
Can I make these cupcakes ahead of time? Absolutely! You can bake the cupcakes and prepare the pastry cream the day before. Just fill and dip them in ganache on the day you plan to serve them for the best texture and taste.
How do I store leftover Boston Cream Pie Cupcakes? If you have any leftovers, simply place them in an airtight container in the refrigerator. This will help keep them moist and fresh for up to 3 days.
Can I substitute the buttermilk? Yes! If you don’t have buttermilk on hand, you can mix 2/3 cup of regular milk with a tablespoon of vinegar or lemon juice. Let it sit for around 5 minutes to thicken before using.
What if I don’t have a piping bag for the pastry cream? No worries! You can easily use a zip-top bag. Just fill it with the cream, snip a small corner off, and pipe it into your cupcakes. It works just as well!
Can I freeze these cupcakes? Yes, you can freeze the unfrosted cupcakes! Just wrap them individually in plastic wrap and place them in a freezer-safe bag. Thaw them in the fridge before filling and dipping them in ganache.
Final Thoughts
Making Boston Cream Pie Cupcakes isn’t just about creating a dessert; it’s about sharing joy with those you love. Picture the smiles on your family’s faces as they bite into the rich pastry cream and velvety ganache. It’s a sweet moment of bliss that transforms an ordinary day into something special. Whether it’s a birthday, a family gathering, or just a well-deserved treat for yourself, these cupcakes bring warmth and nostalgia into the kitchen. Each bite is a reminder that baking can create delightful memories, one cupcake at a time. You’re going to love every moment spent making these!
Print
Boston Cream Pie Cupcakes
- Total Time: 55 minutes
- Yield: 12 cupcakes 1x
- Diet: Vegetarian
Description
Delicious Boston Cream Pie Cupcakes featuring a moist cake filled with rich pastry cream and topped with a luscious chocolate ganache.
Ingredients
- 12 tablespoons unsalted butter, softened
- 1 cup sugar
- 2 teaspoons vanilla
- 3 eggs
- 1 ½ cups flour
- 2 teaspoons baking powder
- ½ teaspoon salt
- ⅔ cup buttermilk
- 3 egg yolks
- 3 cups milk
- ½ cup sugar
- ⅓ cup cornstarch
- ¼ teaspoon salt
- 1 teaspoon vanilla
- 8 ounces semi-sweet baking chocolate, finely chopped
- 1 cup heavy cream
Instructions
- In a large mixing bowl, cream together the butter and sugar.
- Add vanilla and beat again.
- Add eggs, one at a time, beating well after each addition.
- Mix together flour, baking powder, and salt in a separate bowl.
- Alternate adding the flour mixture and buttermilk to the creamed mixture in 3 batches, beginning and ending with the dry ingredients. Beat after each addition, just until combined.
- Line a lightly greased muffin pan with cupcake liners and fill each liner ¾ of the way full.
- Bake in a 350°F oven for 18-25 minutes, or until a toothpick comes out clean. Allow to cool completely.
- In a medium bowl, beat egg yolks well.
- Gradually stir in milk until well blended.
- In a large, heavy saucepan over medium-low heat, mix together sugar, cornstarch, and salt.
- Gradually add in the milk mixture, stirring well to prevent lumps.
- Continue cooking over medium-low heat, stirring constantly until the mixture reaches a low boil (about 20 minutes). Mixture should be thickened at this point, and will continue to thicken as it cools. Remove from heat.
- Set pot in a large bowl of ice water, still stirring. Add vanilla and stir to combine.
- Place a piece of plastic wrap directly on filling to prevent a skin from forming and place in refrigerator until ready to use.
- Place chocolate in a food processor and process until it’s finely chopped. Transfer to a mixing bowl. Set aside.
- Heat cream in a small saucepan until it starts to steam, stirring often.
- Gradually add the hot cream to the bowl of chocolate, and whisk until the mixture is smooth. Wait until cool enough to handle but not hardened.
- When the cupcakes are cooled completely, transfer pastry cream filling to a piping bag with a filling tip attached.
- Fill each cupcake with pastry cream and set aside.
- Dip each cupcake into the finished ganache. Allow 30 minutes to an hour for the ganache to set.
Notes
- Ensure the cupcakes are completely cooled before filling and dipping in ganache.
- Use a filling tip for easy injection of the pastry cream into the cupcakes.
- Store any leftover cupcakes in the refrigerator.
- Prep Time: 30 minutes
- Cook Time: 25 minutes
- Category: Dessert
- Method: Baking
- Cuisine: American
Nutrition
- Serving Size: 1 cupcake
- Calories: 250
- Sugar: 20g
- Sodium: 150mg
- Fat: 15g
- Saturated Fat: 9g
- Unsaturated Fat: 4g
- Trans Fat: 0g
- Carbohydrates: 28g
- Fiber: 1g
- Protein: 3g
- Cholesterol: 85mg