Introduction to Lemon Lava Cake Dessert
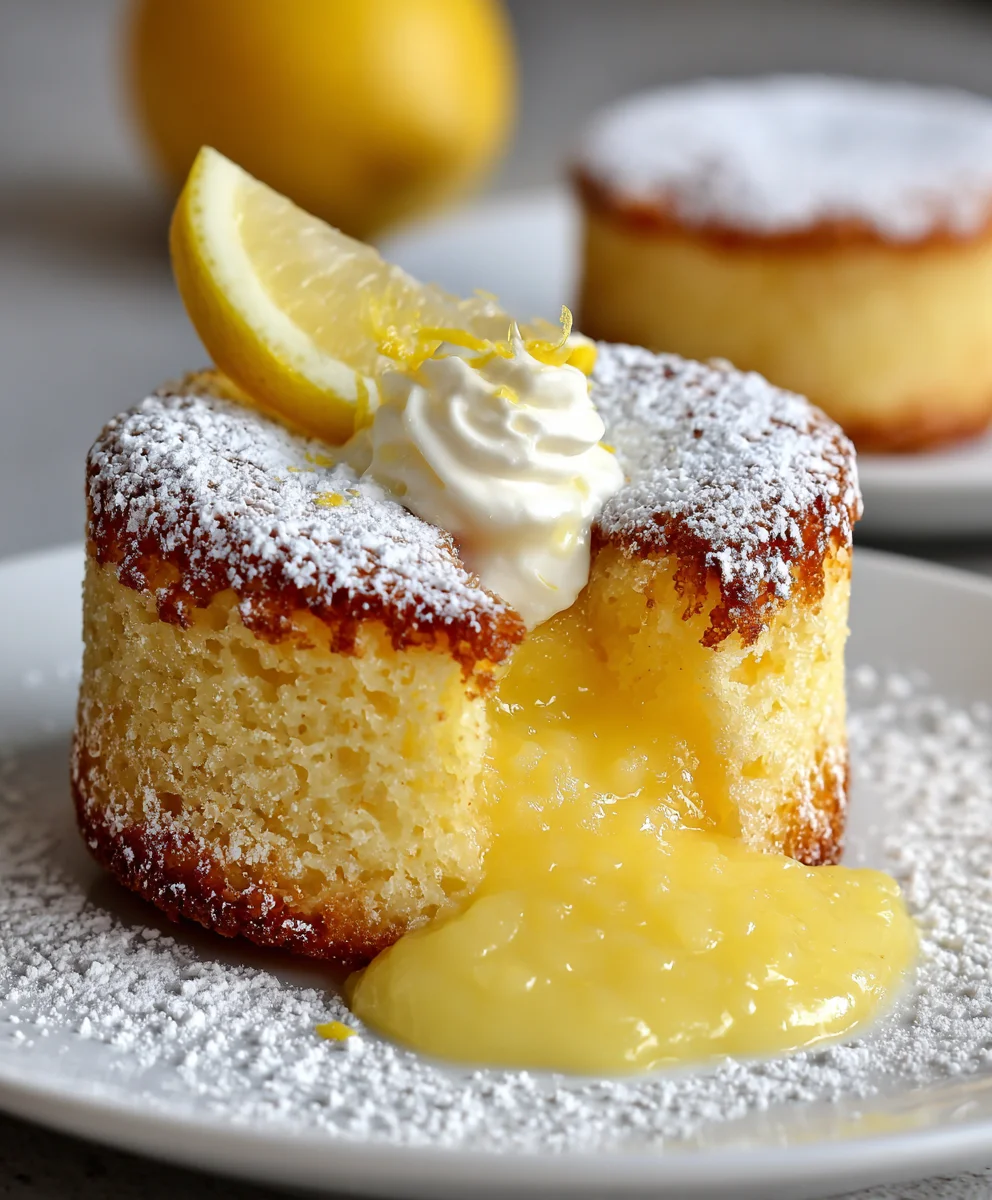
Let me tell you about the magic of Lemon Lava Cake Dessert! This sweet treat is not just any dessert; it’s a gooey, lemony explosion of joy that’s sure to brighten your day. As a busy mom, I know how hectic life can get, and this recipe is a quick solution for those moments when you want to impress without the fuss. The best part? You can whip it up in under 40 minutes! Perfect for celebrations or a cozy family dinner, this dessert will have everyone asking for seconds. Can you hear the applause?
Why You’ll Love This Lemon Lava Cake Dessert
This Lemon Lava Cake Dessert is truly a gem in the busy cook’s repertoire! It’s quick to prepare, with minimal cleanup, making it hassle-free after a long day. The luscious gooey center combined with the bright lemon flavor strikes the perfect balance between sweet and tangy, satisfying even the pickiest of eaters. Plus, it’s impressive enough to wow your guests, ensuring you feel like a culinary superstar!
Ingredients for Lemon Lava Cake Dessert
Gathering the right ingredients is the first step to creating this delightful Lemon Lava Cake Dessert. Each component plays a vital role in achieving that rich, gooey goodness. Here’s what you’ll need:
- White chocolate baking chips: These provide a creamy base that pairs beautifully with the bright lemon flavor.
- Unsalted butter: Essential for richness, it also helps in creating a smooth texture when melted with the chocolate.
- All-purpose flour: This acts as the backbone of the cake, helping it maintain structure while still keeping it light.
- Granulated sugar: Adds sweetness and enhances the overall taste of your dessert, balancing the tartness of the lemon.
- Eggs and egg yolks: Vital for binding and providing a fluffy texture, they ensure your lava cakes rise perfectly.
- Lemon curd: The star ingredient! This zesty filling creates that luscious lava effect when you bite into the cake.
- Lemon zest: A sprinkle of zest brightens the flavor, adding a refreshing punch that elevates your dessert.
- Pure vanilla extract: A dash of vanilla enhances the overall flavor profile, rounding out the cake wonderfully.
- Powdered sugar: Optional for dusting, it adds a touch of sweetness and a beautiful presentation.
For those looking to make adjustments, you can experiment with dairy-free substitutes for the butter or chocolate. Feel free to source high-quality lemon curd or even make your own if you’re up for a little extra adventure!
Exact quantities of these ingredients can be found at the bottom of the article for your convenience and easy printing.
How to Make Lemon Lava Cake Dessert
Creating the perfect Lemon Lava Cake Dessert is easier than you might think! Follow these simple steps for a tantalizing treat that will impress your family and friends. Let’s dive into the heart of gooey deliciousness!
Step 1: Preheat and Prepare
First off, preheat your oven to 220°C (425°F). This is essential for achieving that perfect rise. Grease six 175 ml ramekins with nonstick spray. Arranging them on a baking sheet makes placing them in the oven a breeze, ensuring they bake evenly.
Step 2: Melt the Chocolate and Butter
Next, place your white chocolate baking chips and cubed unsalted butter in a medium heatproof bowl. Microwave them for about a minute, then stir. Continue microwaving in 15-second intervals, stirring after each. This method makes it easy to achieve a silky, smooth mixture, creating that wonderful texture for your cake.
Step 3: Combine Dry Ingredients
In this step, add in your all-purpose flour and granulated sugar to the melted chocolate mixture. Stir gently until just combined. This careful blending is crucial as it prevents lumps and helps create a smooth batter, so keep an eye on it!
Step 4: Add Egg Mixture
Now it’s time to incorporate the eggs and egg yolks into your mixture. Stir gently to combine, being careful not to overmix. Overmixing can lead to dense cakes, and we want our Lemon Lava Cake Dessert to be light and fluffy!
Step 5: Portion the Batter
Divide the mixture evenly among your prepared ramekins, filling each about two-thirds full. This allows enough space for the cakes to rise properly and creates that heavenly lava effect in the center. Don’t worry about being perfect; a little personality in the kitchen is always welcome!
Step 6: Bake to Perfection
Place your baking sheet in the middle of the oven and bake for 20 to 25 minutes. Watch for that golden top that springs back when touched. This is the telltale sign that your Lemon Lava Cakes are ready to shine! Overbaking will rob them of their gooey texture.
Step 7: Serve and Enjoy
After baking, let the cakes rest for five minutes. Carefully run a knife around the edges of each ramekin to loosen. Invert them onto plates and enjoy the magic of that warm lemon lava center. Serve immediately for the ultimate indulgence!
Tips for Success
- Make sure your ramekins are well-greased; this helps the cakes release easily.
- Don’t skip the resting time after baking; it helps set the cakes while keeping the centers molten.
- Use fresh lemons for zest and curd for the brightest flavor.
- Check for doneness by gently pressing the tops; they should spring back.
- If making ahead, store in the fridge but serve warm for the best gooeyness!
Equipment Needed
- Ramekins: Six 175 ml ramekins are ideal, but muffin tins can work in a pinch.
- Baking sheet: A sturdy baking sheet helps in transporting your ramekins to the oven effortlessly.
- Heatproof bowl: Use a glass or ceramic bowl for melting chocolate safely.
- Whisk or spatula: A whisk is great for mixing, while a spatula helps scrape down the sides.
Variations of Lemon Lava Cake Dessert
- Chocolate Lava Delight: Swap half of the white chocolate with dark chocolate for a rich twist on this classic.
- Berry Burst: Add a layer of mixed berries like raspberries or blueberries into the batter for a fruity surprise.
- Dairy-Free Option: Use coconut oil or a plant-based butter substitute with dairy-free chocolate for an indulgent yet vegan treat.
- Reduced Sugar Version: Substitute honey or a sugar alternative to cut down on sweetness while still enjoying the gooey charm.
- Gluten-Free Delight: Replace all-purpose flour with almond flour or a gluten-free blend for a similar texture without gluten.
Serving Suggestions for Lemon Lava Cake Dessert
- Fresh Berries: Serve with a side of mixed berries for a bright contrast and added freshness.
- Vanilla Ice Cream: A scoop of creamy vanilla ice cream on top brings a delightful cold contrast to the warm cake.
- Mint Leaves: Garnish with a sprig of mint for an elegant touch and flavor boost.
- Lemonade: Pair with a chilled glass of lemonade to maintain the citrus theme.
- Dust with Powdered Sugar: A light sprinkle on top enhances presentation and sweetness.
FAQs about Lemon Lava Cake Dessert
What should I do if my Lemon Lava Cake Dessert turns out too dense?
Density often comes from overmixing the batter or adding too much flour. To keep your cake light and airy, mix just until combined and be sure to measure your ingredients accurately. Remember, less is more when it comes to mixing!
Can I make the batter ahead of time?
Yes! You can prepare the batter up to a day in advance. Just store it covered in the refrigerator. When you’re ready, fill the ramekins and bake as directed. This makes it a perfect option for entertaining with minimal last-minute fuss!
Can I use store-bought lemon curd?
Absolutely! Store-bought lemon curd can save you time and still deliver delicious results. Look for high-quality versions for the best flavor in your Lemon Lava Cake Dessert. You won’t regret the convenience!
How do I know when my cake is ready?
Your cakes are ready when they’re golden on top and spring back when touched lightly. The sides should just start to pull away from the ramekin, while the center remains soft. This is what creates that signature gooey lava effect!
How should I store leftovers?
Store any leftover Lemon Lava Cake Dessert in an airtight container in the refrigerator. Enjoy within a few days for the best results. Just remember to reheat them gently to preserve that gooey goodness!
Final Thoughts
There’s something incredibly joyful about baking a Lemon Lava Cake Dessert. The way it fills the kitchen with warmth and sweetness is truly magical. Each bite, with its oozy lemon center, is like a little burst of sunshine on your palate. Whether it’s a casual weeknight or a special occasion, this dessert is a delightful end to any meal. I love how it brings family and friends together, creating moments of happiness. So grab your ramekins and embrace the gooey goodness this recipe offers! You’ll find joy not just in the dessert, but in the memories it creates.
Print
Lemon Lava Cake Dessert
- Total Time: 40 minutes
- Yield: 6 servings 1x
- Diet: Vegetarian
Description
A delicious and indulgent Lemon Lava Cake Dessert with a gooey lemon filling.
Ingredients
- 170 g white chocolate baking chips
- 113 g unsalted butter, cubed
- 85 g all-purpose flour
- 110 g granulated sugar
- 4 large eggs
- 4 large egg yolks
- 150 g lemon curd
- 2 tbsp lemon zest (from 2 lemons)
- 1 tsp pure vanilla extract
- 2 tbsp powdered sugar for dusting (optional)
Instructions
- Preheat the oven to 220°C. Grease six 175 ml ramekins with nonstick spray and arrange them on a baking sheet.
- Combine white chocolate baking chips and cubed unsalted butter in a medium heatproof bowl. Microwave for 1 minute, stir, then continue in 15-second intervals, stirring after each, until smooth.
- Stir in all-purpose flour, granulated sugar, lemon curd, lemon zest, and vanilla extract until just combined.
- Gently mix in the eggs and egg yolks, being careful not to overmix. Ensure the batter is fully incorporated and smooth.
- Divide the batter evenly among the prepared ramekins, filling each about two-thirds full.
- Place the baking sheet on the middle oven rack and bake for 20 to 25 minutes, until surfaces are golden and spring back when touched.
- Allow the cakes to stand for 5 minutes. Run a knife tip around the inside edge of each ramekin. Invert onto a plate and let rest for 1 minute before lifting the ramekin away slowly.
- Dust the tops with powdered sugar if desired. Serve warm for a gooey centre.
Notes
- Ensure not to overmix the batter to keep the cakes light and fluffy.
- Serve immediately for the best gooey texture.
- Store any leftovers in an airtight container in the refrigerator, but consume within a few days for best results.
- Prep Time: 15 minutes
- Cook Time: 25 minutes
- Category: Dessert
- Method: Baking
- Cuisine: American
Nutrition
- Serving Size: 1 cake
- Calories: 350
- Sugar: 25 g
- Sodium: 150 mg
- Fat: 20 g
- Saturated Fat: 10 g
- Unsaturated Fat: 8 g
- Trans Fat: 0 g
- Carbohydrates: 40 g
- Fiber: 1 g
- Protein: 5 g
- Cholesterol: 150 mg