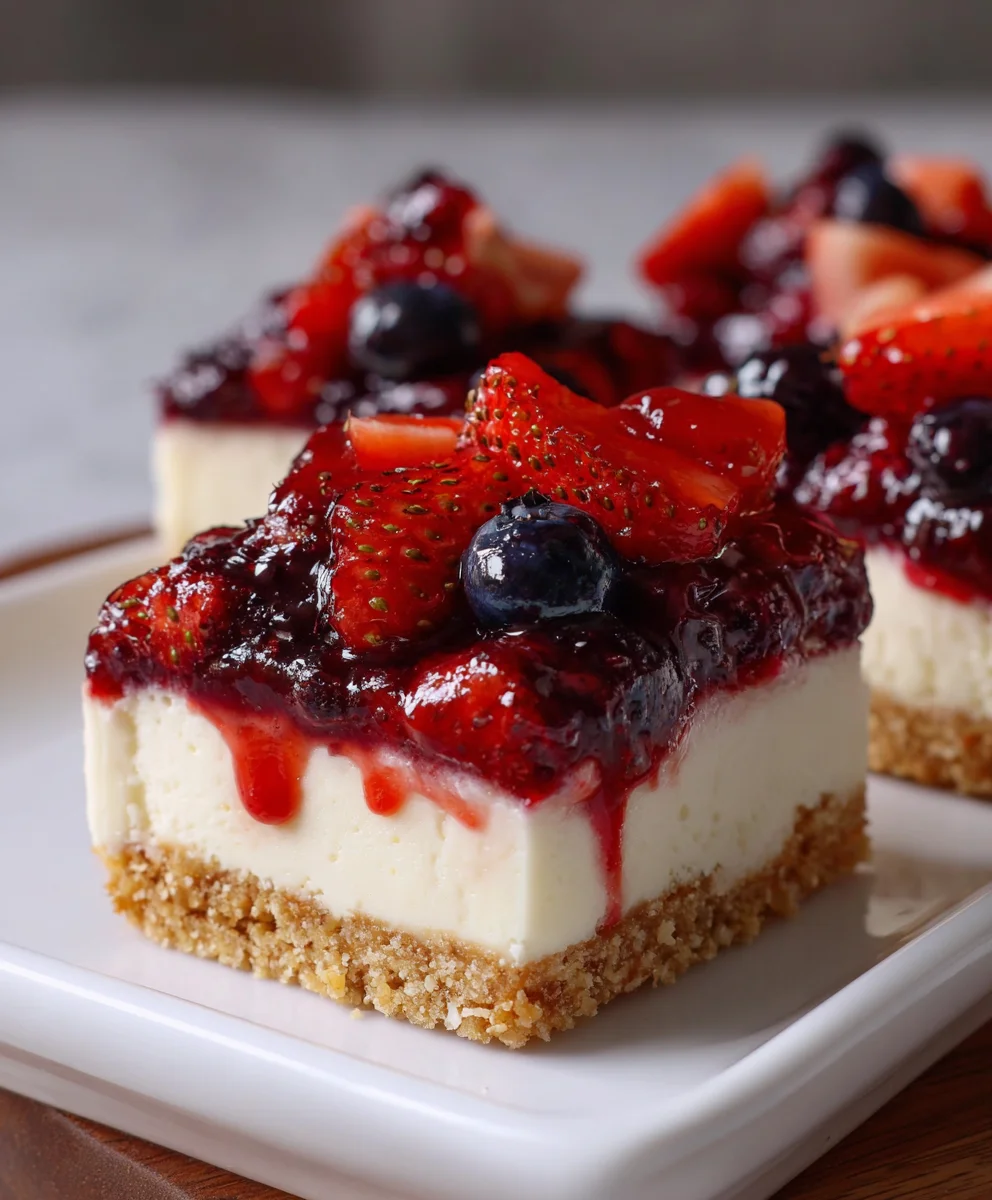
Introduction to No Bake Berry Cheesecake Bars
As a busy mom myself, I understand how chaotic life can get. Between shuffling kids to activities and juggling work, finding time for delicious desserts often feels impossible. That’s where these delightful No Bake Berry Cheesecake Bars come into play! They’re a quick and easy solution that requires no oven and minimal effort—but they look and taste like a gourmet treat. With a luscious layer of creamy cheesecake and a vibrant berry swirl, you’ll impress your loved ones and satisfy your sweet tooth without breaking a sweat. Trust me, they’ll disappear faster than you can say “berry bliss!”
Why You’ll Love This No Bake Berry Cheesecake Bars
These No Bake Berry Cheesecake Bars are not just a dessert; they’re a lifesaver! The best part? You’ll whip them up in no time. With no baking required, they allow you to spend more moments with your family and less time in the kitchen. Plus, the creamy cheesecake paired with a berry swirl bursts with flavor. It’s a treat that everyone will adore, making dessert a delightful end to any meal.
Ingredients for No Bake Berry Cheesecake Bars
Let’s get to the fun part—gathering our ingredients! Trust me, there’s nothing like a beautiful spread to get you excited about baking. Here’s what you’ll need:
- Graham Crackers: My go-to for a crunchy base. You can use crushed digestive biscuits or even gluten-free crackers if you prefer.
- Granulated Sugar: This sweetens the crust and the cheesecake, balancing the tartness of the berries.
- Salt: Just a pinch brings out all the flavors beautifully. It’s the secret ingredient that makes every dish pop!
- Unsalted Butter: Melted, it binds your crust together for a firm foundation. Use salted butter for a different flavor twist.
Now, let’s move on to the heavenly cheesecake filling!
- Heavy Cream: Provides a rich, luxurious texture. Make sure it’s cold for the best whipping.
- Full-Fat Cream Cheese: Softened to room temperature, this is the star of your cheesecake. Light cream cheese will alter the texture.
- Powdered Sugar: This blends smoothly into the cream cheese and creates a sweet, creamy concoction.
- Sour Cream: Adds a delightful tang that complements the sweetness and enhances the creaminess.
- Vanilla Extract: A must for flavor! Use pure vanilla for the best outcome.
- Fresh Lemon Juice: Just a touch brightens the flavor and cuts through the richness.
And we can’t forget about our berry swirl!
- Mixed Fresh Berries: A blend of strawberries, blueberries, and raspberries brings color and natural sweetness. Frozen berries work in a pinch!
- More Lemon Juice, Granulated Sugar, and Vanilla: Just like before, these complement the edges of our berry sauce.
For exact measurements of each ingredient, scroll to the bottom of the article where you’ll find everything listed and ready for printing. Let’s get cooking!
How to Make No Bake Berry Cheesecake Bars
Now, let’s dive into the fun part—making these No Bake Berry Cheesecake Bars! Follow these simple steps, and you’ll create a dessert that’s sure to impress.
Step 1: Prepare the Berry Swirl
Start by cooking the mixed berries. Combine them in a saucepan with lemon juice, sugar, vanilla extract, and a pinch of salt. Bring the mixture to a simmer over medium heat.
As the berries cook, gently mash them with a spoon to release their juices. After about 10 minutes, the mixture will thicken nicely. This mixture should resemble a chunky sauce. For a smoother finish, blend it until smooth. Then, pass it through a fine sieve to catch those pesky seeds.
Let the berry sauce cool completely before storing it in the refrigerator. Trust me, this step adds that delightful freshness when you swirl it into the cheesecake!
Step 2: Make the Crust
Now for the base! In a food processor, pulse the graham crackers, sugar, and salt until they turn into fine crumbs.
Stream the melted butter into the mixture while blending. It should resemble wet sand—if not, add a little more butter.
Line your baking pan with parchment paper for easy removal. Then, evenly distribute the crust mixture into the pan, using the back of a measuring cup or your fingers to press it down firmly. This ensures it holds together when you slice it later.
Pop this into the freezer for about 10 minutes while you prepare the filling. It really helps solidify that crust.
Step 3: Prepare the Cheesecake Filling
Next up, the luscious creaminess! In a chilled mixing bowl, start whipping the cold heavy cream using a hand mixer. Beat on low speed until soft peaks form. This usually takes about 2–3 minutes. But be careful; stop once you see those peaks—over-beating can lead to a grainy texture! Set aside.
In another bowl, blend the room-temperature cream cheese and powdered sugar until smooth. Then, add sour cream, vanilla extract, lemon juice, and salt, mixing until completely blended.
Gently fold the whipped cream into the cream cheese mixture using a rubber spatula. Aim for a light touch here, it’s all about combining without losing that airy texture!
Step 4: Assemble the Cheesecake Bars
It’s time to bring it all together! Take your crust from the freezer and spread the creamy cheesecake filling onto it in an even layer.
Now for the fun part: drop spoonfuls of your berry sauce over the top. With a knife, or even a toothpick, swirl it all together. This marbling creates that stunning visual and flavor burst!
Step 5: Refrigerate and Set
Finally, cover the pan with plastic wrap and pop it in the fridge. It’s essential to let the bars chill for at least 8 hours—or even better, overnight. This helps them set perfectly.
Once they’ve chilled, you’ll easily slice them into gorgeous bars. Plus, the flavors will have melded beautifully! Enjoy this delightful creation—you deserve it!
Tips for Success
- Always use room temperature cream cheese for smoother blending.
- Don’t rush the chilling process; it makes all the difference in texture.
- Feel free to experiment with different berry combinations for unique flavors.
- Keep leftover berry sauce in a sealed container for up to a week—perfect for drizzling!
- Slice with a sharp knife for clean edges; a quick dip in hot water helps!
Equipment Needed
- Food Processor: Essential for crushing graham crackers. A sturdy zip-top bag and rolling pin work too!
- Baking Pan: Use a 23×23-centimetre pan. A similar-sized dish will do in a pinch.
- Mixing Bowls: Have a couple on hand, especially with varying sizes for different mixtures.
- Hand Mixer: This helps with whipping cream. You can use a whisk, but it’ll take longer!
Variations
- Berry Medley: Mix and match your favorite berries! Try using raspberries, blackberries, or even cherries for a twist on the classic flavor.
- Chocolate Drizzle: For chocolate lovers, drizzle melted dark chocolate over the top before chilling. It adds a decadent touch!
- Nutty Crunch: Add crushed nuts or finely chopped almonds to the crust for extra texture and flavor.
- Vegan Option: Substitute the cream cheese with a plant-based soft cheese and use coconut cream instead of heavy cream for a delicious vegan treat.
- Gluten-Free: Use gluten-free graham crackers for the crust to cater to gluten-sensitive friends and family.
Serving Suggestions for No Bake Berry Cheesecake Bars
- Pair these delightful bars with a dollop of freshly whipped cream for added richness.
- Serve alongside a scoop of vanilla ice cream for a delightful contrast in texture.
- Drizzle leftover berry sauce over each piece for a burst of color and flavor.
- Complement with a refreshing glass of iced tea or lemonade for a light, summer touch.
FAQs about No Bake Berry Cheesecake Bars
Can I use frozen berries instead of fresh for the berry swirl? Absolutely! Frozen berries work wonderfully in this recipe. Just be sure to thaw and drain any excess liquid before cooking them down.
How long do the No Bake Berry Cheesecake Bars need to set? For the best results, let the bars chill in the refrigerator for at least 8 hours, or overnight if possible. This ensures they hold their shape when sliced.
Can I make these cheesecake bars ahead of time? Yes! They are perfect for make-ahead desserts. They can be stored in the fridge for up to 5 days—just cover them well to keep them fresh.
What can I do if my cheesecake filling is too thick? If your filling is thicker than you’d like, you can mix in a splash of heavy cream or a bit more sour cream to loosen it up just a bit.
How should I store any leftover bars? Store them in an airtight container in the refrigerator. You can also freeze them—just wrap each bar individually in plastic wrap, then place them in a freezer bag. They should last up to 2 months!
Final Thoughts
Making these No Bake Berry Cheesecake Bars is more than just a cooking project; it’s a delightful experience that brings joy to your kitchen. There’s something magical about swirling together creamy cheesecake with vibrant berries. It feels like a celebration with each slice!
Whether you’re planning a family gathering or simply want a special treat for yourself, these bars are sure to lift spirits. Plus, they let you spend more time with loved ones and less time in the kitchen. I can’t wait for you to share this joy with your family—it’s a sweet moment waiting to happen!
Print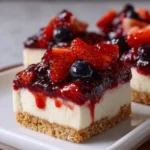
No Bake Berry Cheesecake Bars
- Total Time: 8 hours 40 minutes
- Yield: 16 bars 1x
- Diet: Vegetarian
Description
Delicious no-bake cheesecake bars with a berry swirl that are easy to make and perfect for any occasion.
Ingredients
- Crust
- 15 sheets graham crackers
- 2 tablespoons granulated sugar
- pinch of salt
- 120 millilitres unsalted butter, melted
- Cheesecake Filling
- 240 millilitres heavy cream, cold
- 680 grams full-fat cream cheese, room temperature
- 165 grams powdered sugar
- 80 millilitres sour cream, room temperature
- 2 teaspoons vanilla extract
- 1 teaspoon fresh lemon juice
- pinch of salt
- Berry Swirl
- 300 grams mixed fresh berries (strawberries, blueberries, raspberries)
- 2 tablespoons fresh lemon juice
- 50 grams granulated sugar
- 1 teaspoon vanilla extract
- pinch of salt
Instructions
- Combine mixed berries, lemon juice, sugar, vanilla extract, and salt in a saucepan. Cook over medium heat for approximately 10 minutes, stirring and breaking up the berries, until thickened.
- Transfer the berry mixture to a blender and blend until smooth, or use an immersion blender directly in the pot. Pass the sauce through a fine sieve to remove seeds. Cool the sauce and refrigerate.
- In a food processor, blitz graham crackers, granulated sugar, and salt until finely ground. Stream in melted butter and pulse until the mixture is cohesive. Line a 23×23-centimetre baking pan with parchment paper. Evenly press the crust mixture into the bottom using the back of a measuring cup or fingers. Freeze while preparing the filling.
- In a chilled mixing bowl, beat the cold heavy cream with a hand mixer until stiff peaks form, about 2–3 minutes. Start at a low speed and increase gradually. Take care not to over-beat. Refrigerate whipped cream until needed.
- In a separate bowl, beat cream cheese and powdered sugar together until smooth. Add sour cream, vanilla extract, lemon juice, and salt. Continue mixing until thoroughly blended.
- Gently fold the whipped cream into the cream cheese mixture using a rubber spatula, mixing just until incorporated.
- Spread the cheesecake filling evenly over the prepared crust in the pan. Drop spoonfuls of berry sauce over the surface and use a knife to marble and swirl gently. Reserve leftover berry sauce for serving.
- Cover the pan with plastic wrap and refrigerate for at least 8 hours or overnight, allowing the bars to fully set before slicing.
Notes
- Make sure to use room temperature cream cheese for better mixing.
- Leftover berry sauce can be drizzled on top when serving.
- For best results, refrigerate overnight.
- Prep Time: 30 minutes
- Cook Time: 10 minutes
- Category: Dessert
- Method: No bake
- Cuisine: American
Nutrition
- Serving Size: 1 bar
- Calories: 290
- Sugar: 20g
- Sodium: 150mg
- Fat: 20g
- Saturated Fat: 12g
- Unsaturated Fat: 6g
- Trans Fat: 0g
- Carbohydrates: 25g
- Fiber: 1g
- Protein: 4g
- Cholesterol: 40mg