
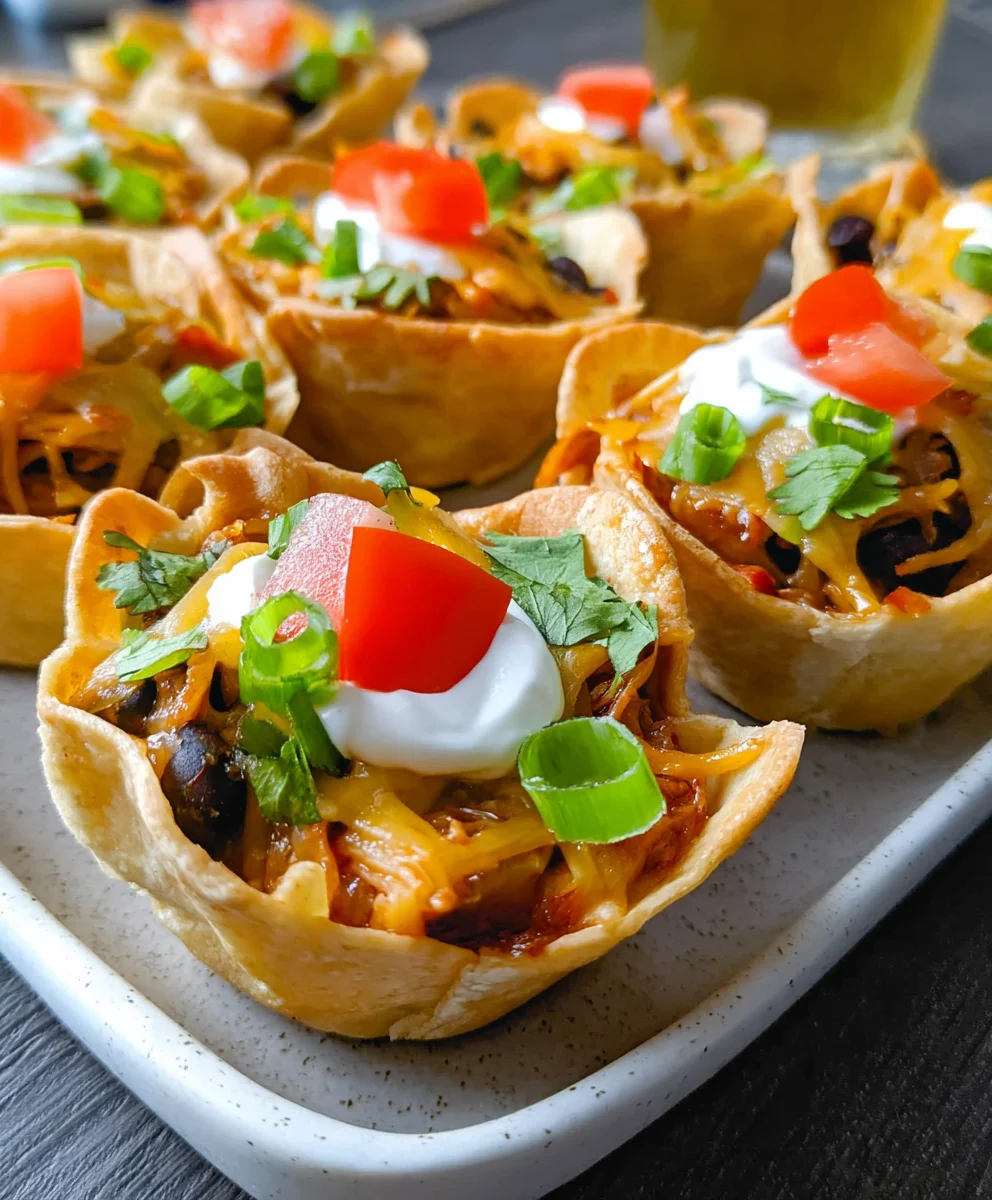
Introduction to Enchilada Cups
There’s something so comforting about a cozy, home-cooked meal, don’t you think? Enchilada Cups are one of those dishes that can bring the family together, no matter how chaotic your day has been. I love these little delights because they’re a quick solution for busy nights, and you can whip them up in no time. Tender tortillas filled with a savory, flavorful mixture of chicken and beans, topped with melted cheese—what’s not to love? Trust me, when you place these beautifully baked Enchilada Cups on the table, everyone will be reaching for seconds!
Why You’ll Love This Enchilada Cups
What really makes Enchilada Cups shine is their irresistible flavor and simplicity. They’re perfect for those hectic weeknights when time is short but you still want to serve a memorable meal. The preparation is a breeze, and the taste? Oh, it’s a flavor explosion that your family will adore! Whether as a snack or a main dish, these cups offer a delightful way to enjoy a classic favorite.
Ingredients for Enchilada Cups
Gathering the right ingredients is half the fun of cooking! For these charming Enchilada Cups, here’s what you’ll need:
- Small flour tortillas: These are the perfect base, soft and flexible, making them easy to form into cups. You can use corn tortillas for a gluten-free version.
- Red enchilada sauce: This rich sauce is the secret to infusing your cups with tantalizing flavors. Store-bought works wonders, or you can whip up a homemade version if you’re feeling adventurous.
- Black beans: Rinsed and drained, they provide a hearty texture and protein boost, making the filling more substantial.
- Green chilies: These are essential for a zesty kick. Look for mild if you prefer less heat.
- Shredded cooked chicken: Rotisserie chicken adds incredible depth of flavor while saving you time. It’s a total win-win!
- Corn: Sweet corn can brighten the filling, adding a pop of sweetness amidst the savory elements.
- Taco seasoning: This blend of spices is the flavor powerhouse in your mixture. You can also make your own for a personal touch.
- Shredded Mexican-blend cheese: This melty goodness ties everything together, creating that comforting cheesy topping.
- Fresh cilantro: Chopped cilantro lends a fresh note, balancing the flavors beautifully.
- Green onions: Thinly sliced, these add a crunch as well as a splash of vibrant color.
- Roma tomato: Diced small, it’s a refreshing garnish that adds a lovely pop of color and flavor.
- Sour cream topping (optional): A dollop of sour cream gives a creamy finish, enhancing the overall experience.
- Aluminum foil balls: Don’t forget these! They’ll help keep those adorable tortilla cups standing tall while baking.
For exact measurements, keep scrolling to the bottom of the article where you’ll find everything laid out for printing. Now, let’s get cooking!
How to Make Enchilada Cups
Step 1: Preheat Your Oven
First things first, preheat your oven to 350°F. A hot oven is key to getting those delicious Enchilada Cups to bake evenly. This way, every bite will have that perfect crispy edge while keeping the filling warm and juicy.
Step 2: Warm the Tortillas
Next, warm the tortillas in the microwave for about 30 seconds. This little trick makes them more pliable, so they bend easily without tearing. Trust me, you want your tortillas to hug those tasty fillings!
Step 3: Form the Tortilla Cups
Now it’s time to form those adorable tortilla cups! Grab a regular-sized muffin pan and place one warmed tortilla in each cup. Gently press it down, pleating where necessary to create a little cup shape. Don’t forget to roll aluminum foil into small balls and place these inside each cup to help them hold their shape during baking.
Step 4: Bake the Cups
Pop the muffin pan into your preheated oven for 10 to 12 minutes. You want the tortilla cups to harden slightly on all sides, making them sturdy enough to hold the delicious filling. Keep an eye on them, so they achieve that glorious golden color!
Step 5: Prepare the Filling
While the cups are baking, it’s time to whip up your scrumptious filling. In a large mixing bowl, combine the enchilada sauce, rinsed black beans, green chilies, shredded chicken, sweet corn, and taco seasoning. Stir it all together like you’re creating a flavor masterpiece!
Step 6: Fill the Cups
Carefully spoon the delightful filling into each tortilla cup. Fill them all the way to the brim—these babies are meant to be packed with flavor! Not too shabby for a busy mom’s dinner solution, right?
Step 7: Add Cheese and Bake Again
Sprinkle a small amount of shredded Mexican-blend cheese on top of each filled cup. This melty layer is the crowning glory of your Enchilada Cups! Return the pan to the oven and bake for about 15 minutes, or until the cheese is bubbly and golden.
Step 8: Serve and Enjoy
Once out of the oven, it’s time for the best part—serving these beauties! Top each cup with fresh cilantro, sliced green onions, and diced Roma tomatoes for a burst of color and freshness. If you like a creamy touch, a dollop of sour cream is the perfect finish. Dig in and enjoy every cheesy bite!
Tips for Success
- Warm tortillas before shaping to prevent tearing.
- Use a muffin pan for even cooking and easy serving.
- Opt for leftover rotisserie chicken for added flavor and convenience.
- Experiment with toppings like avocado or jalapeños for extra flair.
- Keep an eye on the baking time to achieve that perfect golden crisp.
- Let the cups cool for a minute before removing the foil balls.
Equipment Needed
- Muffin pan: Essential for baking the tortilla cups. A regular muffin pan will do, but mini pans can create bite-sized treats.
- Microwave: Perfect for warming tortillas quickly. If you prefer, you can also use a stovetop to heat them.
- Mixing bowl: You’ll need this for combining your filling. Any size works, just make sure it can hold everything!
Variations of Enchilada Cups
- Vegetarian Enchilada Cups: Swap the chicken for a mixture of sautéed bell peppers, zucchini, and mushrooms. Add extra black beans for protein.
- Spicy Enchilada Cups: Use spicy enchilada sauce or add diced jalapeños to the filling for a fiery kick. Don’t forget to adjust for your heat preference!
- Cheesy Enchilada Cups: Layer in different cheese varieties like pepper jack or Monterey Jack for varied flavor and heat levels.
- Gluten-Free Enchilada Cups: Use gluten-free tortillas, and ensure your enchilada sauce is gluten-free. This way, everyone can enjoy!
- Breakfast Enchilada Cups: Add scrambled eggs and diced tater tots for a fun twist on breakfast. Top with salsa for an extra flavor boost.
Serving Suggestions for Enchilada Cups
- Side Salad: Pair your Enchilada Cups with a fresh garden salad tossed in a zesty vinaigrette for a refreshing contrast.
- Mexican Rice: Serve alongside fluffy Mexican rice for a fulfilling meal that keeps everyone satisfied.
- Creative Presentation: Arrange your cups on a vibrant platter, garnishing with extra cilantro and lime wedges for an appealing look.
- Drink Pairing: A light, fruity sangria or sparkling water will perfectly complement the bold flavors of your cups.
FAQs about Enchilada Cups
You might have questions buzzing around your mind about making Enchilada Cups. Don’t worry! I’m here to help clear the air!
Can I make Enchilada Cups ahead of time? Absolutely! You can assemble your cups a day in advance, refrigerate them, and bake when you’re ready. Just add a few extra minutes to the cooking time to ensure they’re heated through.
What type of tortillas work best? I love using small flour tortillas because of their flexibility, but corn tortillas work beautifully as well, especially if you’re looking for a gluten-free option.
Can I freeze Enchilada Cups? Yes, you can! Just bake them, let them cool, and then freeze them in an airtight container. When you’re ready to enjoy, bake straight from the freezer, adding extra time as needed.
How can I customize the filling? Get creative! You can add ingredients like cooked quinoa, black olives, or even different types of beans. The beauty of Enchilada Cups is that they adapt to your tastes.
What can I serve with Enchilada Cups? Besides a refreshing salad, consider serving them with guacamole, salsa, or a side of Mexican rice. They pair well with just about anything, making them a perfect meal!
Final Thoughts
Enchilada Cups are more than just a dish; they embody the joy of cooking for my loved ones. Each time I make them, I’m reminded that food has a magical way of bringing us together. Whether it’s a casual family night or a gathering with friends, these flavorful little cups are always a hit. They’ve won hearts in my home, bringing smiles and satisfied bellies. Plus, I adore how easily they adapt to everyone’s tastes. With every scrumptious bite, I’m grateful for the countless memories created around our dinner table. I hope they bring your family as much joy as they do mine!
Print
Enchilada Cups
- Total Time: 45 minutes
- Yield: 12 servings 1x
- Diet: Gluten Free
Description
Enchilada Cups are a delicious and easy-to-make dish featuring tortillas filled with a flavorful mixture of chicken, beans, and cheese, perfect for any occasion.
Ingredients
- 12 small flour tortillas
- 10 ounces red enchilada sauce
- 14 ounces black beans, rinsed and drained
- 4 ounces green chilies
- 2½ cups shredded cooked chicken, rotisserie has extra flavor
- ¾ cup corn
- 2 tablespoons taco seasoning
- 1 cup shredded Mexican-blend cheese
- ¼ cup chopped fresh cilantro
- 1 to 2 green onions, thinly sliced
- 1 Roma tomato, diced small
- Sour cream topping, optional
- Aluminum foil balls, for each cup
Instructions
- Preheat oven to 350°F.
- Warm the tortillas in the microwave for about 30 seconds so they are more bendable.
- Using a regular size muffin pan place one tortilla in each cup and gently press the tortilla down into the cup, pleating the tortilla where necessary, to form a cup. Roll an aluminum foil ball to place lightly inside each cup to help it keep its shape.
- Bake for 10 to 12 minutes or until the cups have hardened slightly on all sides. Remove the pan from the oven and set aside. Leave the oven on.
- While cups are baking, in a large mixing bowl, combine the enchilada sauce, black beans, green chilies, chicken, corn, and taco seasoning, mixing well.
- Carefully spoon the filling into each cup until the cup is full.
- Place a small amount of cheese on top of each cup. Return pan to the oven and bake for 15 minutes or until cheese is melted and filling has heated up.
- Remove from the oven and serve as is or sprinkle each cup with cilantro, green onions, and tomatoes. You can top with sour cream if desired.
Notes
- For extra flavor, use leftover rotisserie chicken.
- Feel free to add extra toppings such as avocado or jalapeños.
- Prep Time: 20 minutes
- Cook Time: 25 minutes
- Category: Appetizer
- Method: Baking
- Cuisine: Mexican
Nutrition
- Serving Size: 1 cup
- Calories: 250
- Sugar: 2g
- Sodium: 480mg
- Fat: 10g
- Saturated Fat: 4g
- Unsaturated Fat: 2g
- Trans Fat: 0g
- Carbohydrates: 30g
- Fiber: 6g
- Protein: 12g
- Cholesterol: 40mg