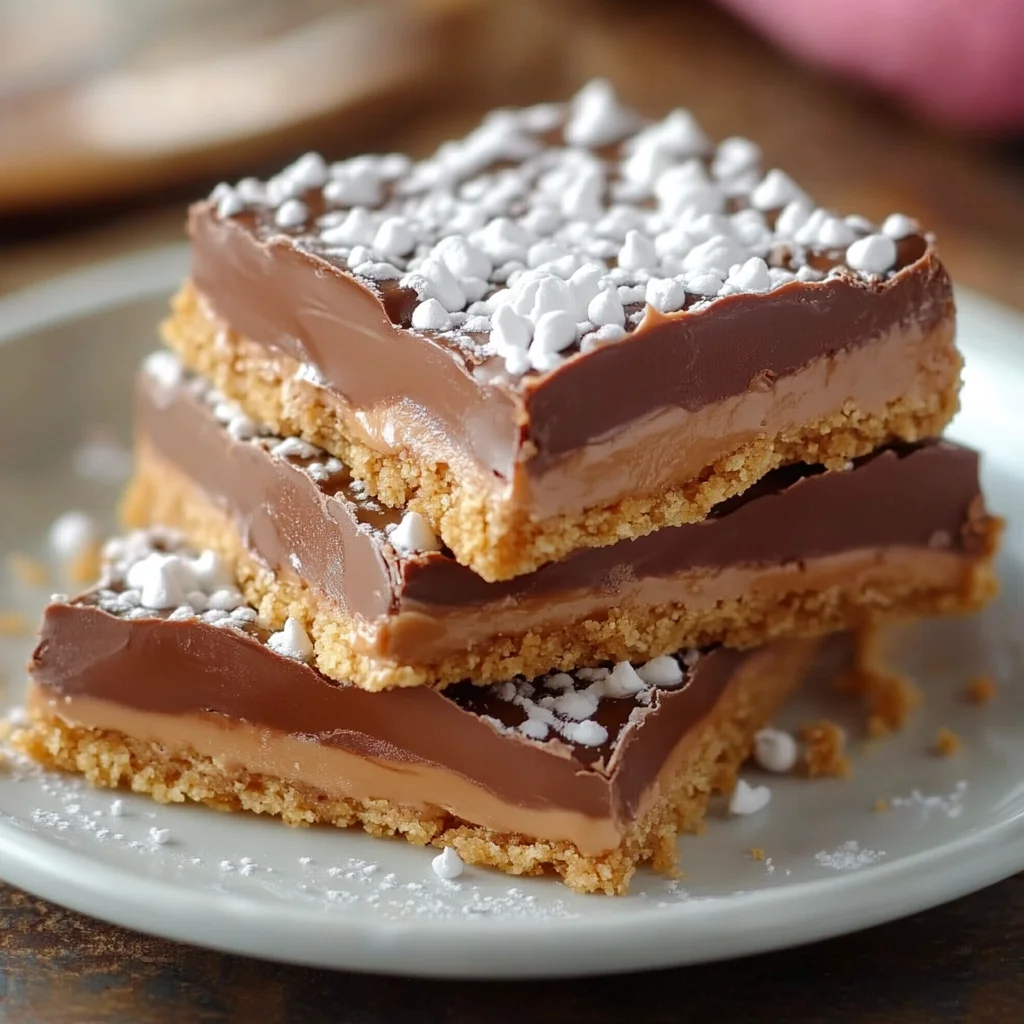
Introduction to No-Bake Candy Bars
As a busy mom, I know how precious time can be, especially when it comes to whipping up something sweet. That’s why I absolutely adore these No-Bake Candy Bars! They’re a delightful treat that requires minimal effort but delivers maximum satisfaction. Imagine a dessert that combines the rich flavors of chocolate and peanut butter, all without turning on the oven. Perfect for those hectic days or when you want to impress your loved ones with a homemade dessert, these bars are a simple solution that everyone will love!
Why You’ll Love This No-Bake Candy Bars
These No-Bake Candy Bars are a lifesaver for busy days! They come together in just 15 minutes, making them a quick and easy dessert option. The combination of creamy peanut butter and rich chocolate creates a flavor explosion that’s hard to resist. Plus, they’re perfect for satisfying sweet cravings without the fuss of baking. Trust me, once you try them, they’ll become a go-to treat in your home!
Ingredients for No-Bake Candy Bars

Gathering the right ingredients is key to making these No-Bake Candy Bars a success. Here’s what you’ll need:
- Graham cracker crumbs: These provide the perfect crunchy base. You can crush whole graham crackers if you prefer.
- Powdered sugar: This sweetens the bars and gives them a smooth texture. It’s a must for that melt-in-your-mouth experience.
- Creamy peanut butter: The star of the show! It adds richness and flavor. Make sure to use creamy for the best consistency.
- Unsalted butter: This helps bind everything together. Unsalted is best, so you can control the saltiness.
- Semi-sweet chocolate chips: These are melted to create a luscious topping. You can swap for dark chocolate if you prefer a richer taste.
- Peanut butter (for topping): A little extra peanut butter on top adds a delightful finish. You can use crunchy for added texture!
Feel free to get creative! You can add nuts, coconut, or even dried fruit for a twist. For exact measurements, check the bottom of the article where you can find everything listed for printing.
How to Make No-Bake Candy Bars
Making these No-Bake Candy Bars is a breeze! Follow these simple steps, and you’ll have a delicious treat ready in no time. Let’s dive in!
Step 1: Prepare the Base
Start by grabbing a large bowl. Combine the graham cracker crumbs, powdered sugar, creamy peanut butter, and melted butter. Mix everything together until it’s well combined. You want a thick, sticky mixture that holds together. If it feels too dry, add a touch more peanut butter!
Step 2: Press the Mixture
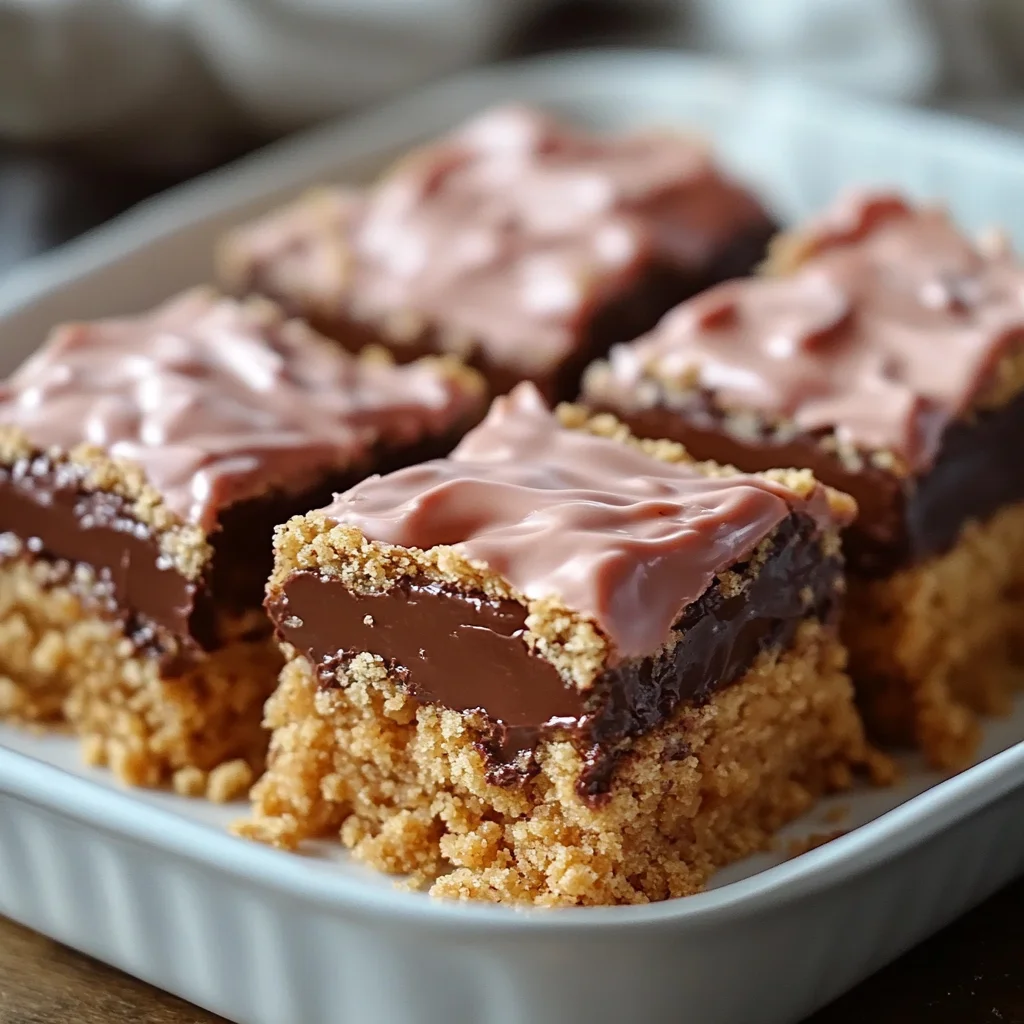
Next, take your mixture and press it firmly into the bottom of a greased or parchment-lined 9×13-inch baking dish. Use your hands or the back of a spatula to ensure it’s even. This base is the foundation of your No-Bake Candy Bars, so make sure it’s packed tightly!
Step 3: Melt the Chocolate
Now, let’s get to the chocolate! In a microwave-safe bowl, combine the semi-sweet chocolate chips and the extra 1/4 cup of peanut butter. Microwave in 30-second intervals, stirring each time until it’s completely melted and smooth. This creates a luscious topping that will make your bars irresistible!
Step 4: Pour and Spread
Once your chocolate mixture is ready, pour it over the graham cracker base. Use a spatula to spread it evenly across the top. This layer of chocolate is what makes these No-Bake Candy Bars so decadent. Don’t be shy—make sure every corner is covered!
Step 5: Refrigerate
Now comes the hardest part—waiting! Place the dish in the refrigerator for at least 2 hours, or until the bars are firm. This step is crucial for achieving that perfect texture. While you wait, you can daydream about how delicious they’ll be!
Step 6: Cut and Serve
Once your bars are set, take them out of the fridge. Use a sharp knife to cut them into squares or rectangles. Serve them chilled for the best experience. Trust me, these No-Bake Candy Bars will disappear faster than you can say “delicious!”
Tips for Success
- Use a sturdy spatula to press the mixture firmly into the dish for a solid base.
- Let the chocolate cool slightly before pouring it over the base to avoid melting it.
- For a fun twist, sprinkle some sea salt on top of the chocolate before refrigerating.
- Keep the bars in the fridge until serving to maintain their firmness.
- Experiment with different toppings like crushed nuts or sprinkles for added flair!
Equipment Needed
- Large mixing bowl: A sturdy bowl for combining ingredients. A glass or metal bowl works well.
- 9×13-inch baking dish: Essential for setting your bars. You can use a smaller dish for thicker bars.
- Spatula: Perfect for pressing and spreading. A silicone spatula is great for easy cleanup.
- Microwave-safe bowl: Needed for melting chocolate. Any microwave-safe dish will do!
- Sharp knife: For cutting the bars into perfect squares. A serrated knife works wonders!
Variations
- Nutty Delight: Add chopped nuts like almonds or walnuts to the base for a crunchy texture.
- Chocolate Lovers: Use dark chocolate chips instead of semi-sweet for a richer flavor.
- Vegan Option: Substitute creamy peanut butter with almond or cashew butter and use dairy-free chocolate chips.
- Fruit Twist: Mix in dried fruits like cranberries or raisins for a sweet and chewy surprise.
- Minty Fresh: Add a few drops of peppermint extract to the chocolate for a refreshing mint flavor.
Serving Suggestions
- Pair these No-Bake Candy Bars with a scoop of vanilla ice cream for a delightful dessert combo.
- Serve with a glass of cold milk or a warm cup of coffee to balance the sweetness.
- For a fun presentation, drizzle extra melted chocolate on top before serving.
- Garnish with crushed nuts or a sprinkle of sea salt for added flair.
- Wrap individual bars in colorful paper for a charming treat to share with friends!
FAQs about No-Bake Candy Bars
Can I use crunchy peanut butter instead of creamy?
Absolutely! Using crunchy peanut butter will add a delightful texture to your No-Bake Candy Bars. Just keep in mind that it may change the overall consistency slightly, but it will still be delicious!
How long do these bars last in the fridge?
Your No-Bake Candy Bars can be stored in the refrigerator for up to a week. Just make sure to keep them in an airtight container to maintain their freshness!
Can I freeze No-Bake Candy Bars?
Yes, you can freeze them! Just wrap the bars tightly in plastic wrap and then place them in a freezer-safe container. They’ll last for about 2-3 months. Thaw them in the fridge before serving for the best texture.
What can I substitute for graham cracker crumbs?
If you don’t have graham cracker crumbs, you can use crushed digestive biscuits or even vanilla wafers. Each will give a slightly different flavor but will work just as well!
Can I make these bars gluten-free?
Definitely! Just use gluten-free graham crackers or a gluten-free cookie alternative. This way, everyone can enjoy these tasty No-Bake Candy Bars!
Final Thoughts
Creating these No-Bake Candy Bars is more than just making a dessert; it’s about sharing joy with family and friends. The simplicity of this recipe allows you to whip up a delightful treat without the stress of baking. Each bite is a sweet reminder of the little pleasures in life, like a cozy evening with loved ones or a well-deserved treat after a long day. I hope these bars bring as much happiness to your home as they have to mine. So, gather your ingredients and let the sweetness unfold—your taste buds will thank you!
Print
No-Bake Candy Bars
- Total Time: 2 hours 15 minutes
- Yield: 24 bars 1x
- Diet: Vegetarian
Description
No-Bake Candy Bars are a simple and delicious treat made with graham crackers, peanut butter, and chocolate.
Ingredients
- 2 cups graham cracker crumbs
- 1 cup powdered sugar
- 1 cup creamy peanut butter
- 1/2 cup unsalted butter, melted
- 1 1/2 cups semi-sweet chocolate chips
- 1/4 cup peanut butter (for topping)
Instructions
- In a large bowl, mix together graham cracker crumbs, powdered sugar, peanut butter, and melted butter until fully combined.
- Press the mixture firmly into the bottom of a greased or parchment-lined 9×13-inch baking dish.
- In a microwave-safe bowl, combine chocolate chips and 1/4 cup peanut butter. Microwave in 30-second intervals, stirring each time, until completely melted and smooth.
- Pour the chocolate mixture over the graham cracker base and spread evenly with a spatula.
- Refrigerate for at least 2 hours, or until firm.
- Once set, cut into bars and serve chilled. Store leftovers in the fridge.
Notes
- Make sure to use creamy peanut butter for the best texture.
- These bars can be stored in the refrigerator for up to a week.
- Feel free to add nuts or other toppings for extra flavor.
- Prep Time: 15 minutes
- Cook Time: 0 minutes
- Category: Dessert
- Method: No-Bake
- Cuisine: American
Nutrition
- Serving Size: 1 bar
- Calories: 320
- Sugar: 20g
- Sodium: 150mg
- Fat: 18g
- Saturated Fat: 7g
- Unsaturated Fat: 10g
- Trans Fat: 0g
- Carbohydrates: 35g
- Fiber: 1g
- Protein: 6g
- Cholesterol: 15mg