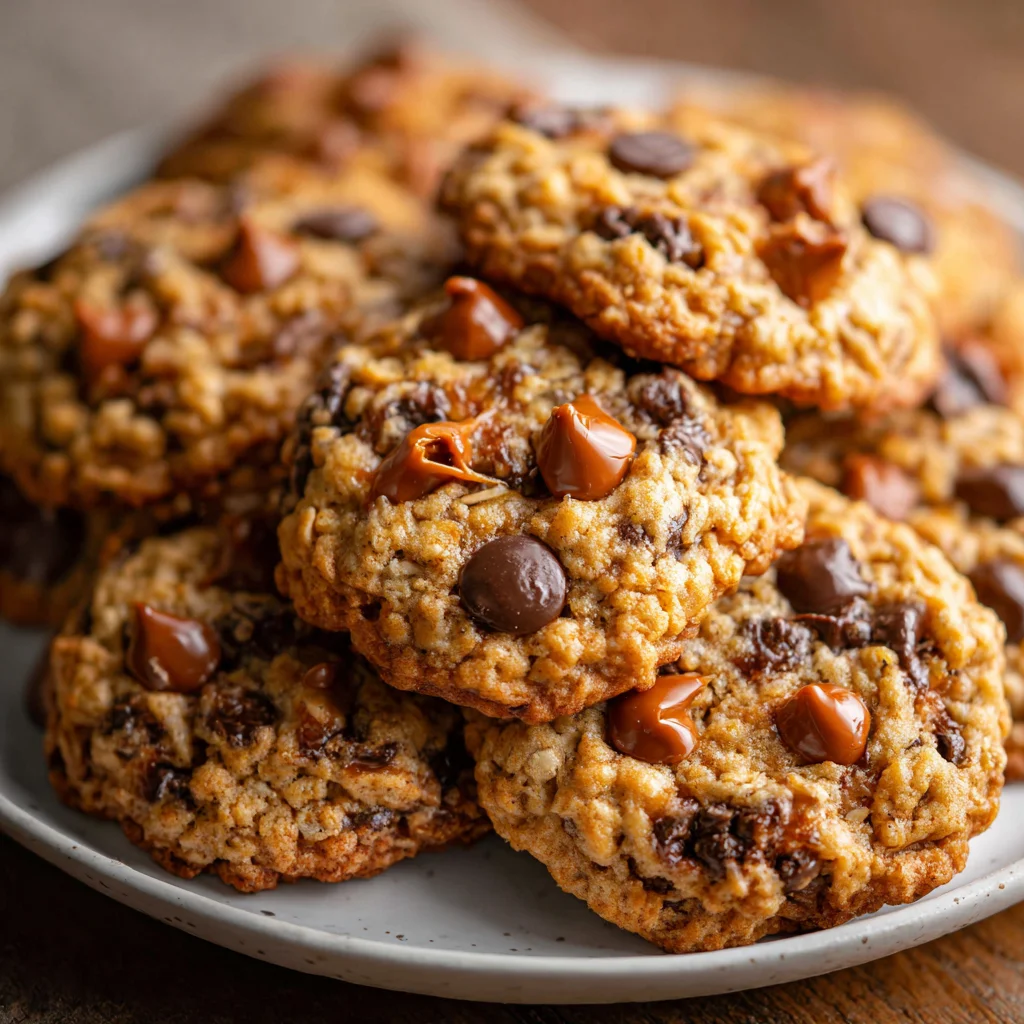
Introduction to Carmelita Cookies
I know how challenging it can be to juggle family, work, and everything in between. That’s why I’m excited to share my go-to recipe for Carmelita Cookies. These treats are not only irresistibly chewy and delicious but also quick to whip up when you need a sweet fix. Picture this: your loved ones walking in, their eyes lighting up at the scent of freshly baked cookies! Trust me, these Carmelita Cookies are a delightful way to impress them or enjoy a little me-time with a warm cookie and a glass of milk.
Why You’ll Love This Carmelita Cookies
These Carmelita Cookies are a game-changer in the dessert department. They’re super easy to make, so you can spend more time enjoying them rather than slaving away in the kitchen. With every bite, you’ll experience a delightful combination of chewy oats, rich caramel, and gooey chocolate. Plus, they bake up in just eight short minutes—perfect for those last-minute cravings or surprise guests!

Ingredients for Carmelita Cookies
Gathering the right ingredients is key to making Carmelita Cookies deliciously irresistible. Below, I’ve listed every component you’ll need, along with a few tips for substitutions.
- Old-fashioned oats: These lend the cookies their chewy texture. Quick oats won’t work as well, so be sure to grab the old-fashioned kind.
- All-purpose flour: This is the foundation of your cookie dough. You can use a gluten-free blend if needed, though it may affect the texture.
- Baking powder: This gives your cookies a light and airy lift. Don’t skip it, or you’ll end up with flat cookies!
- Baking soda: It also helps with rising and adds a nice subtle flavor to your cookies.
- Kosher salt: Balances the sweetness and enhances the overall flavor. Sea salt works too if you have that on hand.
- Unsalted butter: Using butter at room temperature ensures a creamy, smooth batter. You can substitute with coconut oil for a dairy-free option.
- Light brown sugar: Packed for deeper flavor and a hint of molasses. If you’re out, granulated sugar is a fine substitute, though it may change the texture.
- Large eggs: Eggs provide moisture and binding. Ensure they are at room temperature for the best emulsion.
- Molasses: This adds both moisture and rich flavor. You can omit it if you don’t have any, but the flavor will change slightly.
- Vanilla extract: Adds warmth and depth. You can use almond extract for a different twist.
- Caramel bits: The star ingredient! They melt beautifully, creating pockets of gooey goodness. You can substitute with chopped caramel candies if needed.
- Semi-sweet chocolate chips: These intensify the richness of the cookies. Dark chocolate chips can be used for a bolder flavor.
- Caramel sauce: Perfect for drizzling on top before serving. You can either make your own or use store-bought for convenience.
For exact measurements, check the end of the article where you’ll find all ingredient amounts available for easy printing!
How to Make Carmelita Cookies
Now that we have everything ready, let’s dive into the magic of creating Carmelita Cookies! With a few simple steps, you’ll be on your way to baking these chewy delights. Follow along closely for the best results.
Preheat the Oven and Prepare the Baking Sheet
Start by preheating your oven to 400°F. This step is crucial because a hot oven ensures your cookies bake evenly. While it heats up, line a baking sheet with parchment paper. This will prevent sticking and make cleanup a breeze. Trust me, a non-stick hero!
Mix the Dry Ingredients
In a large mixing bowl, whisk together the old-fashioned oats, all-purpose flour, baking powder, baking soda, and kosher salt. Mixing these dry ingredients helps to evenly distribute the leavening agents. This also ensures your cookies rise nicely, giving them that perfect chewy texture!
Cream the Butter and Sugar
Now it’s time for the butter and brown sugar to shine! In your stand mixer, beat the unsalted butter and light brown sugar until it’s smooth and creamy. You want it to look fluffy, like a cloud on a summer day. Scrape down the sides of the bowl to make sure everything is blended well. This step is key to achieving that melt-in-your-mouth texture!
Incorporate the Eggs and Other Wet Ingredients
Add in the eggs, molasses, and vanilla extract next. Mix on medium speed until everything is well combined. This not only adds flavor, but it also helps bind the ingredients together. Remember, a little patience goes a long way with cookie dough!
Combine Dry and Wet Ingredients
With the mixer still on low, gradually add the dry mixture to the wet one. This method helps incorporate the ingredients without overmixing. Overmixing can lead to tough cookies, so go slow! Once everything is combined, you should have a thick, inviting dough.
Add Caramel Bits and Chocolate Chips
Now comes the fun part—add in those delicious caramel bits and semi-sweet chocolate chips! Gently fold them into the dough using a spatula. This preserves their shape and ensures you get sweet surprises in every bite. Who doesn’t love a little indulgence?
Portion the Dough
Using a 2-tablespoon scoop, drop rounded tablespoons of dough onto the prepared baking sheet. Make sure to leave some space between each mound for spreading. Think of them as cozy little cookie islands baking away in the sea of your oven!
Bake to Perfection
Slide the baking sheet into the preheated oven and bake for 7-8 minutes. Your cookies may look a bit doughy when you take them out, but trust the process! They’ll continue to bake on the sheet. Perfectly chewy vibes await!
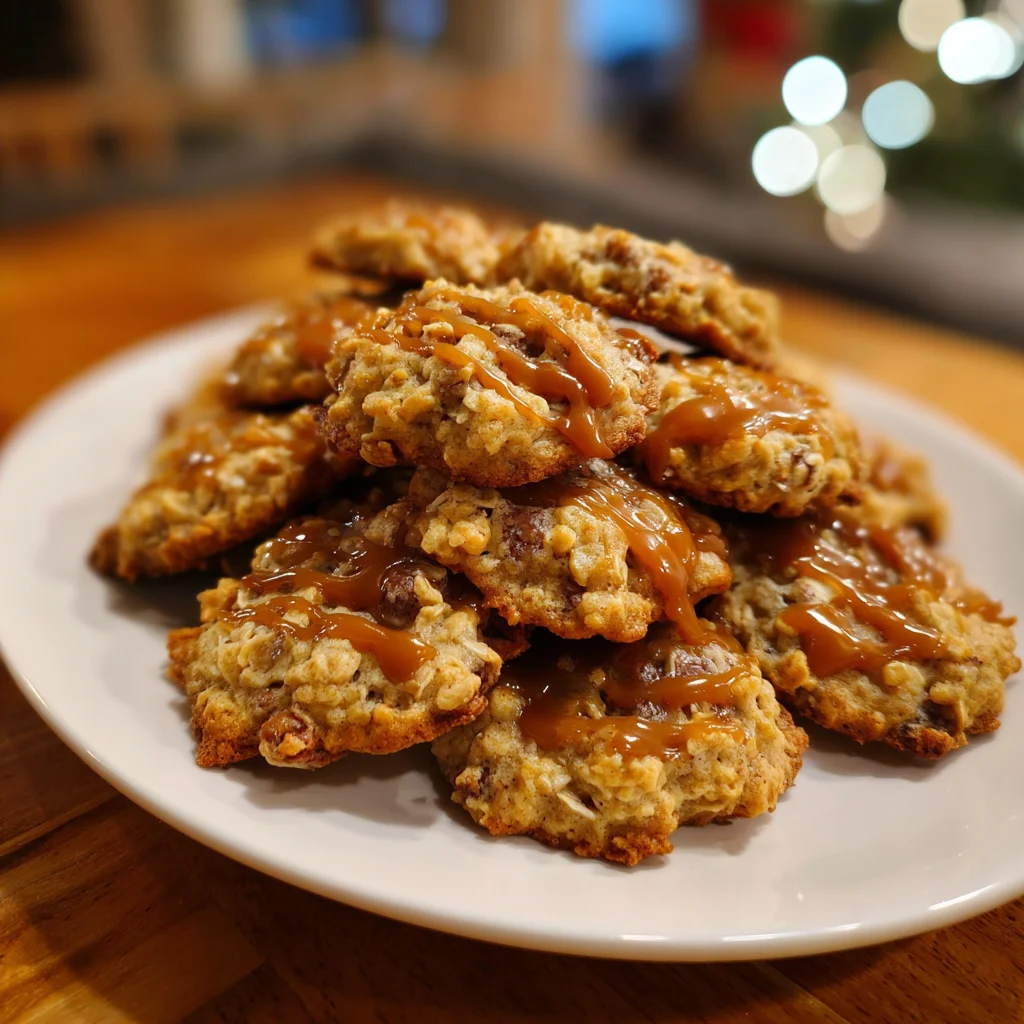
Cool and Garnish
Once baked, let the cookies rest on the baking sheet for about two minutes. Then, transfer them to a wire rack to cool completely. Before serving, don’t forget to drizzle some caramel sauce on top for that show-stopping finish. Your guests will be swooning!
Tips for Success
- Measure your ingredients carefully to maintain the right cookie texture.
- For chewier cookies, slightly underbake them by a minute or two.
- Let your butter come to room temperature for easy creaming.
- Always scrape the sides of the mixing bowl to incorporate all ingredients.
- Allow cookies to cool completely for the best flavor and texture.
Equipment Needed for Carmelita Cookies
- Baking sheet: Use either a standard one or a stoneware sheet for even baking.
- Parchment paper: If you don’t have this, a silicone baking mat works just as well.
- Mixing bowls: Grab a large bowl for dry ingredients and a medium bowl for wet ones.
- Stand mixer or hand mixer: Both will do the job, but a stand mixer makes it easier.
- Cookie scoop: A tablespoon works too, though a scoop ensures even portions.
Variations of Carmelita Cookies
- Nutty Delight: Add 1 cup of chopped nuts, like walnuts or pecans, for an extra crunch.
- Dark Chocolate Lovers: Swap semi-sweet chocolate chips for dark chocolate chips for a richer flavor.
- Peanut Butter Twist: Mix in ½ cup of creamy peanut butter into the wet ingredients for a nutty, creamy finish.
- Gluten-Free Option: Use a gluten-free flour blend in place of regular flour for a gluten-free treat.
- Seasonal Spices: Add 1 teaspoon of cinnamon or pumpkin spice for a fall-inspired touch.
Serving Suggestions for Carmelita Cookies
- Enjoy warm with a glass of cold milk for a classic pairing.
- Serve alongside a scoop of vanilla ice cream for a delightful dessert sundae.
- For a cozy touch, place them on a rustic wooden board with a sprinkling of sea salt.
- Pair with hot coffee or herbal tea for a sweet afternoon pick-me-up.
FAQs about Carmelita Cookies
Can I make Carmelita Cookies ahead of time?Yes! You can prepare the dough and store it in the fridge for up to 3 days. When you’re ready, simply scoop and bake.
What’s the best way to store Carmelita Cookies?To keep them fresh, store your cookies in an airtight container at room temperature. They will stay delicious for about a week.
Can I freeze Carmelita Cookies?Absolutely! Bake and cool the cookies, then freeze them in a single layer. Once frozen, transfer to a freezer bag. Thaw them at room temperature when you’re ready to enjoy again!
What makes these Carmelita Cookies chewy?The combination of old-fashioned oats and brown sugar contributes to their delightful chewiness, creating a satisfying texture in every bite.
Can I substitute different mix-ins?Sure! You can experiment with various add-ins like white chocolate chips, dried fruits, or even toffee bits to create your perfect cookie blend.
Final Thoughts
Baking these Carmelita Cookies brings me so much joy. The aroma that fills the kitchen is like a warm hug, and the taste is just unbeatable! Each chewy bite, bursting with caramel and chocolate, is an experience worth sharing.
I love how quick and easy they are to whip up, making them the perfect treat for busy days or family gatherings. Whether you’re enjoying them with a cup of coffee or packing them for lunch, they’re sure to put a smile on everyone’s face. So, don’t hesitate—get baking and savor the sweet moments!
Print
Carmelita Cookies
- Total Time: 23 minutes
- Yield: 24 cookies 1x
- Diet: Vegetarian
Description
Carmelita Cookies are irresistibly chewy and delicious, filled with caramel bits and chocolate chips.
Ingredients
- 2 cups (180 g) old-fashioned oats
- 1 ½ cups (187.5 g) all-purpose flour
- ½ teaspoon baking powder
- ½ teaspoon baking soda
- ½ teaspoon kosher salt
- ½ cup (1 stick / 113 g) unsalted butter, room temperature
- 1 cup (200 g) light brown sugar, packed
- 2 large eggs, room temperature
- 1 tablespoon molasses
- 1 teaspoon vanilla extract
- 1 cup (170 g) caramel bits
- 1 cup (182 g) semi-sweet chocolate chips
- caramel sauce, for garnish
Instructions
- Preheat oven to 400°F. Line a baking sheet with parchment paper.
- In a large mixing bowl, whisk together oats, flour, baking powder, baking soda, and salt.
- To the bowl of a stand mixer with the paddle attachment, add butter and brown sugar. Beat on low speed until smooth.
- Add eggs, molasses, and vanilla. Mix until all ingredients are fully incorporated, stopping to scrape down the sides of the bowl as needed.
- With the mixer still on low speed, slowly add the dry ingredients until fully incorporated.
- Mix in the caramel bits and the chocolate chips until just incorporated.
- Using a 2-tablespoon scoop, drop the dough onto the lined baking sheet. Gently press to slightly flatten the cookies.
- Bake for 7-8 minutes. They may look slightly doughy, and that is okay.
- Let the cookies rest on the baking sheet for a couple of minutes before transferring them to a wire rack to cool completely.
- Before serving, drizzle with caramel sauce.
Notes
- Allow cookies to cool completely for the best texture.
- Store in an airtight container for freshness.
- Prep Time: 15 minutes
- Cook Time: 8 minutes
- Category: Dessert
- Method: Baking
- Cuisine: American
Nutrition
- Serving Size: 1 cookie
- Calories: 150
- Sugar: 10 g
- Sodium: 50 mg
- Fat: 6 g
- Saturated Fat: 4 g
- Unsaturated Fat: 2 g
- Trans Fat: 0 g
- Carbohydrates: 21 g
- Fiber: 1 g
- Protein: 2 g
- Cholesterol: 20 mg