
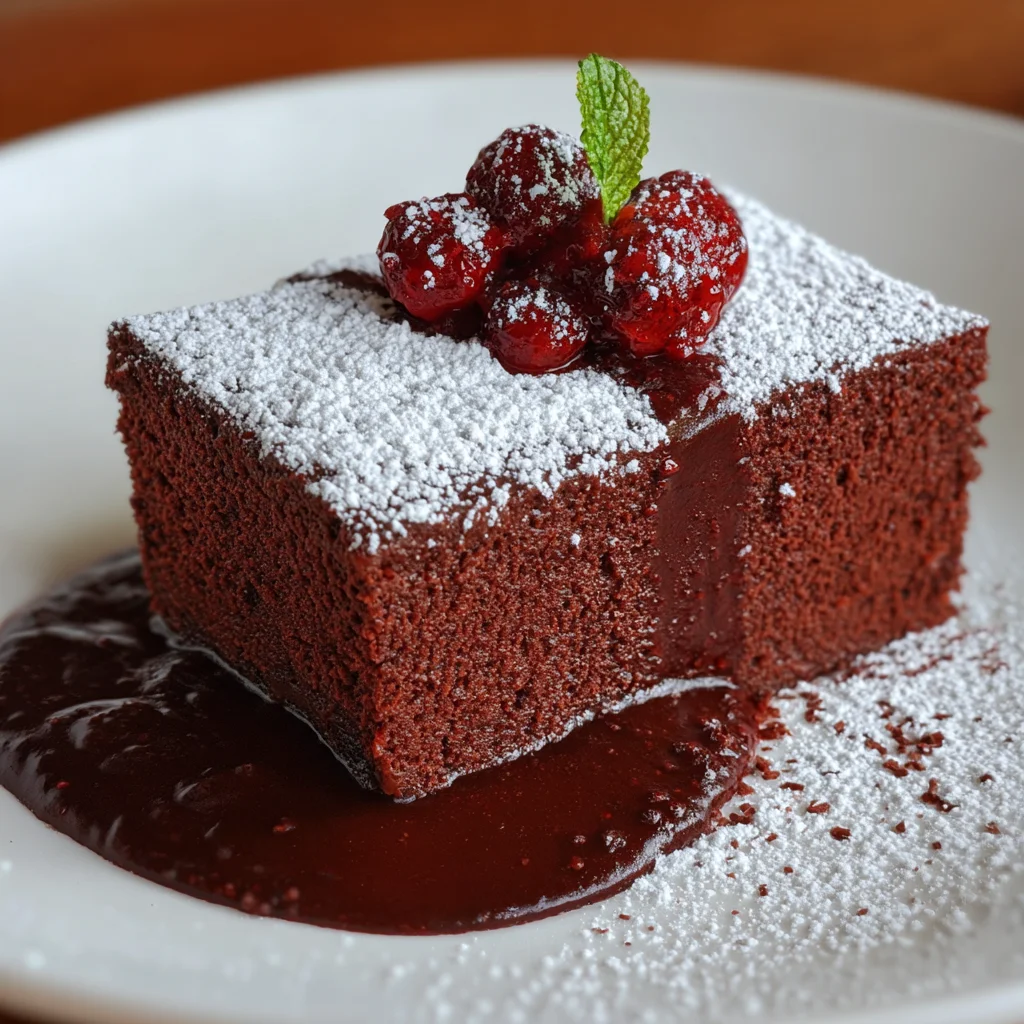
Introduction to Red Velvet Fudge Recipe
Oh, how I adore indulging my sweet tooth! This Red Velvet Fudge Recipe is like a little slice of heaven, wrapped in vibrant red hues. If you’re anything like me, juggling a busy life as a mom or professional, finding delectable no-bake desserts can feel like striking gold. This recipe doesn’t just look stunning; it’s oh-so-simple and a guaranteed crowd-pleaser at any gathering. Whether you’re celebrating a birthday, or holiday, or just treating yourself, this fudge stands tall in the realm of sweet treats that make hearts flutter and smiles grow wide.
Why You’ll Love This Red Velvet Fudge Recipe
This Red Velvet Fudge Recipe is every busy cook’s dream! It’s quick, taking mere minutes to mix and chill while offering a taste that sings of rich cocoa and creamy sweetness. Plus, it’s no-bake, saving you precious time in the kitchen. Trust me; the vibrant color alone will have your family lining up for seconds! It’s truly a delightful way to satisfy your sweet cravings without the hassle.

Ingredients for Red Velvet Fudge Recipe
Gathering your ingredients is like preparing for a delightful adventure in your kitchen! Each component plays a crucial role in crafting this beautiful treat, combining flavor and joy. Here’s what you’ll need for this Red Velvet Fudge Recipe:
- Confectioners’ Sugar: This sweet base adds the right amount of sweetness and smoothness.
- Cocoa Powder: The rich cocoa brings depth to the fudge, blending perfectly with the festive red.
- Unsalted Butter: Softened butter creates that creamy texture we all love. Room temperature yields the best mix!
- Whole Milk: This adds a touch of creaminess to help everything blend seamlessly.
- Red Food Coloring: For that signature red hue that makes this fudge a showstopper. I use McCormick®, but any quality brand works!
- Apple Cider Vinegar: Just a hint of tang, balancing the sweetness beautifully.
- Milk Chocolate Chips: Melting chocolate chips is the crowning glory of this fudge—rich, decadent, and utterly enjoyable.
- Cocoa Powder (optional): A light dusting on top isn’t just for show; it adds a lovely nuance of flavor.
All exact measurements can be found at the bottom of the article, perfect for printing and taking to the store!
How to Make Red Velvet Fudge Recipe
Making this Red Velvet Fudge Recipe is a delightful journey that anyone can embark on! It’s straightforward, fun, and the results are just stunning. Follow these easy steps, and you’ll be enjoying your luscious fudge in no time!
Step 1: Prepare the Dry Ingredients
Start by sifting together the confectioners’ sugar and cocoa powder in a small bowl. This ensures they’re free of lumps and blends beautifully. The combination of sweetness and cocoa is what sets the stage for this vibrant fudge.
Step 2: Mix the Butter
In the bowl of a stand mixer, add your room-temperature unsalted butter. Whisk it for about two minutes on high speed until it’s light and fluffy. This fluffiness adds airiness to your fudge, which is essential for that melt-in-your-mouth experience!
Step 3: Combine the Mixtures
Once your butter is fluffy, turn the mixer off. It’s time to add the sifted sugar and cocoa mixture. Turn the mixer back on to low speed. Gradually add in the whole milk, red food coloring, and apple cider vinegar. Pour the food coloring right into the center for an even mix. Whisk until the mixture is smooth and creamy.
Step 4: Melt the Chocolate
Now, it’s chocolate time! In a large bowl, melt your milk chocolate in the microwave for one minute. Stir it, and then return it to the microwave in 30-second increments until it’s mostly melted. You want it nice and smooth; this is the magic that ties everything together!
Step 5: Incorporate Frosting
Next, add about two cups of red velvet frosting into the melted chocolate. Stir until fully blended. The fudge will take on a luscious, thick consistency. Don’t worry if you have leftover frosting; you can store it for future baking adventures. It’s pure delight!
Step 6: Set the Fudge
Line a 9×13 pan with parchment paper. Press your luscious fudge mixture evenly into the pan. Making sure it’s level or slightly raised on the edges will help when you slice it. Place it in the fridge to chill for 2 hours. This will help it set beautifully and transform into fudgy perfection.
Step 7: Slice and Serve
Once chilled, take it out of the fridge. Carefully lift the fudge out of the pan using the parchment paper. Cut into 1×1 inch pieces, and sprinkle a light dusting of cocoa powder on top right before serving. This not only adds flavor but enhances the visual appeal.
Now, grab a piece and savor that deliciousness! This Red Velvet Fudge Recipe is sure to be a hit!
Tips for Success
- Always use room temperature ingredients for a smoother mix.
- Don’t be shy with the food coloring; it enhances the fudge’s vibrant appeal!
- Double-check your measurements for consistent taste and texture.
- For a more indulgent treat, try adding chopped nuts or sprinkles.
- Storage tip: Keep leftover fudge in an airtight container to maintain freshness and flavor.
Equipment Needed
- Stand Mixer: A hand mixer works too for whisking butter and combining ingredients.
- Mixing Bowls: Use any medium-sized bowls; they’ll hold your dry and wet mixtures.
- Parchment Paper: Essential for easy removal; foil can be a good substitute.
- 9×13 Pan: Any similar sized baking dish can hold this luscious fudge.
- Microwave-Safe Bowl: For melting chocolate; a small saucepan over low heat works as well.
Variations of Red Velvet Fudge Recipe
- Nutty Delight: Add chopped pecans or walnuts for a crunchy texture that perfectly complements the smooth fudge.
- Chocolate Drizzle: Melt some extra chocolate and drizzle it on top before cutting for an elegant touch.
- Minty Fresh: Incorporate mint extract in place of some vanilla for a refreshing twist that brightens the flavors.
- Gluten-Free Option: Substitute confectioners’ sugar with a gluten-free blend to cater to dietary preferences.
- Different Colors: Experiment with other food coloring shades to create a pastel fudge for spring celebrations!
Serving Suggestions for Red Velvet Fudge Recipe
- Artistic Presentation: Serve the fudge on a decorative platter, garnished with fresh mint leaves for a pop of color.
- Perfect Pairing: Enjoy with a hot cup of coffee or a glass of cold milk to balance the sweetness.
- Festive Treats: Package individual pieces in cellophane bags tied with a ribbon for thoughtful party favors.
FAQs about Red Velvet Fudge Recipe
Can I use dark chocolate instead of milk chocolate?
Absolutely! Dark chocolate will lend a richer flavor to your Red Velvet Fudge Recipe. Just make sure it’s a good quality chocolate for the best results.
How long can I store the fudge?
Your delicious fudge can be stored in an airtight container for up to two weeks at room temperature. For longer freshness, consider refrigerating it!
Can I customize the fudge with different flavors?
You sure can! Feel free to mix in extracts like vanilla or almond. Adding nuts or sprinkles can give your Red Velvet Fudge an exciting twist!
What should I do if the fudge doesn’t set?
If your fudge seems too soft, no worries! Just pop it back in the fridge for a bit longer. Sometimes, the cooling time needs a little adjustment.
How do I make this fudge gluten-free?
To make a gluten-free version of your Red Velvet Fudge Recipe, replace the confectioners’ sugar with a gluten-free blend, ensuring it’s labeled as such. You’ll still enjoy that luscious flavor!
Final Thoughts
When you make this Red Velvet Fudge Recipe, you’re not just creating a dessert; you’re crafting moments of joy. It’s the kind of treat that lingers in the heart and on the taste buds, perfect for celebrations, quiet evenings, or surprise gifts for loved ones. Each bite offers an explosion of flavor, while the vibrant color brightens any occasion. Plus, the ease of preparation makes it a go-to recipe for anyone balancing a busy life. So gather your ingredients and enjoy the adventure of making this delightful fudge today. Your taste buds will thank you!
Print
Red Velvet Fudge Recipe
- Total Time: 2 hours 35 minutes
- Yield: 24 pieces 1x
- Diet: Vegetarian
Description
A delicious and visually stunning Red Velvet Fudge that combines the rich flavor of cocoa with the vibrant color of red velvet, perfect for any sweet tooth.
Ingredients
- 4 1/2 c confectioners sugar
- 1 c cocoa powder
- 12 tbsp. (1 1/2 sticks) unsalted butter, room temperature
- 1/2 c whole milk, room temperature
- 1 one-ounce bottle Red McCormick® food coloring
- 1 tsp. apple cider vinegar
- 1 12-ounce bag of milk chocolate chips or 12 ounces good quality chocolate, chopped
- 1 tbsp. cocoa powder – optional
Instructions
- In a small bowl, sift together the confectioners’ sugar and cocoa powder.
- In the bowl of a stand mixer, add butter and whisk for 2 minutes on high speed.
- Turn the mixer off and add in the sugar/cocoa mixture.
- With the mixer on low speed, add in milk, red food coloring, and vinegar (carefully pour the food coloring into the center of the butter mixture).
- Whisk on low/medium-low speed until smooth.
- In the microwave, melt chocolate in a large bowl for 1 minute, stir, then in 30-second increments until mostly melted.
- Add 2 cups of red velvet frosting and stir until fully combined (you will have some frosting left over; store in an airtight container for up to 3 months).
- Press fudge into a 9×13 pan lined with parchment.
- Chill for 2 hours.
- When ready to serve, cut into 1×1 pieces.
- Right before serving, sprinkle with cocoa powder (cocoa will turn darker the longer it sits on the fudge).
Notes
- Ensure all ingredients are at room temperature for better mixing.
- Store leftover fudge in an airtight container to maintain freshness.
- Customize by adding nuts or sprinkles for a unique twist.
- Prep Time: 20 minutes
- Cook Time: 15 minutes
- Category: Dessert
- Method: No-Bake
- Cuisine: American
Nutrition
- Serving Size: 1 piece
- Calories: 150
- Sugar: 22g
- Sodium: 50mg
- Fat: 7g
- Saturated Fat: 4g
- Unsaturated Fat: 2g
- Trans Fat: 0g
- Carbohydrates: 21g
- Fiber: 1g
- Protein: 2g
- Cholesterol: 15mg