Introduction to Creamy Caramel Cake
There’s something magical about a slice of creamy caramel cake that draws us in, isn’t there? It’s the perfect indulgence after a long day, a sweet remedy for life’s little stresses. Whenever I whip up this delightful dessert, it feels like I’m wrapping my family in a warm, sugary hug. This cake doesn’t just satisfy cravings; it brings everyone together, creating moments and memories around the table. Whether it’s a birthday celebration or just because, this recipe is a quick solution for busy days when you want to impress your loved ones. Let’s dive into the sweetness!
Why You’ll Love This Creamy Caramel Cake
This creamy caramel cake is a true game changer for busy moms and professionals alike. It’s not just easy to make; it’s downright delightful. In just about an hour, you’ll have a stunning dessert that’s sure to wow your family and friends. The heavenly caramel sauce drizzled over the layers adds a burst of flavor that’ll make your taste buds dance! Trust me, one slice will never be enough!
Ingredients for Creamy Caramel Cake
Gathering the right ingredients is key to bringing this creamy caramel cake to life! Here’s what you’ll need:
- All-purpose flour: This is the backbone of your cake, providing structure and a fluffy texture.
- Baking powder: The magical ingredient that helps your cake rise and become airy.
- Salt: Just a pinch can enhance the sweetness and balance flavors beautifully.
- Unsalted butter: Softened butter creates that creamy texture we all love. It’s essential for richness!
- Granulated sugar: Sweetness, of course! It gives the cake its delightful flavor and lovely color.
- Large eggs: These bind everything together while adding moisture and richness.
- Vanilla extract: A splash of vanilla deepens the flavor profile, making it irresistibly aromatic.
- Milk: This adds moisture and richness, helping to create a tender crumb.
- Heavy cream: Used in your luscious caramel sauce, it brings a velvety richness that’s just heavenly.
- Brown sugar: This gives the caramel its deep flavor; it’s what makes it so irresistible!
- Additional butter for caramel: More butter? Yes, please! It enriches the sauce, making it beautifully smooth.
It’s worth noting that I often keep an eye out for high-quality vanilla extract. It’s a game changer for any dessert! If you’re feeling adventurous or have dietary needs, feel free to explore alternatives like gluten-free flour or dairy-free milk. For those interested, exact quantities are available at the end of this article for easy printing.

How to Make Creamy Caramel Cake
Now that we have everything laid out, let’s get cooking! Making this creamy caramel cake isn’t just about following steps; it’s about enjoying the process and the delicious aromas filling your kitchen. Here’s how to bring it all together step by step.
Step 1 – Preheat the Oven and Prepare the Pans
First things first, preheat your oven to 350°F (175°C). This ensures your cake bakes evenly. While that’s heating up, grease and flour two 9-inch round cake pans. This little trick prevents sticking and ensures a smooth release. Nobody wants a cake battle with the pan!
Step 2 – Mix the Dry Ingredients
In a medium bowl, whisk together the all-purpose flour, baking powder, and salt. This simple step aerates the flour and gets everything well combined. It’s a crucial foundation for your creamy caramel cake that helps ensure a light texture. Set this aside for later!
Step 3 – Cream Butter and Sugar
In a large mixing bowl, grab your electric mixer and beat together the softened butter and granulated sugar. Mix on medium speed until it becomes light and fluffy. This step is like giving your cake a nice, airy cloud to rise upon—so don’t skip it! You want that lovely creamy consistency.
Step 4 – Incorporate the Eggs
Next up, add the eggs one at a time to your butter-sugar mix. Beat well after each addition so that they blend beautifully. It’s like building a relationship—one egg at a time ensures everything mixes just right!
Step 5 – Add Vanilla Extract
Now, stir in your vanilla extract. The aroma that wafts up is simply divine! This step enhances all the flavors, bringing an irresistible warmth to your creamy caramel cake.
Step 6 – Combine Dry and Wet Ingredients
Time to bring it all together! Gradually add the dry mixture to the butter mixture, alternating with the milk. Start and end with the flour. Mix until just combined. This keeps your cake moist and avoids overmixing—remember, a gentle touch is key!
Step 7 – Bake the Cakes
Evenly divide the batter between the prepared pans and smooth the tops. Pop them in the preheated oven and bake for 25 to 30 minutes. A toothpick inserted in the center should come out clean! Resist the temptation to keep the oven door open wide—it’s like peeking at a surprise party!
Step 8 – Prepare the Caramel Sauce
While the cakes are cooling, it’s caramel time! In a medium saucepan over medium heat, combine the brown sugar, butter, and heavy cream. Stir continuously until the butter melts and the sugar dissolves. Bring it to a simmer. Then, lower the heat, stirring occasionally, until it thickens slightly—about 3 to 5 minutes. The aroma is going to get your taste buds excited!
Step 9 – Assemble the Cake
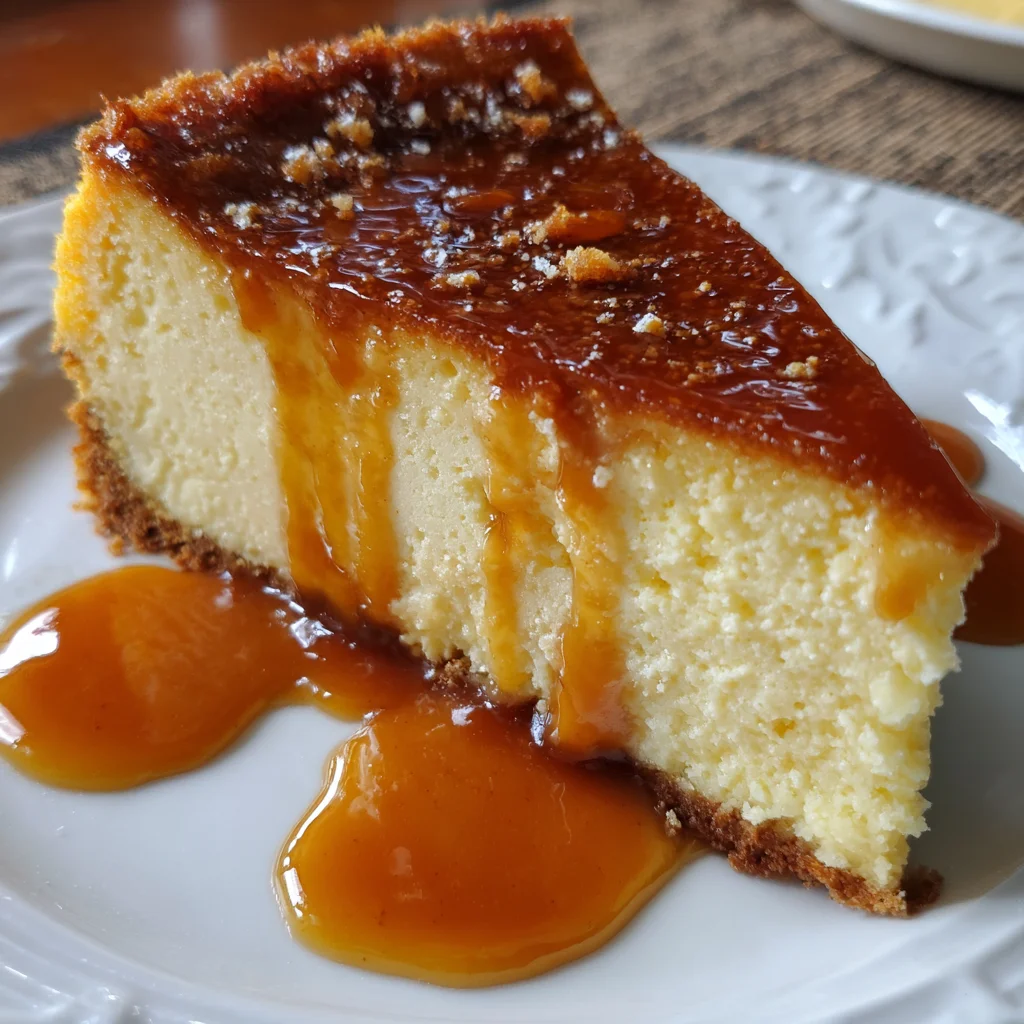
Once the cakes have cooled completely, place one layer on a serving plate. Spread a generous amount of that luscious caramel sauce on top. Then, stack the second layer, drizzling more sauce over it and letting it cascade down the sides. Let it set for a few minutes before slicing, and get ready for the smiles!
Tips for Success
- Always use softened butter for easy mixing and a fluffy texture.
- Don’t rush the cooling process; it prevents cake layers from breaking apart.
- For a richer flavor, let your caramel sauce cool before drizzling it on the cake.
- Use a serrated knife to level your cake layers for a stable stack.
- Feel free to add a pinch of sea salt to your caramel for an extra flavor pop!
Equipment Needed
- 9-inch round cake pans: If you don’t have these, use square pans instead.
- Electric mixer: A hand mixer works just as well if that’s what you have.
- Medium and large mixing bowls: Any size works; just ensure they’re sturdy!
- Spatula: A silicone spatula is great for scraping the bowl clean.
- Wire rack: If you don’t have one, a cutting board can do the trick!
Variations on Creamy Caramel Cake
- Chocolate upgrade: Add cocoa powder to the dry ingredients for a chocolaty twist. You can even make a chocolate caramel layer!
- Nutty additions: Fold in chopped nuts such as pecans or walnuts into the batter for a crunchy texture. They bring delightful flavor!
- Fruit infusion: Layer in fresh sliced strawberries or bananas between the cake layers for a fruity surprise. Talk about refreshing!
- Spiced version: Add a teaspoon of cinnamon or nutmeg for a warm spiced flavor. It’s like wrapping up in a cozy blanket!
- Dairy-free delight: Substitute butter and cream with coconut oil and coconut cream for a dairy-free option. It’s just as creamy and delicious!
Serving Suggestions for Creamy Caramel Cake
- Fresh Berries: Serve with a side of mixed berries for a burst of freshness.
- Whipped Cream: A dollop of whipped cream on top makes it even more indulgent.
- Warm Coffee: Pair with a hot cup of coffee or tea for a comforting treat.
- Elegant Plating: Drizzle extra caramel sauce on the plate for a beautiful presentation.
- Ice Cream: A scoop of vanilla ice cream complements the cake flawlessly!
FAQs about Creamy Caramel Cake
As a passionate home cook, I often stumble upon questions that pop up while dreaming up this creamy caramel cake. Here are some frequently asked questions that can help you along your baking journey!
Can I make this Creamy Caramel Cake in advance?
Absolutely! You can bake the cakes ahead of time and store them in an airtight container for a couple of days. Just save the caramel sauce until you’re ready to assemble!
Can I use a different type of sugar for the caramel?
Yes, you can! While brown sugar gives the caramel that deep, molasses flavor, feel free to experiment with different sugars like granulated sugar or coconut sugar. Just keep an eye on cooking times!
What can I substitute for heavy cream in the caramel sauce?
If you’re looking for a lighter option, half-and-half will work, but for a dairy-free alternative, try full-fat coconut milk. It makes a deliciously rich sauce that fits right into the creamy vibe of the cake!
How do I store leftovers of the Creamy Caramel Cake?
Store any leftover cake in an airtight container in the refrigerator for up to three days. To keep it fresh, place parchment paper between the layers to avoid sticking!
Can I add frosting to the Creamy Caramel Cake?
Of course! If you want to elevate the cake, consider adding a layer of whipped frosting between the cake layers. It creates an extra level of indulgence that’s hard to resist!
Final Thoughts
Every slice of this creamy caramel cake tells a story of love, warmth, and tradition. It transforms any ordinary day into a celebration filled with sweetness and joy. As I watch my family’s faces light up with each delectable bite, I’m reminded of why I love baking so much. This cake is more than just a dessert; it’s a ticket to fond memories and cherished moments around the table. Whether enjoyed on a special occasion or as a simple treat, this creamy caramel cake is guaranteed to bring smiles and laughter, making it a beloved addition to your culinary repertoire!
Print
Creamy Caramel Cake
- Total Time: 1 hour
- Yield: 12 servings 1x
- Diet: Vegetarian
Description
Indulge in a sweet delight with this creamy caramel cake, sure to satisfy your dessert cravings.
Ingredients
- 2 cups all-purpose flour
- 1 1/2 teaspoons baking powder
- 1/2 teaspoon salt
- 1 cup unsalted butter, softened
- 1 1/2 cups granulated sugar
- 3 large eggs
- 1 teaspoon vanilla extract
- 1/2 cup milk
- 1/2 cup heavy cream
- 1/2 cup brown sugar
- 1/4 cup butter
- 1/2 teaspoon vanilla extract
Instructions
- Preheat your oven to 350°F (175°C) and grease and flour two 9-inch round cake pans.
- In a medium-sized bowl, whisk together the all-purpose flour, baking powder, and salt until well combined.
- In a large mixing bowl, cream the softened butter and granulated sugar together using an electric mixer on medium speed until the mixture is light and fluffy.
- Add the eggs one at a time to the butter mixture, beating well after each addition.
- Stir in the vanilla extract and mix until fully incorporated.
- Gradually add the dry ingredients to the butter mixture, alternating with the milk, beginning and ending with the dry ingredients.
- Mix until just combined, being careful not to overmix the batter.
- Divide the batter evenly between the prepared cake pans and smooth the tops with a spatula.
- Place the pans in the preheated oven and bake for 25 to 30 minutes, or until a toothpick inserted into the center of the cakes comes out clean.
- Allow the cakes to cool in the pans for 10 minutes, then turn them out onto a wire rack to cool completely.
- While the cakes are cooling, prepare the caramel sauce by combining the brown sugar, butter, and heavy cream in a medium saucepan over medium heat.
- Stir the mixture continuously until the butter has melted and the sugar has dissolved completely.
- Bring the mixture to a simmer, then reduce the heat to low and cook for 3 to 5 minutes, stirring occasionally, until the sauce thickens slightly.
- Remove the caramel sauce from the heat and stir in the vanilla extract.
- Allow the caramel sauce to cool slightly before using it.
- Once the cakes have cooled, place one layer on a serving plate and spread a generous amount of the caramel sauce over the top.
- Place the second cake layer on top of the first and drizzle more caramel sauce over the top and around the edges of the cake.
- Allow the caramel to set for a few minutes before slicing and serving the cake.
Notes
- Make sure the butter is softened for better mixing.
- Alternative layers of frosting or fruit can be added between the layers for extra flavor.
- This cake can be stored in an airtight container for up to 3 days.
- Prep Time: 30 minutes
- Cook Time: 30 minutes
- Category: Dessert
- Method: Baking
- Cuisine: American
Nutrition
- Serving Size: 1 slice
- Calories: 400
- Sugar: 30g
- Sodium: 200mg
- Fat: 22g
- Saturated Fat: 14g
- Unsaturated Fat: 6g
- Trans Fat: 0g
- Carbohydrates: 45g
- Fiber: 1g
- Protein: 4g
- Cholesterol: 90mg