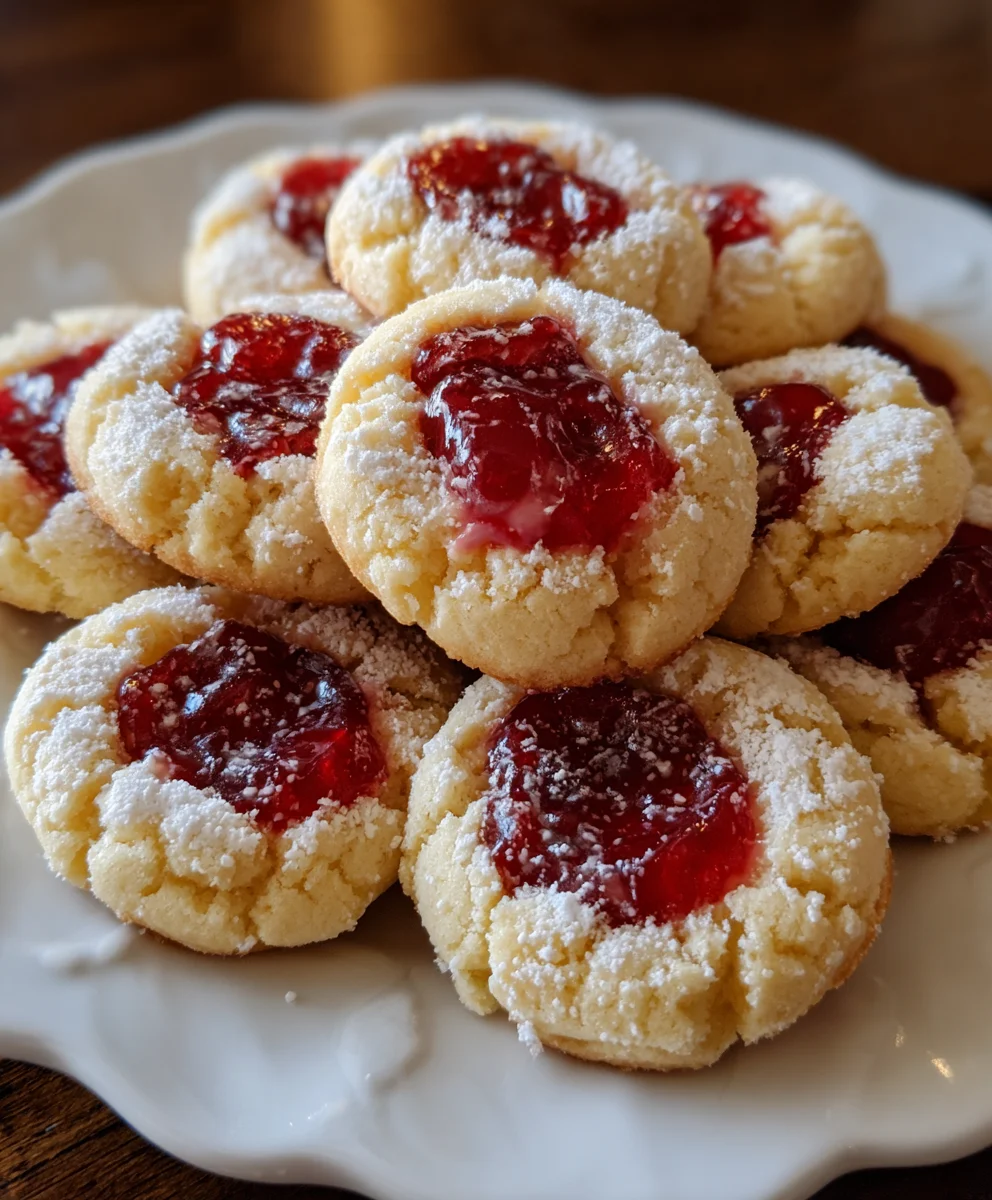
Introduction to Cherry Pie Cookies
As a mom juggling a million things, I often find myself craving something sweet, yet easy to whip up. That’s where these delightful cherry pie cookies come in! They marry the dreamy flavors of cherry pie with the comforting texture of cookies, making them perfect for any occasion. Whether you’re hosting a last-minute gathering or simply treating yourself after a long day, these cookies will impress your loved ones without hogging your precious time. Trust me, once you try these, you’ll wonder how you ever managed without them!
Why You’ll Love This Cherry Pie Cookies
These cherry pie cookies are not just a feast for the taste buds; they’re a lifesaver for your busy schedule! With minimal prep time, you can have these delectable treats ready to share in under 30 minutes. The balance of sweet cherry filling and soft cookie dough creates a mouthwatering experience that your family will adore. Plus, their eye-catching appearance makes them perfect for any gathering or dessert table!
Ingredients for Cherry Pie Cookies
Gathering the right ingredients is half the battle in any recipe! For these cherry pie cookies, you’ll need some staple items that you might already have on hand. Here’s what you’ll be looking for:
- Unsalted butter: A must for that rich, buttery flavor. Remember to let it soften to room temperature for easy mixing.
- Granulated sugar: Sweetness is key! It helps make the cookies chewy and delicious.
- Large egg: This binds everything together, adding moisture to your dough.
- Vanilla extract: A splash of vanilla brings warmth and depth. You can’t go wrong with this flavor enhancer!
- All-purpose flour: The backbone of the cookies, providing the structure needed for that lovely texture.
- Baking powder: This ingredient gives your cookies a lift, making them nice and fluffy.
- Salt: Just a pinch! It balances the sweetness and enhances all the other flavors.
- Cherry pie filling: This is the star of the show! You can buy it pre-made or whip up a batch homemade if you’re feeling adventurous.
- Powdered sugar: You’ll need this for the glaze that makes these cookies pop with sweetness.
- Milk: Just a couple of tablespoons to achieve the perfect glaze consistency.
- Optional fruit fillings: Not a cherry fan? Feel free to swap in blueberry or apple pie filling for some delightful variations!
For exact measurements, head to the bottom of the article where I’ve got everything laid out for you. Happy baking!
How to Make Cherry Pie Cookies
Now, let’s get our hands a little floury and dive into the step-by-step process of making these scrumptious cherry pie cookies. It’s easier than you think and oh-so-rewarding!
Step 1: Preheat Oven
First things first! Preheat your oven to 350°F (175°C). This ensures your delicious cookies bake evenly and come out perfect every time. While that’s heating up, line your baking sheets with parchment paper. This simple step helps prevent sticking and makes clean-up a breeze!
Step 2: Cream Butter and Sugar
In a large mixing bowl, cream together the softened butter and granulated sugar. Use an electric mixer or a wooden spoon—whichever you prefer. You want to mix until it’s light and fluffy, almost like a cloud! This stage is crucial for achieving that tender cookie texture we all love.
Step 3: Add Egg and Vanilla
Next, add in the egg along with that delightful splash of vanilla extract. Mix it well until everything is combined. You’re creating a beautiful batter with a warm aroma—just the right base for our cookie adventure!
Step 4: Mix Dry Ingredients
Now, let’s grab a separate bowl. Whisk together your all-purpose flour, baking powder, and salt. This step helps distribute the leavening agent evenly, ensuring your cookies rise beautifully and don’t turn out flat as a pancake!
Step 5: Combine Ingredients
Time to bring it all together! Gradually add the dry ingredients to the wet mixture. Stir gently until just combined. Be careful not to overdo it. A few floury streaks are perfectly fine; this keeps your cookies tender!
Step 6: Shape Dough
Using a cookie scoop or your hands, scoop tablespoon-sized portions of dough and place them on the prepared baking sheets. Remember to leave space between each one. They’re going to spread out and need their room to shine!
Step 7: Create Indentations
Here’s where the fun really begins! Create an indentation in the center of each cookie using your thumb or the back of a spoon. This little pocket will hold your delicious cherry pie filling, so make sure it’s big enough!
Step 8: Add Cherry Filling
Now, it’s time for the star of the show! Spoon a small amount of cherry pie filling into each indentation. Don’t be shy; this is where the magic happens! You want each cookie to have just the right amount of that sweet, tangy cherry goodness.
Step 9: Bake Cookies
Pop your cookies into the oven and bake for about 12-15 minutes. Keep an eye on them; we want those edges lightly golden, signaling that your cookies are done but still chewy in the middle!
Step 10: Cool and Glaze
Allow the cookies to cool on the baking sheets for a few minutes. This helps them firm up. Then, transfer them to a wire rack to cool completely. While they’re cooling, whisk together powdered sugar, milk, and vanilla extract in a small bowl until smooth. Drizzle this sweet glaze over your cooled cookies, and watch them transform into a delightful treat!
There you have it—your very own batch of cherry pie cookies, filled with love and cherry goodness. Enjoy!
Tips for Success
- Always use room temperature butter for easy mixing and the best texture.
- Keep an eye on your cookies towards the end of baking to prevent over-baking.
- Let your cookies cool slightly on the baking sheet before transferring them to avoid breakage.
- Experiment with different fruit fillings to keep things exciting!
- Store any leftovers in an airtight container to maintain their freshness.
Equipment Needed for Cherry Pie Cookies
- Baking sheets: Essential for placing your cookies. Parchment-lined sheets ensure easy removal.
- Mixing bowls: A couple of medium bowls will make mixing ingredients simple.
- Electric mixer or wooden spoon: Either works for creaming butter and sugar!
- Cookie scoop: This handy tool helps create uniform cookie sizes, but a spoon works too.
- Wire rack: For cooling the cookies, which can be substituted with a plate if needed.
Variations of Cherry Pie Cookies
- Blueberry Pie Cookies: Swap out cherry pie filling with blueberry for a fresh twist that captures summertime vibes!
- Peach Pie Cookies: Use sweet peach pie filling, and enjoy a deliciously fruity alternative that’s perfect for warm weather.
- Chocolate Cherry Cookies: Add chocolate chips to the dough for a decadent variation that combines two beloved flavors in one cookie.
- Gluten-Free Option: Use a 1:1 gluten-free flour blend instead of all-purpose for a cookie that everyone can enjoy.
- Vegan Version: Replace the egg with flaxseed meal or applesauce, and use dairy-free butter for a plant-based delight.
Serving Suggestions for Cherry Pie Cookies
- Pair with a scoop of vanilla ice cream for a heavenly dessert combination.
- Serve alongside a steaming cup of coffee or tea to balance the sweetness.
- For a colorful presentation, place cookies on a decorative platter with fresh cherries.
- Drizzle extra glaze over the cookies for an elegant touch!
FAQs about Cherry Pie Cookies
Can I use other types of pie filling for these cookies?
Absolutely! While cherry pie filling shines in this recipe, feel free to experiment with blueberry, apple, or even lemon pie filling for a delightful twist!
How do I store leftover cherry pie cookies?
To maintain freshness, store your cherry pie cookies in an airtight container at room temperature. They should stay delicious for up to a week!
Can I freeze the cookie dough?
Yes! You can freeze the cookie dough before baking. Just scoop the dough onto baking sheets and freeze until solid, then transfer to a freezer bag. When you’re ready to bake, just pop them into the oven straight from the freezer!
What can I substitute for the egg in this recipe?
If you’re looking for an egg substitute, you can use 1 tablespoon of flaxseed meal mixed with 2.5 tablespoons of water. Let it sit for a few minutes until it thickens, and voila—an excellent vegan-friendly option!
Why are my cookies flat?
Flat cookies can be a bummer! Make sure your butter is not too warm, and don’t skip the baking powder. It helps provide the lift and fluffiness you’re going for!
Final Thoughts
Making these cherry pie cookies is about more than just baking; it’s about creating sweet memories in the kitchen. The joy of watching the cookies rise and fill your home with the warm scent of cherries is truly a treat. They offer the perfect blend of comfort and nostalgia, taking me back to carefree times. Whether they become a staple in your family gatherings or a little indulgence after a long day, I hope these delightful cookies bring a smile to your face and warmth to your heart. Enjoy every bite!
Print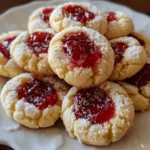
Cherry pie cookies
- Total Time: 30 minutes
- Yield: 24 cookies 1x
- Diet: Vegetarian
Description
Cherry pie cookies are a delightful treat that combine the flavors of cherry pie with the soft, chewy texture of cookies.
Ingredients
- ½ cup unsalted butter, softened
- ½ cup granulated sugar
- 1 large egg
- ½ teaspoon vanilla extract
- 1½ cups all-purpose flour
- ½ teaspoon baking powder
- ¼ teaspoon salt
- Cherry pie filling
- For the glaze:
- ½ cup powdered sugar
- 1–2 tablespoons milk
- ¼ teaspoon vanilla extract
Instructions
- Preheat your oven to 350°F (175°C) and line baking sheets with parchment paper.
- In a large mixing bowl, cream together the softened butter and sugar until light and fluffy.
- Add the egg and vanilla extract, mixing well.
- In a separate bowl, whisk together the flour, baking powder, and salt.
- Gradually add the dry ingredients to the wet ingredients, mixing until just combined.
- Scoop tablespoon-sized portions of dough onto the prepared baking sheets, leaving space between each.
- Create an indentation in the center of each cookie using your thumb or the back of a spoon.
- Spoon a small amount of cherry pie filling into the indentation of each cookie.
- Bake for 12-15 minutes or until the edges are lightly golden. Keep an eye on them to prevent over-baking.
- Allow the cookies to cool on the baking sheets for a few minutes before transferring them to a wire rack to cool completely.
- For the glaze, in a small bowl, whisk together powdered sugar, milk, and vanilla extract until smooth. Drizzle the glaze over the cooled cookies.
Notes
- Make sure to use room temperature butter for the best texture.
- Feel free to substitute the cherry pie filling with other fruit fillings for different flavors.
- Store cookies in an airtight container to maintain freshness.
- Prep Time: 15 minutes
- Cook Time: 15 minutes
- Category: Dessert
- Method: Baking
- Cuisine: American
Nutrition
- Serving Size: 1 cookie
- Calories: 120
- Sugar: 8g
- Sodium: 50mg
- Fat: 5g
- Saturated Fat: 3g
- Unsaturated Fat: 2g
- Trans Fat: 0g
- Carbohydrates: 17g
- Fiber: 0g
- Protein: 1g
- Cholesterol: 20mg