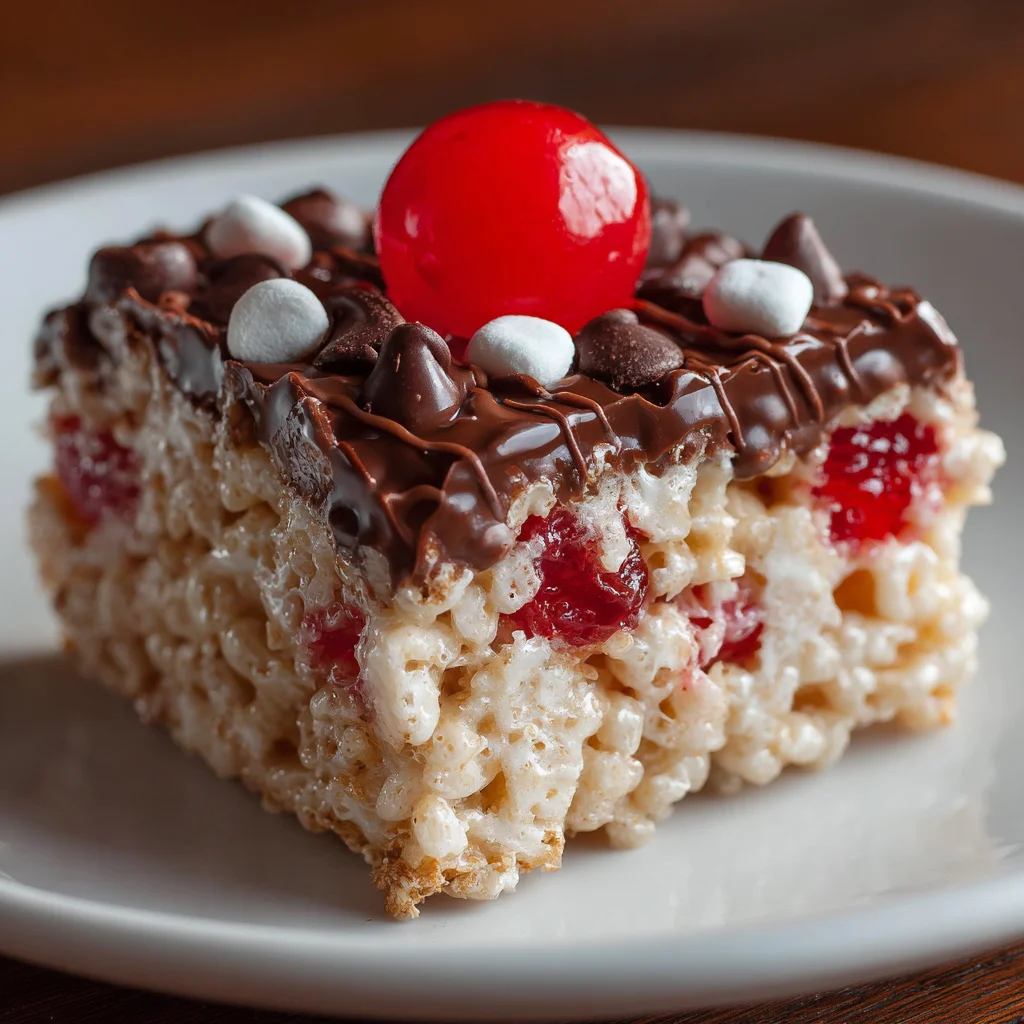
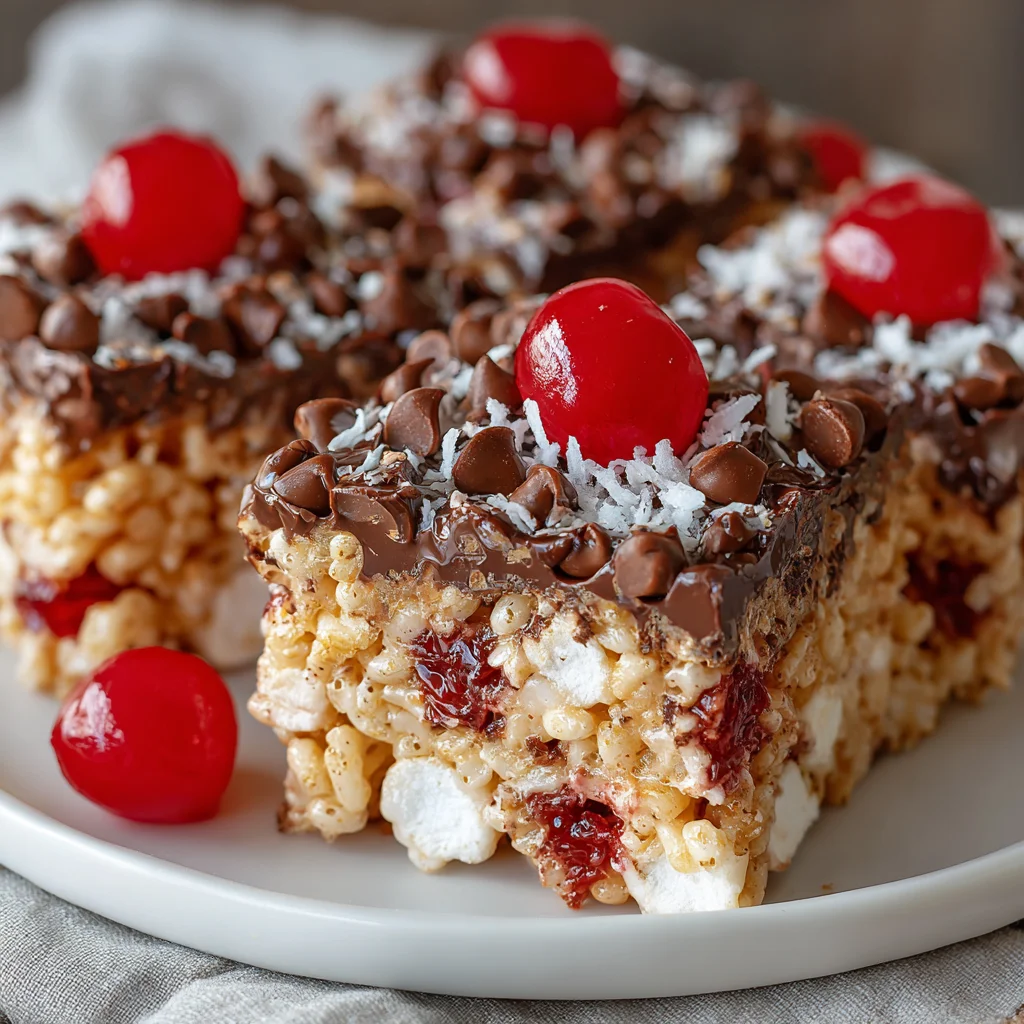
Introduction to Chocolate Covered Cherry Rice Krispies Treats
Welcome to my world of delightful indulgences! Today, I’m thrilled to share a recipe that sparkles with the sweetness of childhood memories: Chocolate Covered Cherry Rice Krispies Treats. Picture this—chewy treats made with love, featuring juicy maraschino cherries cloaked in smooth, luscious chocolate.
For busy moms and professionals like us, this recipe is a lifesaver. It’s quick, easy, and guaranteed to bring smiles to your family’s faces. Gather your little helpers, and let’s whip up this treat together; you’ll experience the joy of cooking while creating lasting memories!
Why You’ll Love This Chocolate Covered Cherry Rice Krispies Treats
Why will you adore these Chocolate Covered Cherry Rice Krispies Treats? For starters, they’re incredibly easy to whip up, taking just 25 minutes from start to finish. The combination of sweet cherries and rich chocolate creates an irresistible flavor that will have your taste buds dancing. Plus, they’re a fantastic way to involve your kids in the kitchen, making memories while you bake together. Satisfy your sweet tooth without a hassle!

Ingredients for Chocolate Covered Cherry Rice Krispies Treats
Let’s gather everything we need to make these delightful treats! Here’s a rundown of each ingredient:
- Rice Krispies cereal: The essential base for our chewy treats, offering that signature crunch and texture.
- Unsalted butter: Adds richness and helps bind everything together. Unsalted ensures you control the overall saltiness.
- Mini marshmallows: These fluffy wonders melt into a gooey sweetness, forming the heart of your treats.
- Vanilla extract: A splash of vanilla adds depth and a comforting aroma to the mix, really elevating the flavor.
- Maraschino cherries: Chopped and included for bursts of juicy sweetness, they’re the star ingredients giving character to the treats.
- Semi-sweet chocolate chips: A rich chocolate coating that complements the cherries perfectly, making each bite heavenly.
- Coconut oil (optional): If you want a smoother chocolate coating, coconut oil can work wonders! It helps the chocolate glide on easily.
Exact quantities are at the bottom of the article, making it easy to print and follow. Now that we have our ingredients ready, let’s dive into the fun part—making these Chocolate Covered Cherry Rice Krispies Treats!
How to Make Chocolate Covered Cherry Rice Krispies Treats
Now that we’ve gathered our ingredients for these delightful Chocolate Covered Cherry Rice Krispies Treats, let’s get to the fun part—making them! Each step is simple, and I’ve sprinkled in some helpful tips to ensure your treats turn out perfectly.
Step 1: Melt the Marshmallows
Start by placing a large pot over medium heat. Add the unsalted butter, allowing it to melt into a glorious golden pool. Once the butter is melted, it’s time to introduce the mini marshmallows. Stir continuously until they melt and transform into a creamy mixture. Just like that, you’ll see a lovely swirl of sweet goodness. Don’t forget to stir in that splash of vanilla extract for that extra flavor boost!
Step 2: Add the Cereal and Cherries
Once your marshmallow mixture is nice and smooth, remove the pot from heat. It’s time for the fun part! Quickly fold in the Rice Krispies cereal and chopped maraschino cherries. Keep stirring until everything is well combined. Each cereal piece should be lovingly coated in the gooey marshmallow mix. It’s a delightful sight, and trust me, the aroma is divine!
Step 3: Shape the Treats
To shape your treats, you’ll need a 9×13-inch baking dish. Grease it lightly with some cooking spray or use parchment paper for easy removal later. Pour the treat mixture into the dish, spreading it evenly. Now, grab a greased spatula and press the mixture down gently. You want a nice, even layer, so it holds together beautifully once it cools.
Step 4: Melt the Chocolate
In a microwave-safe bowl, combine the semi-sweet chocolate chips and coconut oil, if you’re using it. Microwave in 30-second intervals, stirring between each burst. This ensures that your chocolate melts evenly and doesn’t seize up. Keep an eye on it—once it’s smooth and silky, it’s ready for your treats!
Step 5: Drizzle or Dip the Treats
After letting the Rice Krispies treats cool completely, it’s time to coat them in chocolate. You can take your melted chocolate and drizzle it over the top for a beautiful finish. Alternatively, if you’re feeling a little adventurous, dip each square halfway into the chocolate. Place them on a sheet of parchment paper to let the chocolate set. Either way, your treats will look absolutely scrumptious!
Step 6: Serve
After the chocolate is set, it’s time for the best part—enjoying your treats! Slice them into squares, allowing each piece to reveal its chewy, cherry-studded center. You can serve them on a cute plate or individually wrapped for a treat anytime. Trust me, they won’t last long!
Tips for Success
- Measure your marshmallows and cherries accurately to balance flavors perfectly.
- Use a non-stick spray on your spatula for easy mixing and shaping.
- Keep your chocolate warm but not hot to avoid seizing.
- For an extra touch, sprinkle chopped nuts over the chocolate before it sets.
- Let the treats cool completely to ensure they hold their shape when slicing.
Equipment Needed
- Large pot: A sturdy pot to melt your marshmallows; you can also use a non-stick saucepan.
- Spatula: A greased spatula helps in mixing and shaping; consider a silicone spatula for flexibility.
- Baking dish: A 9×13-inch dish is ideal; an 8×8-inch dish works if you prefer thicker treats.
- Microwave-safe bowl: For melting chocolate, any glass or ceramic bowl will do.
Variations
- For a fruity twist, add chopped strawberries or raspberries along with the cherries for a sweet medley.
- Try using white chocolate chips instead of semi-sweet chocolate for a creamy contrast.
- Make it gluten-free by substituting Rice Krispies with gluten-free cereal, ensuring everyone can enjoy them.
- For a minty flair, add a drop of peppermint extract to the melted chocolate before drizzling.
- To make them vegan, substitute the butter with coconut oil and use dairy-free chocolate chips.
Serving Suggestions
- Pair these treats with a glass of cold milk for a nostalgic combination that kids will love.
- Serve alongside fresh fruit like strawberries or slices of banana for a colorful platter.
- For a party, display them on a decorative cake stand for an eye-catching centerpiece.
- Individually wrap the squares in clear bags with ribbons for a delightful gift!
FAQs about Chocolate Covered Cherry Rice Krispies Treats
Let’s tackle some commonly asked questions about these delightful Chocolate Covered Cherry Rice Krispies Treats. I want to make sure you feel confident in making them and exploring your own variations!
Can I use fresh cherries instead of maraschino cherries?
Absolutely! Fresh cherries will give a nice tart flavor. Just make sure to pit and chop them before mixing. You may also want to adjust the sweetness of the treats accordingly.
How should I store the treats after making them?
Store your Chocolate Covered Cherry Rice Krispies Treats in an airtight container. This keeps them fresh and chewy for up to a week. If you want them to last longer, consider refrigerating them!
Can I freeze these treats for later?
Yes, you can! Wrap the treats tightly in plastic wrap, then place them in a freezer-safe container. They can stay frozen for up to three months. Just let them thaw at room temperature before enjoying.
What other toppings can I add besides chocolate?
Get creative! Drizzle caramel, sprinkle crushed nuts, or even top with mini chocolate chips for added texture. The possibilities are endless!
Can kids help make these treats?
Oh, for sure! This recipe is perfect for little hands. They can help measure, stir, and shape the treats, making it a fun family activity filled with laughter and memories!
Final Thoughts
Indulging in these Chocolate Covered Cherry Rice Krispies Treats is like wrapping yourself in a warm hug. They’re not just a treat; they’re a delightful way to connect with family and create cherished memories. From the gooey marshmallows to the burst of fruity cherries, every bite transports you to those carefree summer days of childhood.
This recipe brings joy not only through its sweet taste but also through its simplicity and ease. So, the next time you’re looking for a quick dessert, remember this recipe—it’s bound to bring smiles all around your table!
Print
Chocolate Covered Cherry Rice Krispies Treats
- Total Time: 25 minutes
- Yield: 16 squares 1x
- Diet: Vegetarian
Description
Delicious and chewy Rice Krispies Treats infused with sweet maraschino cherries, and coated in rich chocolate for a delightful snack.
Ingredients
- 6 cups Rice Krispies cereal
- 1/4 cup unsalted butter
- 10 oz mini marshmallows
- 1 tsp vanilla extract
- 1 cup maraschino cherries, drained and chopped
- 1 1/2 cups semi-sweet chocolate chips
- 1 tbsp coconut oil (optional, for smoother chocolate)
Instructions
- Melt the Marshmallows: In a large pot over medium heat, melt the butter. Once melted, add the mini marshmallows and stir continuously until smooth. Stir in the vanilla extract.
- Add the Cereal and Cherries: Remove the pot from heat and quickly stir in the Rice Krispies cereal and chopped maraschino cherries. Stir until the mixture is fully combined and the cereal is evenly coated.
- Shape the Treats: Grease a 9×13-inch baking dish or line it with parchment paper. Pour the mixture into the dish and gently press it down using a greased spatula to create an even layer. Let the treats cool completely.
- Melt the Chocolate: In a microwave-safe bowl, melt the semi-sweet chocolate chips and coconut oil (if using) in 30-second intervals, stirring in between, until smooth.
- Drizzle or Dip the Treats: Once the Rice Krispies treats are cooled and set, drizzle the melted chocolate over the top, or dip each square halfway into the chocolate. Place the treats on a sheet of parchment paper and allow the chocolate to harden.
- Serve: Once the chocolate has set, slice the treats into squares and enjoy!
Notes
- Store leftovers in an airtight container to maintain freshness.
- Feel free to experiment with different types of chocolate for a unique flavor.
- Prep Time: 15 minutes
- Cook Time: 10 minutes
- Category: Dessert
- Method: Stovetop
- Cuisine: American
Nutrition
- Serving Size: 1 square
- Calories: 180
- Sugar: 12g
- Sodium: 20mg
- Fat: 7g
- Saturated Fat: 4g
- Unsaturated Fat: 2g
- Trans Fat: 0g
- Carbohydrates: 27g
- Fiber: 0g
- Protein: 1g
- Cholesterol: 10mg