Introduction to Cookie Monster Oreo Cupcakes
Hey there, fellow baking enthusiasts! If you’re looking for a fun and delightful treat to brighten up your day, look no further than Cookie Monster Oreo Cupcakes! These whimsical goodies are not only delicious but also make for a fantastic activity with your kids, or a simple pick-me-up after a long day. With their playful blue frosting and adorable cookie accents, they’ll steal the spotlight at any gathering. Plus, they’re quick to whip up, making them perfect for busy moms like us who want to impress loved ones without spending hours in the kitchen!
Why You’ll Love This Cookie Monster Oreo Cupcakes
These Cookie Monster Oreo Cupcakes are not just about looks; they’re a deliciously simple way to satisfy your sweet tooth! You’ll adore how quickly they come together, making them an ideal dessert for any occasion. Plus, the comforting flavors of chocolate and vanilla, paired with buttery frosting, create a crowd-pleaser. Whether it’s a birthday party, family gathering, or just a Tuesday, these cupcakes will surely bring smiles all around!
Ingredients for Cookie Monster Oreo Cupcakes
Now let’s dive into the fun part – the ingredients that make these Cookie Monster Oreo Cupcakes come alive! Each component plays a crucial role in creating that delicious flavor and delightful texture. Remember, the exact quantities can be found at the bottom of the article for your convenience.
- Unsalted Butter: Softened to create a rich, creamy base for both cupcakes and frosting.
- Granulated Sugar: Adds sweetness and helps achieve the perfect cupcake structure.
- Egg: Acts as a binding agent, giving your cupcakes that perfect fluffy texture.
- All-Purpose Flour: The main building block for our cupcakes, providing structure and stability.
- Baking Powder: A vital leavening agent that helps the cupcakes rise nicely.
- Salt: Just a pinch to enhance flavor and balance the sweetness.
- Whole Milk: Adds moisture and richness for a tender crumb.
- Vanilla Extract: A must for flavor; high-quality vanilla makes all the difference!
- Canola Oil: Keeps the cupcakes moist and adds a little bit of richness.
- Mini Chocolate Chips: Bursting with chocolate in every bite, these add an extra surprise!
- Oreo Cookies: Crushed up for a delightful crunch and that signature cookie flavor.
- Powdered Sugar: Essential for getting that creamy frosting just right.
- Heavy Cream: Used in the frosting for a luscious, smooth texture.
- Royal Blue Gel Food Dye: Adds that fun, vibrant color to your frosting, making your cupcakes pop!
- Edible Candy Eyes: The finishing touches that give the Cookie Monster a cute and playful look.
- Mini Chocolate Chip Cookies: Halved for decoration, these make the perfect “cookie” mouths!
Gather these ingredients, and let’s get baking an adorable batch of fun! Don’t forget – if you need to refer back for measurements or more info, just scroll down to the bottom of this article.
How to Make Cookie Monster Oreo Cupcakes
Preheat and Prepare the Muffin Tin
First things first! Preheat your oven to 350°F (175°C). This step ensures that the cupcakes bake evenly. While the oven heats up, grab a 12-cup muffin tin and line it with cute paper liners. The liners not only add a pop of color but also make cleanup a breeze!
Creaming Butter and Sugar
Next, let’s cream together the softened unsalted butter and granulated sugar in a large bowl. This step is crucial for light, airy cupcakes. As you mix, the sugar will help aerate the butter, incorporating air into the mix. Beat until it’s light and fluffy, which usually takes about 3-5 minutes. It’s like magic, transforming your ingredients into sugary clouds!
Mixing the Dry Ingredients
In a separate bowl, whisk together the all-purpose flour, baking powder, and salt. Mixing these dry components well before combining them with the wet ingredients helps distribute the baking powder evenly. This ensures that every bite is perfectly fluffy and delightful. You don’t want any surprises in your cupcakes, right?
Combining Wet and Dry Ingredients
Now it’s time to bring everything together! Gradually add the dry mixture to the creamed butter and sugar, alternating with the whole milk and canola oil. Mix gently until just combined. This is key! Overmixing can lead to dense cupcakes, and we want ours to be light and fluffy.
Folding in Delicious Additions
Once your batter is ready, gently fold in the mini chocolate chips and crushed Oreo cookies. Use a spatula and fold carefully so you maintain some texture. Trust me, you want to keep those chocolatey bits and cookie crunch alive in every mouthful. It’s what gives each cupcake its incredible flavor!
Bake the Cupcakes
Now, divide the batter evenly among your lined muffin cups. Fill each one about 3/4 full to allow for rising. Pop them into your preheated oven and bake for about 21-23 minutes. Keep an eye on them towards the end. A toothpick should come out clean when they’re done. The smell wafting through your kitchen will be spot on!
Cool and Prepare Frosting
After baking, allow the cupcakes to cool in the pan for a few minutes. Then transfer them to a wire rack to cool completely. This cooling step is important; if the cupcakes are warm, the frosting will melt off like a silly snowman in the sun.
Make the Frosting
To create the creamy buttercream, beat together softened butter and vanilla extract until it’s smooth. Gradually mix in powdered sugar, then drizzle in heavy cream until you reach your desired consistency. Feel free to adjust the cream for a fluffier or thicker frosting. When you’re ready, add in royal blue gel food dye until you get a vibrant blue color. Don’t be shy with it—it’s Cookie Monster time!
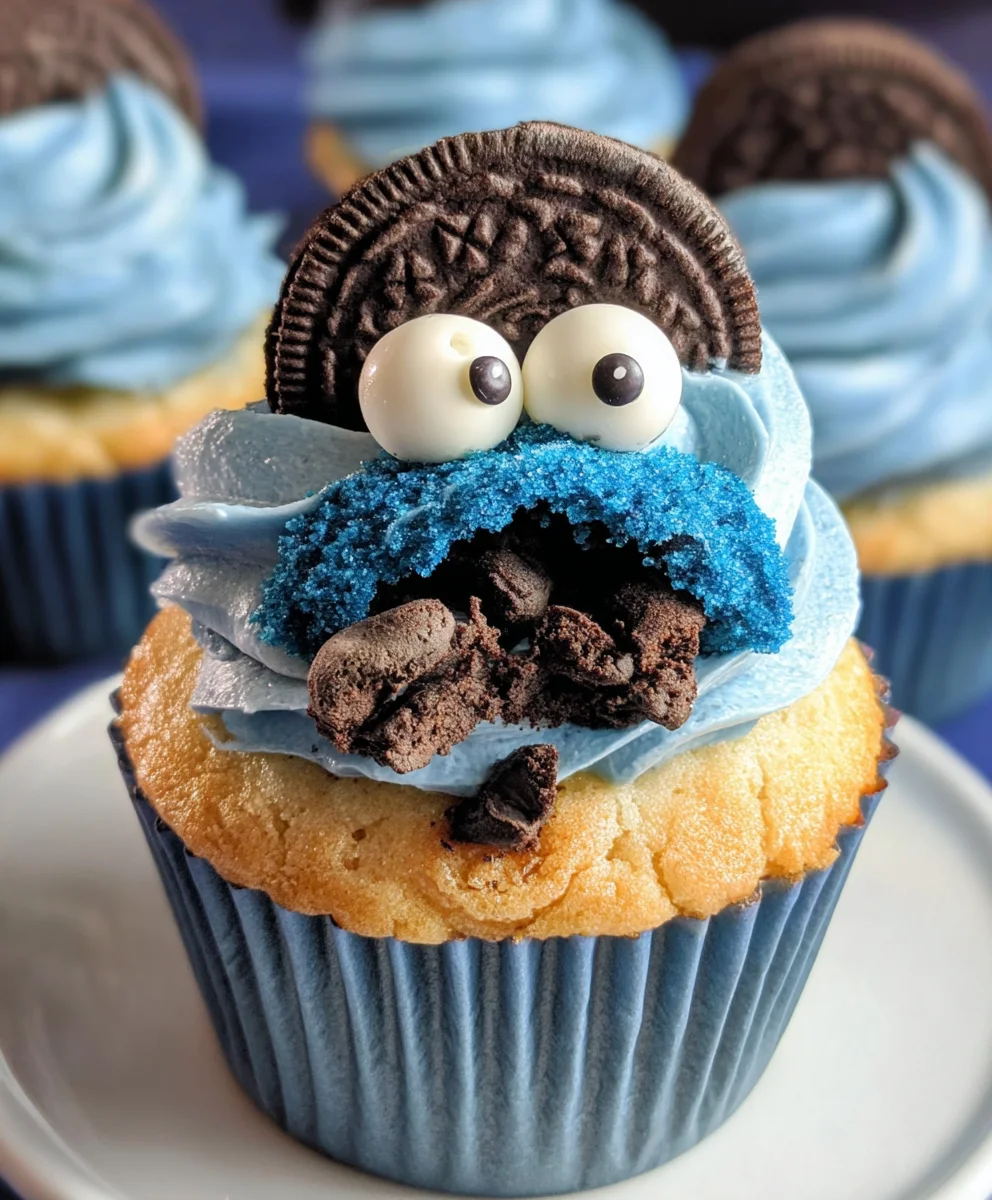
Decorate the Cupcakes
Finally, it’s decoration extravaganza time! Pipe or spread that heavenly blue frosting onto your cooled cupcakes. Finish by placing two edible candy eyes and half a mini chocolate chip cookie on top of each one. Voila, you have your adorable Cookie Monster Oreo Cupcakes! Trust me, these little guys will have everyone smiling.
Tips for Success
- Always use room temperature butter for easier mixing and a smoother batter.
- Measure flour accurately by spooning it into the cup and leveling it off.
- Don’t rush the cooling process; let cupcakes cool completely before frosting.
- For vibrant frosting, start with a small amount of gel food dye and add more as needed.
- Use a piping bag for frosting to make your cupcakes look extra professional!
Equipment Needed
- Muffin Tin: A standard 12-cup tin is perfect; silicone tins work great too!
- Mixing Bowls: Use large bowls for blending; a glass one is my favorite.
- Hand Mixer: A hand mixer will speed up the creaming process; a whisk works in a pinch.
- Piping Bag: For frosting, use a piping bag or a ziplock with a corner cut off.
- Cooling Rack: Essential for cooling cupcakes evenly; a plate can substitute in a bind.
Variations of Cookie Monster Oreo Cupcakes
- Gluten-Free: Substitute all-purpose flour with a 1-to-1 gluten-free baking flour. This allows everyone to enjoy these fun cupcakes!
- Vegan: Replace the butter with coconut oil or vegan butter and use flax eggs (1 tablespoon ground flaxseed mixed with 3 tablespoons water) instead of the egg. Plant-based milk can be used as well!
- Different Flavors: Swap out Oreos for other cookies like chocolate chip or peanut butter for a unique twist. You can even add flavored extracts like almond or mint for added zest!
- Frosting Alternatives: Consider cream cheese frosting instead of buttercream. It adds a tangy touch that pairs wonderfully with chocolate!
- Mini Cupcakes: For a fun bite-sized option, divide the batter into a mini muffin tin. Bake them for about 12-15 minutes, and enjoy these adorable treats!
Serving Suggestions for Cookie Monster Oreo Cupcakes
- Milk: A classic pairing! Serve with a tall glass of cold milk for the ultimate treat experience.
- Ice Cream: Top these cupcakes with a scoop of vanilla or cookies and cream ice cream for a fun sundae twist!
- Presentation: Consider a whimsical cake stand or colorful platter to showcase your cupcakes during gatherings.
- Birthday Parties: These cupcakes make great additions to dessert tables; feel free to mix with other fun treats!
- Decorate Plates: Use chocolate syrup or sprinkles to add flair on the serving plates for an eye-catching arrangement!
FAQs about Cookie Monster Oreo Cupcakes
Curious about these adorable Cookie Monster Oreo Cupcakes? Here are some common questions that I often get asked. Let’s dive in!
Can I make the frosting ahead of time?
Absolutely! You can make the frosting up to two days in advance. Just store it in an airtight container in the fridge. When you’re ready to use it, let it sit at room temperature for a bit to soften up before frosting your cupcakes.
How should I store my cupcakes?
Store your Cookie Monster Oreo Cupcakes in an airtight container at room temperature. They’ll stay fresh for up to 3 days. If you need to keep them longer, consider refrigerating them for up to a week, but remember to let them come to room temperature before serving!
Can I use regular-sized Oreos instead of mini ones?
Of course! If you prefer, regular-sized Oreos will work just fine. Just crush them up and adjust the amount a bit. You’ll still have that fantastic cookie flavor throughout the cupcakes.
What if I don’t have royal blue food dye?
No worries! Feel free to use any food coloring you have on hand. Just keep in mind, the color might turn out a different shade, but it will still be equally fun and delicious!
Are these cupcakes suitable for freezing?
Yes! You can freeze the cupcakes without frosting for up to 3 months. Just wrap them tightly in plastic wrap and place them in a freezer bag. When you’re ready to enjoy, simply thaw at room temperature and frost them fresh!
Final Thoughts
Making these Cookie Monster Oreo Cupcakes isn’t just about whipping up a delightful dessert; it’s about creating moments of joy and connection. As you gather your ingredients and start baking, the sweet aroma wafting through your kitchen sparks smiles and laughter. These cupcakes are a whimsical treat that can transform an ordinary day into something special. Whether you’re sharing them with family, friends, or even enjoying one with a cozy cup of tea, they are sure to bring happiness and fun! Dive into this baking adventure, and let the giggles and deliciousness unfold!
Print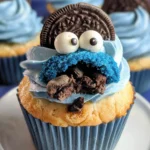
Cookie Monster Oreo Cupcakes
- Total Time: 43 minutes
- Yield: 12 cupcakes 1x
- Diet: Vegetarian
Description
Delicious and fun Cookie Monster Oreo Cupcakes topped with creamy buttercream frosting and decorated with candy eyes and mini cookies.
Ingredients
- 75 grams unsalted butter, softened
- 200 grams granulated sugar
- 1 large egg
- 250 grams all-purpose flour
- 2.5 teaspoons baking powder
- 0.5 teaspoon salt
- 180 millilitres whole milk
- 1 teaspoon vanilla extract
- 3 tablespoons canola oil
- 175 grams mini chocolate chips
- 100 grams Oreo cookies, crushed (about 8 biscuits)
- 225 grams unsalted butter, softened (for frosting)
- 310 grams powdered sugar
- 1 teaspoon vanilla extract (for frosting)
- 45 millilitres heavy cream
- Royal blue gel food dye, as needed
- 24 edible candy eyes
- 6 mini chocolate chip cookies, halved
Instructions
- Preheat oven to 175°C. Line a 12-cup muffin tin with paper liners.
- In a large bowl, cream butter, sugar, and vanilla extract until light and fluffy. Beat in egg, followed by canola oil.
- In a separate bowl, whisk together flour, salt, and baking powder.
- Gradually add dry ingredients to the wet mixture, alternating with milk, mixing until just combined. Do not overmix.
- Gently fold in mini chocolate chips and crushed Oreo biscuits, retaining some texture.
- Divide batter evenly among liners, filling each about 75% full. Bake for 21-23 minutes, or until a toothpick inserted in the centre comes out clean.
- Allow cupcakes to cool in the pan for several minutes, then transfer to a wire rack to cool completely before decorating.
- In a large bowl, beat softened butter and vanilla extract until creamy. Add powdered sugar gradually, then mix in heavy cream until desired consistency is reached.
- Add royal blue gel food dye, mixing until you achieve a rich blue shade suitable for decorating.
- Pipe or spread frosting onto cooled cupcakes using a star tip for texture. Place two edible eyes and half a mini chocolate chip cookie onto each for facial features.
Notes
- Make sure the butter is at room temperature for easy creaming.
- Do not pack the flour; lightly spoon it into the measuring cup for accuracy.
- Use high-quality vanilla extract for the best flavor.
- Store cupcakes in an airtight container at room temperature for up to 3 days.
- Prep Time: 20 minutes
- Cook Time: 23 minutes
- Category: Dessert
- Method: Baking
- Cuisine: American
Nutrition
- Serving Size: 1 cupcake
- Calories: 380
- Sugar: 30g
- Sodium: 220mg
- Fat: 22g
- Saturated Fat: 10g
- Unsaturated Fat: 8g
- Trans Fat: 0g
- Carbohydrates: 40g
- Fiber: 1g
- Protein: 3g
- Cholesterol: 40mg