Garlic Butter Cheese Bombs were my quick fix the first time I needed something cheesy and warm to rescue a sad game night. I grabbed a can of biscuit dough, shoved a cube of mozzarella into each piece, brushed them with garlic butter, and—honestly—they disappeared faster than I expected.
I made this the first time when a last-minute group of friends showed up. In my kitchen, this works better when you let the biscuits rest a minute after rolling so the seams seal. One thing I noticed is the cheese can ooze out if the dough isn’t sealed tightly, so don’t rush that step.
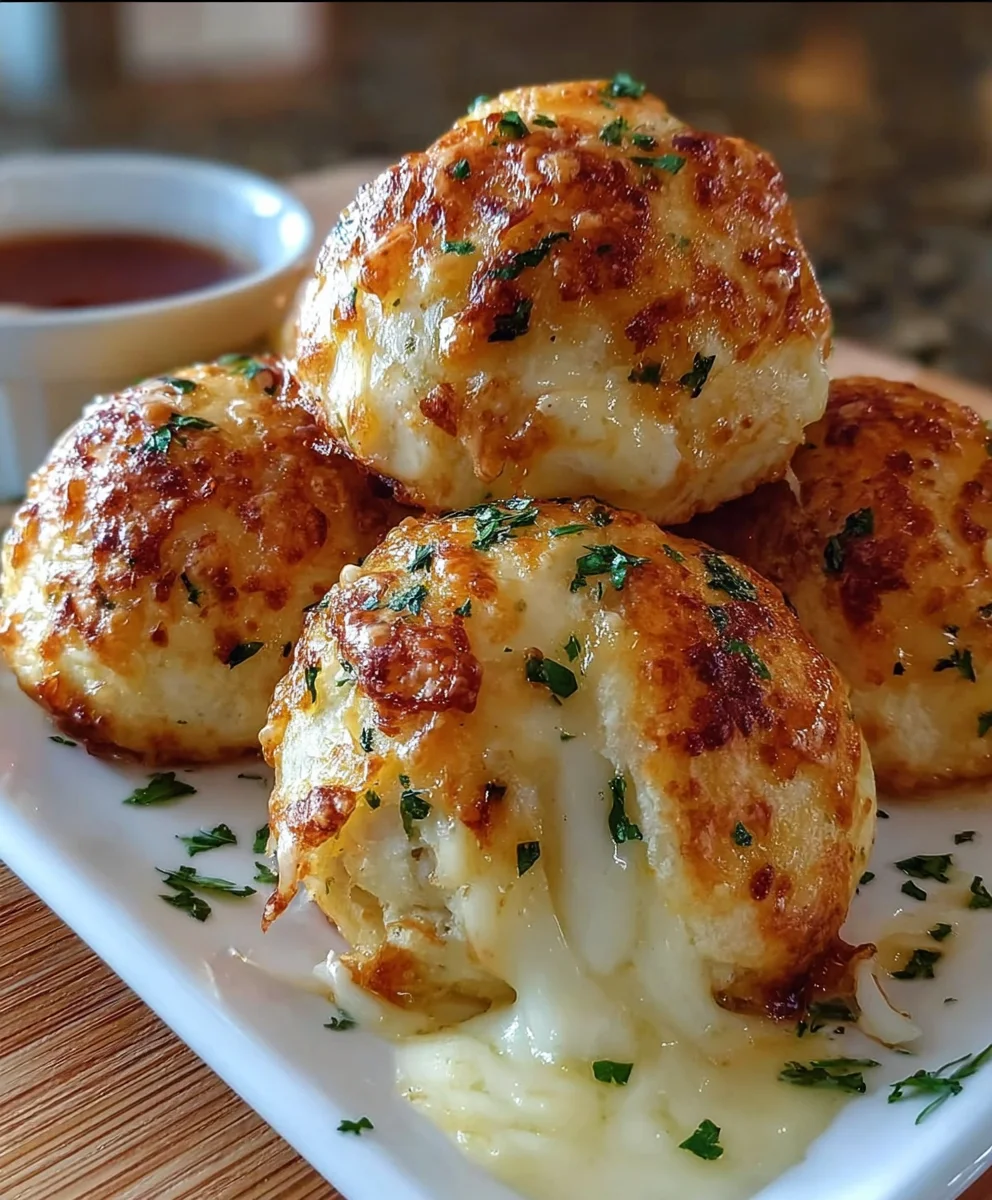
Short answer: Garlic Butter Cheese Bombs are bite-sized stuffed biscuits with melted mozzarella inside, brushed with garlic-parsley butter and baked until golden — ready in about 20 minutes. Try them warm. They’re addictive.
Quick list of related keywords
- garlic butter rolls
- cheese bombs recipe
- mozzarella bombs
- garlic butter bites
- party appetizer
- stuffed biscuit dough
- pull-apart cheese bombs
Keep reading, this part matters…
Opening Description
These little spheres of joy are exactly what they sound like: fluffy biscuit dough wrapped around a gooey cube of mozzarella, then kissed with garlic butter and parsley. They’re straightforward, comforting, and perfect when you want something impressive with almost no fuss.
I like to serve them right from the oven so the cheese pulls. You’ll see the steam when you break one open. Small imperfect moment: sometimes the top browns faster than the sides — I usually rotate the tray halfway through.
Quick tip: don’t skip letting the biscuits breathe for a minute after shaping.
Also — if you like a meaty spin, check out a similar twist on cheeseburger bombs I tried recently: garlic Parmesan bacon cheeseburger bombs.
Why You’ll Love This Garlic Butter Cheese Bombs
- Ready fast: about 20 minutes from start to finish.
- Kid-friendly and crowd-pleasing.
- Minimal ingredients, big flavor.
- Easy to customize (see variations below).
Here’s the thing…
These are simple but feel special. Serve them at a party and people will think you worked harder than you actually did.
Preparation Phase & Tools to Use
You don’t need fancy gear. Gather:
- Baking sheet
- Parchment paper
- Small bowl for garlic butter
- Pastry brush (or spoon)
- Small knife or kitchen scissors (to open biscuit can)
Prep tips:
- Preheat the oven to 375°F (190°C) early.
- Line the baking sheet with parchment so cheese drips don’t stick.
- Keep your butter warm so it stays liquid for brushing.
Ever had this happen? The butter solidifies and is harder to brush. Warm it up again if needed.
Ingredients
- 1 can of biscuit dough
- 8 ounces of mozzarella cheese (cubed)
- 4 tablespoons of butter (melted)
- 2 cloves of garlic (minced)
- 2 tablespoons of fresh parsley (chopped)
- Salt and pepper to taste
Note: you can use pre-shredded mozzarella in a pinch, but cubes give a better ooze.
How to Make Garlic Butter Cheese Bombs at Home
- Preheat your oven to 375°F (190°C).
- In a small bowl, mix the melted butter, minced garlic, parsley, salt, and pepper together.
- Take a piece of biscuit dough and flatten it, placing a cube of mozzarella in the center.
- Fold the dough around the cheese to create a ball, sealing it tightly.
- Place the cheese balls on a baking sheet lined with parchment paper.
- Brush the garlic butter mixture over each cheese ball.
- Bake for 12-15 minutes or until golden brown.
- Serve warm and enjoy your delicious cheese bombs!
Don’t rush this step: fold carefully so the seams are sealed. If a ball leaks, put a little extra dough over the seam and pinch.
Quick tip: rotate the tray halfway through if your oven has hot spots.
Pro Tips for Best Results
- Use cold cheese slightly chilled; it helps hold shape while sealing the dough.
- Press seams firmly and pinch twice.
- Brush butter just before baking and again right after to intensify flavor.
- Stir often when warming butter with garlic so it doesn’t burn.
- It thickens more as it cools, so serve immediately for the best gooey pull.
Warning: the melted cheese is very hot right out of the oven — warn kids and impatient adults.
Variations & Customization Ideas
- Add cooked bacon or pepperoni inside for a meaty twist.
- Sprinkle with Parmesan after brushing with butter for extra nutty flavor.
- Use herb-flavored butter or a pinch of red pepper flakes for heat.
- Swap mozzarella for a mix of cheddar and mozzarella for sharper flavor.
Keep reading, more combos ahead…
Common Mistakes to Avoid
- Not sealing seams properly — leads to cheese leaks.
- Overbaking — no one likes dry, tough dough.
- Burning the garlic — stir often so it doesn’t stick and turn bitter.
- Brushing butter too early — it can wash off before baking.
Most people miss this step: pressing the seam twice. Do it.
What to Serve With
These pair wonderfully with:
- Marinara or pizza sauce for dipping.
- A crisp green salad to cut the richness.
- Soup — tomato soup and these are a cozy match.
For another idea with similar savory vibes, try this garlic Parmesan cheeseburger bombs recipe I bookmarked.
Try it and see how it turns out.
Storage & Reheating Instructions
- Store cooled bombs in an airtight container in the fridge for up to 3 days.
- Reheat in a 350°F oven for 8–10 minutes to restore crispness.
- Microwave will melt cheese fast but makes the dough softer — use only if time is tight.
Warning: do not freeze after baking — texture suffers. You can freeze unbaked balls on a tray, then transfer to a bag.
Estimated Nutrition Information
(Per serving — 2 bombs; rough estimate)
- Calories: ~280
- Fat: 16g
- Carbs: 20g
- Protein: 12g
- Sodium: varies by biscuit brand
This is an estimate. Nutritional content will change with variations.
Quick tip: choose low-sodium biscuits if you’re watching salt.
FAQs
Q: Can I make these ahead?
A: You can assemble and refrigerate for a few hours, but bake right before serving for best texture.
Q: Can I use other cheeses?
A: Yes — provolone, Monterey Jack, or a mix work well.
Q: Are these gluten-free?
A: Not with standard biscuit dough. Use a gluten-free biscuit dough alternative.
Q: How do I keep the bottoms from burning?
A: Use parchment and keep an eye near the end of baking; rotate tray if needed.
Q: Can I make them vegan?
A: Use vegan biscuit dough and dairy-free cheese; adjust seasonings to taste.
Q: What if the cheese leaks out in the oven?
A: Remove the leaking one, let it cool slightly, and sprinkle the pan with a bit of flour next time to help seal.
Expert Tips for the Best Garlic Butter Cheese Bombs
- Chill the cubed cheese for 10 minutes before wrapping.
- Use a dab of flour on the seam for extra grip.
- Brush butter in two thin layers for maximum flavor without sogginess.
- Bake on the middle rack for even browning.
One more thing… if your oven runs hot, shave a minute off the baking time and check.
Save this recipe for later. Try it, and tell me how it goes.
Conclusion
This Garlic Butter Cheese Bombs recipe is perfect for quick meals, easy snacks, or special occasions. If you love more recipe inspiration and want an alternate take on garlic cheese bombs, check out this Easy Garlic Cheese Bombs Recipe – Crunchy Creamy Sweet for another perspective.
And that’s it — nothing complicated here. Make them, share them, and enjoy the cheesy chaos.
Print
Garlic Butter Cheese Bombs
- Total Time: 25 minutes
- Yield: 4 servings 1x
- Diet: Vegetarian
Description
Bite-sized stuffed biscuits with melted mozzarella inside, brushed with garlic-parsley butter and baked until golden.
Ingredients
- 1 can of biscuit dough
- 8 ounces of mozzarella cheese (cubed)
- 4 tablespoons of butter (melted)
- 2 cloves of garlic (minced)
- 2 tablespoons of fresh parsley (chopped)
- Salt and pepper to taste
Instructions
- Preheat your oven to 375°F (190°C).
- Mix the melted butter, minced garlic, parsley, salt, and pepper together in a small bowl.
- Take a piece of biscuit dough and flatten it, placing a cube of mozzarella in the center.
- Fold the dough around the cheese to create a ball, sealing it tightly.
- Place the cheese balls on a baking sheet lined with parchment paper.
- Brush the garlic butter mixture over each cheese ball.
- Bake for 12-15 minutes or until golden brown.
- Serve warm and enjoy your delicious cheese bombs!
Notes
Let the biscuits rest for a minute after rolling to help seal. If cheese leaks, try pressing the seams tighter.
- Prep Time: 10 minutes
- Cook Time: 15 minutes
- Category: Appetizer
- Method: Baking
- Cuisine: American
Nutrition
- Serving Size: 2 bombs
- Calories: 280
- Sugar: 1g
- Sodium: 450mg
- Fat: 16g
- Saturated Fat: 10g
- Unsaturated Fat: 5g
- Trans Fat: 0g
- Carbohydrates: 20g
- Fiber: 0g
- Protein: 12g
- Cholesterol: 30mg