Introduction to Halloween Popcorn
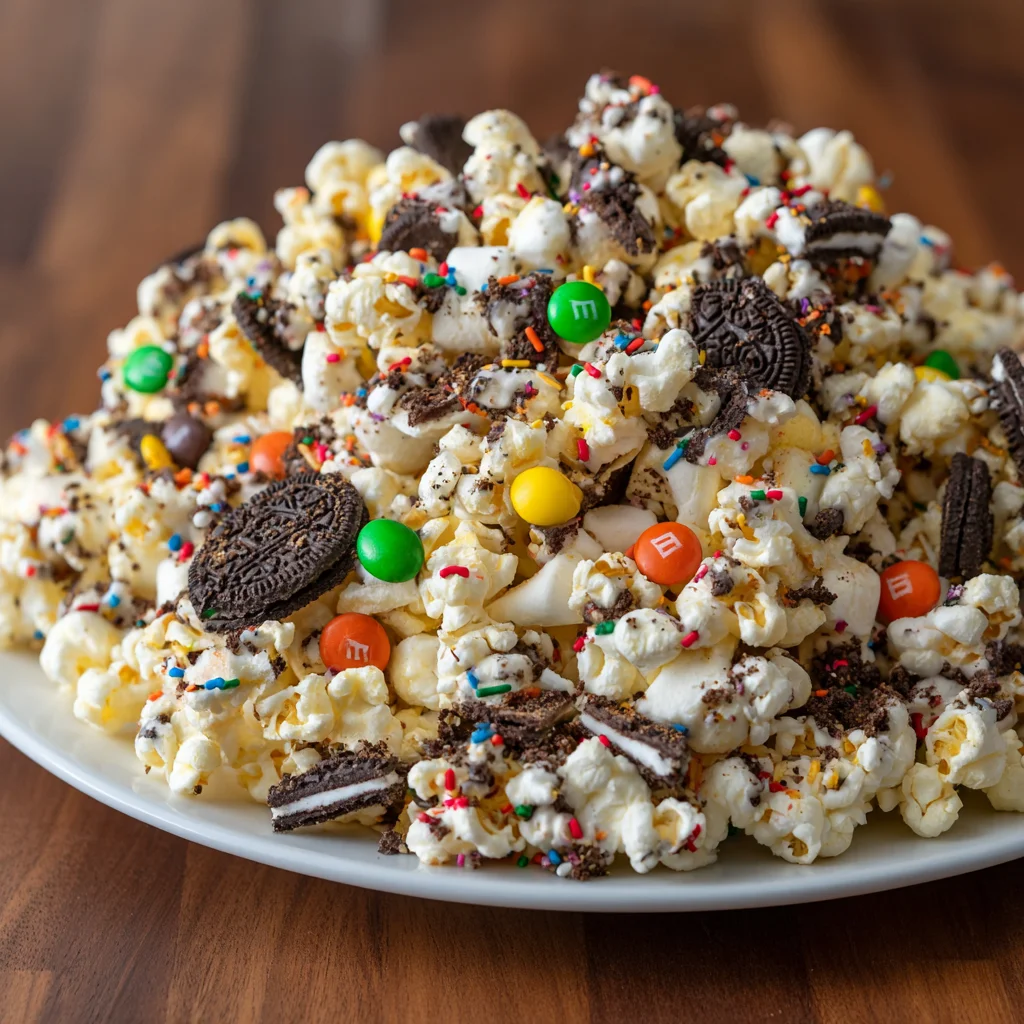
As the leaves begin to turn and the days grow shorter, my thoughts drift to the spookiest time of year. If you’re like me, you want to make the most of Halloween without adding extra stress to your busy schedule. That’s where this delightful Halloween Popcorn comes in! It’s the perfect treat for gatherings, class parties, or simply a fun night in with the family. With just a handful of ingredients and no baking involved, you can whip up this festive snack in no time. Trust me; your loved ones will be begging for seconds!
Why You’ll Love This Halloween Popcorn
This Halloween Popcorn is a lifesaver for busy moms like me. It’s quick, taking just about 25 minutes to make from start to finish. And the best part? It’s a simple process that lets you unleash your creativity with toppings. Plus, this festive treat is not only delicious but also visually stunning. Your family and friends will be impressed, and you’ll feel like a culinary hero without all the fuss!
Ingredients for Halloween Popcorn
To create this fabulous Halloween Popcorn, you’ll need a few simple ingredients that can often be found in your pantry or local grocery store. Here’s what you’ll gather:
- Popped popcorn: Light and fluffy, this forms the delightful base of our treat. You can either pop your own using kernels or buy pre-popped popcorn if you’re tight on time.
- Miniature marshmallows: Soft and chewy, these add a fun sweetness to the mix. You could also try using larger marshmallows, just chop them into smaller pieces.
- White chocolate melting wafers: These melt beautifully, giving our popcorn that creamy, sweet coating. Feel free to swap in milk or dark chocolate wafers if you prefer!
- Halloween sprinkles: These add color and festivity, making your popcorn truly pop! Don’t hesitate to mix in other themed sprinkles for added fun.
- Oreo cookies: Crushed into fine crumbs, they add a bold chocolate flavor and a bit of crunch. If Oreos aren’t your thing, crushed graham crackers make a great substitute!
- M&M’s (Cookies & Scream M&M’s): These colorful candies bring a delightful crunch and a burst of flavor. You can easily switch them out for regular M&M’s or any other favorite candy.
Exact quantities are provided at the bottom of this article for your convenience, making it easy for you to print or save them. Happy cooking!

How to Make Halloween Popcorn
Prepare the Popcorn Base
To kick off our Halloween Popcorn, you need to pop your popcorn. You can either use microwave popcorn or the stovetop method—whichever suits your schedule best! Once popped, let the popcorn cool slightly. In two large bowls, divide your popcorn into equal portions. Now, add the miniature marshmallows to one bowl. This step ensures we get a delightful coating on each piece. As you mix, the warmth from the popcorn gently starts to melt those marshmallows, making everything stick together like magic!
Melt the White Chocolate
Now it’s time to get that velvety white chocolate ready! Place half of your melting wafers in a microwave-safe bowl. Set your microwave to 50% power and heat for 45 seconds. Stir well and keep heating in 15-second intervals until it’s smooth and creamy. Avoid overheating, as that can ruin the chocolate. When the chocolate is perfectly melted, you’ll notice its lovely sheen. This will be the luscious coating that glues everything together. You can’t go wrong here if you take your time!
Combine Ingredients
Alright! Let’s bring everything together. Pour the melted chocolate over the bowl with popcorn and marshmallows. With a gentle touch, stir the mixture, making sure each piece of popcorn is generously coated. It’s like dressing a salad—you want every piece to be included! Now, sprinkle in your Halloween sprinkles and toss again until they’re evenly distributed. This adds a festive touch! Finally, grab your M&M’s and fold those in just before transferring the mixture to your parchment-lined tray. Don’t be shy; it helps create a colorful masterpiece!
Make the Oreo Coated Popcorn
Time for the second bowl! Take the remaining melting wafers and microwave them just like before until smooth. Pour this luscious chocolate over the second bowl of popcorn. Stir well to coat every morsel. Now, here’s the fun part—slowly add in your Oreo cookie crumbs and mix until each popcorn piece is covered. The cookies not only add flavor but also a nice crunch! This step is where the Halloween spirit really comes alive with that rich chocolatey goodness.
Assemble and Chill
Now that your popcorn is deliciously coated, let’s assemble it onto the tray. Spread the white chocolate popcorn on one side of the parchment-lined tray and the Oreo-coated popcorn on the other. Make sure they don’t mix too much! Then, pop the tray in the fridge for about 5 minutes. This helps the chocolate set, making it easy to break into pieces later. Once cooled, you can break it apart and store it in an airtight bag. Keeping your workspace clean during this process makes your life easier when it’s time to clean up!
Tips for Success
- Use fresh popcorn for the best texture and flavor—day-old popcorn can get stale!
- Keep your workspace organized; it makes everything smoother and less stressful.
- Experiment with toppings—try adding crushed nuts or seasonal candies for fun variations.
- If you’re short on time, pre-popped popcorn can save the day.
- Store any leftovers in an airtight container to maintain freshness—if there are any leftovers!
Equipment Needed
- Mixing bowls: Two large bowls for easy mixing. Any size works!
- Spoon or spatula: A sturdy spoon for stirring. A spatula also works great!
- Microwave-safe bowl: Use this for melting the chocolate—ensure it’s safe for heat.
- Parchment paper: This helps with easy cleanup; you can also use wax paper if needed.
Variations
- Chocolate Alternatives: Experiment with dark or milk chocolate melting wafers for a different flavor profile.
- Nutty Twist: Add in some chopped nuts, like almonds or pecans, for a crunchy surprise!
- Allergy-Friendly Options: Substitute the chocolate with dairy-free melting wafers and use gluten-free Oreos for a safe treat.
- Seasonal Sprinkles: Switch up the holiday spirit with themed sprinkles for Thanksgiving or Christmas—let your creativity shine!
- Dried Fruit Addition: Toss in some dried cranberries or cherries for an extra fruity pop of flavor.
Serving Suggestions
- Spooky Serving Bowl: Use a Halloween-themed bowl to serve your Halloween Popcorn—it adds instant festivity!
- Candy Corn Pairing: Serve with candy corn for a colorful and classic Halloween vibe.
- Hot Chocolate: A cozy mug of hot chocolate pairs perfectly for a sweet treat.
- Fun Presentation: Create individual bags or jars for a cute party favor idea.
- Movie Night: Enjoy with a family movie night—this treat makes the perfect companion!
FAQs about Halloween Popcorn
Can I store Halloween Popcorn for later? Absolutely! Make sure to keep your Halloween Popcorn in an airtight container. This will help maintain its freshness and crunchy texture. You can enjoy it for up to a week—if it lasts that long!
What if I don’t have white chocolate melting wafers? No worries! You can use any type of chocolate you prefer, such as milk or dark chocolate. Just follow the same melting instructions, and you’ll achieve a deliciously different flavor for your popcorn.
How do I ensure my popcorn doesn’t get stale? Storing your Halloween Popcorn in an airtight container is key. Keeping it out of the air prevents moisture from sneaking in, which can make it lose that delightful crunch.
Can I make this popcorn in advance? Yes! This treat is perfect for prepping ahead of time. You can prepare it a day or two in advance and store it properly. It’s a great addition to any Halloween gathering.
How can I adjust serving sizes for different occasions? This recipe yields about 10 servings, but you can easily double or halve it based on your needs. Just remember to adjust the ingredient quantities accordingly, keeping the same delightful proportions!
Final Thoughts
Making Halloween Popcorn is more than just a fun recipe; it’s a chance to create joyful memories with your loved ones. With its vibrant colors and delightful crunch, this treat brings excitement to any gathering. As you gather around the table, sharing stories and laughter while enjoying this festive snack, you’ll feel the warmth of family bonds grow stronger. Whether you’re treating your kids after school or bringing a festive snack to a Halloween party, this recipe embodies the spirit of togetherness. Celebrate the season and enjoy every delicious bite!
Print
Halloween Popcorn: A Spooktacular Treat You’ll Love!
- Total Time: 25 minutes
- Yield: 10 servings 1x
- Diet: Vegetarian
Description
A fun and festive treat perfect for Halloween celebrations, combining popcorn, marshmallows, and colorful toppings.
Ingredients
- 6 cups popped popcorn
- 2 cups miniature marshmallows
- 1 – 10 ounce bag white chocolate melting wafers
- ¼ cup Halloween sprinkles
- 10 Oreo cookies, crushed into fine crumbs
- 1 bag M&M’s (Cookies & Scream M&M’s)
Instructions
- Divide the popcorn and marshmallows evenly in two bowls.
- Place half the melting wafers in a microwave safe bowl. Heat at 50% power for 45 seconds. Stir and repeat until melted and creamy.
- Pour into one bowl of popcorn. Stir until everything is coated. Add sprinkles and toss again.
- Dump the popcorn onto a tray lined with parchment. Add half the M&M’s.
- Melt the rest of the chocolate and pour into the other bowl of popcorn. Stir until everything is coated.
- Slowly add the Oreo crumbs as you continue to stir until everything has a crumb coating.
- Dump the popcorn onto the other end of the tray. Add the rest of the candies.
- Refrigerate for 5 minutes. Break apart and store in a tightly sealed bag.
Notes
- Make sure to use a parchment lined tray for easy cleanup.
- Feel free to customize the toppings based on your preferences.
- Store in an airtight container to keep it fresh.
- Prep Time: 15 minutes
- Cook Time: 10 minutes
- Category: Dessert
- Method: No-Bake
- Cuisine: American
Nutrition
- Serving Size: 1 cup
- Calories: 220
- Sugar: 18g
- Sodium: 120mg
- Fat: 10g
- Saturated Fat: 5g
- Unsaturated Fat: 5g
- Trans Fat: 0g
- Carbohydrates: 33g
- Fiber: 1g
- Protein: 2g
- Cholesterol: 0mg