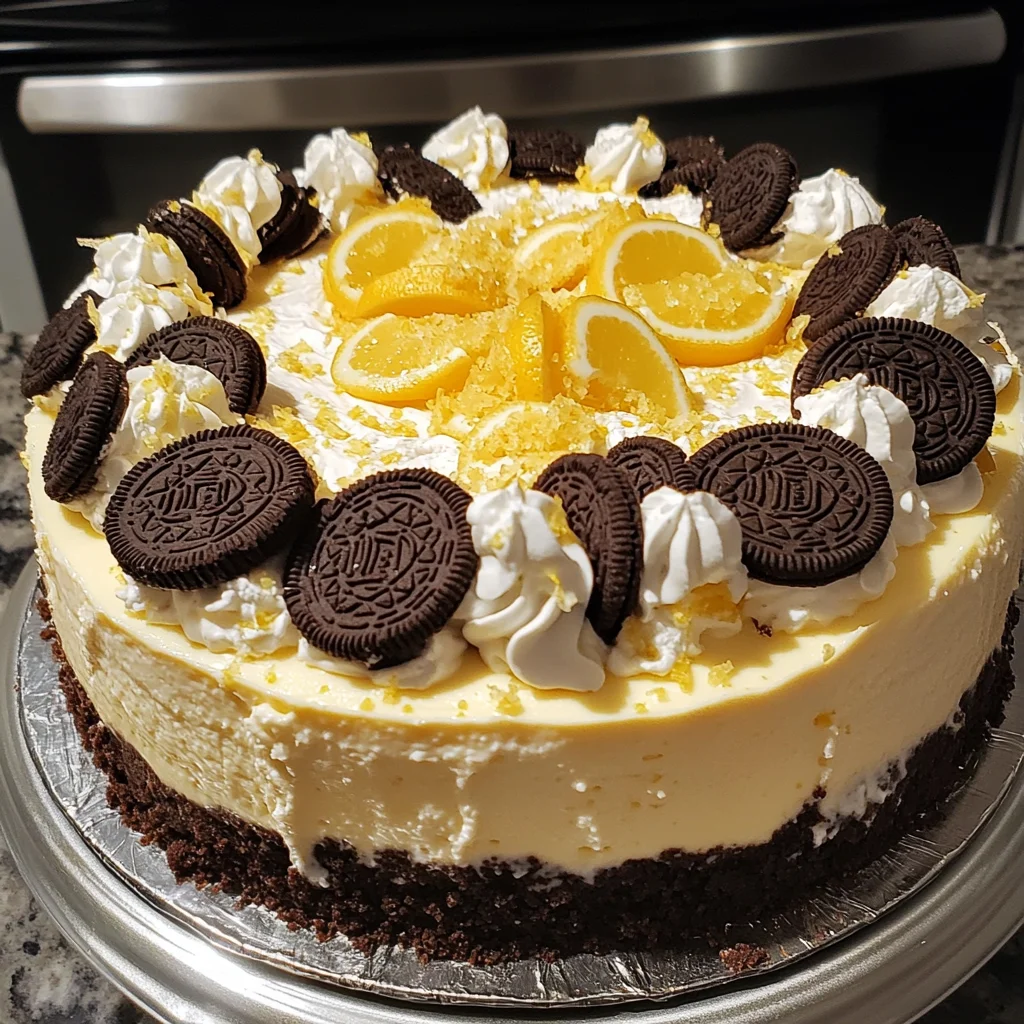
Introduction to Lemon Oreo Cheesecake
As a busy mom, I know how precious time can be, especially when it comes to whipping up something special in the kitchen. That’s why I’m excited to share my Lemon Oreo Cheesecake recipe with you! This delightful dessert combines the creamy richness of cheesecake with the zesty brightness of lemon and the satisfying crunch of Oreo cookies. It’s perfect for impressing guests or simply treating yourself after a long day. Trust me, this Lemon Oreo Cheesecake will become your go-to recipe for any occasion, bringing smiles and sweet moments to your table!
Why You’ll Love This Lemon Oreo Cheesecake
This Lemon Oreo Cheesecake is a dream come true for busy lives! It’s incredibly easy to make, requiring just a handful of ingredients and minimal prep time. The combination of creamy cheesecake and zesty lemon is a flavor explosion that will leave your taste buds dancing. Plus, it’s a showstopper that will impress your family and friends, making it the perfect dessert for any gathering or celebration!
Ingredients for Lemon Oreo Cheesecake

Gathering the right ingredients is the first step to creating your Lemon Oreo Cheesecake masterpiece. Here’s what you’ll need:
- Graham cracker crumbs: These form the base of your crust, providing a sweet and crunchy foundation.
- Brown sugar: Adds a rich sweetness and depth to the crust, balancing the tangy lemon flavor.
- Vanilla extract: A splash of this enhances the overall flavor, making everything taste more delicious.
- Melted unsalted butter: This binds the crust ingredients together, giving it that perfect texture.
- Lemon Oreos: The star of the show! These cookies bring a delightful lemony twist and crunch to the cheesecake.
- Cream cheese: The creamy base of the cheesecake, it’s essential for that rich, smooth texture.
- Granulated sugar: Sweetens the filling, balancing the tartness of the lemon.
- Sour cream: Adds creaminess and a slight tang, enhancing the cheesecake’s flavor.
- Egg: Helps bind the filling together, giving it structure as it bakes.
- Heavy whipping cream: This adds richness and a light texture to the cheesecake.
- More vanilla extract: Yes, another splash! It’s worth it for that extra flavor boost.
- Cornstarch: A little bit helps stabilize the filling, ensuring a smooth and creamy result.
- Lemon zest: This is where the magic happens! It infuses the cheesecake with fresh lemon flavor.
- Whipped cream topping: A light and fluffy finish that makes the cheesecake even more indulgent.
- Chopped Lemon Oreos: For garnish, these add a fun crunch and a pop of color on top.
For exact measurements, check the bottom of the article where you can find everything listed for easy printing. Feel free to get creative with your ingredients! You can swap out the sour cream for Greek yogurt or use gluten-free cookies if needed. The possibilities are endless!
How to Make Lemon Oreo Cheesecake
Step 1: Prepare the Springform Pan
First things first, let’s get that oven preheating to 325°F (163°C). While it warms up, grab your 9-inch springform pan and lightly grease it. This will help the cheesecake slide out easily later. Now, set up a large roasting pan that can fit your springform inside. This is crucial for creating a water bath, which helps the cheesecake bake evenly and prevents cracks. Trust me, this little step makes a big difference in the final result!
Step 2: Make the Crust
In a small bowl, combine your graham cracker crumbs, melted butter, brown sugar, and vanilla extract. Mix until everything is well combined and resembles wet sand. Now, press this mixture firmly into the bottom and halfway up the sides of your springform pan. This crust is the foundation of your Lemon Oreo Cheesecake, so make sure it’s packed tightly. For an extra zesty crunch, lay whole Lemon Oreos evenly across the crust. It’s like a surprise waiting to be discovered!
Step 3: Prepare the Cheesecake Filling
In a mixing bowl, beat the softened cream cheese until it’s silky smooth. This is where the magic begins! Gradually blend in the cornstarch and granulated sugar until fully combined. Next, add the egg, sour cream, vanilla extract, and heavy whipping cream. Mix until everything is smooth and creamy. Finally, stir in the lemon zest for that fresh, vibrant flavor. This filling is going to be the star of your Lemon Oreo Cheesecake, so make sure it’s well mixed!
Step 4: Bake the Cheesecake
Pour the luscious cheesecake filling into your prepared crust. Now, carefully place the springform pan into the larger roasting pan. Fill the roasting pan with hot water until it reaches halfway up the sides of the springform. This water bath is essential for a creamy texture and helps prevent cracks. Bake your cheesecake for 60-65 minutes, or until it’s set but still slightly jiggly in the center. The aroma wafting through your kitchen will be heavenly!
Step 5: Cool and Chill
Once your cheesecake is baked, let it cool in the pan for about 15 minutes. This allows it to settle before chilling. After that, pop it into the fridge and let it chill for at least 4 hours. I know, patience is key here! Chilling overnight is even better, as it enhances the flavor and texture. Just imagine the anticipation as you wait for that first slice of your Lemon Oreo Cheesecake!
Step 6: Add the Topping
When you’re ready to serve, it’s time to add the finishing touches! Spread a generous layer of whipped cream topping over the chilled cheesecake. This adds a light and fluffy element that complements the rich filling. For the grand finale, sprinkle the chopped Lemon Oreos on top. This not only looks beautiful but adds that delightful crunch. Your Lemon Oreo Cheesecake is now ready to impress!
Tips for Success

- Always use room temperature cream cheese for a smooth filling.
- Don’t skip the water bath; it’s key for a creamy texture.
- Chill the cheesecake overnight for the best flavor and texture.
- Adjust the lemon zest to your taste for a more or less zesty kick.
- Use a sharp knife to slice for clean, beautiful pieces.
Equipment Needed
- 9-inch springform pan: Essential for easy removal; a regular cake pan works too, but slicing will be trickier.
- Mixing bowls: Use a large bowl for the filling and a smaller one for the crust; any bowls will do!
- Electric mixer: A hand mixer is perfect; a whisk can work, but it’ll take more elbow grease.
- Roasting pan: Needed for the water bath; a large baking dish can substitute.
Variations
- Gluten-Free: Swap out the graham cracker crumbs and Lemon Oreos for gluten-free alternatives to enjoy this dessert without worry.
- Fruit-Infused: Add a layer of fresh berries or a fruit compote on top of the whipped cream for a burst of color and flavor.
- Chocolate Lovers: Mix in some mini chocolate chips into the cheesecake filling for a delightful chocolatey twist.
- Vegan Option: Use vegan cream cheese and coconut cream instead of heavy whipping cream for a plant-based version.
- Extra Zesty: Increase the lemon zest and juice for a more pronounced lemon flavor that really pops!
Serving Suggestions
- Pair your Lemon Oreo Cheesecake with a refreshing glass of iced tea or lemonade for a delightful contrast.
- Serve with fresh berries like strawberries or blueberries for a pop of color and flavor.
- Garnish with mint leaves for an elegant touch that brightens up the presentation.
- Consider a drizzle of lemon glaze for an extra zesty kick.
FAQs about Lemon Oreo Cheesecake
Can I make Lemon Oreo Cheesecake ahead of time?
Absolutely! In fact, making it a day in advance is a great idea. The flavors meld beautifully overnight, making each slice even more delicious. Just keep it covered in the fridge until you’re ready to serve.
What can I use instead of Lemon Oreos?
If you can’t find Lemon Oreos, regular Oreos work just fine! You can also use any lemon-flavored cookies or even vanilla cookies for a different twist. Just remember, the lemon flavor is key, so consider adding extra lemon zest or juice to the filling.
How do I store leftover Lemon Oreo Cheesecake?
Store any leftovers in an airtight container in the fridge. It should last for about 3-4 days. Just be sure to keep it covered to maintain its freshness and flavor!
Can I freeze Lemon Oreo Cheesecake?
Yes, you can freeze it! Wrap the cheesecake tightly in plastic wrap and then in aluminum foil. It can be frozen for up to 2 months. When you’re ready to enjoy it, let it thaw in the fridge overnight before serving.
What’s the best way to slice the cheesecake?
For clean slices, use a sharp knife dipped in hot water. Wipe the knife clean between cuts for perfect, beautiful pieces. This little trick makes a big difference in presentation!
Final Thoughts
Creating this Lemon Oreo Cheesecake is more than just baking; it’s about crafting sweet memories. The joy of sharing a slice with loved ones, watching their faces light up with delight, is truly priceless. This dessert brings a burst of sunshine to any gathering, making it a perfect treat for celebrations or quiet evenings at home. Plus, the ease of preparation means you can whip it up even on the busiest days. So, roll up your sleeves, embrace the zesty goodness, and let this Lemon Oreo Cheesecake become a cherished part of your culinary adventures!
Print
Lemon Oreo Cheesecake
- Total Time: 4 hours 85 minutes
- Yield: 12 servings 1x
- Diet: Vegetarian
Description
A delightful and zesty Lemon Oreo Cheesecake that combines the creaminess of cheesecake with the tangy flavor of lemon and the crunch of Oreo cookies.
Ingredients
- 1 1/2 cups graham cracker crumbs
- 1/2 cup brown sugar
- 1 tsp vanilla extract
- 5 Tbsp melted unsalted butter
- 14–15 Lemon Oreos
- 24 oz cream cheese, softened
- 1/2 cup white granulated sugar
- 3 Tbsp sour cream
- 1 egg, room temperature
- 3/4 cup heavy whipping cream
- 2 tsp vanilla extract
- 2 Tbsp cornstarch
- Zest from 1 large lemon
- 6 oz whipped cream topping (like Cool Whip)
- Remaining half of the Lemon Oreo cookies, chopped
Instructions
- Preheat your oven to 325°F (163°C) and lightly grease a 9-inch springform pan. Set up a large roasting pan that can fit the springform inside—this will help create a lovely water bath.
- In a small bowl, combine the graham cracker crumbs, melted butter, vanilla extract, and brown sugar until well mixed. Press this mixture firmly into the bottom and halfway up the sides of your springform pan. Then, lay whole Lemon Oreos evenly across the crust for an extra zesty crunch.
- In a mixing bowl, beat the softened cream cheese until it’s silky smooth. Next, blend in the cornstarch and sugar until combined. Gradually beat in the egg, followed by the sour cream, vanilla extract, and heavy cream. Finish it off by stirring in the lemon zest for that fresh zing.
- Pour the luscious cheesecake batter into the prepared pan and bake it in the water bath for 60-65 minutes, or until set.
- Once baked, let the cheesecake cool for about 15 minutes. Then, pop it into the fridge to chill for at least 4 hours—patience is key here!
- When you’re ready to serve, spread a generous layer of whipped cream topping over the chilled cheesecake and sprinkle the chopped Lemon Oreos on top for the finishing touch.
Notes
- For best results, use room temperature cream cheese to avoid lumps.
- Chilling the cheesecake overnight enhances the flavor and texture.
- Feel free to adjust the amount of lemon zest to your taste preference.
- Prep Time: 20 minutes
- Cook Time: 65 minutes
- Category: Dessert
- Method: Baking
- Cuisine: American
Nutrition
- Serving Size: 1 slice
- Calories: 350
- Sugar: 25g
- Sodium: 250mg
- Fat: 24g
- Saturated Fat: 12g
- Unsaturated Fat: 8g
- Trans Fat: 0g
- Carbohydrates: 30g
- Fiber: 1g
- Protein: 4g
- Cholesterol: 70mg