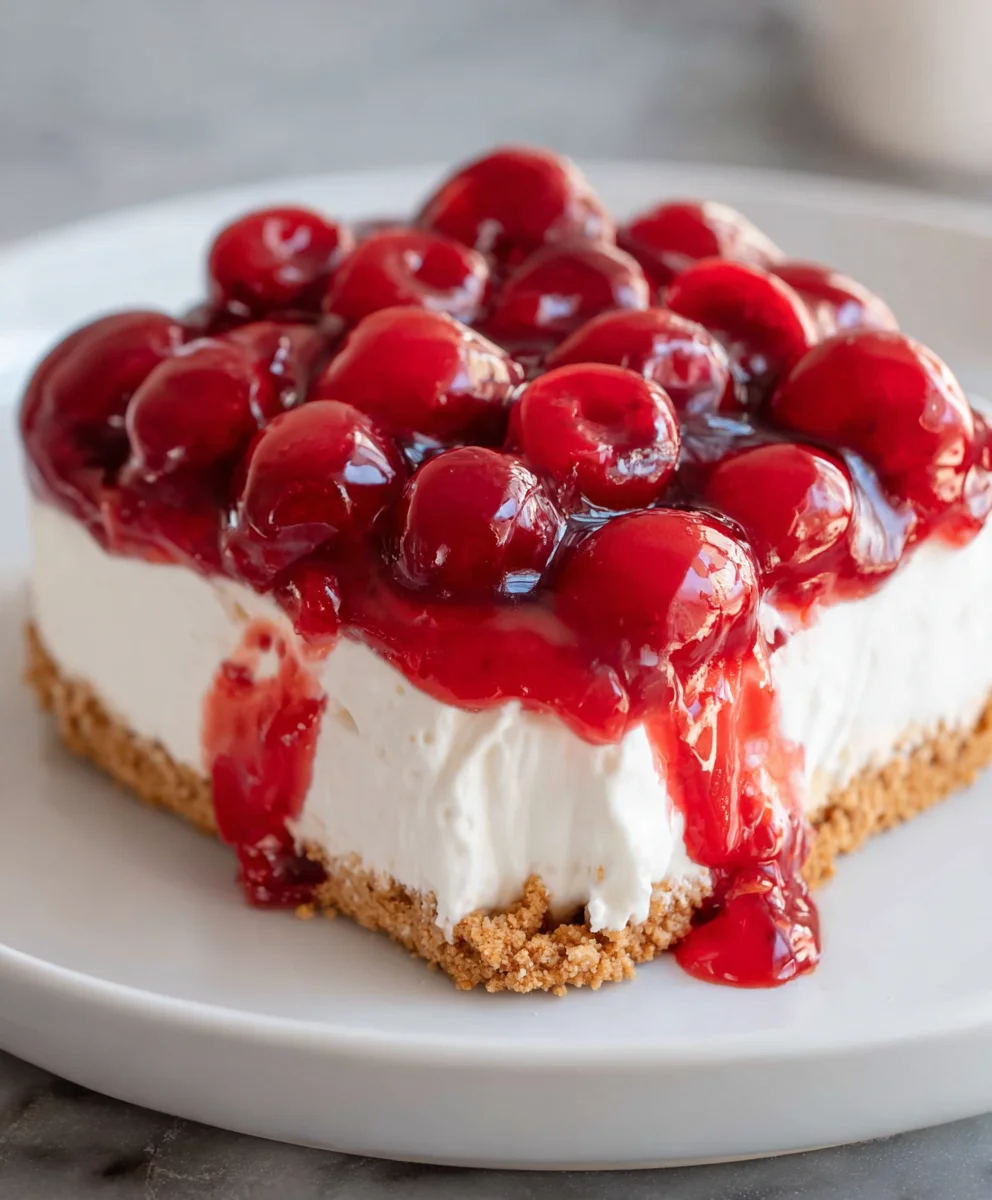
Introduction to No-Bake Cherry Cheesecake
I often find myself on the hunt for desserts that won’t take hours to make but still impress. That’s where my beloved No-Bake Cherry Cheesecake shines! It’s a delightful treat that brings a smile to my family’s faces without turning my kitchen into a disaster zone. With a creamy filling, a crispy graham cracker base, and sweet cherry topping, this dessert is an effortless way to wrap up a long day. Whether it’s for a special occasion or an everyday treat, this recipe has you covered, balancing simplicity and deliciousness perfectly!
Why You’ll Love This No-Bake Cherry Cheesecake
This No-Bake Cherry Cheesecake is the ultimate dessert for busy lifestyles. It saves you time—ready in just 15 minutes, plus chilling time! The taste is simply divine; the creamy filling paired with tart cherries creates a flavor explosion. Plus, it’s a make-ahead treat, perfect for last-minute gatherings or cozy nights in. Trust me, it’s impossible not to love this no-fuss, crowd-pleasing dessert!
Ingredients for No-Bake Cherry Cheesecake
Gathering the right ingredients is the first step to crafting your No-Bake Cherry Cheesecake, and trust me, it couldn’t be easier!
- Graham cracker crust: This no-fuss foundation provides a crunchy contrast to the creamy filling. You can buy a premade crust or whip up your own if you’re feeling adventurous.
- Cream cheese: The star of this dessert! Softened cream cheese gives our cheesecake that rich and smooth texture we crave. Make sure it’s at room temperature for the best results.
- Granulated sugar: Sweetness is crucial! This simple ingredient elevates our flavors, balancing the richness of the cream cheese.
- Whipped topping: This adds a lightness to our cheesecake as it makes it airy and fluffy. You can use store-bought or make your own for a fresher taste.
- Cherry pie filling: Topping our cheesecake, this luscious filling brings that burst of flavor and colors it beautifully. For a twist, fresh cherries can substitute, bringing a natural touch of sweetness.
Each ingredient works together like a well-rehearsed band, creating a harmonious dessert experience. For exact measurements, check the end of the article where I’ve listed everything for you to print! Let’s keep this adventure sweet and simple.
How to Make No-Bake Cherry Cheesecake
Now, let’s dive into the delicious process of making this No-Bake Cherry Cheesecake! Each step is simple and straightforward. I’ll guide you along the way, ensuring you create a masterpiece that’s as tasty as it is easy to whip up. Let’s get started!
Step 1: Prepare the Cream Cheese Mixture
The first step in our cheesecake journey is preparing the cream cheese mixture. Start by taking your softened cream cheese and placing it in a stand mixer bowl. You want it to be at room temperature—it makes mixing a breeze.
Beat the cream cheese with granulated sugar until the mixture is completely smooth. Make sure there are no lumps! This smooth texture is what will make your cheesecake creamy and dreamy.
Step 2: Fold in Whipped Topping
Now it’s time to add some airiness! Gently fold the defrosted whipped topping into the cream cheese mixture. Fold it in slowly; the goal is to maintain that light texture.
If you mix too aggressively, your cheesecake will lose some of that wonderful fluffiness. Trust me, you want your cheesecake light and velvety!
Step 3: Spread Cream Cheese Filling
Take your beautiful cream cheese filling and spread it evenly into your prepared graham cracker crust. Use a silicone spatula to smooth the surface.
Wiggle it a bit, and make sure every nook and cranny of the crust gets covered in that luscious filling. It’s like giving your dessert a snug little blanket!
Step 4: Add Cherry Pie Filling
Now comes the star of the show! Spoon the cherry pie filling over the cream layer. It’s all about even distribution; you want those gorgeous cherries to pop up in every bite.
A little tip: feel free to get creative and use a spatula to spread the cherries out if they clump together. You want that stunning cherry topping to shine!
Step 5: Refrigerate
Finally, it’s time for our cheesecake to chill in the fridge. For the best results, let it sit for at least two hours before slicing.
This chilling time gives the flavors a chance to mingle, and the texture will firm up beautifully. Plus, the anticipation of waiting makes it that much sweeter when you finally dig in!
Tips for Success
- Always ensure your cream cheese is fully softened. It makes mixing so much easier!
- When folding in the whipped topping, a gentle motion keeps the texture light and fluffy.
- For extra flavor, consider adding a splash of vanilla extract to the cream cheese mixture.
- Keep your cheesecake in the fridge until you’re ready to serve for optimal freshness.
- Use a sharp knife dipped in warm water for clean slices when serving.
Equipment Needed
- Stand mixer: If you don’t have one, a hand mixer works just as well!
- Silicone spatula: Great for spreading and scraping. A regular spatula can do the job too.
- Measuring cups and spoons: Essential for accurate ingredient measurements!
- 9-inch pie dish: Any similar sized dish will work if you’re in a pinch.
Variations
- Chocolate Cherry Cheesecake: Swap half of the cream cheese for chocolate cream cheese, giving it a scrumptious twist!
- Fresh Fruit Topping: Instead of cherry pie filling, use an assortment of fresh fruits like strawberries or blueberries for a lighter option.
- Gluten-Free Version: Use gluten-free graham crackers for the crust to cater to those with gluten sensitivities.
- Low-Sugar Alternative: Opt for a sugar substitute like Stevia or monk fruit sweetener in place of granulated sugar.
- Lemon Zest: Add a teaspoon of lemon zest to the cream cheese mixture for a bright, citrus flavor that cuts through the richness!
Serving Suggestions
- Pair your No-Bake Cherry Cheesecake with a scoop of vanilla ice cream for a delightful contrast.
- Serve it alongside a warm cup of coffee or tea for a cozy dessert experience.
- Garnish with a mint leaf to add a pop of color and freshness.
- Present slices on colorful dessert plates for a fun and festive look.
- Add a drizzle of chocolate ganache for an indulgent touch!
FAQs about No-Bake Cherry Cheesecake
Can I use fresh cherries instead of cherry pie filling?
Absolutely! Fresh cherries can add a beautiful pop of flavor. Just wash, pit, and halve them, then toss with a bit of sugar to enhance their natural sweetness.
How long can I store my No-Bake Cherry Cheesecake?
Your cheesecake can last up to 5 days in the fridge! Just make sure it’s covered tightly to keep it fresh.
Can I freeze this cheesecake?
Yes! To freeze, cover slices tightly with plastic wrap and aluminum foil. When ready to enjoy, let them thaw overnight in the fridge for the best texture.
Why is my cheesecake not setting properly?
If it isn’t firming up, it could be from not chilling long enough or the cream cheese not being fully softened. Ensure you adhere to the chilling time for better results!
What are some easy toppings I can try?
Besides cherry pie filling, try drizzling caramel, adding crushed Oreos, or sprinkling crushed nuts on top for added flavor and crunch!
Final Thoughts
There’s something magical about making a No-Bake Cherry Cheesecake that brings joy to any gathering. The ease of whipping together this delightful treat allows me to focus on what truly matters—spending time with loved ones. With every creamy bite topped with vibrant cherries, memories are made around the table. Whether it’s for a birthday, holiday, or just because, this dessert is a reminder that life is too short not to indulge in something sweet! I hope you find the same joy and satisfaction in creating this delicious no-bake delight for those you hold dear.
Print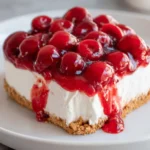
No-Bake Cherry Cheesecake
- Total Time: 2 hours 15 minutes
- Yield: 8 servings 1x
- Diet: Vegetarian
Description
A delightful and easy dessert, this No-Bake Cherry Cheesecake features a creamy filling atop a graham cracker crust, topped with sweet cherry pie filling.
Ingredients
- 255 grams prepared graham cracker crust
- 454 grams cream cheese, softened
- 100 grams granulated sugar
- 227 grams whipped topping, defrosted
- 595 grams cherry pie filling
Instructions
- Using a stand mixer, beat the softened cream cheese with the granulated sugar until the mixture is completely smooth and free of lumps.
- Gently fold the defrosted whipped topping into the cream cheese mixture, maintaining a light and airy texture.
- Evenly spread the cream cheese filling into the prepared graham cracker crust, smoothing the surface with a silicone spatula.
- Spoon the cherry pie filling over the cream layer, distributing it evenly to cover the surface.
- Refrigerate the cheesecake until ready to serve. For best results, chill for at least 2 hours before slicing.
Notes
- Make sure the cream cheese is well softened for easier mixing.
- For an added touch, you can use fresh cherries instead of cherry pie filling.
- Prep Time: 15 minutes
- Cook Time: 0 minutes
- Category: Dessert
- Method: No-Bake
- Cuisine: American
Nutrition
- Serving Size: 1 slice
- Calories: 320
- Sugar: 26g
- Sodium: 200mg
- Fat: 20g
- Saturated Fat: 10g
- Unsaturated Fat: 5g
- Trans Fat: 0g
- Carbohydrates: 30g
- Fiber: 1g
- Protein: 4g
- Cholesterol: 40mg