Introduction to No Bake Orange Creamsicle Truffles
I know time tends to be of the essence when you’re a busy mom, and especially when you’re trying to make something sweet. And that’s why I love, love, love these No Bake Orange Creamsicle Truffles so much! They give you all the goodness of a summery orange snack in a cool and creamy form, but without ever getting close to turning on the oven. Perfect for those busy days when you want to spoil your family, but little effort is required, these truffles are the epitome of troublemaking and gobbled up with relish. Seriously, once you try them, you won’t want anything else in your recipe repertoire!
Why You’ll Love This No Bake Orange Creamsicle Truffles
These no bake orange creamsicle truffles are what every mom or working woman dreams of – to make in twenty minutes flat, from readily available ingredients in the kitchen, for those surprise guests or to indulge in something sweet after dinner. The bright orange taste with a creamy sweet taste tastes divine, isn’t it? On top of that, there is no baking included, so you can make a dessert without sweating over the oven!
Ingredients for No Bake Orange Creamsicle Truffles

Gathering the right ingredients is half the fun of making these No Bake Orange Creamsicle Truffles! Here’s what you’ll need:
- Powdered Sugar: This sweetener gives the truffles their creamy texture and sweetness.
- Unsalted Butter: Softened butter adds richness and helps bind the ingredients together.
- Finely Crushed Vanilla Wafers: These provide a delightful crunch and a hint of vanilla flavor.
- Frozen Orange Juice Concentrate: The star of the show! It brings that zesty orange flavor that makes these truffles shine.
- Orange Zest (optional): A sprinkle of zest enhances the orange flavor, making it even more vibrant.
- Vanilla Extract: Just a touch of vanilla adds depth to the overall flavor profile.
- White Chocolate Chips or Candy Melts: This is what you’ll use to coat the truffles, giving them a sweet, creamy finish.
- Optional Garnishes: Sprinkles or extra orange zest can be used to make your truffles look even more festive!
For those who want to mix things up, you can substitute graham cracker crumbs for the vanilla wafers for a different texture. If you’re craving a stronger orange flavor, a few drops of orange extract can do the trick!
Don’t worry about the exact measurements just yet; you can find them at the bottom of the article for easy printing!
How to Make No Bake Orange Creamsicle Truffles
Making these No Bake Orange Creamsicle Truffles is a breeze! Follow these simple steps, and you’ll have a delightful treat ready in no time. Let’s dive in!
Step 1: Prepare the Mixture
Start by grabbing a large mixing bowl. Beat the softened butter and powdered sugar together until the mixture is smooth and creamy. This step is crucial because it creates the base for your truffles. You want it to be fluffy, like a cloud of sweetness!
Step 2: Add Flavorings
Next, it’s time to bring in the flavor! Stir in the thawed orange juice concentrate, orange zest (if you’re using it), and vanilla extract. The combination of these ingredients will make your kitchen smell heavenly. Trust me, the aroma alone will have everyone asking what you’re making!
Step 3: Combine with Wafers
Now, add the finely crushed vanilla wafers to the bowl. Mix everything together until a dough forms. It should be thick enough to hold its shape but still soft. If it feels too crumbly, don’t hesitate to add a splash more orange juice concentrate!
Step 4: Shape the Truffles
Once your dough is ready, it’s time to get your hands a little messy! Scoop out small portions of the dough, about one tablespoon each, and roll them into smooth balls. This is where the fun begins! You can even involve your kids in this step; they’ll love rolling the truffles!
Step 5: Chill the Truffles
Place the truffle balls on a parchment-lined baking sheet. Refrigerate them for about 30 minutes. Chilling is essential because it helps the truffles firm up, making them easier to coat later. Plus, it gives you a little break while you wait!
Step 6: Melt the Coating
While the truffles chill, it’s time to melt the white chocolate chips or candy melts. Use a microwave-safe bowl and heat them in 20-second intervals, stirring after each interval. Keep an eye on it; you want it smooth and creamy, not burnt!
Step 7: Coat the Truffles
Once your chocolate is melted, it’s dipping time! Using a fork or a dipping tool, dip each chilled truffle into the melted chocolate. Allow the excess chocolate to drip off before placing them back on the parchment-lined sheet. This step is where the magic happens, turning your truffles into a beautiful treat!
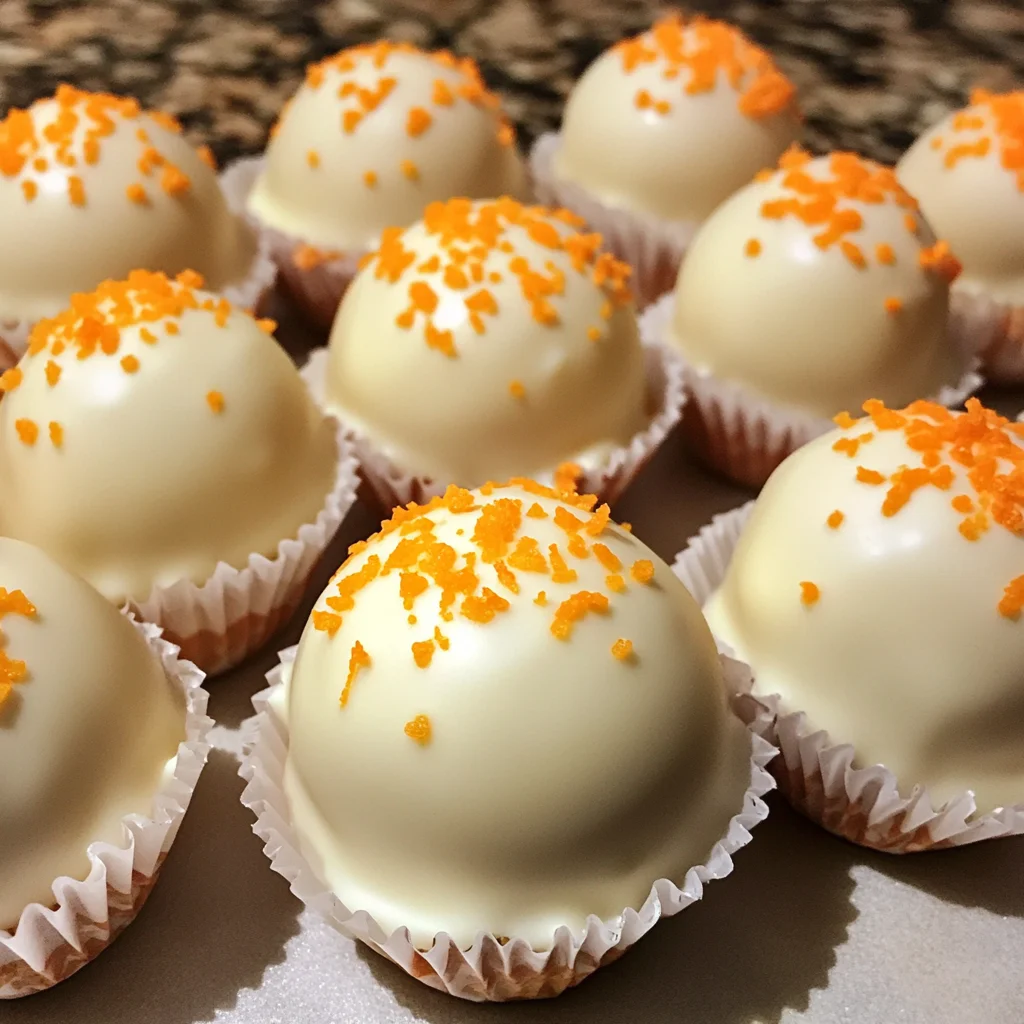
Step 8: Add Finishing Touches
Before the chocolate coating hardens, sprinkle your truffles with colorful sprinkles or a bit of extra orange zest. This adds a festive touch and makes them look even more appealing. It’s all about that presentation!
Step 9: Set and Serve
Finally, refrigerate the coated truffles for another 15-20 minutes to set the chocolate completely. Once they’re ready, serve them chilled or at room temperature. These No Bake Orange Creamsicle Truffles are perfect for sharing, but I won’t judge if you keep them all to yourself!
Tips for Success
- Make sure your butter is softened for easy mixing.
- Use a food processor to crush the vanilla wafers quickly and evenly.
- Chill the truffles long enough to ensure they hold their shape when coated.
- Experiment with different toppings like crushed nuts or coconut for variety.
- For a fun twist, try adding a splash of liqueur to the mixture!
Equipment Needed
- Mixing Bowl: A large bowl for combining ingredients. A stand mixer works great too!
- Fork or Dipping Tool: For coating the truffles. A toothpick can work in a pinch!
- Parchment Paper: To line your baking sheet. Wax paper is a suitable alternative.
- Microwave-Safe Bowl: For melting chocolate. A double boiler can be used if preferred.
Variations of No Bake Orange Creamsicle Truffles

- Chocolate Orange Truffles: Swap the white chocolate coating for dark chocolate for a rich twist.
- Nutty Delight: Add finely chopped nuts like almonds or walnuts to the dough for extra crunch.
- Vegan Option: Use vegan butter and dairy-free chocolate chips to make these truffles plant-based.
- Fruit Fusion: Mix in other fruit juices like pineapple or mango for a tropical flavor explosion.
- Spiced Up: Add a pinch of cinnamon or nutmeg to the mixture for a warm, cozy flavor.
Serving Suggestions for No Bake Orange Creamsicle Truffles
- Pair these truffles with a refreshing glass of iced tea or lemonade for a delightful treat.
- Serve them on a colorful platter, garnished with fresh orange slices for a vibrant presentation.
- For a fun twist, add a scoop of vanilla ice cream on the side.
- These truffles also make a great addition to a dessert table at parties!
FAQs about No Bake Orange Creamsicle Truffles
Can I make these No Bake Orange Creamsicle Truffles ahead of time?
Absolutely! These truffles can be made a day or two in advance. Just store them in an airtight container in the refrigerator. They’ll be just as delicious when you’re ready to serve them!
How do I store leftover truffles?
Store any leftover No Bake Orange Creamsicle Truffles in an airtight container in the refrigerator for up to a week. You can also freeze them for up to three months. Just make sure to separate layers with parchment paper to prevent sticking!
Can I use fresh orange juice instead of concentrate?
Yes, you can use fresh orange juice! However, you may need to adjust the amount slightly, as fresh juice can be less concentrated than the frozen variety. Start with a little and taste as you go!
What can I use instead of white chocolate for coating?
If you’re not a fan of white chocolate, you can use dark chocolate or milk chocolate instead. Just melt it the same way, and you’ll have a deliciously different flavor for your truffles!
Are these truffles suitable for kids?
Definitely! These No Bake Orange Creamsicle Truffles are a fun treat for kids. They can even help with rolling the truffles and adding sprinkles. Just keep an eye on the chocolate melting process!
Final Thoughts
Making these No Bake Orange Creamsicle Truffles is so much more than making dessert. It’s about spreading the love and sweetness with those you love. They have that vibrant orange taste with a center so creamy that everyone will keep smiling whatever the occasion is to have them. Good occasions or no occasion at all, if there’s some way you are rewarding yourself, do it right. The truffling experience and the not-so-hassle preparation would otherwise take a jiffy out of your lifetime for which you’ve got lots of reasons to celebrate. Have each die and happy cooking!
Print
No Bake Orange Creamsicle Truffles
- Total Time: 50 minutes
- Yield: 24 truffles 1x
- Diet: Vegetarian
Description
Delicious no-bake truffles that combine the flavors of orange and cream for a delightful treat.
Ingredients
- 1 1/2 cups (180 g) powdered sugar
- 1/2 cup (115 g) unsalted butter, softened
- 2 cups (120 g) finely crushed vanilla wafers
- 1/4 cup (60 ml) frozen orange juice concentrate, thawed
- 1 teaspoon orange zest (optional, for extra flavor)
- 1/2 teaspoon vanilla extract
- 1 cup (200 g) white chocolate chips or candy melts (for coating)
- Optional Garnishes: Sprinkles, Extra orange zest
Instructions
- In a large mixing bowl, beat the softened butter and powdered sugar until smooth and creamy.
- Stir in the orange juice concentrate, orange zest (if using), and vanilla extract.
- Add the crushed vanilla wafers and mix until a dough forms.
- Scoop out small portions of the dough (about 1 tablespoon each) and roll them into smooth balls.
- Place the truffle balls on a parchment-lined baking sheet and refrigerate for 30 minutes to firm up.
- In a microwave-safe bowl, melt the white chocolate chips or candy melts in 20-second intervals, stirring after each interval, until smooth and fully melted.
- Using a fork or dipping tool, dip each chilled truffle into the melted white chocolate, allowing the excess to drip off.
- Place the coated truffles back onto the parchment-lined baking sheet.
- Immediately sprinkle the truffles with sprinkles or orange zest before the coating hardens.
- Refrigerate the truffles for 15-20 minutes to set the coating completely. Serve chilled or at room temperature.
Notes
- Storage: Store truffles in an airtight container in the refrigerator for up to 1 week or freeze for up to 3 months.
- Substitutions: Graham cracker crumbs can be used instead of vanilla wafers for a slightly different texture and flavor.
- Extra Tang: For a stronger orange flavor, add a few drops of orange extract.
- Prep Time: 20 minutes
- Cook Time: 0 minutes
- Category: Dessert
- Method: No Bake
- Cuisine: American
Nutrition
- Serving Size: 1 truffle
- Calories: 120
- Sugar: 10g
- Sodium: 30mg
- Fat: 7g
- Saturated Fat: 4g
- Unsaturated Fat: 2g
- Trans Fat: 0g
- Carbohydrates: 14g
- Fiber: 0g
- Protein: 1g
- Cholesterol: 15mg