Introduction to Peanut Butter and Jelly Cheesecake Recipe
As a busy mom and passionate home cook, I know how precious our time can be. That’s why I’m thrilled to share my Peanut Butter and Jelly Cheesecake Recipe! It’s the perfect sweet solution when you want something delicious without spending hours in the kitchen. This no-bake delight brings together the creamy goodness of cheesecake, the nostalgia of childhood favorites, and, of course, that delightful flavor combo of peanut butter and jelly. Whether you’re hosting friends or treating your family, this cheesecake will impress while keeping your sanity intact. Let’s dive in!
Why You’ll Love This Peanut Butter and Jelly Cheesecake Recipe
This Peanut Butter and Jelly Cheesecake is a true lifesaver for busy schedules. It’s not only simple to make, but it also packs a flavor punch that will leave your taste buds singing. The creamy layers combined with a hint of sweetness make it a hit for kids and adults alike. Plus, it’s a no-bake recipe, so you can whip it up and let your fridge do all the hard work while you relax!
Ingredients for Peanut Butter and Jelly Cheesecake Recipe
Gathering the right ingredients is key to making this Peanut Butter and Jelly Cheesecake as delightful as your childhood memories. Here’s what you’ll need:
- Nutter Butter cookies: These sweet, vanilla-flavored cookies form the delicious crust. They have just the right crunch!
- Unsalted butter: Melted butter holds the crust together. I always prefer unsalted to control the sweetness level.
- Whole Nutter Butters: These are perfect for lining the pan’s edge, adding an extra visual touch and flavor.
- Cream cheese: The star of the cheesecake! Make sure it’s at room temperature for a smooth mixture.
- Powdered sugar: This helps sweeten the cream cheese while giving it that perfect cheesecake texture. It dissolves easily, ensuring a silky finish.
- Vanilla extract: Just a teaspoon brings warmth and depth to the flavor profile.
- Creamy peanut butter: This ingredient adds that irresistible nutty flavor. I recommend using creamy for a smooth texture, but crunchy works too!
- Whipped topping (Cool Whip): This fluffy goodness lightens up the dessert and makes it extra creamy. You can always opt for homemade whipped cream if needed.
- Grape jelly: A sweet layer that complements the peanut butter wonderfully. Feel free to swap it out for strawberry or raspberry jelly if you prefer!
For exact quantities, you’ll find them at the bottom of the article for easy printing.

How to Make Peanut Butter and Jelly Cheesecake Recipe
Now, let’s bring our Peanut Butter and Jelly Cheesecake to life! With each step, you’ll see how easy and enjoyable this process is. Grab your apron, and let’s get cooking!
Step 1: Prepare the Pan
Line with Parchment Paper
Begin by lining your 9” springform pan with parchment paper. This small step is vital for a clean release later. No one loves wrestling with a cheesecake stuck to the pan! A parchment circle at the bottom makes all the difference. It will slide out beautifully, allowing for those perfect slices.
Step 2: Make the Crust
Mixing and Pressing
In a bowl, mix your crushed Nutter Butters with melted butter until they’re well combined. You want a slightly damp, sandy texture. It should hold together when you pinch it. Press this mixture evenly into the bottom of the pan. Use the back of a measuring cup for an even surface. Trust me; it creates a delicious crunch!
Step 3: Add Jelly Layer
Spreading the Jelly
Now, let’s add the first layer of sweetness! Take about 1/4 cup of grape jelly and spread a thin layer over the crust. To avoid a mess, use the back of a spoon to gently spread the jelly, working from the center outwards.
Step 4: Cream Cheese Mixture
Beating to Perfection
In a large bowl, beat your room temperature cream cheese with a handheld mixer until it’s smooth and fluffy. This ensures no lumps. Gradually add powdered sugar and vanilla extract, mixing until blended. You want a silky texture here! Don’t underestimate the power of proper mixing.
Step 5: Incorporate Peanut Butter
Mixing Techniques
It’s time for our star ingredient! Add in 30 oz of creamy peanut butter to your cream cheese mixture. Mix at medium speed until everything is creamy and well-combined. Scrape the bowl sides frequently to ensure no pockets of peanut butter are left behind!
Step 6: Folding in Whipped Topping
Gentle Folding
Next, gently fold in the whipped topping using a rubber spatula. This step is crucial for adding airiness. Be kind to your mixture; you don’t want to deflate it! Slowly incorporate the whipped topping so it stays light and fluffy.
Step 7: Pour the Filling
Final Assembly
Now it’s time to pour the heavenly filling over the jelly layer. Carefully spread it out evenly with a spatula. This ensures every slice will have that perfect balance of flavors we all crave.
Step 8: Chill the Cheesecake
Importance of Refrigeration
Cover your pan tightly with plastic wrap or aluminum foil and refrigerate for at least 4 hours. Overnight is best for flavor development! The longer it sits, the better the flavors meld together, resulting in a creamy, dreamy cheesecake that will wow your family and friends.
Tips for Success
- Use room temperature ingredients for a smoother mix—especially cream cheese!
- Allow your cheesecake to chill overnight for the best flavor development.
- When slicing, run your knife under hot water and wipe it clean for neat edges.
- Feeling adventurous? Add in chopped peanuts for extra crunch!
- Keep an eye on the consistency of your jelly for easy spreading.
Equipment Needed
- 9” Springform Pan: Essential for easy removal. A regular cake pan works but be prepared for a bit of a struggle.
- Parchment Paper: To line the pan. If you don’t have any, lightly grease the pan instead.
- Handheld Mixer: For fluffy mixtures. A whisk works too, just be ready for a workout!
- Rubber Spatula: Perfect for folding in ingredients without deflating them.
- Bowl: A mixing bowl, any size will do!
Variations
- Creamy Chocolate Peanut Butter: Swap half of the peanut butter for chocolate spread for a delightful twist!
- Reese’s Cup Version: Fold in chopped mini Reese’s cups into the filling for a delicious peanut butter-chocolate crunch.
- Nut-Free Option: Replace peanut butter with sunflower seed butter for a nut-free version that’s just as creamy!
- Fruit Layer Alternatives: Experiment with different jellies or make a fruit compote with fresh berries for a fresher take.
- Lower Sugar Version: Use a granulated sugar alternative or sugar-free jelly to cut down on sweetness.
Serving Suggestions
- Pair your cheesecake with a dollop of whipped cream on each slice for extra indulgence.
- Serve alongside fresh berries for a pop of color and flavor contrast.
- A scoop of vanilla ice cream complements the creamy texture beautifully.
- For drinks, a glass of cold milk or a cup of coffee makes the perfect companion.
- Garnish with a drizzle of chocolate or extra jelly for a stunning presentation!
FAQs about Peanut Butter and Jelly Cheesecake Recipe
As you embark on this culinary adventure, you might have a few questions about making the perfect Peanut Butter and Jelly Cheesecake. Here are some common queries and their answers:
Can I use crunchy peanut butter instead of creamy?
Absolutely! Crunchy peanut butter adds a fun texture, but it may slightly change the creaminess. If you love a little crunch, go for it!
How long does this cheesecake last in the fridge?
Properly stored, your cheesecake will stay delicious for up to four days in the refrigerator. Just cover it well to keep it fresh.
Can I freeze the Peanut Butter and Jelly Cheesecake?
You can freeze it! Just wrap it carefully without the jelly topping to avoid a mess. Thaw it in the fridge overnight before serving, and then add your jelly!
What’s the best way to slice the cheesecake?
For clean slices, run your knife under hot water first. Wipe it dry before each cut. This little trick ensures perfect pieces every time!
Can I substitute the jelly for something else?
Of course! While grape jelly is traditional, feel free to explore other flavors. Strawberry or raspberry jelly will give a delightful twist, too!
Final Thoughts
Creating this Peanut Butter and Jelly Cheesecake is more than just a cooking experience; it’s a way to share love and nostalgia with your family. The delightful blend of creamy peanut butter, sweet jelly, and a crunchy crust creates a dessert that brings smiles and warm memories. As you slice into this heavenly cheesecake, you’re not just serving a treat—you’re offering a moment of joy. Every bite is a reminder of carefree childhood days and the laughter shared around the table. I hope this recipe becomes a cherished favorite in your home, just as it has in mine!
Print
Peanut Butter and Jelly Cheesecake
- Total Time: 4 hours 30 minutes (including refrigeration)
- Yield: 12 servings 1x
- Diet: Vegetarian
Description
A delicious and easy-to-make Peanut Butter and Jelly Cheesecake that combines creamy cheesecake with a delightful peanut butter filling and a sweet jelly topping.
Ingredients
- 24 Nutter Butter cookies (crushed into crumbs)
- 6 tablespoons unsalted butter (melted)
- 10–12 whole Nutter Butter cookies (for the edge)
- 3 (8 oz) blocks cream cheese (room temperature)
- 1 1/2 cups powdered sugar
- 1 teaspoon vanilla extract
- 30 oz creamy peanut butter
- 16 oz whipped topping (Cool Whip)
- 3/4 cup grape jelly (divided)
Instructions
- Line a 9” springform pan with parchment paper.
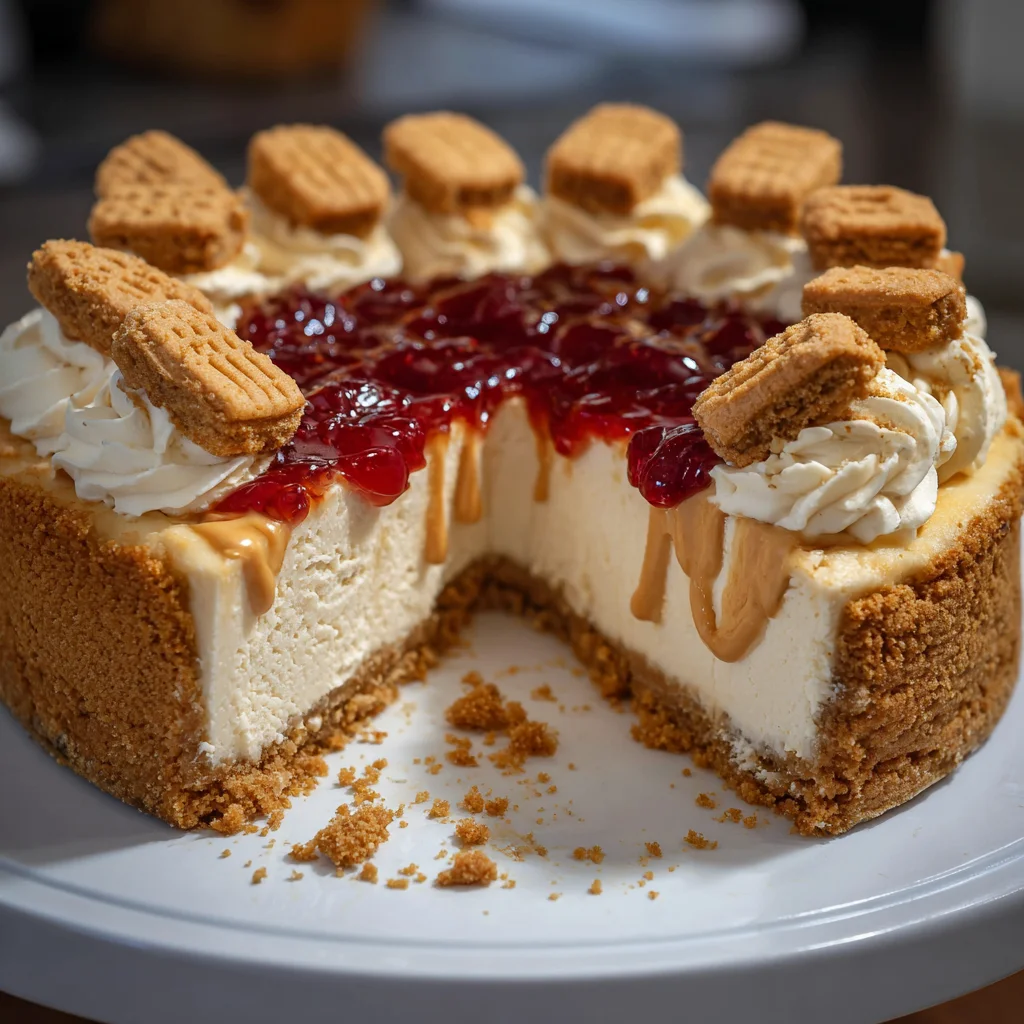
- Mix the crushed Nutter Butters with melted butter until evenly combined. Press the mixture into the bottom of the pan to form the crust. Stand whole Nutter Butters vertically around the edge of the pan.
- Spread about 1/4 cup of the grape jelly in a thin layer over the bottom crust. Set aside.
- Using a handheld mixer, beat the cream cheese in a large bowl until smooth and fluffy. Add the powdered sugar and vanilla extract, then mix until fully incorporated.
- Add the peanut butter to the cream cheese mixture and beat until smooth and creamy. Scrape down the sides of the bowl as needed to ensure everything is mixed evenly.
- Gently fold in the whipped topping using a rubber spatula, careful not to deflate the mixture. Once well combined, pour the filling over the jelly layer in the pan and smooth the top with a spatula.
- Spread the remaining grape jelly on top of the cream cheese layer. If the jelly is too thick to spread quickly, microwave it for 10-15 seconds to loosen it.
- Cover the pan tightly with plastic wrap or aluminum foil and refrigerate for at least 4 hours or overnight for best results.
- Once set, carefully remove the springform pan. Slice into pieces and serve chilled. Enjoy!
Notes
- Cover leftover cheesecake tightly and store it in the refrigerator for up to 4 days.
- You can freeze the cheesecake (without jelly on top) by wrapping it securely in plastic wrap and foil for up to 2 months. Thaw it in the fridge overnight, then add the jelly topping before serving.
- For added crunch, fold chopped peanuts or mini chocolate chips into the filling before pouring it into the crust.
- You can swap creamy peanut butter for crunchy, but the texture will change slightly. If you prefer, use strawberry or raspberry jelly.
- Chilling overnight is highly recommended. It helps the flavors meld and gives a firmer texture for easier slicing.
- If Cool Whip isn’t available, use homemade whipped cream by whipping 2 cups of heavy cream with four tablespoons of powdered sugar to stiff peaks.
- Run your knife under hot water for clean slices, wipe it dry, and cut. Repeat between slices.
- Prep Time: 30 minutes
- Cook Time: 0 minutes
- Category: Dessert
- Method: No-Bake
- Cuisine: American
Nutrition
- Serving Size: 1 slice
- Calories: 450
- Sugar: 30g
- Sodium: 320mg
- Fat: 30g
- Saturated Fat: 10g
- Unsaturated Fat: 20g
- Trans Fat: 0g
- Carbohydrates: 40g
- Fiber: 2g
- Protein: 7g
- Cholesterol: 60mg