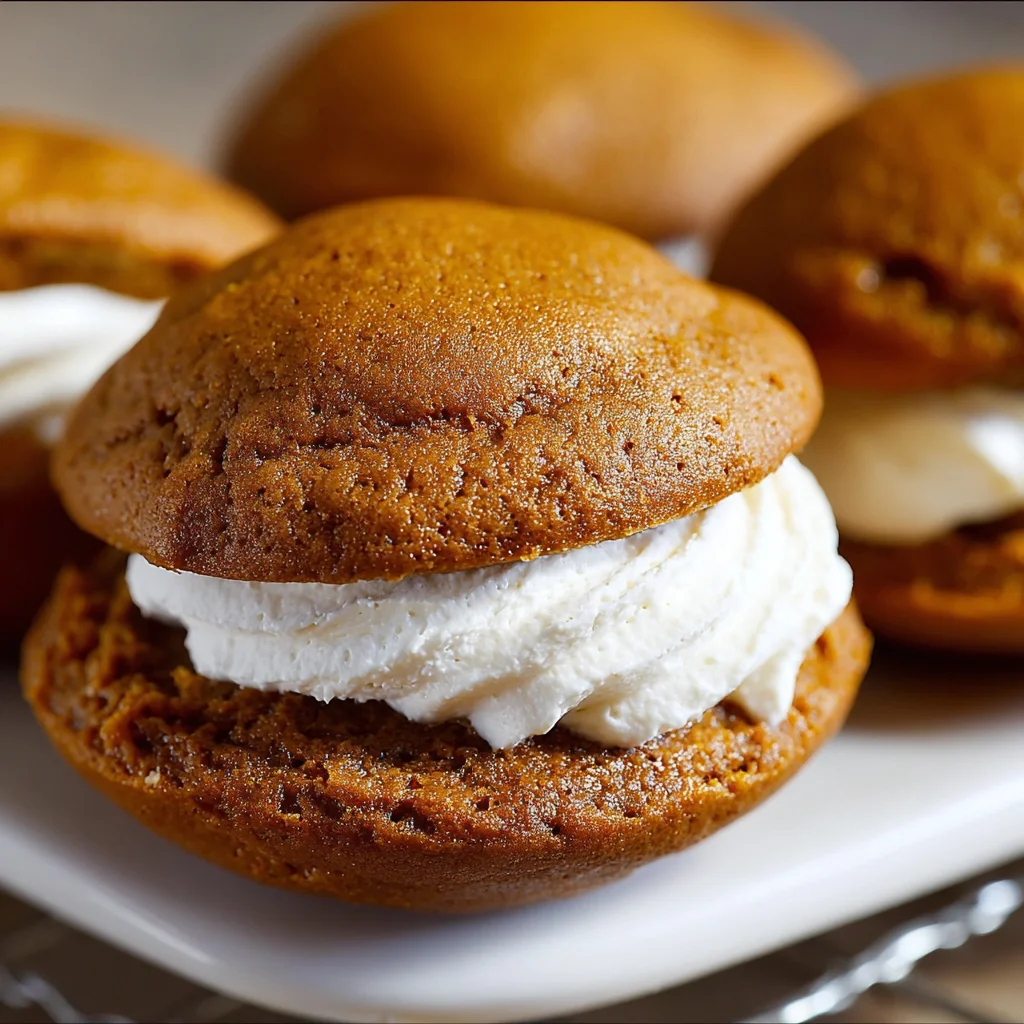
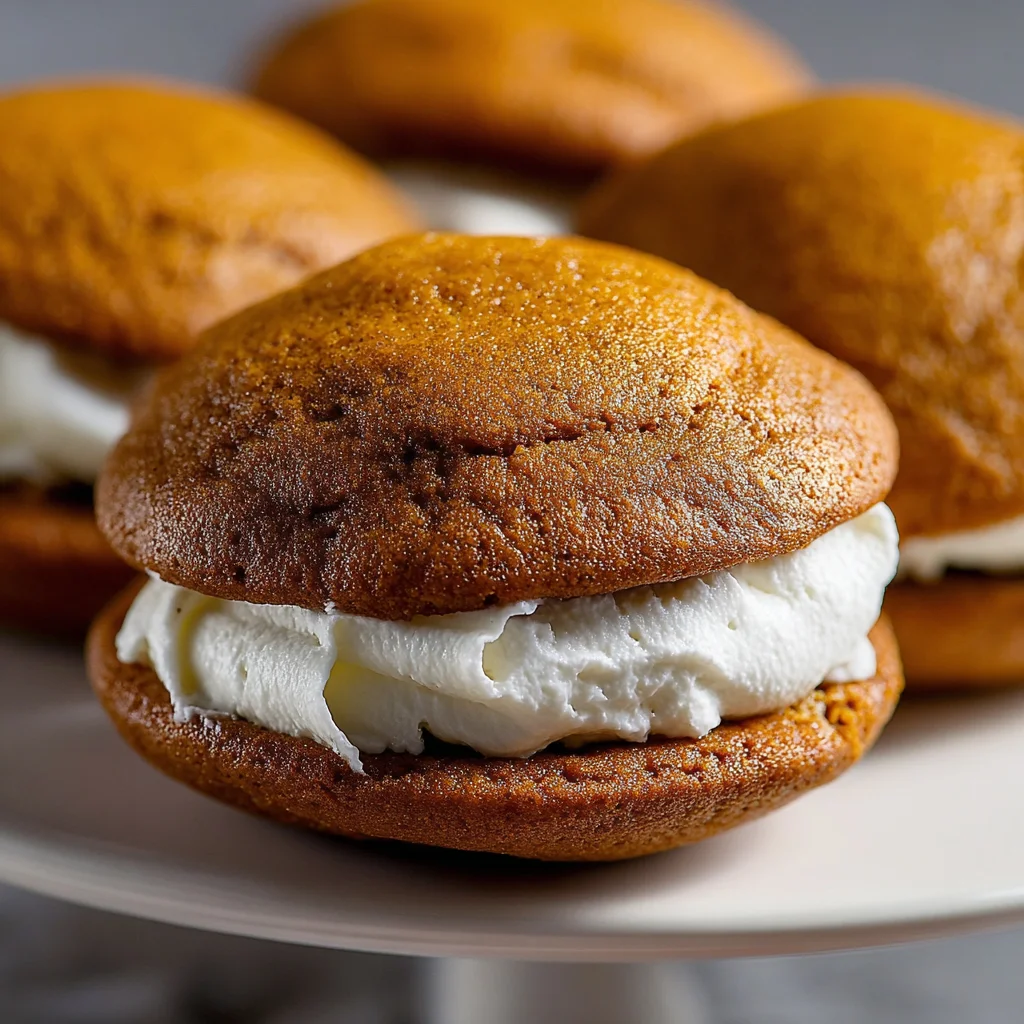
Introduction to Pumpkin Whoopie Pies
As the leaves begin to crisp underfoot and the air turns refreshingly brisk, it’s time to treat yourself with delightful Pumpkin Whoopie Pies. These fluffy treasures are perfect for busy days when you need a touch of warmth and sweetness. I promise, whether you’re crossing off a to-do list or hosting a cozy gathering, these whoopie pies will be your secret weapon. They boast a creamy filling that brings comfort, plus they’re a fun way to impress your loved ones without too much fuss. Let’s embrace the flavors of fall together!
Why You’ll Love This Pumpkin Whoopie Pies
What’s not to adore about Pumpkin Whoopie Pies? They’re not only incredibly easy to make, but they also lend a cozy autumn vibe to any gathering. With just one bowl and a handful of ingredients, you can whip these up in no time. Each pie offers a perfect balance of spice and sweetness, leaving everyone craving more. Plus, they’re fun to share, making them ideal for family, friends, or a cherished treat just for you!
Ingredients for Pumpkin Whoopie Pies
Before we dive into the mixing and baking, let’s gather our stars for these Pumpkin Whoopie Pies! Each ingredient plays a crucial role, so let’s get familiar.
- All-purpose flour: The backbone of our pies, giving them structure.
- Baking powder and baking soda: These two work together to make our whoopie pies rise and stay fluffy.
- Salt: A touch of salt enhances all the sweet and spicy flavors.
- Ground cinnamon: This warm spice is a fall essential, bringing that cozy aroma.
- Ground nutmeg: A little nutmeg adds a lovely depth of flavor.
- Ground ginger: It gives a gentle kick, complementing the pumpkin beautifully.
- Ground cloves: Just a pinch creates a wonderfully aromatic experience.
- Canned pumpkin puree: This is the star! It adds moisture, flavor, and that classic pumpkin taste.
- Sugars (granulated and brown): They sweeten the pies and contribute to their soft texture.
- Vegetable oil: This keeps the pies moist while allowing for a tender crumb.
- Eggs: They help bind everything together and add richness.
- Vanilla extract: A splash of vanilla infuses warmth and enhances overall flavor.
- Cream cheese: This is key for the dreamy filling, providing creaminess and tang.
- Unsalted butter: It adds richness and helps achieve the right texture in the filling.
- Powdered sugar: This sugar gives us that light, fluffy filling we crave.
- Optional spices or toppings: Feel free to get creative with your favorite holiday spices or chocolate chips!
For exact measurements, check the bottom of the article, where you’ll find a printable version of the recipe!
How to Make Pumpkin Whoopie Pies
Now that we’ve gathered our delightful ingredients, let’s get into the fun part—making these glorious Pumpkin Whoopie Pies! Follow these simple steps, and you’ll have a batch of these scrumptious treats ready to impress.
Step 1: Preheat the Oven
First things first, preheat your oven to 350°F (175°C). This is crucial for getting that perfect rise and fluffy texture. Next, line two baking sheets with parchment paper to prevent sticking and ensure easy cleanup. Trust me, you’ll appreciate this little step later!
Step 2: Prepare Dry Ingredients
In a medium bowl, whisk together the flour, baking powder, baking soda, salt, and spices. Make sure to mix them well to evenly distribute the baking powder and soda. A good whisk will break up any lumps and ensure everything is fluffy. This will help your Pumpkin Whoopie Pies achieve that light and airy feel we crave.
Step 3: Mix Wet Ingredients
In a large bowl, it’s time to combine the pumpkin puree, granulated sugar, brown sugar, vegetable oil, eggs, and vanilla extract. Beat these together until smooth and well blended. The sweetness from the sugars and creaminess from the pumpkin will have you dreaming of fall parties already!
Step 4: Combine Mixtures
Gradually add your dry ingredients to the wet mixture, stirring gently. Be careful not to over-mix; we want to keep that light texture. Just mix until you see no more flour streaks. At this point, you can almost smell the aromatic spices filling your kitchen!
Step 5: Shape the Cookies
Using a tablespoon or a small cookie scoop, drop rounded spoonfuls onto the prepared baking sheets. Space them about 2 inches apart, because these pies will spread. Remember, they need a little room to breathe as they bake!
Step 6: Bake the Whoopie Pies
Bake your delightful creations for 12-15 minutes, or until the tops bounce back when lightly touched. Keep an eye on them, as oven temperatures can vary. Let them cool completely on wire racks for an enjoyable texture before we finish them up.
Step 7: Prepare the Filling
While the whoopie pies are cooling, let’s whip up that delicious cream cheese filling. Beat the cream cheese and unsalted butter together until smooth. Mix in the powdered sugar gradually, along with the vanilla extract, and beat until it’s fluffy and dreamy. You’ll want to eat it straight from the bowl!
Step 8: Assemble the Whoopie Pies
Once your cakes have cooled, it’s assembly time! Spread or pipe the cream cheese filling onto the flat side of one pie, then sandwich it with another. This is where the magic happens—two fluffy pies hugging that creamy goodness!
Step 9: Chill Before Serving
Last but not least, chill the assembled Pumpkin Whoopie Pies for at least 30 minutes. This sets the filling and helps bring out the flavors. Plus, it makes each bite a little bit more refreshing. You can hardly resist these pillows of fall joy!
Tips for Success
- Use room temperature ingredients for a smoother batter and better incorporation.
- Don’t over-mix your batter; it will keep your pies fluffy.
- Test for doneness by gently pressing the tops; they should spring back.
- Have fun with the filling—add spices or chocolate chips for a twist!
- Store any leftovers in an airtight container to maintain freshness.
Equipment Needed
- Baking sheets: A sturdy pair will do; you can also use a stone baking pan.
- Parchment paper: If you don’t have this, a silicone baking mat works great.
- Mixer: A hand mixer is perfect, but a stand mixer speeds up the process.
- Mixing bowls: Opt for one large and one medium for simplicity.
- Cookie scoop: If you don’t have one, use a tablespoon for portioning.
Variations of Pumpkin Whoopie Pies
- Gluten-free version: Substitute all-purpose flour with a gluten-free blend to accommodate dietary needs.
- Vegan option: Replace eggs with flaxseed meal and use plant-based cream cheese for the filling.
- Spice it up: Add a dash of cayenne pepper for a subtle kick in your whoopie pies.
- Chocolate lovers: Mix in mini chocolate chips to the batter or filling for a delightful surprise.
- Nutty flavor: Incorporate finely chopped pecans or walnuts in the batter for added texture and flavor.
- Maple cream filling: Swap out some powdered sugar in the filling for maple syrup to enhance that fall flavor.
Serving Suggestions for Pumpkin Whoopie Pies
- Pair with a warm cup of chai tea or spiced apple cider for an autumn-inspired treat.
- Serve atop a rustic wooden platter to showcase these delightful pies at gatherings.
- Add a sprinkle of cinnamon on top for a lovely presentation.
- Include a side of whipped cream for an extra indulgence.
FAQs about Pumpkin Whoopie Pies
Can I make Pumpkin Whoopie Pies in advance?
Absolutely! You can bake the whoopie pies and fill them a day ahead. Just remember to chill them for that perfect texture! They can also be stored in the fridge for up to a week.
What can I use instead of cream cheese for the filling?
If cream cheese isn’t your thing, feel free to use mascarpone cheese or even whipped coconut cream for a lighter, dairy-free option.
Can I freeze Pumpkin Whoopie Pies?
Yes, you can! After assembling, wrap them tightly in plastic wrap and place them in an airtight container. They last well in the freezer; just thaw before serving!
How do I know when my whoopie pies are done baking?
Gently press the tops of the pies. They should spring back when done. If your finger leaves a dent, they need a few more minutes in the oven.
Can I customize the spices in these Pumpkin Whoopie Pies?
Of course! Feel free to adjust the spices based on your preferences. Adding a pinch of cardamom or allspice can elevate the flavor and really bring out that fall essence.
Final Thoughts
There’s something truly magical about whipping up a batch of Pumpkin Whoopie Pies. The aroma of spices wafting through the kitchen instantly transports you to cozy autumn days, filled with laughter and love. Each bite brings a delightful burst of sweetness, perfectly balanced by the cream cheese filling.
Whether you’re sharing them with family, enjoying a quiet moment with a cup of tea, or surprising a friend, these little pies deliver joy. So gather your ingredients, roll up your sleeves, and let’s create some delicious memories together! Who can resist such a delightful piece of fall? You won’t regret it!
Print
Pumpkin Whoopie Pies: Indulge in Fall’s Best Treat!
- Total Time: 1 hour (including chilling)
- Yield: 12 pies 1x
- Diet: Vegetarian
Description
Delicious and fluffy Pumpkin Whoopie Pies filled with creamy frosting, perfect for fall.
Ingredients
- 2 cups all-purpose flour
- 1 teaspoon baking powder
- 1/2 teaspoon baking soda
- 1/2 teaspoon salt
- 1 teaspoon ground cinnamon
- 1/2 teaspoon ground nutmeg
- 1/4 teaspoon ground ginger
- 1/4 teaspoon ground cloves
- 1 cup canned pumpkin puree
- 3/4 cup granulated sugar
- 1/2 cup brown sugar, packed
- 1/2 cup vegetable oil
- 2 large eggs
- 1 teaspoon vanilla extract
- 8 oz cream cheese, softened
- 1/4 cup unsalted butter, softened
- 2 cups powdered sugar
- 1 teaspoon vanilla extract
Instructions
- Preheat oven to 350°F (175°C). Line two baking sheets with parchment paper.
- In a medium bowl, whisk together flour, baking powder, baking soda, salt, and spices. Set aside.
- In a large bowl, beat together pumpkin puree, sugars, oil, eggs, and vanilla until smooth.
- Gradually add dry ingredients to wet ingredients, mixing until just combined.
- Using a tablespoon or small cookie scoop, drop rounded spoonfuls onto prepared baking sheets, spacing about 2 inches apart.
- Bake for 12-15 minutes or until tops spring back when lightly touched. Remove and cool completely on wire racks.
- Meanwhile, beat cream cheese and butter until smooth. Gradually add powdered sugar and vanilla, beating until fluffy.
- Once cakes are cooled, spread or pipe cream cheese filling onto the flat side of one cake, then sandwich with another. Repeat with remaining cakes.
- Chill the whoopie pies for at least 30 minutes before serving to set filling.
Notes
- Store in an airtight container in the refrigerator for up to a week.
- These can be frozen for longer storage; thaw before serving.
- Prep Time: 15 minutes
- Cook Time: 15 minutes
- Category: Dessert
- Method: Baking
- Cuisine: American
Nutrition
- Serving Size: 1 pie
- Calories: 280
- Sugar: 25g
- Sodium: 180mg
- Fat: 12g
- Saturated Fat: 3g
- Unsaturated Fat: 8g
- Trans Fat: 0g
- Carbohydrates: 36g
- Fiber: 1g
- Protein: 3g
- Cholesterol: 30mg