
Introduction to Red, White and Blue Mini Cheesecakes
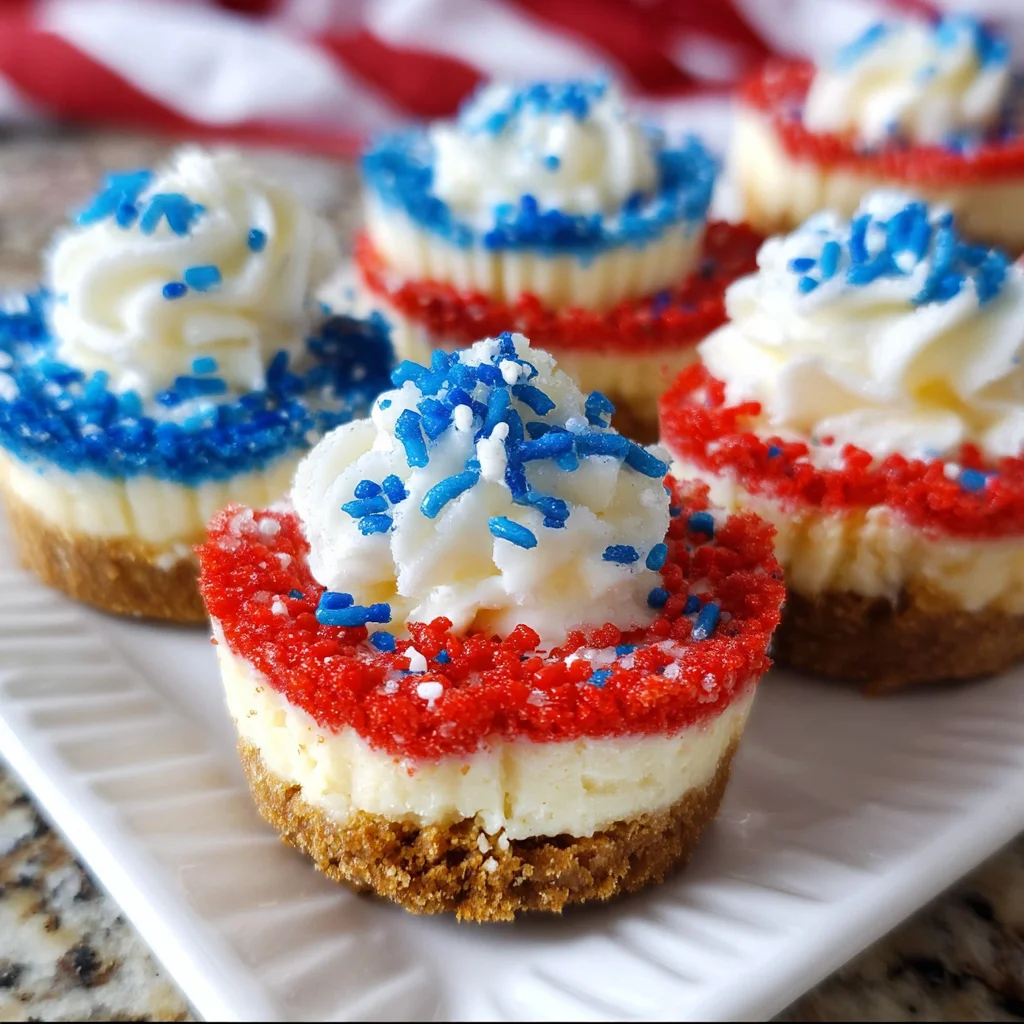
When summer rolls around, all I can think about is gathering with friends and family for a celebration. What better way to make those moments sweeter than with these delightful Red, White and Blue Mini Cheesecakes? They’re like little bites of happiness, packed with creamy goodness and festive colors that wow at any gathering.
This recipe fits perfectly into a busy mom’s schedule, giving you a dessert that impresses without the stress. Just make, chill, and serve! Trust me, these mini cheesecakes will make everyone feel like a star at your next BBQ or family get-together.
Why You’ll Love This Red, White and Blue Mini Cheesecakes
These Red, White and Blue Mini Cheesecakes are the heroic dessert every busy mom dreams of! They’re quick to whip up and so easy that even the kids might want to join in on the fun. Each cheesecake is a creamy explosion of flavor, balancing sweetness and tartness in every bite. Plus, their adorable size makes portion control a breeze while still feeling festive and indulgent. You’ll be the star of every summertime gathering!

Ingredients Needed for Red, White and Blue Mini Cheesecakes
Before we dive into baking these delightful Red, White and Blue Mini Cheesecakes, let’s gather everything we need! Each ingredient plays a vital role in creating that light, creamy texture with vibrant colors. Here’s what you’ll need:
- Vanilla wafer cookie crumbs: These provide a sweet and crunchy crust. You can use graham cracker crumbs as a substitute.
- Sugar: This sweetener balances the tanginess of the cream cheese and enhances flavor. Adjust the quantity for a sweeter treat!
- Butter: Melted butter keeps the crust together while adding richness. Use unsalted for better control of flavors.
- Cream cheese: The star of the show! Softened cream cheese ensures a smooth and creamy filling. Don’t be tempted to skimp on this one!
- Flour: This ingredient helps to stabilize the cheesecakes, giving them structure. Gluten-free flour can also be used without compromising taste.
- Sour cream: Adds creaminess and a slight tang. You can replace it with Greek yogurt for a healthier twist.
- Vanilla extract: This adds a lovely, warm flavor. Use pure extract for the best quality.
- Eggs: Essential for binding the ingredients. They also help your mini cheesecakes rise and set perfectly.
- Blue and red gel icing color: These vibrant colors will make your desserts pop! Always choose gel over liquid for stronger hues.
- Heavy whipping cream: Needed for that fluffy whipped cream topping. Make sure it’s cold for the best results.
- Powdered sugar: This sweetens the whipped cream without graininess, providing a smooth finish.
- Sprinkles: For that extra festive touch! Them or your favorite toppings to suit any occasion.
You can find all the exact quantities at the bottom of the article but gather these goodies, and let’s get ready to create something special! This dessert is as much about love as it is about the ingredients!
How to Make Red, White and Blue Mini Cheesecakes
Now comes the fun part! Making these Red, White and Blue Mini Cheesecakes is easier than you might think. Just follow these simple steps, and you’ll have a festive dessert that’s not only beautiful but also delicious!
Step 1: Prep Your Oven and Cupcake Pan
First things first, let’s get that oven preheating. Set it to 325°F (162°C). This lovely warm-up helps our cheesecakes cook evenly later. As the oven heats, line your cupcake pan with pretty cupcake liners. They’re essential for easy removal later and add a pop of color!
Step 2: Create the Cookie Crust
Now, let’s make the crust! In a mixing bowl, combine your vanilla wafer cookie crumbs, sugar, and melted butter. Stir until it resembles wet sand. Then, take a spoon or your fingers and press this mixture firmly into the cupcake liners. You want a nice, even layer here—it’s the crunchy foundation for our delicious mini cheesecakes!
Step 3: Bake the Crusts
Pop the crusts in the preheated oven and let them bake for just 5 minutes. This quick bake helps set your crust and gives it a perfect texture. Once time’s up, allow them to cool a bit while we move on to the next step.
Step 4: Prepare the Cheesecake Batter
In a large mixing bowl, it’s time to get creamy! Combine room temperature cream cheese, sugar, and flour. Mix until everything is silky smooth and no lumps remain. Scrape down the sides of the bowl to make sure all ingredients are well incorporated. Then, add in sour cream and vanilla extract, mixing gently until fully blended.
Step 5: Color the Batter
Now, let’s have a little fun with colors! Divide your batter into three bowls. Leave one as is for the white layer. Add red gel icing color to one bowl, and blue to the other. Stir until you get a beautiful, vibrant hue. This is where your cheesecakes really start to shine!
Step 6: Layer the Batter
Time to layer! Start by spooning the white batter into each crust, filling them about a third full. Next, gently add your red batter on top, filling each almost to the rim. Finally, spoon in the blue batter, leaving a tiny bit of space as they will puff up. It’s like a little culinary art project!
Step 7: Bake the Mini Cheesecakes
Let’s bake our mini masterpieces! Slide the pan into the oven and reduce the temperature to 300°F (148°C). Bake them for 18-20 minutes, or until the centers are just set but still slightly jiggly. When the time’s up, turn off the oven but keep the door closed for another 10 minutes—it helps prevent cracking.
Step 8: Create Whipped Cream Topping
While the cheesecakes cool, let’s whip up some creamy goodness! In a chilled bowl, pour in your cold heavy whipping cream, powdered sugar, and vanilla extract. Beat on high until stiff peaks form. This fluffy topping is the perfect complement to our delightful cheesecakes.
Step 9: Garnish and Chill
Once the mini cheesecakes are cool and set, it’s time for the finishing touches. Pipe that lovely whipped cream on top of each cheesecake, followed by a sprinkle of festive sprinkles. Now, cover them and refrigerate for at least an hour, letting those delicious flavors meld together. Trust me, it’s worth the wait!
Tips for Success
- Always use room temperature cream cheese for a smooth batter.
- Chill your mixing bowl for the whipped cream for extra fluffiness.
- Don’t overmix the batter; gentle mixing keeps the cheesecakes light.
- Be patient when cooling in the oven to avoid cracks.
- Feel free to experiment with different colors for toppings!
Equipment Needed for Red, White and Blue Mini Cheesecakes
- 12-cup cupcake pan: A must-have. You can also use silicone molds for easy removal.
- Mixing bowls: Essential for combining ingredients. Nesting bowls save space!
- Electric mixer: Makes whipping cream a breeze. A whisk works too, just a bit more elbow grease!
- Measuring cups and spoons: Accurate measurements ensure success. Eye-balling works in a pinch!
- Spoons or spatula: Useful for filling cupcake liners and scraping down batter.
Variations on Red, White and Blue Mini Cheesecakes
- Fruit Swirls: Add fresh strawberries or blueberries to the batter for a fruity twist and natural flavor.
- Gluten-Free Option: Substitute the vanilla wafer crumbs with gluten-free cookies or almond flour for a gluten-free crust.
- Chocolate Lovers: Incorporate melted chocolate into the cream cheese mixture for a rich chocolate flavor.
- Lower Sugar: Use a sugar substitute like Stevia or Erythritol to reduce the sugar content without sacrificing flavor.
- Dairy-Free Version: Swap cream cheese with a dairy-free alternative and use coconut cream for a rich topping.
- Vegan Cheesecakes: Use plant-based cream cheese and flax eggs instead of regular eggs to create a totally plant-based version.
Serving Suggestions for Red, White and Blue Mini Cheesecakes
- Fresh Berries: Serve alongside raspberries, strawberries, or blueberries for a colorful and healthy complement.
- Festive Drinks: Pair with refreshing lemonade, iced tea, or sparkling water to keep the vibe light.
- Presentation: Arrange on a colorful platter and garnish with mint leaves for an elegant touch.
- Warm Weather: Chill cheesecakes in the fridge until serving for a cool, refreshing dessert experience.
FAQs about Red, White and Blue Mini Cheesecakes
Can I make these Red, White and Blue Mini Cheesecakes ahead of time?
Absolutely! These mini cheesecakes can be made a day in advance. Just store them in the refrigerator until you’re ready to serve. They actually taste better after chilling as the flavors meld together.
What type of gel icing colors should I use?
I recommend using gel icing colors because they provide vibrant hues without adding extra liquid to your batter. Liquid food colorings can alter the consistency, making them less ideal for this recipe.
Can I substitute the cream cheese for a lighter option?
Yes, you can use Neufchâtel cheese as a lower-fat alternative to cream cheese. Just keep in mind that it may yield a slightly different texture!
How do I store leftover cheesecakes?
Store any leftovers in an airtight container in the fridge. They’ll keep fresh for about 2-3 days, but trust me, they won’t last that long!
Is this recipe suitable for gluten-free diets?
Definitely! You can easily make these Red, White and Blue Mini Cheesecakes gluten-free by using gluten-free cookies to make the crust. It’s a delicious treat for everyone!
Final Thoughts on Red, White and Blue Mini Cheesecakes
Creating these Red, White and Blue Mini Cheesecakes is more than just baking; it’s about crafting joyful moments. As you layer the colors, each spoonful is a reminder of summer celebrations, laughter, and the love we share at gatherings. They evoke smiles from family and friends and distractions from our busy lives. These mini delights bring flavor and form to any occasion, making you the hero in your kitchen. Trust me, these cheesecakes are a bite-sized piece of happiness, perfect for sweetening up life’s little celebrations!
Print
Red, White and Blue Mini Cheesecakes
- Total Time: 1 hour 5 minutes
- Yield: 12 mini cheesecakes 1x
- Diet: Vegetarian
Description
Delicious mini cheesecakes layered in red, white and blue for a festive treat.
Ingredients
- 1 cup (134g) vanilla wafer cookie crumbs
- 2 tbsp (26g) sugar
- 4 tbsp (56g) butter, melted
- 12 ounces (339g) cream cheese, room temperature
- 1/2 cup (104g) sugar
- 3 tbsp (24g) flour
- 1/2 cup (115g) sour cream
- 1 1/2 tsp vanilla extract
- 2 eggs
- Blue gel icing color
- Red gel icing color
- 1/2 cup (120ml) heavy whipping cream, cold
- 5 tbsp (36g) powdered sugar
- 1/2 tsp vanilla extract
- Sprinkles
Instructions
- Preheat oven to 325°F (162°C) and prepare a cupcake pan with liners.
- Combine vanilla wafer crumbs, sugar, and melted butter; press into cupcake liners.
- Bake crusts for 5 minutes, then allow to cool.
- Reduce oven temperature to 300°F (148°C). Mix cream cheese, sugar, and flour in a large bowl until combined, scraping down the bowl as needed.
- Add sour cream and vanilla extract; mix on low speed until well combined.
- Incorporate eggs one at a time, beating slowly and scraping the bowl after each addition.
- Divide batter into three bowls, coloring one red and another blue, leaving one uncolored.
- Layer the batter into crusts: start with white, then red, then blue, filling almost to the top.
- Bake for 18-20 minutes, turn off oven and leave door closed for another 10 minutes.
- Crack the oven door, allow cheesecakes to cool for 15-20 minutes, then refrigerate to finish cooling.
- Remove cheesecakes from the pan when cooled.
- For whipped cream, beat heavy whipping cream, powdered sugar, and vanilla extract on high until stiff peaks form.
- Pipe whipped cream onto cheesecakes and add sprinkles.
- Refrigerate in an airtight container until ready to serve, best within 2-3 days.
Notes
- Use cold ingredients for better whipped cream results.
- Cheesecakes can be made a day ahead and stored in the refrigerator.
- For vibrant colors, use gel colors rather than liquid food coloring.
- Prep Time: 30 minutes
- Cook Time: 30-35 minutes
- Category: Dessert
- Method: Baking
- Cuisine: American
Nutrition
- Serving Size: 1 mini cheesecake
- Calories: 300
- Sugar: 18g
- Sodium: 180mg
- Fat: 24g
- Saturated Fat: 12g
- Unsaturated Fat: 8g
- Trans Fat: 0g
- Carbohydrates: 25g
- Fiber: 1g
- Protein: 4g
- Cholesterol: 70mg