Introduction to Chocolate Peppermint Bark Roll Cake
Ah, the holiday season! It’s the time of year when the air fills with the scent of fresh pine, and our hearts seem to grow a little warmer. Amid the hustle and bustle, I find joy in creating little delights that can impress friends and family without taking up all my precious time. This chocolate peppermint bark roll cake is just that—a festive dessert combining rich chocolate and refreshing peppermint. It’s a treat that not only tastes divine but offers a delightful visual appeal, making it perfect for your next gathering or a simple family meal.
Why You’ll Love This Chocolate Peppermint Bark Roll Cake
Imagine whipping up a stunning dessert without spending hours in the kitchen. This chocolate peppermint bark roll cake is not only easy to make but also comes together quickly, making it ideal for busy days. Each slice offers a melt-in-your-mouth experience, marrying rich chocolate and zesty peppermint that everyone craves during the festive season. Plus, it’s a visual showstopper that will impress your guests while satisfying your sweet tooth!
Ingredients for Chocolate Peppermint Bark Roll Cake
Creating this chocolate peppermint bark roll cake is like gathering a treasure chest of ingredients, each adding its own charm to your festive creation. Here’s what you’ll need:
- Eggs: Room temperature eggs help create a fluffy texture in your cake, ensuring a beautiful rise.
- Granulated Sugar: This sweetener brings sweetness and aids in creating a light and airy batter.
- Whole Milk: Adds moisture and richness, harmonizing with the chocolate and peppermint flavors.
- Vanilla Extract: A staple in baking, vanilla enhances other flavors, making your cake taste unmistakably indulgent.
- Peppermint Extract: This is key for that refreshing kick, giving your cake its festive flair.
- All-Purpose Flour: The structure of your cake relies on this classic ingredient, providing just the right density.
- Special Dark Cocoa Powder: Dark cocoa elevates the chocolatey goodness and gives depth to the flavor.
- Baking Powder: This magical leavening agent helps the cake rise perfectly, ensuring it stays light.
- Salt: A pinch of salt balances the sweetness and enhances all the flavors beautifully.
- Powdered Sugar: Used to dust your rolling towel and later for sweetening your filling, adding a silky sweetness.
- Unsalted Butter: Room temperature butter creates a rich, creamy filling that melts in your mouth.
- Cream Cheese: This lends a delightful tang to your filling, making it creamy and luscious.
- Heavy Cream: Essential for whipping up a luxurious filling and making that silky ganache.
- Baking White Chocolate: This adds richness and a lovely sweetness when combined with peppermint.
- Candy Cane Chocolate: Finely chopped, this provides that unmistakable peppermint crunch and flavor.
- Crushed Candy Canes: For a festive finish, these not only add flavor but a lovely crunch on top.
For exact measurements, be sure to scroll to the bottom of the article where I’ve provided everything you need to get started. Trust me, this recipe will become a cherished part of your holiday traditions!
How to Make Chocolate Peppermint Bark Roll Cake
Now that you have your ingredients ready, let’s dive into the fun part: making this beautiful chocolate peppermint bark roll cake! I promise, with each step, you’ll be one step closer to creating a scrumptious treat that’ll have everyone raving.
Step 1: Prepare the Oven and Pan
To kick things off, preheat your oven to 350°F. Don’t rush this step! A properly heated oven is key to achieving that fluffy texture we’re aiming for.
Then, line a jelly roll pan with aluminum foil. Make sure to grease the foil lightly. This will ensure that your cake comes out easily once it’s baked.
Step 2: Beat Eggs and Sugar
In a mixing bowl, add your room temperature eggs and granulated sugar. Using the paddle attachment, beat on medium-low speed for about five minutes. Watch as it transforms! The mixture should look frothy and fluffy, nearly tripling in volume.
Step 3: Mix Dry Ingredients
While that’s happening, sift together the flour, cocoa powder, baking powder, and salt three times. This is crucial! Sifting adds air, ensuring your cake remains light and airy.
Step 4: Combine Wet and Dry Mixtures
Once the egg mixture is ready, gently fold in the milk, vanilla, and peppermint extracts. Then, carefully add your sifted dry ingredients. Be gentle here! Overmixing can create a dense cake.
Step 5: Bake the Cake
Pour the batter in big dollops across the lined pan. Spread it evenly, then pop it in the oven. Bake for about 12–13 minutes. Pro tip: It’s done when it springs back when gently pressed and starts pulling away from the sides of the pan.
Step 6: Prepare the Rolling Towel
While your cake bakes, get ready to roll! Sift powdered sugar onto a clean tea towel, covering about half to two-thirds of it. This prevents sticking! Trust me, this little detail makes a big difference.
Step 7: Roll the Cake
Once the cake is done, take it out of the oven and immediately turn it onto the tea towel. Remove the baking pan and foil. Now, while it’s still warm, roll the cake tightly from the short end. Let it cool for at least two hours in this rolled shape.
Step 8: Make the Filling
For the filling, melt the chopped white chocolate over simmering water, ensuring it stays smooth. Allow it to cool a bit. Now whip the butter until creamy. Add the cream cheese and cooled white chocolate, followed by heavy cream and peppermint extract. Whip it until fluffy, then gradually fold in the powdered sugar and chopped candy cane chocolate.
Step 9: Assemble the Roll Cake
Once your cake has cooled completely, unroll it carefully. Spread your filling evenly across the surface. Don’t skimp here! Roll it back up, ensuring that those sweet layers stay intact. Wrap it in plastic wrap and refrigerate for a few hours or overnight. This will enhance the flavors and set the form.
Step 10: Create the Ganache
To make that luscious ganache, melt the chopped semi-sweet chocolate with heavy cream using the same double boiler method. Stir until it’s silky smooth. Patience is key here! You want it to be perfectly blended before moving on.
Step 11: Final Touches
Pour about two-thirds of your ganache over the cake, letting it drizzle beautifully down the sides. Let it set in the fridge for about 10–15 minutes. Then, pour the remaining ganache over the top and finish it off with crushed candy canes for that festive crunch! Chill again for a couple of hours or enjoy the next day—it just gets better!
Tips for Success
- Always use room temperature eggs for the best volume and texture.
- Be careful not to overmix the batter; gentle folding is key.
- Roll the cake while it’s still warm for easier handling.
- Let the filling chill before spreading for better consistency.
- Make the cake a day in advance to enhance the flavors.
Equipment Needed
- Jelly roll pan – If you don’t have one, a standard baking sheet will do.
- Mixing bowls – Grab a large bowl and a medium bowl to keep things organized.
- Electric mixer – A whisk can work in a pinch, just be ready for a workout!
- Rubber spatula – Essential for folding and scraping down the sides.
Variations
- Gluten-Free Version: Substitute all-purpose flour with a 1-to-1 gluten-free baking blend for a delicious gluten-free treat.
- Vegan Option: Use flax eggs for the eggs, coconut cream in place of heavy cream, and dairy-free chocolate and butter for a fully plant-based dessert.
- Chocolate Mint Swirl: Swirl in some mint chocolate chips into the batter for bursts of minty goodness throughout your cake.
- Less Sugar:** Reduce sugar in both the cake and filling for a lighter version without sacrificing flavor.
- Different Toppings: Experiment with different toppings like toasted pecans, walnuts, or even drizzles of caramel for a fun twist.
Serving Suggestions for Chocolate Peppermint Bark Roll Cake
- Pair with a dollop of whipped cream or a scoop of vanilla ice cream for an indulgent treat.
- Serve alongside a steaming cup of peppermint hot chocolate to enhance the festive flavors.
- Garnish with fresh mint leaves for a pop of color and added freshness.
- Present on a decorative platter, sprinkled with extra crushed candy canes for charm.
FAQs about Chocolate Peppermint Bark Roll Cake
Can I make this chocolate peppermint bark roll cake ahead of time?
Absolutely! In fact, this cake tastes even better the next day. You can prepare it a day in advance and keep it in the fridge. The flavors meld beautifully, providing a delightful experience with each slice.
What can I substitute for peppermint extract?
If peppermint extract isn’t available, you can use mint extract for a similar flavor. Just note that mint extract has a bolder taste, so consider using slightly less than the recipe calls for.
Can I freeze the chocolate peppermint bark roll cake?
Yes! It freezes well. Wrap it tightly in plastic wrap and then foil. Just let it thaw in the fridge overnight when you’re ready to enjoy it again. It’ll taste just as delicious!
What do I do if my cake cracks while rolling?
Don’t worry; this happens to the best of us! If it cracks, simply cover it with ganache or whipped cream, and those imperfections will become part of the cake’s charm. Plus, it’ll still taste incredible!
How can I make this cake less sweet?
To tone down the sweetness, reduce the sugar in the cake and filling a bit. You can also balance the sweetness with a tart fruit topping or a dollop of unsweetened whipped cream!
Final Thoughts
There’s something magical about the combination of chocolate and peppermint, especially during the holidays. This chocolate peppermint bark roll cake isn’t just a dessert; it’s an experience. As I’ve rolled, filled, and decorated this cake, I find joy in the process, knowing it will bring smiles to my loved ones. Every slice reveals that beautiful swirl, and each bite offers a delightful explosion of flavors! It’s a perfect addition to any festive table and surprisingly easy to make, even for busy nights. I hope this recipe finds a special place in your holiday traditions!
Print
Chocolate peppermint bark roll cake
- Total Time: 2-3 hours including cooling
- Yield: 12 servings 1x
- Diet: Vegetarian
Description
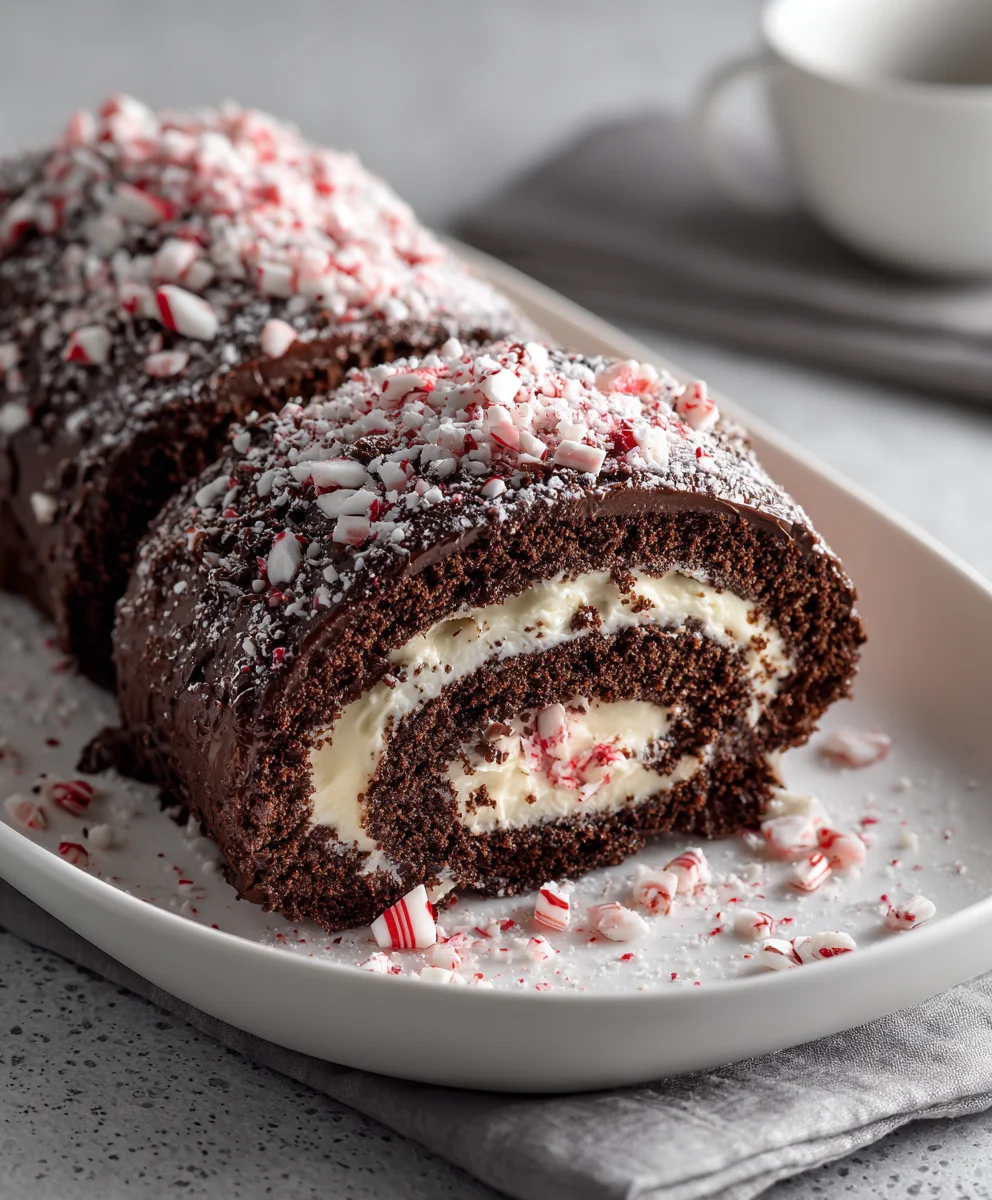
Chocolate peppermint bark roll cake is a festive delight that combines rich chocolate and refreshing peppermint flavors in a delightful dessert.
Ingredients
- 3 eggs, room temperature
- 3/4 cup white granulated sugar
- 2 tablespoons whole milk
- 1/2 tablespoon vanilla extract
- 1/4 teaspoon peppermint extract
- 3/4 cup all purpose flour
- 1/3 cup special dark cocoa powder
- 1 teaspoon baking powder
- pinch of salt
- Powdered sugar for the tea towel
- 1 package (7 oz) Finlandia unsalted butter, room temperature
- 4 oz cream cheese, room temperature
- 1/4 cup heavy cream
- 1/4 teaspoon peppermint extract
- 4 oz baking white chocolate, chopped
- 4 oz candy cane chocolate, finely chopped
- 4 cups powdered sugar
- 6 oz semi-sweet chocolate, chopped
- 1/2 cup heavy cream
- Crushed candy canes
Instructions
- Heat the oven to 350F. Line a jelly roll pan with aluminum foil. Set aside.
- In a mixing bowl add the eggs and sugar. With the paddle attachment on, beat on medium low speed until frothy, thick, fluffy, and tripled in volume (about 5 minutes).
- Sift the flour, cocoa powder, baking powder, and salt 3 times.
- Fold in the milk, vanilla, and peppermint extracts into the whipped egg mixture.
- Gently fold in the dry ingredients until just incorporated, ensuring no air bubbles remain.
- Pour the batter in big dollops across the pan.
- Bake until it springs back when pressed and starts pulling away from the sides (about 12-13 minutes).
- Sift 1/2 to 2/3 cup powdered sugar over a clean tea towel.
- Turn the cake onto the towel, remove the baking pan and foil.
- Starting from the short end, roll the cake tightly while it’s still hot and let it cool for at least two hours.
- For the filling, melt the chopped white chocolate over simmering water, then cool.
- Whip the butter, then add cream cheese, melted white chocolate, heavy cream, and peppermint extract, whipping well.
- Gradually add powdered sugar, folding in the chopped candy cane chocolate.
- Spread the filling on the cooled cake, roll it back up, and refrigerate for a few hours or overnight.
- For the ganache, melt chocolate and heavy cream in intervals until smooth.
- Pour 2/3 of the ganache over the cake, refrigerating to set for 10-15 minutes.
- Pour remaining ganache and decorate with crushed candy canes, then refrigerate for a couple of hours or up to 4-5 days.
Notes
- Ensure not to overmix the batter.
- Roll the cake while it is still warm for best results.
- The cake can be prepared a day in advance.
- Prep Time: 30 minutes
- Cook Time: 15 minutes
- Category: Dessert
- Method: Baking
- Cuisine: American
Nutrition
- Serving Size: 1 slice
- Calories: 350
- Sugar: 32g
- Sodium: 150mg
- Fat: 20g
- Saturated Fat: 10g
- Unsaturated Fat: 8g
- Trans Fat: 0g
- Carbohydrates: 42g
- Fiber: 2g
- Protein: 4g
- Cholesterol: 80mg