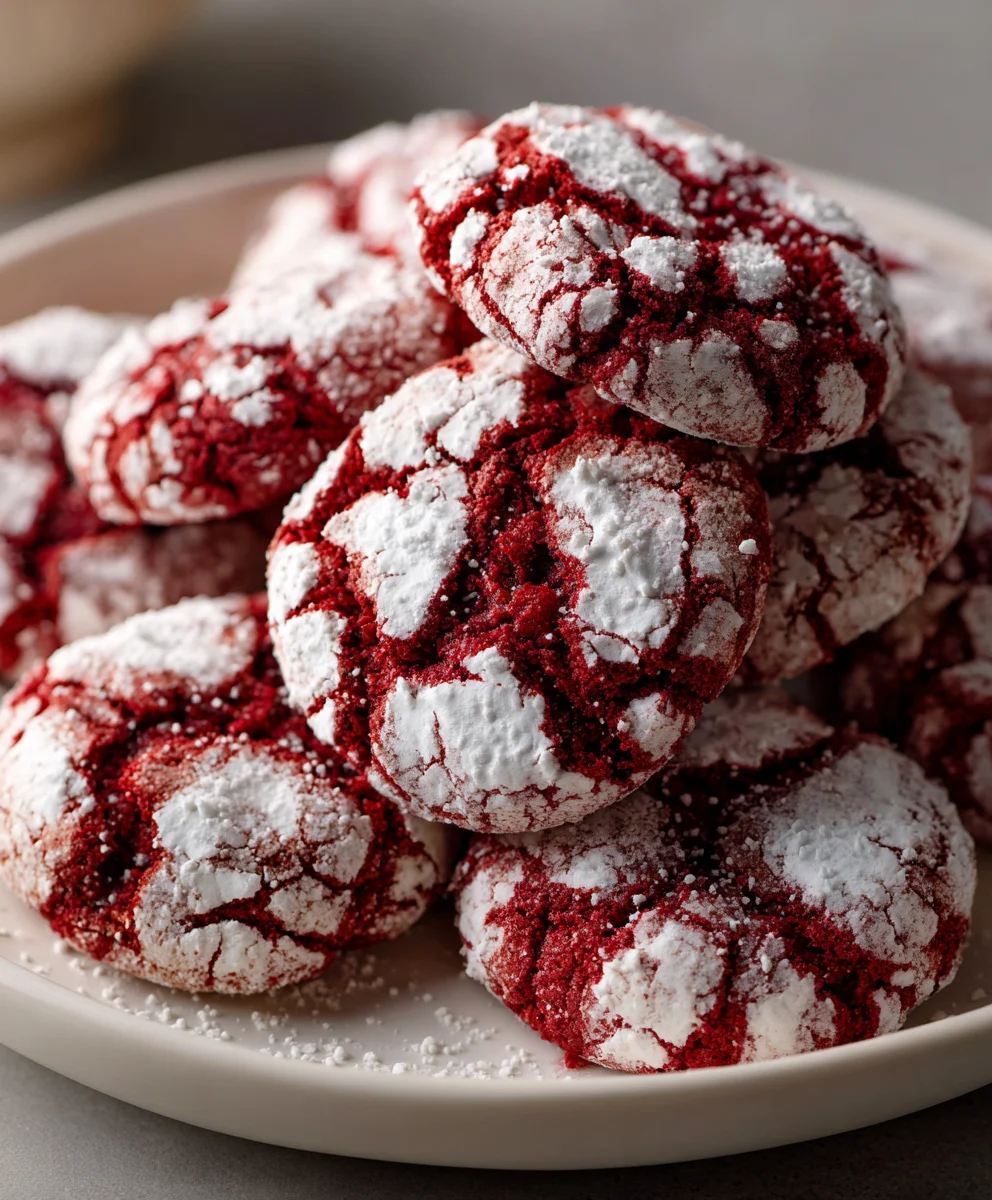
Introduction to Red Velvet Crinkle Cookies
Life can get hectic, can’t it? Between work, kids, and a million errands, finding time to bake may feel like a distant dream. That’s why I’m excited to share my Red Velvet Crinkle Cookies recipe with you! These beauties are not only visually stunning with their rich red hue, but they also deliver an indulgent flavor that melts in your mouth. Perfect for surprising loved ones or satisfying your sweet tooth on a busy day, these cookies can quickly turn any moment into a special occasion. Trust me, they’re easier to whip up than you might think!
Why You’ll Love This Red Velvet Crinkle Cookies
If you’re anything like me, you crave sweet treats that don’t take all day to make. These Red Velvet Crinkle Cookies fit the bill perfectly. They’re simple and quick, making them an ideal solution for busy days. Plus, the soft and chewy texture, coupled with a taste that sings of cocoa and vanilla, will leave your family begging for more. Trust me; these cookies will be a hit at any gathering!
Ingredients for Red Velvet Crinkle Cookies
Let’s dive into the colorful and delightful ingredients that make these Red Velvet Crinkle Cookies a true treat. Each one plays an essential role in bringing these cookies to life!
- Unsalted Butter: This is the foundation of our cookies. It adds richness and helps create that melt-in-your-mouth texture. Room temperature butter is best for easy mixing.
- Granulated Sugar: Sweetness is what you’re after! This sugar gives your cookies that delightful crunchy exterior, while also contributing to their body.
- Large Eggs: Eggs are the glue that holds everything together. They add moisture and help the cookies rise for that chewy center we all love.
- Whole Milk: Just a splash of milk provides moisture, adding to the overall tenderness of your cookies. Plus, it helps dissolve the sugars.
- Lemon Juice or Vinegar: A small amount of acidity brightens the flavor and helps create that unique red velvet flavor profile. Don’t skip this step!
- Vanilla Extract: It’s the secret weapon for flavor. A splash of vanilla brings warmth and depth to the cookie dough.
- Red Gel Coloring: The showstopper! This vibrant color is what makes these Red Velvet Crinkle Cookies so eye-catching. Gel coloring works best and won’t alter the dough’s consistency.
- All-Purpose Flour: The base of our cookie. It provides structure and helps achieve that perfect chewy texture.
- Cocoa Powder: Just a bit of cocoa powder adds a rich chocolate flavor that complements the vibrant red color beautifully.
- Baking Powder: This leavener helps our cookies puff up. It’s the ingredient that makes your cookies delightful and soft.
- Baking Soda: A little bit of this will also help in the leavening process, balancing the acidity from the lemon juice or vinegar.
- Granulated Sugar and Powdered Sugar (for rolling): These are the finishing touches to make your cookies look extra special. They create that lovely crinkled effect on the surface.
For exact measurements, check out the bottom of the article where you can find the full recipe available for printing. Happy baking!
How to Make Red Velvet Crinkle Cookies
Now that we’ve gathered our beautiful ingredients, let’s transform them into Red Velvet Crinkle Cookies! Grab your mixing bowls, and let’s dive into the crafting process!
Step 1: Cream Butter and Sugar
Start by placing your unsalted butter and granulated sugar into a large mixing bowl. Using an electric mixer or your trusty whisk, cream them together until the mixture is light and fluffy. This step is crucial! It incorporates air, making your cookies light and delightful. Trust me; the aroma will have your family flocking to the kitchen.
Step 2: Add Wet Ingredients
Now, let’s bring in the eggs, milk, lemon juice or vinegar, and red gel coloring. Mix these ingredients until they’re smooth and combined. I love watching the vibrant color swirl into the batter! This adds that fun twist to our cookies and makes them look so appealing.
Step 3: Combine Dry Ingredients
In another bowl, whisk together the all-purpose flour, cocoa powder, baking powder, and baking soda. This is where the magic begins! You want to make sure they are evenly combined to avoid clumps of cocoa later. A well-blended dry mix is the key to consistent flavor and texture.
Step 4: Mix Wet and Dry Ingredients
Time to unite the mixtures! Gently add the dry ingredients to the wet mixture. It’s tempting to over-mix, but resist! Stir until just combined. It’s okay if a few flour streaks remain; this is a sign of a light cookie.
Step 5: Chill the Dough
Now comes the waiting game—chill the dough! Wrap it in plastic wrap and pop it in the fridge for at least two hours or overnight. Chilling helps to firm up the dough, preventing the cookies from spreading too much while baking. I always use this time for a little self-care or to batch prep dinners for the week!
Step 6: Shape the Cookies
Once your dough is nice and chilled, it’s time to shape your cookies! Scoop small portions of the dough and roll them into balls. First, roll them in granulated sugar, then in powdered sugar. This double dusting creates that beautiful crinkle effect while also adding a touch of sweetness.
Step 7: Bake and Enjoy
Place the cookies on a baking tray lined with parchment paper, making sure to space them out. Bake in a preheated oven at 350 degrees for 10-12 minutes. Keep an eye on them! You want the edges firm but the centers soft. Once cooled, you’ll have a colorful cookie that’s perfect for sharing—or devouring all by yourself!
Tips for Success
- Chill your dough for at least two hours. This keeps the cookies from spreading too much while baking.
- For the richest color, opt for high-quality red gel coloring. It makes all the difference!
- Use an accurate oven thermometer. Ovens can vary, and this ensures you bake at the perfect temperature.
- Let the cookies cool on the baking tray for a few minutes before transferring them to a wire rack.
- Feel free to get creative with mix-ins, like white chocolate chips or nuts, for added flavor!
Equipment Needed
- Mixing Bowls: A set of varying sizes works best. You can also use large jars if needed.
- Electric Mixer or Whisk: An electric mixer saves time, but a whisk and some elbow grease do the trick!
- Baking Tray: Use a standard cookie sheet. A pizza stone works in a pinch!
- Parchment Paper: This keeps cookies from sticking. Aluminum foil also does a decent job.
- Cookie Scoop: Perfect for consistent dough balls. A tablespoon can work too!
Variations for Red Velvet Crinkle Cookies
- White Chocolate Chips: Add a handful of white chocolate chips to the dough for a lovely contrast. They melt beautifully and create pockets of creamy sweetness in every bite.
- Nutty Twist: Incorporate chopped nuts like pecans or walnuts for a delightful crunch. This adds texture and pairs wonderfully with the softness of the cookies.
- Gluten-Free Option: Substitute all-purpose flour with a 1:1 gluten-free blend. Make sure it includes xanthan gum for the best texture.
- Reduced Sugar: Swap half of the granulated sugar with a sugar substitute like stevia or erythritol for a lower-sugar version without sacrificing taste.
- Creative Coloring: Experiment with different colors of gel food coloring for various occasions. Think pastel pink for a spring celebration or green for St. Patrick’s Day!
Serving Suggestions
- Glass of Milk: Serve your Red Velvet Crinkle Cookies with a chilled glass of milk for a classic combination.
- Tea or Coffee: Pair these cookies with a warm cup of tea or coffee for an afternoon pick-me-up.
- Festive Platter: Arrange the cookies on a decorative platter, garnished with fresh berries for an appealing presentation.
- Ice Cream Sandwich: For a fun twist, sandwich vanilla or cream cheese ice cream between two cookies.
- Gift Wrapping: Package cookies in a cute box or bag as a delightful homemade gift for friends and family.
FAQs about Red Velvet Crinkle Cookies
Can I use regular food coloring instead of gel food coloring?
While you can use regular food coloring, gel coloring gives you a more vibrant red hue without adding extra liquid. For the best results, stick with gel!
How can I store leftover Red Velvet Crinkle Cookies?
Store your cookies in an airtight container at room temperature. They’ll stay fresh for up to a week—if they last that long!
Can I freeze the cookie dough?
Absolutely! You can freeze the chilled dough for up to three months. Just thaw it in the fridge before shaping and baking!
What can I do if the cookies spread too much while baking?
If your cookies spread more than expected, try chilling the dough longer. You’ll get a firmer texture that holds its shape better!
Are Red Velvet Crinkle Cookies suitable for special dietary needs?
Yes, with a few modifications—like using gluten-free flour or low-sugar substitutes—these delightful cookies can cater to various dietary preferences!
Final Thoughts
Baking these Red Velvet Crinkle Cookies is more than just a recipe; it’s an experience filled with joy and creativity. The vibrant red color brings a festive spirit to any occasion, while the chewy, melt-in-your-mouth texture will keep your family coming back for seconds! Every bite is a reminder that life’s sweetest moments can be created right in our kitchens, despite our busy lives. Whether you’re celebrating a special event or simply need a sweet treat, these cookies bring a sprinkle of happiness to the everyday hustle. So, gather your loved ones and indulge in this delightful creation!
Print
Red Velvet Crinkle Cookies
- Total Time: 2 hours 30 minutes (including chilling time)
- Yield: 24 cookies 1x
- Diet: Vegetarian
Description
Indulge in a sweet delight with these Red Velvet Crinkle Cookies that are soft, chewy, and visually stunning with their vibrant red color.
Ingredients
- ¾ cup Butter Unsalted, Room temperature
- 1⅓ cups Granulated sugar
- 3 Eggs Large
- 1 tablespoon Whole milk
- 2 teaspoon Lemon juice Or vinegar
- 2 teaspoon Vanilla extract
- Red gel coloring
- 3 cups All-purpose flour
- ¼ cup Cocoa powder
- 2 teaspoon Baking powder
- ¼ teaspoon Baking soda
- 1 cup Granulated sugar For rolling cookie dough balls
- 1 cup Powdered sugar For rolling cookie dough balls
Instructions
- In a mixing bowl, cream together butter and granulated sugar until mixture is light and fluffy.
- Add eggs, milk, lemon juice or vinegar, and red gel coloring and mix until smooth.
- In a separate mixing bowl, whisk together the flour, cocoa powder, baking powder and baking soda.
- Dump the dry mixture into the wet mixture and mix until just combined. Do not over-mix!
- Chill the dough for 2 hours or overnight.
- Scoop out small portions of the dough and make small balls. Roll them in granulated sugar first and then, roll in powdered sugar. Place them on a baking tray, lined with parchment paper.
- Bake at 350 degrees for 10-12 minutes or until the cookies are firm around the edges. Enjoy!
Notes
- Make sure to chill the dough to ensure the cookies maintain their shape while baking.
- Use high-quality red gel coloring for the best color saturation.
- Prep Time: 20 minutes
- Cook Time: 10-12 minutes
- Category: Dessert
- Method: Baking
- Cuisine: American
Nutrition
- Serving Size: 1 cookie
- Calories: 150
- Sugar: 10g
- Sodium: 80mg
- Fat: 6g
- Saturated Fat: 4g
- Unsaturated Fat: 2g
- Trans Fat: 0g
- Carbohydrates: 20g
- Fiber: 1g
- Protein: 2g
- Cholesterol: 30mg