Introduction to Mini Sponge Cake
I know time is one of the most valuable assets when one is juggling being a mom and being an entrepreneur, and time becomes all the more valuable when making something sweet for the kids. Which is why I love this particular Mini Sponge Cake recipe so much. It’s not only easy and quick to make but also very, very porous and soft to taste. These mini cakes are your go-to solution whether you are celebrating something or just need to have something to cheer you up. You can dress them up for a party or take them plain with tea- either way is just perfect. Believe me, after making these cakes once, you’re going to make them a regular in your house!
Why You’ll Love This Mini Sponge Cake
The following recipe is ideal for those with little time and much love for great-tasting food: Mini Sponge Cake. Preparation is very fast: just 25 minutes to prepare and the ‘game-changer’ is there. As for the taste? Unreal. Think of a ‘cloud’ of sweetness melting in your mouth. Best of all, it’s versatile; decorate it with your favorite toppings to make it a delightful treat for any occasion. You have been warned: Your family will want seconds.
Ingredients for Mini Sponge Cake

Gathering the right ingredients is the first step to creating your delicious Mini Sponge Cake. Here’s what you’ll need:
- Large Eggs: These are the backbone of your cake, providing structure and moisture. Fresh eggs will give the best results.
- Sugar: This sweetener not only adds flavor but also helps create that lovely fluffy texture when beaten with eggs.
- Cake Flour: A lighter flour that gives the cake its tender crumb. If you don’t have cake flour, you can substitute with all-purpose flour, but the texture may vary slightly.
- Vanilla Extract: This adds a warm, inviting flavor. You can also experiment with almond extract for a different twist!
- Baking Powder: A leavening agent that helps the cake rise, making it light and airy.
- Salt: Just a pinch enhances the sweetness and balances the flavors.
For those who love to experiment, consider adding lemon zest or a splash of orange juice for a citrusy kick. You can find the exact measurements for these ingredients at the bottom of the article, ready for printing. Happy baking!
How to Make Mini Sponge Cake
Now that you have your ingredients ready, let’s dive into the fun part—making your Mini Sponge Cake! Follow these simple steps, and you’ll have a batch of delightful mini cakes in no time.
Step 1: Preheat the Oven
First things first, preheat your oven to 350°F (180°C). This step is crucial because it ensures your cakes bake evenly. While the oven warms up, grease your mini cake pan. A little butter or cooking spray will do the trick. This prevents the cakes from sticking, making it easier to pop them out later.
Step 2: Beat Eggs and Sugar
In a large mixing bowl, beat the eggs and sugar together using an electric mixer on high speed. You want to mix them for about 5 minutes until the mixture is thick and fluffy. This step is vital! The air you incorporate here is what gives your Mini Sponge Cake its light, airy texture. So, don’t rush it!
Step 3: Sift Dry Ingredients
Next, sift together the cake flour, baking powder, and salt in a separate bowl. Sifting is not just for show; it helps break up any lumps and aerates the flour. This process contributes to the cake’s delicate crumb, making it even fluffier. Trust me, your taste buds will thank you!
Step 4: Fold in Dry Ingredients
Now, it’s time to gently fold the sifted dry ingredients into the egg mixture. Do this in three separate additions. Use a spatula and be gentle! The goal is to maintain that lovely airiness you created earlier. Overmixing can lead to a dense cake, and we definitely want to avoid that!
Step 5: Add Vanilla Extract
Once everything is combined, add the vanilla extract. This little splash of flavor enhances the overall taste of your Mini Sponge Cake. You can also get creative here—try adding almond extract for a unique twist!
Step 6: Pour Batter into Pan
Carefully pour the batter into your prepared mini cake pan. Fill each cavity about two-thirds full. This allows room for the cakes to rise without overflowing. It’s like giving them space to bloom!
Step 7: Bake the Cakes
Pop the pan into your preheated oven and bake for 12-15 minutes. Keep an eye on them! To check for doneness, insert a toothpick into the center of a cake. If it comes out clean, they’re ready to come out. If not, give them a couple more minutes.
Step 8: Cool the Cakes
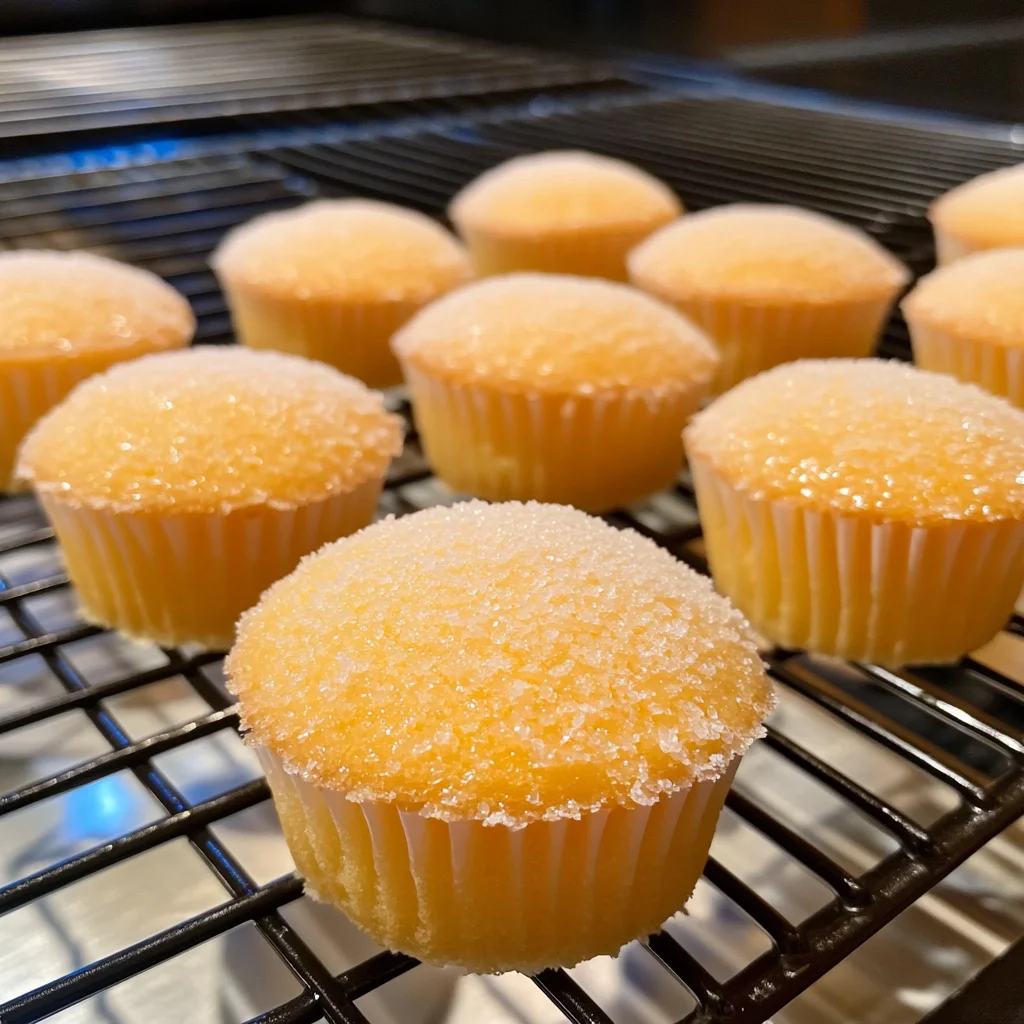
Once baked, remove the mini sponge cakes from the oven and let them cool in the pan for about 5 minutes. This cooling time is important; it helps them set. After that, carefully invert the pan onto a wire rack to release the cakes. Let them cool completely before serving.
Step 9: Serve and Enjoy
Now for the best part—serving your Mini Sponge Cakes! You can enjoy them plain, or dress them up with whipped cream and fresh berries. A dusting of powdered sugar adds a lovely touch too. These little delights are perfect for any occasion, and I guarantee they’ll disappear quickly!
Tips for Success
- Always use fresh eggs for the best flavor and texture.
- Don’t skip the sifting step; it’s key for a light cake.
- Be gentle when folding in the dry ingredients to keep the batter airy.
- Check your cakes a minute or two before the timer goes off to avoid overbaking.
- Experiment with flavors like lemon zest or almond extract for a fun twist!
Equipment Needed
- Mini Cake Pan: Essential for shaping your cakes. If you don’t have one, a muffin tin works too!
- Electric Mixer: Makes beating eggs and sugar a breeze. A whisk can work, but it’ll take longer.
- Mixing Bowls: Use at least two—one for wet and one for dry ingredients.
- Spatula: Perfect for folding in ingredients gently.
- Wire Rack: Ideal for cooling your cakes. A plate can substitute in a pinch.
Variations of Mini Sponge Cake

- Citrus Zest: Add lemon or orange zest to the batter for a refreshing citrus flavor that brightens up the cake.
- Chocolate Delight: Incorporate cocoa powder into the dry ingredients for a rich chocolate version of your Mini Sponge Cake.
- Gluten-Free Option: Substitute cake flour with a gluten-free blend to make this recipe suitable for those with gluten sensitivities.
- Berry Bliss: Fold in fresh or frozen berries like blueberries or raspberries for a fruity twist.
- Nutty Flavor: Add finely chopped nuts, such as almonds or walnuts, for a delightful crunch and added flavor.
- Spiced Cake: Mix in a pinch of cinnamon or nutmeg for a warm, spiced version that’s perfect for fall.
Serving Suggestions for Mini Sponge Cake
- Pair with a dollop of whipped cream and fresh strawberries for a classic treat.
- Serve alongside a scoop of vanilla ice cream for a delightful dessert experience.
- Drizzle with a simple glaze for an elegant touch.
- Enjoy with a cup of tea or coffee for a cozy afternoon snack.
- Dust with powdered sugar for a beautiful presentation.
FAQs about Mini Sponge Cake
As you embark on your Mini Sponge Cake journey, you might have a few questions. Here are some common queries I’ve encountered, along with helpful answers to guide you along the way.
Can I make Mini Sponge Cake ahead of time?
Absolutely! You can bake the cakes a day in advance. Just store them in an airtight container at room temperature. When you’re ready to serve, add your favorite toppings for a fresh touch!
What can I use instead of cake flour?
If you don’t have cake flour on hand, you can substitute it with all-purpose flour. For a lighter texture, remove 2 tablespoons of flour per cup and replace it with cornstarch. This little trick can help mimic the fluffiness of cake flour!
How do I know when my Mini Sponge Cakes are done baking?
The best way to check for doneness is by inserting a toothpick into the center of a cake. If it comes out clean, your cakes are ready! If there’s batter on the toothpick, give them a few more minutes in the oven.
Can I freeze Mini Sponge Cakes?
Yes, you can freeze these delightful treats! Just wrap them tightly in plastic wrap and place them in a freezer-safe bag. They’ll keep well for up to three months. Thaw them at room temperature before serving.
What toppings pair well with Mini Sponge Cake?
The options are endless! Whipped cream and fresh berries are a classic choice. You can also try chocolate ganache, a drizzle of caramel, or even a simple dusting of powdered sugar for a touch of elegance.
Final Thoughts
Baking Mini Sponge Cake … just baking; after all, the best way to enjoy life is with something sweet to accompany it. Excitement at pulling these tiny pillow-y cakes out of the oven is unmatched. They’re perfect to share for a celebration, over an intimate afternoon, or just as an indulgence. Not to mention how flexible the recipe is, allowing you to tailor-make it for any occasion or mood. I hope you get enough joy out of baking and giving away these dainty goodies. Well, get your ingredients together and your apron on because it’s time for Mini Sponge Cake to make your day!
Print
Mini Sponge Cake
- Total Time: 25 minutes
- Yield: 12 mini cakes 1x
- Diet: Vegetarian
Description
A quick and easy recipe for mini sponge cakes that are light, fluffy, and perfect for any occasion.
Ingredients
- 6 large eggs
- 1 cup sugar
- 1 cup cake flour
- 1/2 teaspoon vanilla extract
- 1/2 teaspoon baking powder
- 1/4 teaspoon salt
Instructions
- Preheat the oven to 350°F (180°C) and grease a mini cake pan.
- In a large mixing bowl, beat the eggs and sugar together with an electric mixer on high speed for about 5 minutes or until thick and fluffy.
- Sift the cake flour, baking powder, and salt together.
- Gently fold the sifted dry ingredients into the egg mixture in three separate additions, being careful not to deflate the eggs.
- Add vanilla extract and fold gently until just combined.
- Pour the batter into the prepared mini cake pan, filling each cavity about two-thirds full.
- Bake in the preheated oven for 12-15 minutes or until a toothpick inserted into the center comes out clean.
- Remove from the oven and let the mini sponge cakes cool in the pan for 5 minutes.
- Carefully invert the pan onto a wire rack to release the cakes and cool completely.
- Serve the mini sponge cakes plain or topped with whipped cream and fresh berries. Enjoy!
Notes
- Beating the eggs and sugar until thick and fluffy is crucial for the cake’s texture, so make sure to mix them well.
- Gently folding the dry ingredients into the egg mixture helps maintain the lightness of the cake, avoid overmixing.
- Check the doneness of the cakes by inserting a toothpick into the center; if it comes out clean, they are ready.
- You can add lemon zest or other flavorings to customize the taste of the mini sponge cakes.
- For a fancier presentation, dust the cakes with powdered sugar or drizzle with a simple glaze.
- Store any leftovers in an airtight container at room temperature for up to 2 days.
- Prep Time: 10 minutes
- Cook Time: 15 minutes
- Category: Dessert
- Method: Baking
- Cuisine: American
Nutrition
- Serving Size: 1 mini cake
- Calories: 120
- Sugar: 10g
- Sodium: 50mg
- Fat: 3g
- Saturated Fat: 1g
- Unsaturated Fat: 2g
- Trans Fat: 0g
- Carbohydrates: 20g
- Fiber: 0g
- Protein: 3g
- Cholesterol: 70mg