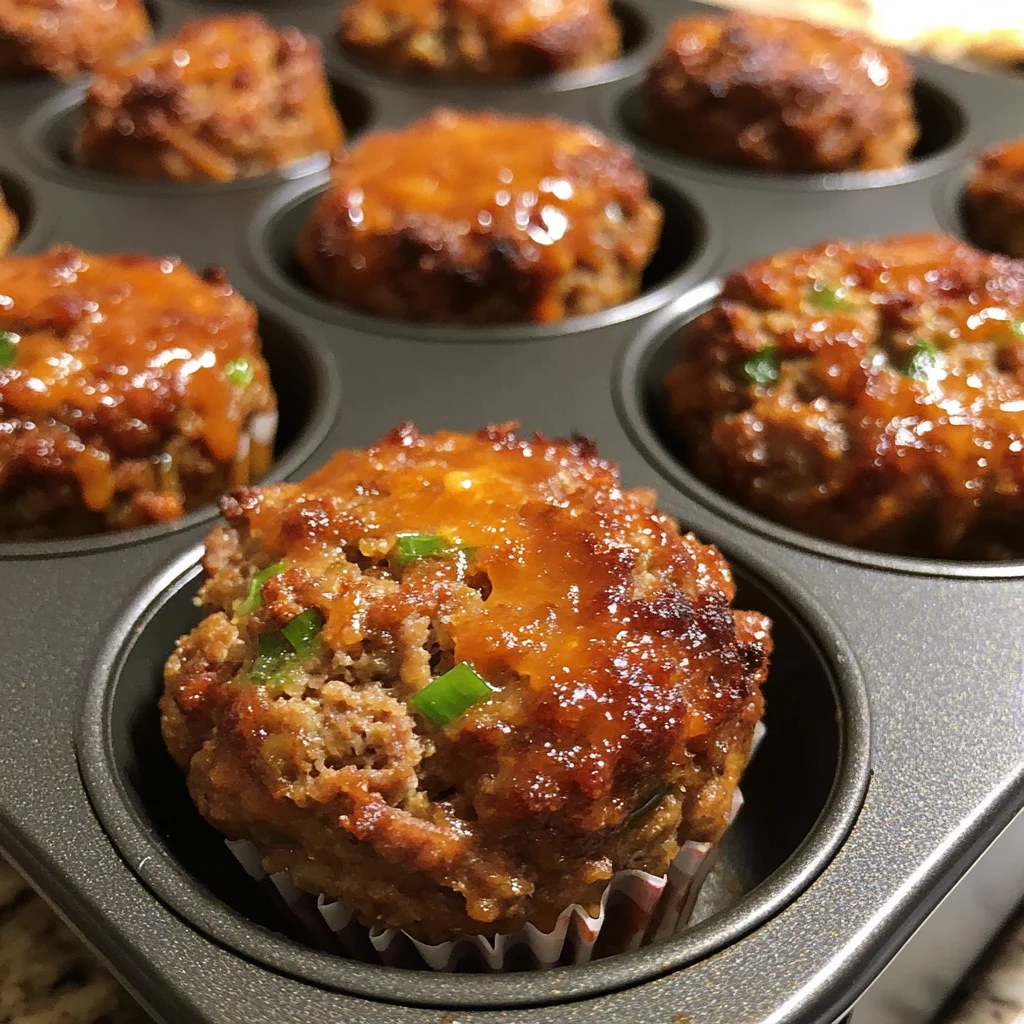
Introduction to Mini Meatloaf Muffins
As a busy mom, I know how hectic weeknights can get. Between juggling work, kids, and everything in between, finding time to cook can feel like a daunting task. That’s where my Mini Meatloaf Muffins come in! These little gems are not only quick to whip up, but they also pack a punch of flavor that will impress your loved ones. Imagine a comforting, hearty meal that’s ready in just 45 minutes. With these muffins, you can serve a delicious dinner without the stress. Let’s dive into this easy recipe that’s sure to become a family favorite!
Why You’ll Love This Mini Meatloaf Muffins
These Mini Meatloaf Muffins are a lifesaver for busy evenings! They come together in a flash, making dinner prep a breeze. Plus, they’re incredibly versatile—perfect for picky eaters or those who love to customize their meals. The delightful combination of flavors and textures will have everyone asking for seconds. Trust me, these muffins are not just quick; they’re a delicious way to bring the family together around the dinner table!
Ingredients for Mini Meatloaf Muffins

Gathering the right ingredients is key to making these Mini Meatloaf Muffins a success. Here’s what you’ll need:
- Ground beef: I prefer an 80/20 blend for the perfect balance of flavor and moisture.
- Onion: Finely chopped onion adds a sweet and savory depth to the muffins.
- Green bell pepper: This brings a pop of color and a slight crunch, but feel free to swap it for red or yellow peppers!
- Breadcrumbs: They help bind the mixture together, giving the muffins a nice texture.
- Milk: A splash of milk keeps the meatloaf moist and tender.
- Egg: This acts as a binder, helping everything hold together beautifully.
- Shredded cheddar cheese: Who doesn’t love cheese? It adds a creamy richness that’s hard to resist.
- Worcestershire sauce: Just a teaspoon adds a savory umami flavor that elevates the dish.
- Salt and black pepper: Essential for seasoning, these two ingredients bring out all the flavors.
- Ketchup: Used in the glaze, it gives a sweet and tangy finish that complements the meatloaf perfectly.
- Brown sugar: This adds a touch of sweetness to the glaze, balancing the savory elements.
- Dijon mustard: A hint of mustard in the glaze adds a zesty kick that makes these muffins stand out.
For those looking to customize, consider adding chopped carrots, zucchini, or even some spices like garlic powder or Italian seasoning. You can find the exact quantities for each ingredient at the bottom of the article, ready for printing!
How to Make Mini Meatloaf Muffins
Step 1: Preheat the Oven
First things first, preheat your oven to 350°F (175°C). This step is crucial for even cooking. While the oven heats up, lightly grease a 12-cup muffin tin or line it with muffin liners. This will make removing the muffins a breeze later on!
Step 2: Prepare the Meat Mixture
In a large bowl, combine the ground beef, chopped onion, green bell pepper, breadcrumbs, milk, egg, shredded cheddar cheese, Worcestershire sauce, salt, and black pepper. Use your hands or a spoon to mix everything together gently. Be careful not to over-mix; you want the muffins to stay tender and juicy. Just combine until everything is evenly distributed, and you’re good to go!
Step 3: Fill the Muffin Cups
Now it’s time to fill those muffin cups! Divide the meat mixture evenly among the cups, pressing gently to fill each one. Make sure to leave a little space at the top, as they will rise while baking. This ensures they cook evenly and don’t overflow.
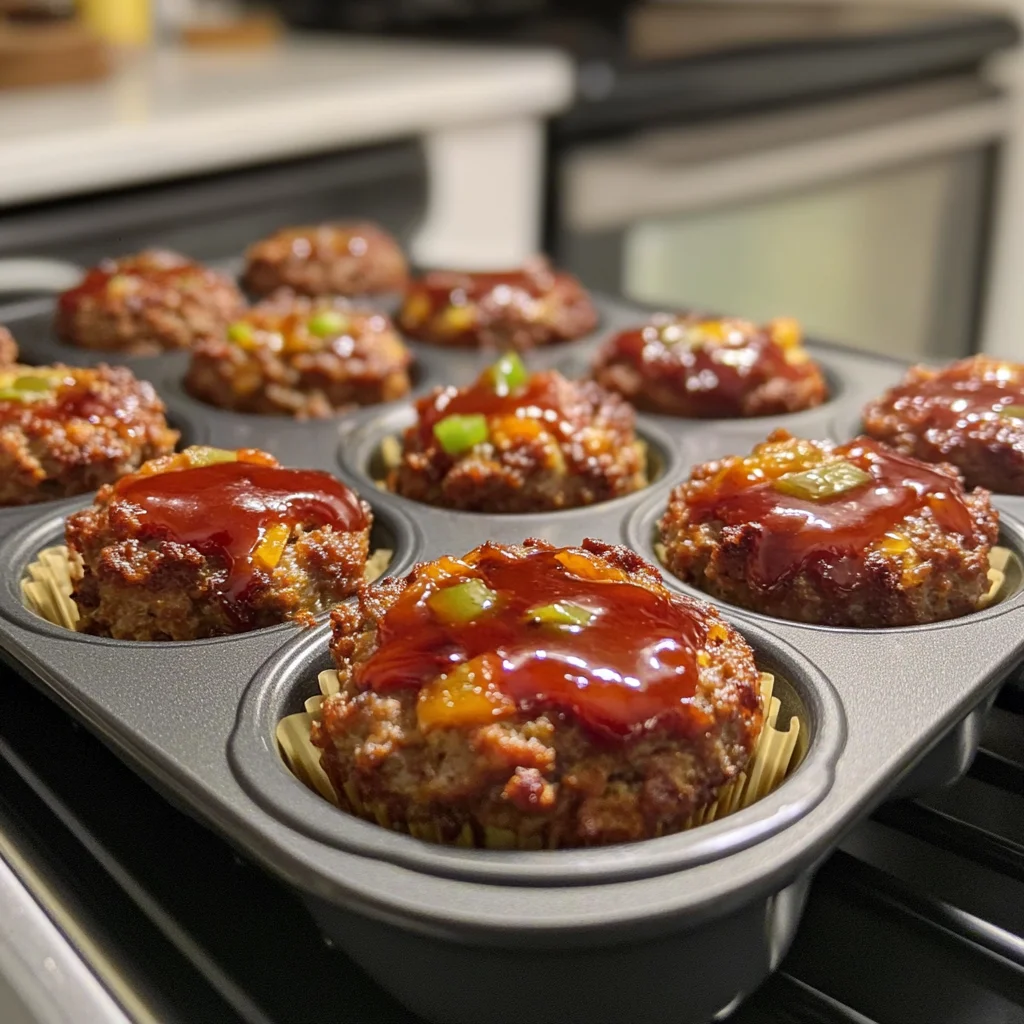
Step 4: Make the Glaze
In a small bowl, mix together the ketchup, brown sugar, and Dijon mustard until smooth. This glaze adds a sweet and tangy finish to your Mini Meatloaf Muffins. Spoon the glaze generously over the top of each muffin, ensuring they’re well-coated for maximum flavor!
Step 5: Bake the Muffins
Place the muffin tin in your preheated oven and bake for 25-30 minutes. Keep an eye on them! You’ll know they’re done when they reach an internal temperature of 160°F (71°C). A little tip: use a meat thermometer for accuracy!
Step 6: Cool and Serve
Once baked, let the muffins cool in the pan for a few minutes. This helps them set and makes them easier to remove. Serve them warm with your favorite side dishes, and watch your family dig in with delight!
Tips for Success
- Don’t over-mix the meat mixture; it keeps the muffins tender.
- Use a cookie scoop for even portions when filling the muffin cups.
- Experiment with different veggies to suit your family’s taste.
- Let the muffins cool slightly before serving to enhance flavor.
- Double the recipe and freeze extras for a quick meal later!
Equipment Needed
- Muffin tin: A standard 12-cup muffin tin works best, but you can use silicone molds for easy removal.
- Mixing bowl: A large bowl is essential for combining ingredients; a sturdy wooden spoon or spatula will do the trick.
- Meat thermometer: This ensures your muffins are cooked perfectly; a simple kitchen thermometer will suffice.
Variations
- Turkey or Chicken: Swap out the ground beef for ground turkey or chicken for a leaner option.
- Vegetarian: Use lentils or black beans as a base, adding in your favorite veggies and spices for flavor.
- Spicy Kick: Add diced jalapeños or a dash of hot sauce to the meat mixture for a spicy twist.
- Cheesy Delight: Mix in different types of cheese, like mozzarella or pepper jack, for a gooey surprise.
- Herb Infusion: Incorporate fresh herbs like parsley, thyme, or basil for an aromatic touch.
Serving Suggestions
- Classic sides: Pair your Mini Meatloaf Muffins with creamy mashed potatoes or buttery corn for a comforting meal.
- Fresh salad: A crisp garden salad adds a refreshing contrast to the savory muffins.
- Drinks: Serve with iced tea or a light red wine for a delightful dinner experience.
- Presentation: Garnish with fresh parsley for a pop of color and a touch of elegance.
FAQs about Mini Meatloaf Muffins
Can I make Mini Meatloaf Muffins ahead of time?
Absolutely! You can prepare the meat mixture a day in advance and store it in the fridge. Just fill the muffin cups and bake when you’re ready for dinner. This makes weeknight meals even easier!
How do I store leftovers?
Store any leftover Mini Meatloaf Muffins in an airtight container in the fridge for up to three days. You can also freeze them for up to three months. Just reheat in the oven or microwave when you’re ready to enjoy!
Can I customize the ingredients?
Definitely! Feel free to swap out the ground beef for turkey or chicken. You can also add different vegetables or spices to suit your family’s taste. The beauty of these muffins is their versatility!
What can I serve with Mini Meatloaf Muffins?
These muffins pair wonderfully with mashed potatoes, a fresh salad, or steamed veggies. You can also serve them with a side of your favorite dipping sauce for an extra flavor boost!
How do I know when they are done baking?
Check for doneness by inserting a meat thermometer into the center of a muffin. They should reach an internal temperature of 160°F (71°C). If you don’t have a thermometer, they should be firm to the touch and no longer pink inside.
Final Thoughts
Cooking should be a joyful experience, and my Mini Meatloaf Muffins bring just that to the dinner table. They’re not only quick and easy to make, but they also create a warm, inviting atmosphere for family gatherings. Each bite is a delightful blend of flavors that can be customized to suit everyone’s tastes. Plus, the smiles on my family’s faces when they dig in make all the effort worthwhile. So, whether you’re a busy mom or a professional on the go, these muffins are your ticket to a stress-free, delicious dinner. Enjoy every moment!
Print
Mini Meatloaf Muffins: Your Quick Dinner Solution!
- Total Time: 45 minutes
- Yield: 12 muffins 1x
- Diet: Gluten Free
Description
Mini Meatloaf Muffins are a quick and delicious dinner solution, perfect for busy weeknights.
Ingredients
- 1 pound ground beef (80/20 blend)
- 1/2 cup onion, finely chopped
- 1/2 cup green bell pepper, finely chopped
- 1/2 cup breadcrumbs
- 1/2 cup milk
- 1 egg
- 1 cup shredded cheddar cheese
- 1 teaspoon Worcestershire sauce
- 1 teaspoon salt
- 1/2 teaspoon black pepper
- 1/2 cup ketchup (for glaze)
- 1/4 cup brown sugar (for glaze)
- 1 teaspoon Dijon mustard (for glaze)
Instructions
- Preheat your oven to 350°F (175°C). Lightly grease a 12-cup muffin tin or line with muffin liners for easy removal.
- In a large bowl, combine the ground beef, chopped onion, chopped green bell pepper, breadcrumbs, milk, egg, shredded cheddar cheese, Worcestershire sauce, salt, and black pepper. Mix until just combined.
- Divide the meatloaf mixture evenly among the muffin cups, pressing gently to fill each cup.
- In a small bowl, mix together the ketchup, brown sugar, and Dijon mustard until smooth. Spoon the glaze over the top of each meatloaf muffin.
- Bake in the preheated oven for 25-30 minutes, or until the meatloaf is cooked through and reaches an internal temperature of 160°F (71°C).
- Let the meatloaf muffins cool slightly in the pan before removing. Serve warm with your favorite side dishes.
Notes
- Do not over-mix the meatloaf mixture to keep it tender.
- These muffins can be frozen for later use.
- Feel free to customize the vegetables in the meatloaf mixture.
- Prep Time: 15 minutes
- Cook Time: 30 minutes
- Category: Dinner
- Method: Baking
- Cuisine: American
Nutrition
- Serving Size: 1 muffin
- Calories: 200
- Sugar: 5g
- Sodium: 400mg
- Fat: 10g
- Saturated Fat: 4g
- Unsaturated Fat: 5g
- Trans Fat: 0g
- Carbohydrates: 15g
- Fiber: 1g
- Protein: 15g
- Cholesterol: 50mg