
Introduction to Coconut Dome with Chocolate
Hey there, fellow food lovers! If you’re like me—a busy mom or a professional juggling a million things—you know how important it is to have delicious yet simple recipes in your back pocket. That’s where this Coconut Dome with Chocolate comes in! Imagine sinking your teeth into a rich, chocolate-covered coconut treat that tastes like a slice of paradise. Plus, it’s super easy to whip up, making it perfect for those hectic days when you want to impress your loved ones without spending hours in the kitchen. Let’s dive into this delightful sweet treat together!
Why You’ll Love This Coconut Dome with Chocolate
What’s not to love about these Coconut Domes coated in chocolate? They’re incredibly easy to make, even on your busiest days. Just a little mixing, chilling, and dipping, and voilà—you’ve got a decadent dessert that’ll wow your family! The blend of fluffy coconut and rich chocolate captures the essence of a tropical getaway, making every bite feel like a celebration. Trust me; they’ll become a regular request in your home!
Ingredients for Coconut Dome with Chocolate

Let’s talk about the delightful ingredients that make up our Coconut Dome with Chocolate. Each one plays a critical role in creating that beautiful balance of flavors and textures. You’ll find these ingredients at your local grocery store or online—easy peasy!
- Desiccated coconut: This finely shredded coconut provides that tropical essence and chewy texture we’re after. It’s the star of the show!
- Coconut milk: This adds creaminess and a subtle sweetness, enhancing the coconut flavor. You can swap it for almond milk if you wish!
- Heavy cream: Bringing that luscious texture, heavy cream makes our sweet treat rich and indulgent. For lighter options, you can use coconut cream.
- Sugar: Just a touch of sweetness to balance the flavors. Feel free to use coconut sugar or a sugar substitute if you’re watching your intake.
- Vanilla extract: A splash of this aromatic goodness elevates the flavor profile of your domes.
- Dark chocolate: This is essential for creating that decadent coating. Choose quality dark chocolate for a richer taste. You can also experiment with milk chocolate if preferred.
- Butter: It helps create a smooth chocolate coating. You can substitute with a vegan butter if you want to make this treat dairy-free.
- Sea salt: Just a pinch to enhance the chocolate flavor. It’s like a little love note to your taste buds!
- Water: Used to help melt the chocolate smoothly. It’s a simple addition that makes a big difference.
- Almond flour: This adds an extra layer of flavor and helps bind the coconut mixture. You could replace it with oat flour or even optional graham cracker crumbs for a twist.
- Coconut oil: Gives a nice gloss to the finished product, making it shiny and attractive. Plus, it amps up that coconut flavor!
For exact measurements, check out the details at the bottom of the article, where you can also find a handy printable version!
How to Make Coconut Dome with Chocolate
Let’s get to the fun part—making our Coconut Dome with Chocolate! I promise it’s simple and satisfying. Follow these straightforward steps, and soon you’ll have some delightful sweet treats to enjoy or share.
Prepare the Coconut Mixture
First, grab a medium mixing bowl and add the desiccated coconut along with the coconut milk. Stir until every bit of coconut is perfectly hydrated. It should feel a bit sticky and ready for flavor!
Next, add in the heavy cream, sugar, and a splash of vanilla extract. Whisk gently until the mixture is smooth and thoroughly combined. Feel free to channel your inner whisking champion during this step—it makes it so much more fun!
Now comes the tricky part: patting yourself on the back for a job well done! Transfer this yummy mixture to the fridge and let it chill for at least 30 minutes. It’ll feel like waiting for the perfect love story to unfold, but it’ll be worth it.
Make the Chocolate Coating
While the coconut mixture chills, let’s prepare the chocolate coating that will envelop our domes in pure bliss. Start by breaking the dark chocolate into small pieces and putting them in a heatproof bowl. If that’s not satisfying, I don’t know what is!
Then, heat a small saucepan over low heat and melt the butter. Once it’s melted, mix in a tablespoon of water until combined. Now pour this buttery goodness over the broken chocolate. Stir it gently until everything is melted and smooth. Patience is key here; keep stirring until there are no lumps. A smooth chocolate coating is a happy coating!
Don’t forget to add a pinch of sea salt to the melted chocolate! This little addition will make the flavor pop and take your domes to the next level.
Shape and Coat the Domes
Take your chilled coconut mixture out of the fridge, and it’s showtime! Add the almond flour and give it a good stir. This will help everything stick together beautifully.
Now, it’s time to get your hands a little messy! Shape the coconut mixture into small dome-like shapes, about the size of a golf ball. Embrace those creative vibes—each dome can have its own little character!
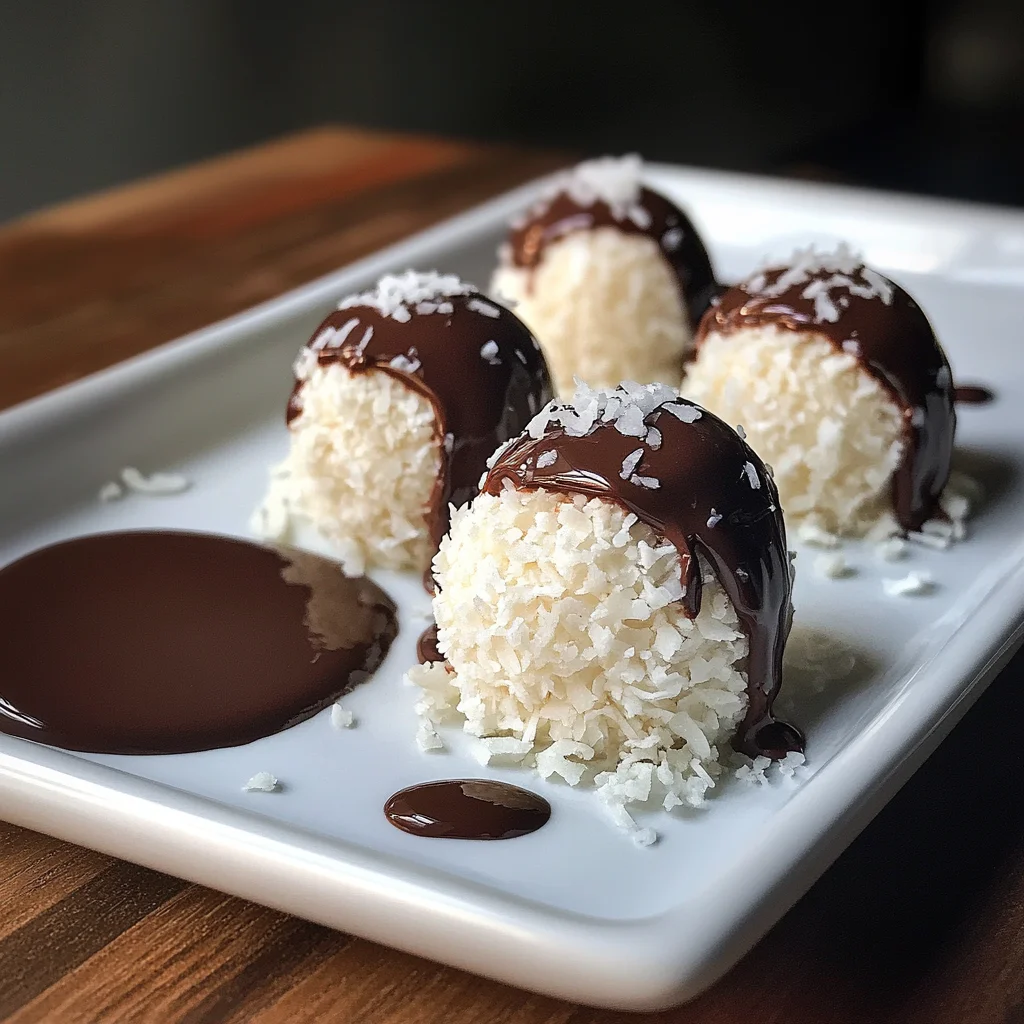
Next, dip each coconut dome into the melted chocolate. Make sure to coat it thoroughly. Let the excess chocolate drip off before placing it on a tray lined with parchment paper. This part really feels like a chocolaty art project!
Set and Serve
After all that dipping, leave the chocolate-covered domes to set at room temperature for about 10 minutes. Then pop them in the refrigerator to firm up for at least 30 minutes. This is the perfect time to envision the smiles of your family when they taste these treats!
Once set, serve immediately or store your delightful Coconut Dome with Chocolate in an airtight container. They’ll stay fresh for about a week, so you can sneak a sweet bite whenever you want!
Tips for Success
- Make sure the coconut mixture is well-chilled for easier shaping.
- Use high-quality dark chocolate for the best flavor.
- Don’t rush the melting process; a gentle heat avoids burning the chocolate.
- Experiment with different toppings, like chopped nuts or sprinkles.
- For a gourmet finish, drizzle extra melted chocolate over the finished domes.
Equipment Needed
- Medium mixing bowl—any size works, just make sure it’s big enough to mix!
- Heatproof bowl for chocolate—perfect for melting, but a ceramic dish can do the trick too.
- Small saucepan—use a microwave-safe bowl if you prefer a quicker method.
- Parchment paper for lining—wax paper is a suitable alternative!
- Whisk or fork for mixing—feel free to use a spatula instead.
Variations for Coconut Dome with Chocolate
- Nutty Delight: Add chopped nuts like pistachios or almonds to the coconut mixture for extra crunch and flavor.
- Fruit Fusion: Incorporate dried fruits such as cranberries, cherries, or pineapple bits for a fruity twist.
- Minty Fresh: Mix in a few drops of peppermint extract for a refreshing mint chocolate experience.
- Vegan Version: Use coconut cream instead of heavy cream, and swap in vegan butter and chocolate for a delicious plant-based option.
- Spicy Kick: Sprinkle in a touch of cayenne pepper or chili powder in the chocolate coating for a surprising heat that complements the sweetness.
Serving Suggestions for Coconut Dome with Chocolate
- Pair these coconut domes with a scoop of vanilla ice cream for a delightful contrast.
- Garnish with fresh mint leaves to add a pop of color and freshness.
- Serve alongside a steaming cup of coffee or a tropical fruit smoothie.
- For an impressive presentation, arrange them on a decorative platter.
- Dust with cocoa powder or shredded coconut for an extra touch of elegance.
FAQs about Coconut Dome with Chocolate
Can I use different types of chocolate for the coating?
Absolutely! While dark chocolate offers a rich experience, feel free to experiment with milk or white chocolate for a sweeter treat. Each type brings its unique flavor profile to the Coconut Dome.
How can I store the Coconut Dome with Chocolate?
These delightful treats can be stored in an airtight container at room temperature for a few days. For longer freshness, stow them in the refrigerator, where they can last up to a week!
Is this recipe suitable for people with nut allergies?
If you’re concerned about nut allergies, simply omit the almond flour and ensure the dark chocolate is nut-free. You can use oat flour as a substitute if desired. Your Coconut Dome will still be delicious!
What can I do with leftover chocolate coating?
Don’t let that delicious melted chocolate go to waste! You can drizzle it over fruits, pretzels, or even spoon it onto homemade popcorn for an indulgent treat. Get creative!
Can I make these Coconut Domes ahead of time?
Yes! These Coconut Dome with Chocolate treats can be made a few days in advance. Just ensure you keep them in an airtight container in the fridge until you’re ready to serve!
Final Thoughts
Creating these Coconut Dome with Chocolate treats is not just about making dessert; it’s about crafting joy and connection. Each dome is a bite of happiness, merging the dreamy tropical flavor of coconut with the luxurious embrace of chocolate. I’ve loved sharing these with family and friends, watching their faces light up with every bite. Whether as a special occasion treat or a delightful surprise during the week, these domes hold the power to brighten even the busiest of days. I hope they bring you as much happiness in your kitchen as they have in mine!
Print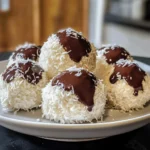
Coconut Dome with Chocolate
- Total Time: 70 minutes
- Yield: 12 domes 1x
- Diet: Vegetarian
Description
Coconut Dome with Chocolate is a delicious sweet treat that combines the tropical flavor of coconut with a rich chocolate coating.
Ingredients
- 1 cup desiccated coconut
- 1⁄2 cup coconut milk
- 1⁄2 cup heavy cream
- 1⁄4 cup sugar
- 1⁄2 teaspoon vanilla extract
- 200 grams dark chocolate
- 2 tablespoons butter
- 1⁄4 teaspoon sea salt
- 1 tablespoon water
- 1⁄2 cup almond flour
- 1⁄4 cup coconut oil
Instructions
- In a medium-sized mixing bowl, combine the desiccated coconut and coconut milk. Stir until the coconut is fully hydrated.
- Add the heavy cream, sugar, and vanilla extract. Whisk gently until smooth.
- Transfer the mixture into the refrigerator to chill for at least 30 minutes.
- Prepare the chocolate coating by breaking the dark chocolate into pieces and place in a heatproof bowl.
- Melt the butter in a small saucepan over low heat, then add the water and stir until combined.
- Pour the melted butter and water over the dark chocolate. Stir until completely melted and smooth.
- Add the sea salt to the melted chocolate and mix thoroughly.
- Remove the chilled coconut mixture and stir in the almond flour.
- Melt the coconut oil in a small saucepan, then pour into the coconut mixture and stir to combine.
- Shape the coconut mixture into small dome-like shapes.
- Dip each coconut dome into the melted chocolate until fully coated.
- Place the chocolate-coated domes on a tray lined with parchment paper.
- Allow to set at room temperature for 10 minutes, then refrigerate to firm up for at least 30 minutes.
- Once set, serve immediately or store in an airtight container for up to a week.
Notes
- Ensure the chocolate is fully melted for a smooth coating.
- These treats can be stored in the refrigerator for up to a week.
- For a more intense coconut flavor, consider adding a pinch of coconut extract.
- Prep Time: 30 minutes
- Cook Time: 10 minutes
- Category: Dessert
- Method: No-Bake
- Cuisine: International
Nutrition
- Serving Size: 1 dome
- Calories: 150
- Sugar: 5g
- Sodium: 50mg
- Fat: 10g
- Saturated Fat: 5g
- Unsaturated Fat: 3g
- Trans Fat: 0g
- Carbohydrates: 15g
- Fiber: 2g
- Protein: 2g
- Cholesterol: 10mg