
Introduction to DIY Salt Scrub Recipe
As a busy mom, I know how hard it is to carve out time for self-care. But let me tell you, a DIY salt scrub can be a game changer! This rejuvenating scrub not only revives tired skin but does it in just 15 minutes. By combining the wonders of natural ingredients, you can give your skin a loving boost. Imagine the soothing touch of coconut oil mingling with the exfoliating magic of fine salt. Whether you’re prepping for a special occasion or just need a moment of pampering, this simple recipe is your ticket to radiant skin.
Why You’ll Love This DIY Salt Scrub Recipe
This DIY salt scrub recipe is a lifesaver for busy women like us! It’s incredibly easy to whip up in just 15 minutes, making it perfect for a quick self-care session. With natural ingredients that nourish and revitalize your skin, it’s a guilt-free indulgence. Plus, the delightful scents from essential oils turn your shower into a mini-spa, helping you unwind after a long day. Trust me; you’ll look forward to this treat!
Ingredients for DIY Salt Scrub Recipe

Creating your own salt scrub is not only fulfilling, but it allows you to control what goes on your skin. Let’s explore the ingredients that will transform you into a DIY beauty expert!
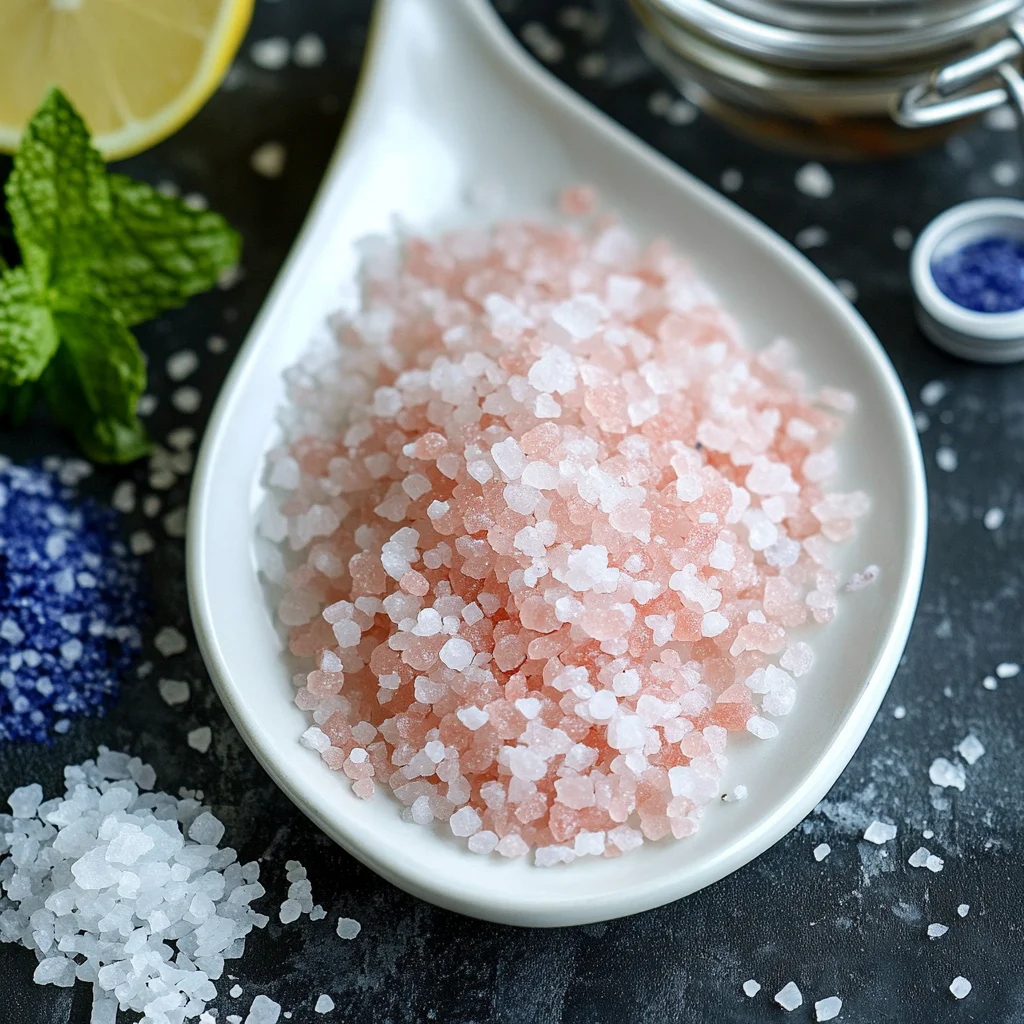
- Fine Grain Salt: This is the star of our show! Whether it’s Pink Himalayan or Dead Sea salt, these natural exfoliants gently buff away dead skin cells, revealing a smoother surface beneath.
- Fractionated Coconut Oil: A hydrating powerhouse, it nourishes your skin without feeling greasy. Its lightweight nature makes it perfect for a scrub, ensuring your skin feels soft and moisturized.
- Shea Butter: This creamy delight is packed with vitamins A and E. It helps lock in moisture while soothing any dry, irritated areas, making it great for all skin types.
- Olivem 1000: This fantastic emulsifier blends oil and water together, helping to create a smooth, spreadable texture for your scrub. It’s a must-have for achieving that silky consistency.
- Blue Spirulina Powder: Not just a pretty color! Spirulina is known for its antioxidant properties, helping to rejuvenate and protect your skin during exfoliation.
- Lemon Essential Oil: With a fresh and zesty aroma, lemon oil brightens your spirits while acting as a natural astringent. It may also assist in evening out skin tone.
- Lime Essential Oil: This juicy, uplifting scent is another mood booster! Lime oil helps to purify the skin and can minimize the appearance of pores.
- Spearmint Essential Oil: The refreshing menthol scent can invigorate your senses, turning your scrubbing routine into an enjoyable experience. Plus, it’s cleansing for the skin.
- Blue Cypress Essential Oil: For a grounding finish, blue cypress oil calms the mind while offering skin-soothing benefits. Its woodsy scent anchors your scrub in tranquility.
For precise quantities of each ingredient, you’ll find them listed below. Feel free to get creative; tweak the oils to match your preferences or swap out the oils based on your skin’s needs!
How to Make DIY Salt Scrub Recipe
Ready to get started on your DIY salt scrub? I promise it’s not just easy; it’s also quite fun! Let’s go through the steps together.
Step 1: Prepare Your Salt
First up, let’s talk salt! If you’d like a finer texture, pop your salt into a food processor. Just pulse it a couple of times. This optional step makes the scrub gentler on your skin. Now, a quick safety note – when handling these machines, be cautious. There might be a cloud of salt dust when you open it. You don’t want to be sneezing mid-scrub!
Step 2: Melt the Base
Next, we need to melt down our base. Take your shea butter and Olivem 1000 and put them in a heat-proof measuring cup. Set this cup in a warm water bath. Gently heat until everything turns liquid. Be careful while handling hot utensils. Trust me, burnt fingers don’t make for a relaxing spa experience!
Step 3: Combine Your Ingredients
Once everything is smooth and melted, it’s time to mix! Add the fractionated coconut oil, essential oils, and spirulina powder to your melted base. Stir it all together until it’s completely combined. You want each ingredient to shine through in this DIY salt scrub!
Step 4: Mix the Salt and Oil Base
Now, grab that large mixing bowl filled with fine salt. Pour your oil mixture over the salt. Take a whisk and mix, mix, mix! Thoroughly combining the two is key to a great texture. You don’t want dry salt clumps hanging out. Feel free to get in there with your hands if you want to ensure everything is blended perfectly!
Step 5: Store Your Scrub
It’s time to store your fabulous scrub! Find an airtight jar or storage container that you love. Carefully transfer the scrub into the container, making sure not to spill any. If you have a small funnel, that can help too! Label it with the date so you remember when you made your natural skincare gem, and keep it in a cool, dry place.
Tips for Success
- Use fine grain salt for a gentler scrub that won’t irritate your skin.
- Test essential oils on a small skin area to avoid any allergic reactions.
- Don’t rush the melting process; slow and steady ensures a smooth base.
- Make sure the container is airtight to keep your scrub fresh for longer.
- Adjust the scent by adding more drops of essential oil, if desired.
Equipment Needed
- Mixing bowl: Essential for combining all the ingredients.
- Whisk or spoon: For mixing, a whisk creates a fluffy texture, but a spoon works too!
- Heat-proof measuring cup: Perfect for melting shea butter without spills.
- Food processor (optional): For a finer salt, but you can use a mortar and pestle instead.
- Airtight jar: To store your finished scrub and keep it fresh.
Variations
The beauty of this DIY salt scrub recipe is its versatility! You can easily customize it to match your preferences or cater to specific skin types. Here are some fun variations to spark your creativity:
- For Dry Skin: Add a tablespoon of honey or almond oil for extra moisture and nourishment.
- For Sensitive Skin: Use sugar instead of salt for a gentler exfoliation, perfect for delicate skin.
- Seasonal Scents: Incorporate seasonal essential oils like cinnamon for fall or peppermint for winter to keep things festive!
- Citrus Bliss: Mix lemon and orange essential oils for a refreshing citrus scent that lifts your spirits.
- Herbal Infusion: Blend in dried lavender or chamomile for extra calming benefits and a lovely texture.
- Scrub with Color: Use different types of spirulina or food-safe colorants to make your scrub visually appealing.
- Detox Blend: Add activated charcoal for a detoxifying effect, great for fighting blemishes.
Feel free to play around with your ingredients! The joy of DIY comes from experimenting and finding what works best for you. Let your creativity shine!
Serving Suggestions
To enhance your DIY salt scrub experience, consider integrating these delightful skincare routines into your pampering sessions:
- Enjoy a calming face mask from avocado or yogurt after exfoliating.
- Indulge in a warm bath with rose petals and candles for a serene atmosphere.
- Follow up with a nourishing body lotion or oil to lock in moisture.
- Pair your scrub with homemade lip balm for a complete spa experience.
FAQs about DIY Salt Scrub Recipe
I’ve gathered a few common questions about this DIY salt scrub recipe that I think you’ll find helpful. Let’s clear up any confusion you may have!
Can I substitute the salt for sugar?
Absolutely! If you have sensitive skin or want a gentler scrub, sugar is a great alternative. It exfoliates without being too harsh, making it perfect for delicate skin types.
How should I store my salt scrub?
Your scrub loves a cool, dry place! Keep it in an airtight jar to maintain freshness. Remember to avoid moist areas to ensure it stays effective for as long as possible.
What if I’m allergic to one of the essential oils?
Great question! Always do a patch test with essential oils before using them in your scrub. If you find something that doesn’t agree with your skin, feel free to swap it out for a different scent you enjoy!
How long will the scrub last?
This DIY salt scrub generally lasts up to six months when stored properly. To enjoy the best benefits, use it within that time frame, keeping an eye on any changes in color or scent.
Could I make this scrub with different oils?
Of course! Get creative with your oils. Olive oil, almond oil, or avocado oil can be wonderful substitutes that offer their own unique benefits while still providing that nourishing touch for your skin.
Final Thoughts
As I wrap up this journey into DIY salt scrubs, I can’t help but feel a sense of joy. Taking time for self-care is so important, especially for us busy women. This DIY salt scrub isn’t just about exfoliating your skin; it’s about reclaiming those precious moments of pampering that we often let slip away.
When you use natural ingredients, you’re not just treating your skin; you’re also nurturing your spirit. Imagine how wonderful it feels to know that you’ve created something wholesome and effective just for you. So go ahead—indulge and enjoy the radiant results!
Print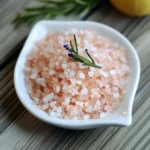
DIY Salt Scrub Recipe
- Total Time: 15 minutes
- Yield: 1 cup 1x
- Diet: Vegan
Description
A rejuvenating DIY salt scrub recipe that naturally revitalizes your skin.
Ingredients
- 1/2 cup / 180 g / 6.3 oz fine grain salt (e.g. Pink Himalayan, Pacific, Dead Sea salt or Epsom salt)
- 4 tbsp / 50 g / 1.7 oz fractionated coconut oil
- 2 tbsp / 30 g / 1 oz shea butter
- 3 tbsp / 15 g / 0.5 oz Olivem 1000
- 1/2 tsp blue spirulina powder
- 24 drops lemon essential oil (steam distilled)
- 15 drops lime essential oil (steam distilled)
- 10 drops spearmint essential oil
- 10 drops blue cypress essential oil
Instructions
- Optionally, place the salt in a food processor or blender and pulse a couple of times to achieve extra fine salt, which is gentler on the skin. Caution: beware of the dust cloud when opening the food processor.
- Put the shea butter and Olivem 1000 in a heat-proof measuring cup and melt in a warm water bath until liquid. Protect your hands when handling hot tools.
- Add the fractionated coconut oil, essential oils and spirulina powder. Mix until well-combined.
- Fill the fine salt into a large mixing bowl. Pour the oil base over the salt and whisk until well combined.
- Transfer the salt scrub into an airtight jar or storage container.
Notes
- Store the scrub in a cool, dry place for best results.
- Test a small amount on your skin to ensure no allergic reactions.
- Use within 6 months for optimal freshness.
- Prep Time: 15 minutes
- Cook Time: 0 minutes
- Category: Beauty
- Method: Mixing
- Cuisine: N/A
Nutrition
- Serving Size: 1 tablespoon
- Calories: 50
- Sugar: 0g
- Sodium: 10mg
- Fat: 5g
- Saturated Fat: 4g
- Unsaturated Fat: 1g
- Trans Fat: 0g
- Carbohydrates: 1g
- Fiber: 0g
- Protein: 0g
- Cholesterol: 0mg