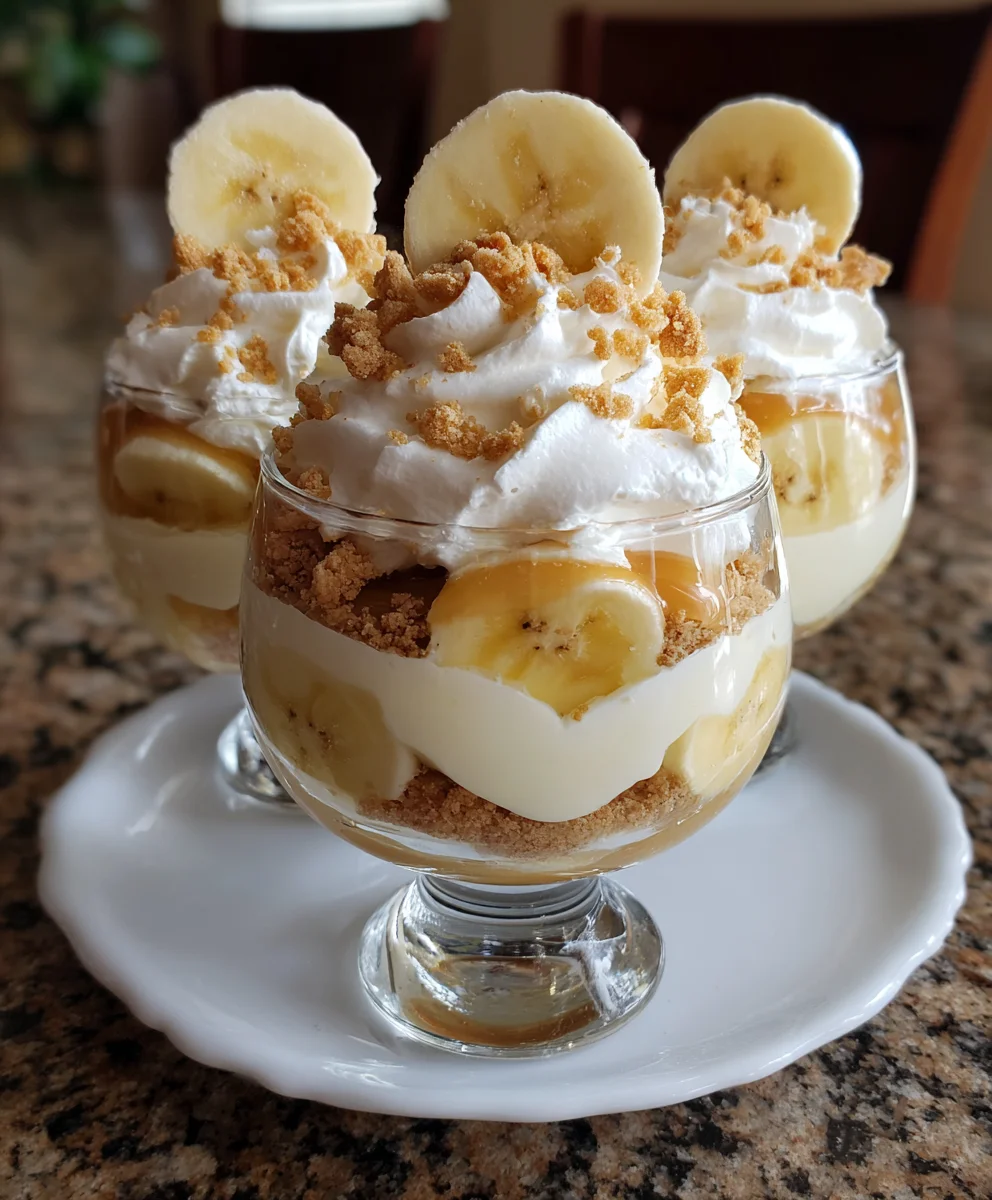
Introduction to Banana Pudding Cups
Hi there, fellow dessert lovers! If you’re like me, you know that life can get hectic, especially for busy moms and professionals. When the sweet tooth calls, we often need a quick and delightful response. That’s where these Banana Pudding Cups come to the rescue! They’re simply the perfect combination of creamy goodness layered with whipped topping and crunchy vanilla wafers. Whether you’re looking to impress loved ones at a gathering or seeking a quick solution for a busy day, these cups promise to bring smiles and satisfaction all around.
Why You’ll Love This Banana Pudding Cups
These Banana Pudding Cups are a dream come true for anyone craving something sweet without spending hours in the kitchen. They’re quick to whip up and require no baking—just layer and chill! The creamy texture paired with the crunchy vanilla wafers creates a delightful contrast that’s simply irresistible. Plus, they’re perfect for entertaining or a cozy family dessert after a long day. What’s not to love?
Ingredients for Banana Pudding Cups
Let’s gather everything you need to create these delightful Banana Pudding Cups! Here’s what you’ll be working with:
- Instant vanilla pudding mix: This is the key to a creamy pudding layer. You can opt for banana cream pudding if you’re feeling adventurous and want to boost that banana flavor!
- Cold whole milk: Whole milk gives that rich texture. If you’re looking for a lighter option, 2% milk works just fine.
- Pure vanilla extract: It’s optional, but a splash of vanilla elevates the flavor profile beautifully!
- Cream cheese: Softened cream cheese adds a delightful richness to the creamy layer. Make sure it’s at room temperature for easy mixing.
- Sweetened condensed milk: This ingredient sweetens and thickens the creamy layer while adding depth to the overall flavor.
- Whipped topping: A light, airy texture is what you want here. Use your favorite brand or make your own if you’re up for it!
- Ripe bananas: Choose bananas with a few light brown speckles; they’re sweet but still firm enough to hold their shape.
- Vanilla wafers: Nothing beats the classic crunch of vanilla wafers, specifically Nilla Wafers, for this treat!
- Garnishes: I love topping mine with extra whipped cream, crushed vanilla wafers, and freshly sliced bananas right before serving to avoid browning. A drizzle of caramel adds a lovely touch of indulgence!
You can find the specific quantities for each ingredient at the bottom of the article, and feel free to print it out for your kitchen adventures!
How to Make Banana Pudding Cups
Now that you’ve got all your ingredients ready, let’s dive into the fun part! Making these Banana Pudding Cups is just a matter of following a few simple steps. Trust me, it’s as easy as pie—well, maybe easier! Let’s get started!
Prepare the Pudding Base
First, let’s get that pudding base going! In a large mixing bowl, whisk together the instant pudding mix and cold milk. You’ll want to beat it for about 2–3 minutes until it thickens up a bit. It should feel like a silky dream! If you decide to add vanilla extract, go for it right here. Once it’s mixed, pop it into the fridge for about 5 minutes to chill while we tackle the creamy layer.
Make the Creamy Cheesecake Layer
Now onto that luscious creamy layer! In a separate large bowl, beat your softened cream cheese using an electric mixer until it’s all nice and smooth without any lumps. Then, pour in the sweetened condensed milk. Mix it until well combined and creamy. Next, fold in half of your whipped topping gently; this lightens the mixture and keeps it fluffy. The creamy layer will add a delightful richness to your Banana Pudding Cups!
Slice the Bananas
Time for some banana magic! Peel and slice your bananas into ¼-inch thick rounds. If you want to keep them from browning too quickly, a quick toss in lemon juice works wonders. Just don’t go overboard; no one wants a tangy banana! The perfectly sliced bananas will sit beautifully in your layers.
Layer the Banana Pudding Cups
This is where the fun really begins! Grab your clear plastic cups, mason jars, or small trifle bowls—whatever you’ve got on hand. Start with a bottom layer of vanilla wafers. You can keep them whole or crush them up a bit for extra texture. Next, add a layer of banana slices over those wafers, followed by a layer of your creamy cheesecake mixture. Repeat these layers until the cup is filled, finishing off with a dollop of whipped topping or a spoonful of pudding. It’ll look irresistibly tempting!
Garnish and Chill
Almost there! Top those beautiful Banana Pudding Cups with extra whipped cream, crushed vanilla wafers, and fresh banana slices right before serving. A drizzle of caramel can really take it over the top if you’re feeling indulgent. Now, chill your cups in the fridge for at least 2–3 hours, or overnight if you have the patience. This allows all the flavors to meld beautifully, creating a dessert that’s pure joy!
Tips for Success
- Use ripe bananas for the best flavor and texture; look for those with light brown speckles.
- Chill your cups overnight for optimal flavor fusion; patience pays off!
- For a creamier pudding, consider using whole milk instead of 2%.
- Feel free to experiment with flavored pudding mixes for unique variations!
- Don’t forget to add your banana slices just before serving to keep them fresh and vibrant.
Equipment Needed
- Mixing bowls: Any large bowl will do, but a stainless steel bowl keeps things cooler.
- Electric mixer: A hand mixer works well, but a stand mixer can save you time.
- Measuring cups and spoons: Essential for accuracy in your delicious layers.
- Spoons for layering: Use a big spoon or a piping bag for neat layers.
- Clear cups or jars: You can use plastic cups, mason jars, or even pretty dessert dishes!
Variations
- Chocolate Banana Pudding Cups: Swap out vanilla pudding for chocolate pudding to create a rich, chocolatey delight!
- Healthy Banana Pudding Cups: Use Greek yogurt instead of cream cheese for a lighter, protein-packed version while still keeping the creaminess alive.
- Nutty Banana Pudding Cups: Add a layer of crushed nuts like pecans or almonds for an added crunch and nutty flavor.
- Dairy-Free Option: Substitute almond milk or coconut milk and use dairy-free cream cheese for a delicious, dairy-free treat!
- Banana Bread Pudding Cups: Incorporate crumbled banana bread instead of vanilla wafers for a unique twist on texture and flavor.
Serving Suggestions for Banana Pudding Cups
- Pair your delicious Banana Pudding Cups with a light, fruity salad to balance the sweetness.
- A scoop of vanilla ice cream on the side adds a delightful creaminess!
- Serve with iced tea or lemonade for a refreshing drink option.
- For presentation, use colorful dessert plates to make each cup pop!
- Consider placing a mint leaf on top for a touch of color and freshness.
FAQs about Banana Pudding Cups
Got questions about making these delightful Banana Pudding Cups? You’re not alone! Here are some common inquiries I’ve come across as a passionate home cook, along with helpful answers to guide you through your pudding adventure.
Can I make Banana Pudding Cups ahead of time?
Absolutely! These cups are perfect for making ahead. Just prepare them and chill in the fridge for a few hours or overnight. The flavors only get better with time!
How can I store leftover Banana Pudding Cups?
To store any leftovers, cover them tightly with plastic wrap or a lid and refrigerate. They should be good for about 2–3 days, though they’re best enjoyed fresh.
What can I use instead of whipped topping?
If you prefer a more homemade touch, whipping your own cream is a great alternative! You’ll give your cups a delightful, fluffy texture without the preservatives.
Can I freeze Banana Pudding Cups?
While you can freeze the pudding itself, it’s best to hold off on freezing the assembled cups. The banana slices may not retain their freshness, and the texture could change. Just keep it chilled instead!
What’s the best way to prevent bananas from browning?
To keep those bananas looking vibrant, toss them lightly in lemon juice before layering. This little trick works wonders at preventing browning without affecting the taste.
Final Thoughts on Banana Pudding Cups
Creating these Banana Pudding Cups is about more than just dessert; it’s about bringing joy to the table. Each layer promises a symphony of flavors and textures, bringing together creamy pudding, light whipped topping, and crunchy wafers with sweet bananas. They are a fun way to reconnect with family and friends over something delicious. You’ll love how easy they are to make, and the smiles they create are totally worth the effort. So, whether for a celebration or a simple treat, I hope these cups bring as much happiness to your home as they do to mine!
Print
Banana Pudding Cups
- Total Time: 2-3 hours (including chilling time)
- Yield: 4–6 servings 1x
- Diet: Vegetarian
Description
Delicious and creamy banana pudding cups layered with whipped topping and vanilla wafers, perfect for dessert lovers.
Ingredients
- For the Pudding Layer:
- 1 (5.1 oz) box instant vanilla pudding mix (or banana cream pudding for extra banana flavor)
- 3 cups cold whole milk (or 2% for lighter pudding)
- 1 teaspoon pure vanilla extract (optional, for flavor boost)
- For the Creamy Layer:
- 1 (8 oz) package cream cheese, softened
- 1 (14 oz) can sweetened condensed milk
- 1 (12 oz) container whipped topping (like Cool Whip), thawed
- For the Layers:
- 4–5 ripe bananas (yellow with light brown speckles, not overly mushy)
- 1 box vanilla wafers (about 11 oz; Nilla Wafers work best)
- For Garnish:
- Extra whipped cream or topping
- Crushed vanilla wafers
- Banana slices (fresh, added before serving to prevent browning)
- Caramel drizzle (optional, for extra indulgence)
Instructions
- Prepare the Pudding Base: In a large mixing bowl, whisk together the instant pudding mix and cold milk for about 2–3 minutes until it thickens slightly. Stir in vanilla extract if using. Place in the refrigerator to chill for at least 5 minutes while preparing the other components.
- Make the Creamy Cheesecake Layer: In a separate large bowl, beat the softened cream cheese with an electric mixer until smooth and lump-free. Add the sweetened condensed milk and mix until well combined. Gently fold in half of the whipped topping until light and fluffy.
- Slice the Bananas: Peel and slice the bananas into ¼-inch thick rounds. To prevent browning, you can lightly toss them in a little lemon juice, but be careful not to overdo it or the flavor will alter.
- Layer the Banana Pudding Cups: You can use clear plastic cups, mason jars, or small trifle bowls. Bottom Layer: Place a few vanilla wafers at the bottom of each cup. You can leave them whole or lightly crush them. Banana Layer: Add a layer of banana slices on top of the wafers. Creamy Layer: Spoon or pipe in a layer of the cream cheese mixture. Pudding Layer: Add a layer of vanilla pudding. Repeat the layers until the cup is filled, finishing with whipped topping or pudding on top.
- Garnish and Chill: Top with extra whipped cream, crushed wafers, banana slices, or a drizzle of caramel. Refrigerate for at least 2–3 hours (or overnight for best results) before serving.
Notes
- For a lighter pudding, use 2% milk instead of whole milk.
- To enhance the banana flavor, use banana cream pudding mix.
- Make sure to refrigerate for enough time to allow flavors to meld.
- Serve immediately after garnishing to prevent bananas from browning.
- Prep Time: 20 minutes
- Cook Time: 0 minutes
- Category: Dessert
- Method: No-bake
- Cuisine: American
Nutrition
- Serving Size: 1 cup
- Calories: 300
- Sugar: 20g
- Sodium: 150mg
- Fat: 10g
- Saturated Fat: 5g
- Unsaturated Fat: 2g
- Trans Fat: 0g
- Carbohydrates: 45g
- Fiber: 1g
- Protein: 4g
- Cholesterol: 30mg