
Introduction to Boston Cream Pie Cupcakes
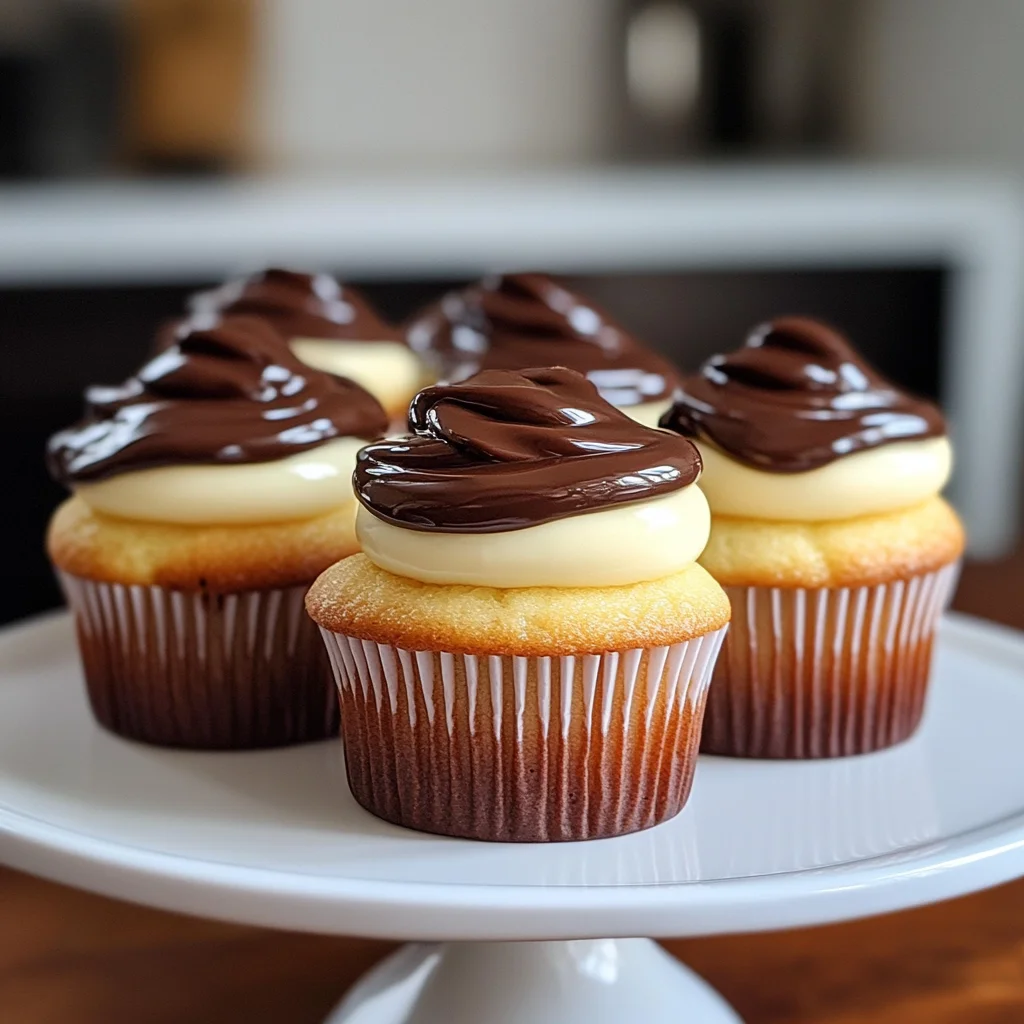
Have you ever craved something sweet but felt too busy to whip up an elaborate dessert? Well, let me introduce you to the delightful world of Boston Cream Pie Cupcakes! These little gems are the perfect solution for those hectic days when you want to impress your loved ones without spending hours in the kitchen. Just imagine fluffy vanilla cupcakes filled with rich pastry cream and topped with decadent chocolate ganache. What’s not to love? These cupcakes are a sweet escape that bring joy to any occasion—whether you’re celebrating a birthday or simply indulging yourself after a long day.
Why You’ll Love This Boston Cream Pie Cupcakes
These Boston Cream Pie Cupcakes are a dream come true for busy moms and professionals like us. Not only are they quick and easy to make, but their layered flavors bring a touch of elegance to dessert time. You can whip them up in under an hour and still impress family or friends. Plus, who can resist the tantalizing combination of vanilla, creamy pastry, and chocolate? They’re truly irresistible!
Ingredients for Boston Cream Pie Cupcakes

To create these delightful Boston Cream Pie Cupcakes, you’ll need a handful of common ingredients that blend beautifully together. Here’s what you should gather:
- All-purpose flour: This forms the base of our cupcakes, contributing to their light texture. You can also substitute half with whole wheat flour for a nuttier flavor.
- Baking powder: The rising agent that gives these cupcakes their fluffy structure. Be sure it’s fresh for the best results!
- Salt: A pinch enhances all the flavors, balancing the sweetness perfectly.
- Unsalted butter: Provides richness and moisture. If you’re dairy-free, coconut oil works well too.
- Granulated sugar: Sweetness is key! You might experiment with brown sugar for a deeper flavor if you prefer.
- Eggs: They bind the ingredients! You can substitute flax eggs for a vegan version.
- Vanilla extract: A must for flavor! Use pure extract for the best taste, but imitation works in a pinch.
- Whole milk: Adds moisture. You can use almond milk or oat milk for a non-dairy option.
- For the Pastry Cream Filling: Whole milk, sugar, egg yolks, cornstarch, and a hint of vanilla come together for a silky smooth center.
- For the Chocolate Ganache: Heavy cream and semi-sweet chocolate; the combination creates a glossy, rich topping. If you’re feeling adventurous, try using dark chocolate for a more intense flavor.
Exact measurements for all these ingredients can be found at the end of the article, ready for you to print and take into your kitchen!
How to Make Boston Cream Pie Cupcakes
Step 1: Preheat the Oven and Prepare the Muffin Tin
Let’s kick things off by preheating your oven to 350°F (175°C). This gives the oven time to reach the right temperature while you prepare your batter. Line a 12-cup muffin tin with paper liners. Trust me, it makes cleanup a breeze! You’ll thank yourself when you’re done.
Step 2: Whisk Dry Ingredients Together
In a medium bowl, whisk together the all-purpose flour, baking powder, and salt. This may seem simple, but this step is crucial! Properly mixing the dry ingredients ensures an even texture, allowing the cupcakes to rise perfectly. After all, we want these Boston Cream Pie Cupcakes to be fluffy delights!
Step 3: Cream Butter and Sugar
In a large mixing bowl, use an electric mixer to beat the softened butter and granulated sugar together. You want it light and fluffy—about three minutes should do the trick. This creaming process is vital as it incorporates air into the cupcakes. More air means they’ll rise nicely when baking, so don’t skimp on this step!
Step 4: Combine Wet and Dry Ingredients
Now it’s time to bring it all together! Add the eggs one at a time, mixing well after each addition. Then, stir in the vanilla extract. Gradually mix in the dry ingredients in three parts, alternating with the whole milk. Start and end with the flour mixture. Be careful not to overmix. A few lumps are perfectly fine! This step keeps your cupcakes tender and delightful.
Step 5: Bake the Cupcakes
Divide the batter evenly among your lined muffin cups. Bake them for 18–20 minutes. The cupcakes are done when a toothpick inserted in the center comes out clean. After baking, let them cool completely in the pan for about 10 minutes. Then transfer them to a wire rack. Cooling is essential to ensure the pastry cream doesn’t melt.
Step 6: Make the Pastry Cream Filling
Heat 1 cup of whole milk in a small saucepan until it’s steaming but not boiling. Meanwhile, whisk together sugar, egg yolks, cornstarch, flour, and a pinch of salt in a bowl until smooth. Now, slowly pour the hot milk into the egg mixture while whisking. Return everything back to the saucepan and cook over medium heat. Keep whisking until it thickens and bubbles—about 2–3 minutes. Remove from heat, and stir in the vanilla extract. Let cool and chill it in the fridge until you need it.
Step 7: Fill the Cupcakes
Once your cooled cupcakes are ready, use a small knife or a cupcake corer to remove the centers. Don’t cut all the way through—just dig deep enough for a generous helping of filling. Now, spoon or pipe that delightful pastry cream into those holes, filling them right to the top. It’s going to be heavenly!
Step 8: Prepare the Chocolate Ganache
For your ganache, start by heating the heavy cream in a small saucepan until it begins to simmer. Pour it over the chopped semisweet chocolate and butter in a bowl. Let it sit for a minute, allowing the chocolate to melt. Then, stir until it’s smooth and glossy. Achieving the right consistency is key, so don’t rush this step!
Step 9: Finish and Set the Cupcakes
Finally, gently spoon or dip the tops of each filled cupcake into the chocolate ganache. Allow them to set for a few minutes at room temperature. If you’re impatient like me, you can pop them in the fridge for a quick chill. The ganache should drizzle beautifully over the cream-filled cupcakes, so take your time to get it just right!
Tips for Success
- Check your baking powder for freshness; old leavening agents can lead to dense cupcakes.
- When making pastry cream, stir constantly to prevent lumps from forming.
- Let the cupcakes cool completely before filling them to avoid melting the pastry cream.
- For a more decadent ganache, let it cool slightly longer before topping the cupcakes.
- Have fun with piping the cream! Don’t worry about being perfect—just enjoy the process.
Equipment Needed
- Muffin tin: Essential for baking the cupcakes. A silicone mold can be a fun alternative!
- Mixing bowls: You’ll need a medium and a large one. Glass or stainless steel works well.
- Electric mixer: Perfect for creaming the butter and sugar. A whisk can suffice if you’re up for a workout!
- Cupcake corer or knife: For removing that center, a simple paring knife works just fine.
- Spatula: Handy for mixing and distributing the batter and filling.
Variations on Boston Cream Pie Cupcakes
- Chocolate Cupcake Base: Swap the vanilla cupcakes for chocolate to create a rich, indulgent twist that complements the pastry cream.
- Fruit Infusion: Add a layer of fresh raspberries or strawberries on top of the pastry cream for a fruity contrast that brightens each bite.
- Almond Extract: Replace the vanilla extract with almond extract in the batter and filling for a nutty, aromatic flavor.
- Gluten-Free Option: Substitute all-purpose flour with a gluten-free blend for a tasty treat everyone can enjoy, without compromising flavor.
- Vegan Cupcakes: Use flax eggs, almond milk, and dairy-free chocolate for a vegan-friendly version that doesn’t skimp on taste!
- Spiced Variation: Add a sprinkle of cinnamon or nutmeg to the cupcake batter for a warm, inviting touch that makes these treats even cozier.
Serving Suggestions for Boston Cream Pie Cupcakes
- Pair these delightful cupcakes with a steaming cup of coffee or a glass of cold milk to enhance their flavors.
- Serve alongside fresh berries for a splash of color and a fresh contrast to the rich ganache.
- Dust with powdered sugar or cocoa powder for a charming presentation that’s sure to impress.
- Display on a tiered cake stand to elevate your dessert table for any gathering.
FAQs about Boston Cream Pie Cupcakes
Can I make the pastry cream ahead of time? Yes, you can! The pastry cream keeps well in the fridge for up to 2 days. Just be sure to cover it tightly to prevent a skin from forming.
What can I substitute if I don’t have semisweet chocolate? If semisweet chocolate isn’t available, you can use milk chocolate for a sweeter ganache or dark chocolate for a more intense flavor. Adjust the ratio of cream for the desired consistency!
How do I store leftover cupcakes? These cupcakes are best enjoyed fresh but can be stored in an airtight container in the fridge for up to 3 days. They’ll still taste great, although the ganache may lose some of its shine.
Can I freeze the Boston Cream Pie Cupcakes? Absolutely! You can freeze the cupcakes before filling and frosting them. Just wrap each in plastic wrap and store in a freezer-safe container. Thaw in the fridge when ready to enjoy!
What’s the best way to pipe the pastry cream into the cupcakes? Use a piping bag fitted with a round tip for a clean finish. If you don’t have one, a plastic sandwich bag with a corner snipped off works just as well!
Final Thoughts
Creating Boston Cream Pie Cupcakes is more than just baking; it’s about crafting moments of joy and indulgence. Whether for a family gathering or a quiet evening treat, these cupcakes bring smiles with every bite. The fluffy vanilla base, the silky pastry cream, and the velvety chocolate ganache come together in harmonious bliss. As a busy mom, I appreciate how these little cupcakes can transform ordinary days into celebrations. Remember, life’s too short for bland desserts—so let these cupcakes be a sweet reminder to enjoy the little things, one delicious bite at a time!
Print
Boston Cream Pie Cupcakes
- Total Time: 50 minutes
- Yield: 12 cupcakes 1x
- Diet: Vegetarian
Description
Delicious Boston Cream Pie Cupcakes made with vanilla cupcakes, rich pastry cream, and chocolate ganache.
Ingredients
- 1 ½ cups all-purpose flour
- 1 ½ teaspoons baking powder
- ¼ teaspoon salt
- ½ cup unsalted butter, softened
- ¾ cup granulated sugar
- 2 large eggs
- 1 ½ teaspoons vanilla extract
- ½ cup whole milk
- For the Pastry Cream Filling:
- 1 cup whole milk
- 3 tablespoons granulated sugar
- 2 egg yolks
- 1 tablespoon cornstarch
- 1 tablespoon all-purpose flour
- ½ teaspoon vanilla extract
- Pinch of salt
- For the Chocolate Ganache:
- ½ cup heavy cream
- 4 oz semisweet chocolate, finely chopped
- 1 tablespoon unsalted butter
Instructions
- Preheat oven to 350°F (175°C). Line a 12-cup muffin tin with paper liners.
- In a medium bowl, whisk together flour, baking powder, and salt.
- In a large bowl, beat butter and sugar until light and fluffy—about 3 minutes.
- Add eggs one at a time, then vanilla. Mix in the flour mixture in 3 parts, alternating with the milk, beginning and ending with flour. Don’t overmix.
- Divide batter evenly among the cupcake liners and bake for 18–20 minutes, or until a toothpick inserted comes out clean. Let cool completely.
- In a small saucepan, heat the milk for the pastry cream until steaming but not boiling.
- In a bowl, whisk together sugar, egg yolks, cornstarch, flour, and salt until smooth.
- Slowly pour the hot milk into the egg mixture while whisking, then return everything to the saucepan.
- Cook over medium heat, whisking constantly, until thickened and bubbling (about 2–3 minutes). Remove from heat, stir in vanilla, and let cool. Chill in the fridge until ready to use.
- Once cupcakes are cool, use a small knife or cupcake corer to remove the centers (don’t go all the way through).
- Spoon or pipe the chilled pastry cream into the holes, filling just to the top.
- Heat the cream for the ganache in a small saucepan until just simmering.
- Pour over the chopped chocolate and butter in a bowl. Let sit 1 minute, then stir until smooth and glossy.
- Spoon or dip the tops of each filled cupcake with ganache. Let it set for a few minutes at room temperature or chill briefly to speed it up.
- These cupcakes are best enjoyed slightly chilled or at room temperature. Store in the fridge for up to 3 days.
Notes
- Do not overmix the batter to keep the cupcakes light and fluffy.
- Make sure to chill the pastry cream thoroughly before filling the cupcakes.
- If you prefer a thicker ganache, allow it to set longer before serving.
- Prep Time: 30 minutes
- Cook Time: 20 minutes
- Category: Dessert
- Method: Baking
- Cuisine: American
Nutrition
- Serving Size: 1 cupcake
- Calories: 310
- Sugar: 22g
- Sodium: 150mg
- Fat: 18g
- Saturated Fat: 10g
- Unsaturated Fat: 4g
- Trans Fat: 0g
- Carbohydrates: 36g
- Fiber: 1g
- Protein: 4g
- Cholesterol: 80mg