
Introduction to Brownie Refrigerator Cake
Have you ever found yourself in a sweet predicament, craving something delicious but short on time? Enter the Brownie Refrigerator Cake! This delightful no-bake treat layers rich brownies with fluffy whipped cream, creating a dessert that’s not only easy but utterly impressive. Perfect for busy moms and professionals alike, it’s a quick solution for a hectic day or an elegant dish for guests. Plus, with just a few simple ingredients, you can whip up a masterpiece that will leave your loved ones asking for seconds. Trust me; you’ll adore every decadent bite!
Why You’ll Love This Brownie Refrigerator Cake
This Brownie Refrigerator Cake is a game changer for anyone juggling a busy lifestyle. It’s an absolute breeze to prepare, taking a mere 20 minutes of your time. The combination of rich, chocolatey brownies and light, airy whipped cream creates a taste sensation that will have everyone raving. Plus, it can be made ahead of time, perfect for those days when you need a sweet treat without the last-minute rush. Who wouldn’t love that?
Ingredients for Brownie Refrigerator Cake

Gathering the right ingredients is your first step toward brownie bliss! Here’s what you’ll need for this irresistible Brownie Refrigerator Cake:
- Brownie mix: Choose your favorite box mix; it serves as the foundation for this cake. You can go for classic chocolate or explore gourmet options, depending on your taste. Don’t forget the ingredients listed on the box!
- Heavy cream: This is the star of your whipped cream layer. Opt for heavy cream for that luscious, stable texture. If you’re watching calories, feel free to substitute with a lighter option, but the texture may vary.
- Powdered sugar: It adds sweetness and helps stabilize the whipped cream. If you want to cut down on sugar, you can use a sugar alternative, but I recommend sticking to the classic recipe for the best flavor.
- Vanilla extract: A splash of vanilla adds depth to your whipped cream. If you don’t have vanilla extract on hand, you could get creative with almond extract for a unique twist!
- Chocolate ganache: This luscious topping can make or break your dessert! You can use store-bought ganache to save time or make your own at home—either way, it’s essential for that chocolatey finish!
- Chocolate shavings or sprinkles: These are optional, but they add a lovely touch of elegance and crunch. Feel free to sprinkle nuts or use colored sprinkles to match the occasion.
For exact measurements, check the bottom of the article where you’ll find a handy printable version. Now you’re all set to create magic in your kitchen!
How to Make Brownie Refrigerator Cake
Ready to dive into the charm of a Brownie Refrigerator Cake? Let’s make some magic happen in your kitchen! Follow these easy, step-by-step instructions to create your own delightful no-bake dessert. Trust me; it’s not only fun but rewarding!
Step 1: Prepare the Brownies
First, time to make those brownies sing! Start by preheating your oven according to the instructions on the box. Then, mix that brownie mix with the necessary ingredients—typically eggs, oil, and water. I always give it a good stir to ensure no dry pockets remain. Pour the mixture into a greased 9×13 inch pan, smoothing the top for an even bake.
Now, here’s a pro tip: keep an eye on baking time! Overbaked brownies become dry and crumbly. Check a few minutes early by inserting a toothpick—great when it’s just a few moist crumbs sticking to it. Once they’re done, let them cool completely in the pan. This will make cutting them much easier later!
Step 2: Cut the Brownies
Once your brownies have cooled, it’s time for some careful cutting. Use a sharp knife to slice the brownies into even squares. Not only does this create uniform pieces for layering, but it also looks more appealing! You could even crumble half of the brownies for a fun texture to mix with whipped cream.
Layering works well with whole brownie squares, but crumbling gives a delightful variation. Choose whatever suits your fancy—you can’t really go wrong here!
Step 3: Make the Whipped Cream
Now that we have brownies ready, let’s whip up some luscious whipped cream! Grab a mixing bowl and pour in the heavy cream. Use an electric mixer on medium speed. Aim for soft peaks at first, and then gradually add the powdered sugar and vanilla extract.
Continue whipping until you reach stiff peaks—that’s when the cream holds its shape wonderfully. Don’t rush this step; gentle hands make happy cream! If it seems too runny, keep whipping until fluffy. It’s all about achieving that dreamy texture that everyone craves in a no-bake dessert.
Step 4: Assemble the Cake
Now comes the fun part: assembly! In your serving dish, start layering those brownie squares on the bottom. Add a generous dollop of whipped cream on top, then dribble chocolate ganache over it. It’s like building a chocolatey lasagna!
Repeat these layers until all your ingredients are used up, finishing with a creamy whipped layer on top. For a beautiful finish, don’t skimp on the ganache drizzle—it’s the crown jewel of your Brownie Refrigerator Cake!
Step 5: Refrigerate
Finally, it’s time for patience! Cover your assembled cake with plastic wrap and pop it in the fridge. Here’s where the magic happens: letting it chill for at least 4 hours helps the flavors meld beautifully. Overnight is even better for that perfect slice, allowing all elements to cooperate in delicious unity. Trust me, waiting will pay off when you cut into this cream-filled masterpiece!
Tips for Success
- Chill your mixing bowl and beaters before whipping cream for extra fluffiness.
- Use high-quality chocolate in your ganache for a richer flavor—don’t skimp here!
- If using store-bought ganache, warm it slightly to make it easier to drizzle.
- Feel free to get creative by mixing in some crushed cookies with the brownies!
- For a lighter dessert, try folding in some Greek yogurt into the whipped cream.
Equipment Needed
- Mixing bowl: A medium or large bowl works great. Glass bowls are perfect for whipping cream!
- Electric mixer: Essential for that fluffy whipped cream. If you don’t have one, a whisk works—but prepare for quite the arm workout!
- 9×13 inch baking pan: Necessary for baking your brownies. A disposable aluminum pan serves as a great alternative.
- Sharp knife: For cutting brownies. A bench scraper can also make this task easier!
- Plastic wrap: Keep your cake covered while it chills—store-bought lids can work too!
Variations of Brownie Refrigerator Cake
- Nutty Delight: Add chopped walnuts or pecans between the layers for an extra crunch. These nuts complement chocolate beautifully!
- Mint Chocolate: Incorporate mint extract into the whipped cream for a refreshing twist. Garnish with mint leaves for a pop of color!
- Fruit-Filled: Layer in some fresh raspberries or strawberries between the brownies and whipped cream. The tartness balances the sweetness perfectly!
- Gluten-Free Option: Use a gluten-free brownie mix to cater to gluten sensitivities. It tastes just as decadent!
- Vegan Version: Substitute the heavy cream with coconut cream and use a vegan brownie mix for a deliciously dairy-free dessert.
Serving Suggestions
- Pair with a dollop of whipped cream on top for that extra indulgence.
- Serve alongside fresh berries for a burst of color and flavor.
- Complement with a scoop of vanilla ice cream for the ultimate dessert experience.
- Pour a rich cup of coffee or a light herbal tea to balance the sweetness.
FAQs about Brownie Refrigerator Cake
Let’s tackle some common questions about this delightful Brownie Refrigerator Cake! If you’re feeling unsure, I’ve got you covered with the answers you need.
Can I make this cake ahead of time?
Absolutely! In fact, making it a day in advance often enhances the flavors, allowing them to meld beautifully. Just be sure to keep it well covered in the fridge!
How long does the Brownie Refrigerator Cake last?
Stored in an airtight container, this delicious treat can last up to 5 days in the refrigerator. Just keep in mind that the cream may lose its fluffiness over time.
Can I use a different type of brownie mix?
Definitely! Feel free to experiment with different flavors or types of brownie mixes. Don’t hesitate to try flavors like caramel-infused or mocha for a new twist!
Is it possible to freeze the Brownie Refrigerator Cake?
While freezing is possible, it’s best enjoyed fresh. If needed, you can freeze individual slices wrapped tightly in plastic wrap for a later indulgence!
What can I serve with this cake?
The possibilities are endless! I recommend pairing it with fresh fruit, extra whipped cream, or a scoop of ice cream for a truly indulgent experience.
Final Thoughts
Creating a Brownie Refrigerator Cake is more than just a baking project; it’s a heartfelt experience that brings joy to your kitchen. As you layer rich brownies with creamy whipped delight, you’re not just assembling a dessert—you’re crafting memories. Whether it’s a busy weeknight treat or a special occasion, the happiness that comes from each slice is undeniable. I love seeing my family gather around the table, savoring every delicious bite. Trust me, this cake is a loving hug in dessert form, guaranteed to brighten anyone’s day and leave you craving more!
Print
Brownie Refrigerator Cake: A Delightful No-Bake Treat!
- Total Time: 4 hours 50 minutes
- Yield: 12 servings 1x
- Diet: Vegetarian
Description
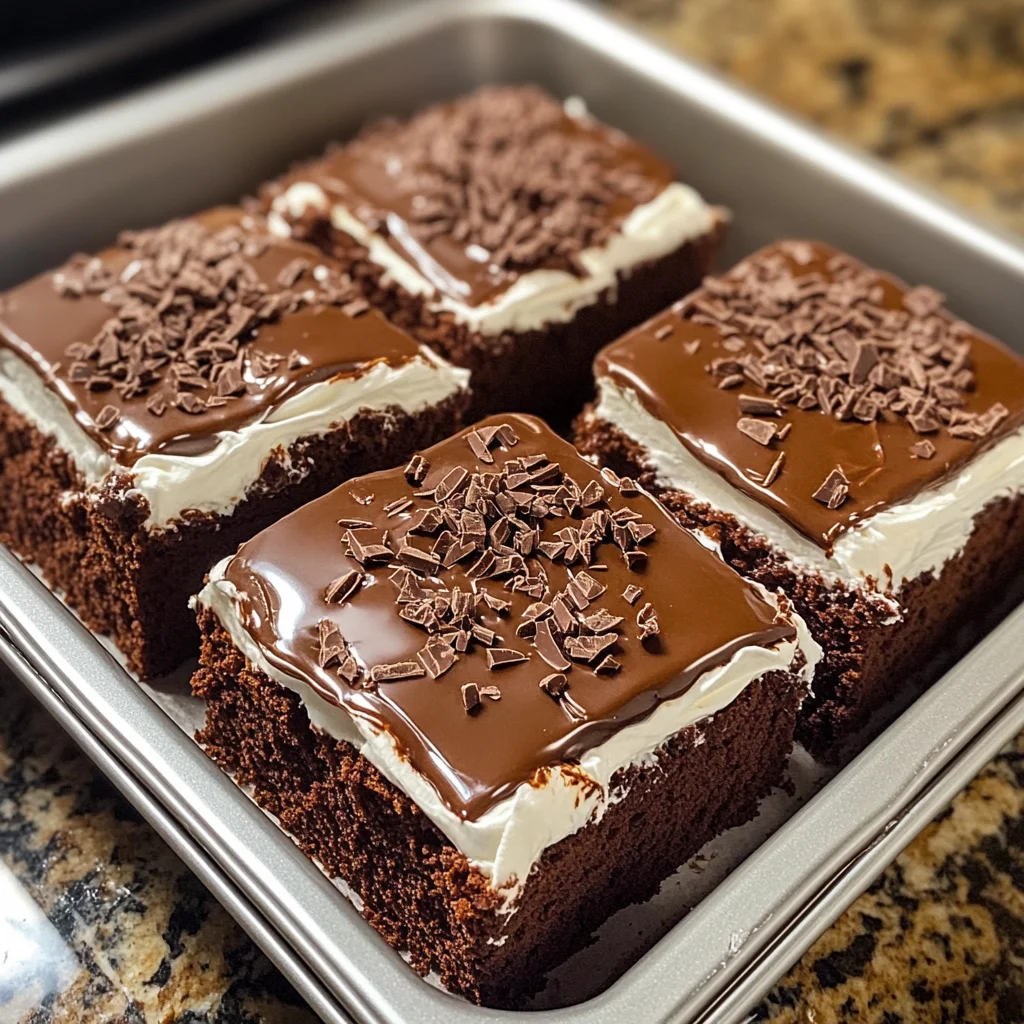
A delightful no-bake brownie refrigerator cake made with layers of rich brownies and fluffy whipped cream, topped with chocolate ganache.
Ingredients
- 1 box brownie mix (plus ingredients required on the box)
- 1 cup heavy cream
- 1/2 cup powdered sugar
- 1 teaspoon vanilla extract
- 1 cup chocolate ganache (store-bought or homemade)
- Chocolate shavings or sprinkles for garnish
Instructions
- Prepare the brownie mix according to the package instructions and bake in a greased 9×13 inch pan. Allow the brownies to cool completely in the pan.
- Once cooled, cut the brownies into even squares. You can choose to layer them as whole squares or crumble them for a different texture.
- In a mixing bowl, whip the heavy cream until soft peaks form. Gradually add the powdered sugar and vanilla extract, continuing to whip until stiff peaks form.
- In a serving dish, layer the brownie squares, followed by a layer of whipped cream. Drizzle some chocolate ganache over the whipped cream. Repeat the layers until all ingredients are used, finishing with a layer of whipped cream on top.
- Cover the dish with plastic wrap and refrigerate for at least 4 hours, or overnight for best results. This allows the flavors to meld and the cake to set.
- Before serving, garnish with chocolate shavings or sprinkles for an extra touch of sweetness.
Notes
- For best results, refrigerate overnight.
- Feel free to customize the toppings with nuts or different sprinkles.
- Prep Time: 20 minutes
- Cook Time: 30 minutes
- Category: Dessert
- Method: No-Bake
- Cuisine: American
Nutrition
- Serving Size: 1 slice
- Calories: 350 kcal
- Sugar: N/A
- Sodium: N/A
- Fat: N/A
- Saturated Fat: N/A
- Unsaturated Fat: N/A
- Trans Fat: N/A
- Carbohydrates: N/A
- Fiber: N/A
- Protein: N/A
- Cholesterol: N/A