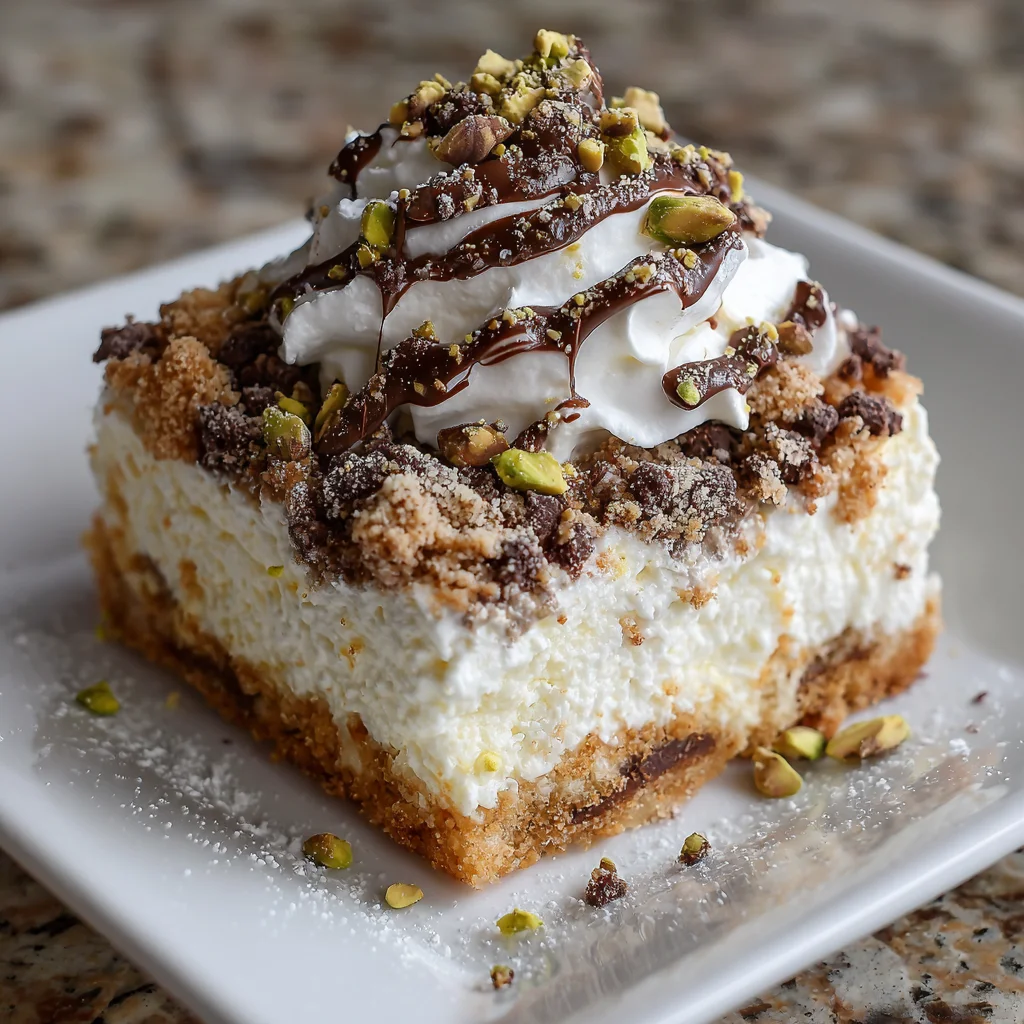
Introduction to Cannoli Cheesecake Bars
As a busy mom and passionate home cook, I know how precious our time is. That’s why I’m excited to share this delightful recipe for Cannoli Cheesecake Bars. They’re the perfect sweet treat to impress your family or guests without spending hours in the kitchen. These bars combine the rich, creamy goodness of cheesecake with the classic flavors of cannoli, creating a dessert that’s both familiar and indulgent. Plus, they’re easy to prepare ahead of time, making them a fantastic solution for a hectic week. Trust me, you’ll want to make these!
Why You’ll Love This Cannoli Cheesecake Bars
One of the best parts about these Cannoli Cheesecake Bars is how effortlessly they come together. You don’t need to be a professional pastry chef to create this masterpiece! With just a few simple steps, you’ll whip up a dessert that impresses even the toughest critics. Plus, with their creamy filling and buttery crust, these bars are pure bliss in every bite. They’re sure to become a family favorite!
Ingredients for Cannoli Cheesecake Bars
To create these delectable Cannoli Cheesecake Bars, you’ll need a delightful assortment of ingredients. Here’s what you’ll be gathering:
- Graham cracker crumbs: These will form the base of your bars. Their sweet crunch adds a lovely texture.
- Unsalted butter: This helps bind the crust together while providing richness. Make sure it’s melted for easy mixing.
- Granulated sugar: A touch of sweetness for the crust, balancing perfectly with the creamy filling.
- Vanilla extract: This adds a warm flavor that complements both the crust and cheesecake filling.
- Ricotta cheese: The star of the filling! Its creamy texture makes these bars almost like a cannoli in cheesecake form.
- Cream cheese: It enhances the richness and creaminess of the filling, creating that velvety texture we crave.
- Powdered sugar: For that extra touch of sweetness, making the filling delectable without being overpowering.
- Lemon zest: A dash of fresh zest adds brightness, cutting through the richness of the cheesecake.
- Mini chocolate chips: These little gems provide bursts of chocolatey goodness, reminiscent of traditional cannoli.
- Chopped pistachios (optional): If you like a bit of crunch, these are perfect for adding both flavor and color.
- Whipped cream: Used for topping, it adds a light, airy finish to the bars.
- Chocolate chips and pistachios for garnish: A simple way to dress up your bars for serving, making them look extra tempting!
Don’t worry if you’re missing an ingredient! You can always swap out the nuts or even use a different type of cheese, depending on your preferences and what you have on hand. For exact quantities, check out the bottom of the article where they’re conveniently listed for printing.

How to Make Cannoli Cheesecake Bars
Now, let’s dive into the fun part: making these delightful Cannoli Cheesecake Bars! Follow these simple steps to achieve a delicious dessert that’ll have everyone asking for seconds.
Step 1: Preheat and Prepare the Pan
First things first, preheat your oven to 325°F (160°C). This ensures that your Cannoli Cheesecake Bars bake evenly. While it’s warming up, grab a 9×9-inch baking pan. Grease it lightly and line it with parchment paper, leaving some overhang. This will make removing the bars super easy later!
Step 2: Make the Graham Cracker Crust
In a mixing bowl, combine your graham cracker crumbs, melted butter, granulated sugar, and vanilla extract. Mix until it resembles wet sand. Now, press this mixture firmly into the bottom of the prepared pan. Use your fingers or the back of a measuring cup to ensure it’s an even layer. This crust is the foundation of your dessert, so take your time with it!
Step 3: Create the Cheesecake Filling
In another bowl, beat together the ricotta cheese, cream cheese, powdered sugar, vanilla extract, and lemon zest until it’s super smooth. You want it to be creamy and fluffy. Then, gently fold in the mini chocolate chips and pistachios. This filling is where the magic happens! It’s rich, creamy, and packed with those classic cannoli flavors.
Step 4: Bake the Cheesecake Bars
Spread that luscious cheesecake filling evenly over your crust. Now, slide the pan into the preheated oven and let it bake for about 30–35 minutes. Keep an eye on it! The edges should be firm, but the center can still be a little jiggly. That’s the sweet spot for a creamy texture!
Step 5: Cool and Set
Once baked, take the pan out of the oven and allow it to cool completely at room temperature. This step is vital because it helps the bars firm up nicely. After cooling, pop it in the fridge for at least 4 hours, but overnight is even better. Overnight chilling enhances the flavors!
Step 6: Cut and Serve
When you’re ready to serve, use the parchment overhang to lift the bars out of the pan. Place them on a cutting board and slice into squares. Top each square with a dollop of whipped cream, and sprinkle on extra chocolate chips and pistachios for that beautiful presentation. Enjoy every bite of your heavenly creation!
Tips for Success
- Make sure your cream cheese is softened to avoid lumps in the filling.
- Use a measuring cup to press the crust into the pan evenly—this ensures a perfectly aligned base.
- For a fun twist, try using flavored extracts like almond or orange in place of vanilla.
- Let the cheesecake cool gradually to prevent cracks on the surface.
- Cut the bars with a hot knife for clean edges.
Equipment Needed
- 9×9-inch baking pan: You can also use an 8×8 pan for thicker bars.
- Mixing bowls: Use a large bowl for mixing the filling and a smaller one for the crust.
- Electric mixer: A hand mixer works just as well if you don’t have a stand mixer.
- Rubber spatula: Perfect for folding and scraping down the sides of your bowls.
- Parchment paper: Alternatively, you can use aluminum foil for easy removal.
Variations of Cannoli Cheesecake Bars
- Chocolate Lovers: Swap out the mini chocolate chips for dark chocolate chunks or even add cocoa powder to the crust for extra chocolatey goodness.
- Fruit-Infused: Add fresh berries like raspberries or strawberries into the filling for a fruity twist that pairs wonderfully with the creamy base.
- Gluten-Free Option: Use gluten-free graham crackers or almond flour to create a delicious crust that everyone can enjoy.
- Nut-Free: Omit the pistachios and add a sprinkle of cinnamon to the filling for a warm, spiced flavor that’s just as delightful.
- Vegan Variation: Substitute the cream cheese and ricotta for a plant-based alternative, and use coconut cream for a rich, dairy-free option.
Serving Suggestions for Cannoli Cheesecake Bars
- Pair these bars with a cup of rich espresso or cappuccino for a delightful coffee break.
- Serve with fresh berries on the side for a pop of color and freshness.
- Drizzle a little chocolate syrup over the top for added indulgence.
- Garnish with mint leaves for a refreshing touch that elevates presentation.
- Use a decorative platter to showcase your Cannoli Cheesecake Bars at gatherings.
FAQs about Cannoli Cheesecake Bars
Can I freeze Cannoli Cheesecake Bars?
Absolutely! These bars freeze beautifully. Just wrap them tightly in plastic wrap and foil before placing them in the freezer. When you’re ready to enjoy, simply thaw them in the refrigerator overnight.
How long are Cannoli Cheesecake Bars good for?
Stored in the refrigerator, these tasty bars can last up to three days. However, they’re best enjoyed fresh or within a day or two for optimum flavor and texture.
Can I use ricotta cheese from a different brand?
Yes, you can! Just ensure it’s a quality ricotta that’s creamy. Different brands may vary a bit in texture and flavor, but most will work wonderfully for these Cannoli Cheesecake Bars.
What can I substitute for whipped cream?
If you’re looking for an alternative, consider using whipped coconut cream or a dairy-free whipped topping. Both will add a light finish to your bars without compromising on taste.
Can I make these bars dairy-free?
Certainly! Use dairy-free cream cheese and ricotta alternatives to create a delightful dairy-free version of Cannoli Cheesecake Bars. They’ll still be delicious and full of flavor!
Final Thoughts
Creating these Cannoli Cheesecake Bars has been such a joyful experience for me, and I hope it will be for you too! They’re not just dessert; they’re a celebration of flavor and texture that brings smiles to faces. Each bite is a delightful reminder of why I love to cook for my family and friends. Whether it’s a casual weeknight or a special gathering, these bars will shine. I encourage you to indulge in this recipe—it truly captures the essence of comfort food while being surprisingly easy to make. Happy baking!
Print
Cannoli Cheesecake Bars: A Decadent Dessert Delight!
- Total Time: 4 hours 55 minutes
- Yield: 12 servings 1x
- Diet: Vegetarian
Description
Delicious Cannoli Cheesecake Bars combining the flavors of classic cannoli with a creamy cheesecake base.
Ingredients
- 1 ½ cups graham cracker crumbs
- ½ cup unsalted butter, melted
- ¼ cup granulated sugar
- 1 teaspoon vanilla extract
- 16 oz ricotta cheese
- 8 oz cream cheese, softened
- ¾ cup powdered sugar
- 1 teaspoon vanilla extract
- 1 teaspoon lemon zest
- ½ cup mini chocolate chips
- ¼ cup chopped pistachios (optional)
- 1 cup whipped cream
- Chocolate chips and pistachios for garnish
Instructions
- Preheat the oven to 325°F (160°C). Prepare a 9×9-inch baking pan by greasing it and lining with parchment paper, leaving some overhang for easy removal.
- Combine graham cracker crumbs, melted butter, granulated sugar, and vanilla extract in a bowl. Mix thoroughly and press the mixture evenly into the base of the prepared pan to form a crust.
- In another large bowl, beat together the ricotta cheese, cream cheese, powdered sugar, vanilla extract, and lemon zest until smooth. Fold in the mini chocolate chips and pistachios, if using.
- Evenly spread the cheesecake mixture over the prepared crust. Bake in the oven for 30-35 minutes, until the edges are firm with a slightly jiggly center.
- Allow the cheesecake to cool completely at room temperature, then refrigerate for at least 4 hours or overnight to set properly.
- Once firm, remove the cheesecake from the pan using the parchment overhang. Cut into squares and top each square with a dollop of whipped cream. Garnish with additional chocolate chips and pistachios, if desired.
Notes
- Store leftovers in the refrigerator for up to 3 days.
- Can be made a day in advance for enhanced flavor.
- Substitute nuts based on preference or allergy.
- Prep Time: 20 minutes
- Cook Time: 35 minutes
- Category: Dessert
- Method: Baking
- Cuisine: Italian
Nutrition
- Serving Size: 1 square
- Calories: 320
- Sugar: 24g
- Sodium: 150mg
- Fat: 22g
- Saturated Fat: 10g
- Unsaturated Fat: 9g
- Trans Fat: 0g
- Carbohydrates: 26g
- Fiber: 1g
- Protein: 4g
- Cholesterol: 50mg