Introduction to Cherry Cheese Danish
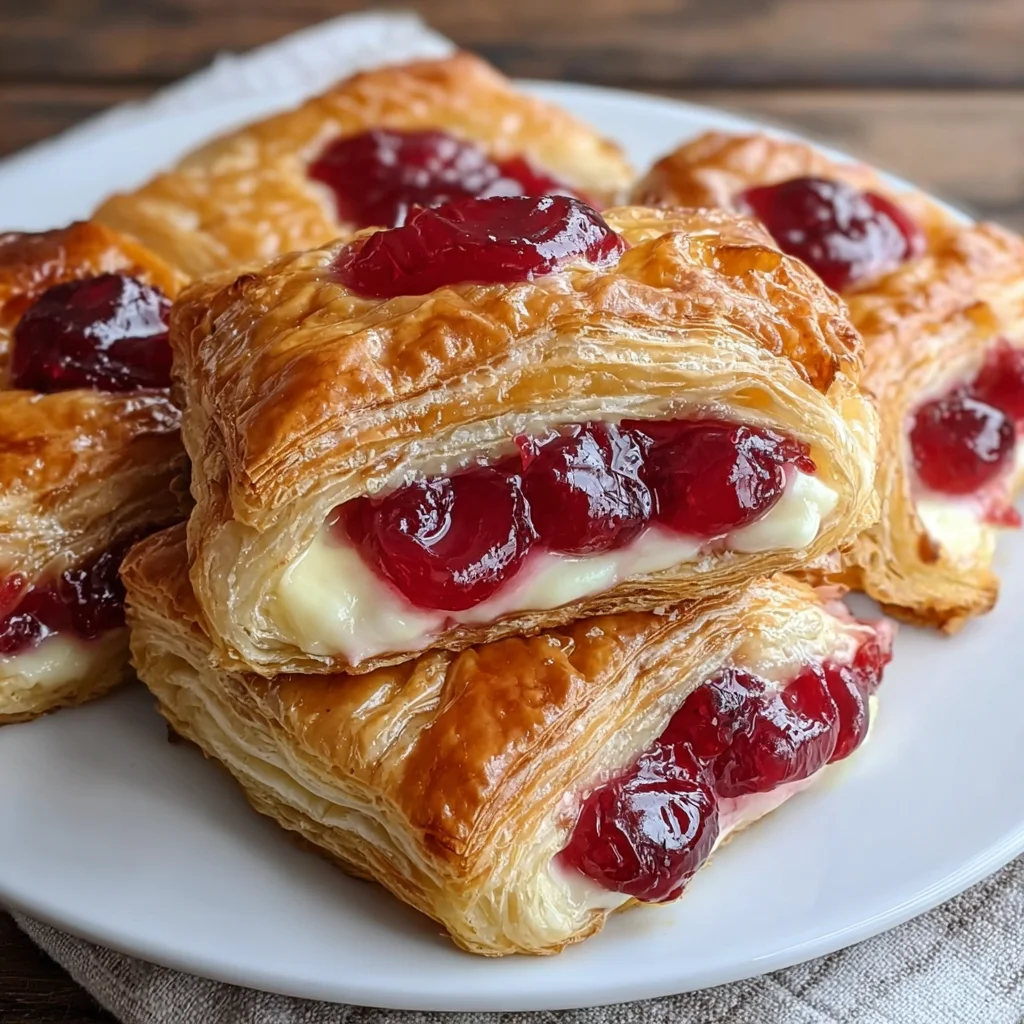
Have you ever craved something sweet, flaky, and utterly irresistible? That’s where my Cherry Cheese Danish comes in! This delightful treat marries a luscious, creamy cheese filling with the vibrant tang of cherries, all nestled in a buttery, flaky pastry. As a busy mom, I know the struggle of juggling work and family, which is why this easy recipe is a real lifesaver. It’s perfect for a quick breakfast or an elegant dessert that will surely impress your loved ones. Trust me, it’s a delicious way to brighten up any day!
Why You’ll Love This Cherry Cheese Danish
This Cherry Cheese Danish is a perfect blend of simplicity and indulgence. In just 40 minutes, you can whip up a scrumptious dessert that feels like a treat from a pastry shop. The flaky puff pastry hugs the rich cheese filling and sweet cherry topping, creating an explosion of flavors. Plus, it requires minimal effort, making it the ideal solution for busy moms who crave something delicious yet manageable!
Ingredients for Cherry Cheese Danish
Gathering the right ingredients is key to making a delightful Cherry Cheese Danish. Here’s what you’ll need:
- Puff Pastry: The star of the show! Thaw one sheet of puff pastry for that buttery, flaky texture. You can find this in the freezer section of your grocery store.
- Cherry Pie Filling: A luscious topping that adds sweetness and a pop of color. You can also use fresh cherries if you prefer a natural touch.
- Cream Cheese: This creamy base forms the heart of your filling. Make sure it’s softened for easy mixing.
- Granulated Sugar: Just a touch to sweeten the cream cheese mixture and balance flavors.
- Vanilla Extract: A splash of vanilla elevates the taste, adding warmth and depth to the filling.
- Egg (for egg wash): Brushed on top before baking to give your Danish that beautiful golden color and a slight sheen.
If you’re feeling adventurous, consider adding a sprinkle of lemon zest to the cheese filling for a zesty twist. You’ll find the specific quantities for these ingredients at the bottom of the article, perfect for printing out your shopping list. Let’s get cooking!

How to Make Cherry Cheese Danish
Step 1: Preheat the Oven
First things first, preheating your oven to 375°F (190°C) is crucial for even baking. It ensures that every Danish bakes beautifully, giving you that lovely golden finish. When the oven is hot, those yummy layers of puff pastry will puff up perfectly, creating that irresistible texture we all love!
Step 2: Prepare the Puff Pastry
Next, roll out your thawed puff pastry on a lightly floured surface. Aim for a thickness of about 1/8 inch. The key here is to be gentle! A thinner layer helps achieve that flakiness we crave. Cut the pastry into four 4×4-inch squares. This step makes your Cherry Cheese Danish the perfect size for the filling!
Step 3: Create the Cheese Filling
In a mixing bowl, combine your softened cream cheese, granulated sugar, and vanilla extract. Blend until smooth and creamy. The cream cheese provides that rich base, while sugar balances the sweetness, and vanilla adds a warm touch. This filling is what makes each bite feel indulgent and satisfying. Don’t hesitate to taste it—I know I do!
Step 4: Assemble the Danishes
Now it’s time to put it all together! Place a generous spoonful of the cream cheese mixture in the center of each pastry square, then add a dollop of cherry pie filling right on top. Carefully fold the corners of the pastry over the filling to create little pockets, and pinch to seal them tight. You want to keep all that deliciousness inside!
Step 5: Egg Wash for a Golden Finish
Before baking, brush each Danish with a beaten egg. This egg wash works wonders! It gives your pastries that golden, shiny exterior and a beautiful finish. Besides, it makes the Cherry Cheese Danish look like they came straight from a bakery—a delightful perk for your efforts!
Step 6: Bake Until Golden Brown
Finally, pop your assembled Danishes into the preheated oven and bake for 20-25 minutes. Keep an eye on them! You’ll know they are done when the tops are golden brown and the pastry has puffed up nicely. The aroma wafting through your kitchen will have everyone asking what’s for dessert!
Tips for Success
- Make sure your puff pastry is fully thawed for easier handling and rolling.
- Don’t overfill the pastry; it can make sealing difficult and lead to leaks while baking.
- Chill your cream cheese before mixing; it ensures a smoother filling.
- For a crunchier exterior, bake on a baking sheet lined with parchment paper.
- Experiment with different fruit fillings to keep things fresh and exciting!
Equipment Needed
- Baking Sheet: A sturdy baking sheet will do the trick. If you don’t have one, a shallow casserole dish works well too.
- Parchment Paper: Helps prevent sticking. If you’re out, lightly greasing the baking sheet is a good alternative.
- Mixing Bowl: Any mixing bowl will suffice; just ensure it’s big enough to comfortably mix ingredients.
- Rolling Pin: If you don’t have one, use a wine bottle or a sturdy glass to roll out the pastry.
Variations
- Fruit Variations: Swap out the cherry pie filling for other fruits like blueberries, raspberries, or peaches for a delightful twist.
- Nutty Addition: Add a handful of crushed nuts, such as almonds or pecans, to the cheese filling for added crunch and flavor.
- Spiced Flavor: Mix in a pinch of cinnamon or nutmeg into the cream cheese filling for a warm, spiced touch.
- Vegan Twist: Use a plant-based cream cheese alternative and a flax egg for a dairy-free version of the Cherry Cheese Danish.
- Gluten-Free Option: Substitute the puff pastry with gluten-free pastry options available in stores for a gluten-sensitive treat.
Serving Suggestions
- Coffee or Tea: Pair your Cherry Cheese Danish with a hot cup of coffee or fragrant tea for a cozy treat.
- Fresh Fruit: Serve alongside seasonal fruit like strawberries or melon to refresh the palate.
- Presentation: Dust with powdered sugar for an elegant finish and serve on a pretty plate to impress your guests!
FAQs about Cherry Cheese Danish
Can I Use Fresh Cherries Instead of Pie Filling?
Absolutely! Fresh cherries can give your Cherry Cheese Danish a vibrant, natural flavor. Simply pit and chop them, then mix with a touch of sugar to enhance their sweetness. Expect a fresher, more tart taste compared to canned pie filling, adding a lovely twist to your dessert!
How Can I Make This Recipe Gluten-Free?
To create a gluten-free Cherry Cheese Danish, opt for gluten-free puff pastry found in many grocery stores. You can also use alternatives like almond flour or oat flour to make your own pastry. Just ensure you follow a reliable recipe for a delicious outcome!
How to Store Leftover Danishes?
To keep your leftover Cherry Cheese Danishes fresh, place them in an airtight container in the refrigerator. They can retain their delightful taste for up to 3 days. For longer storage, freeze them in a single layer, then transfer to a freezer bag for up to a month.
Final Thoughts
Creating this Cherry Cheese Danish feels like a little hug for your taste buds. Each bite transports you to a cozy café, yet it’s so simple to whip up at home. With the flaky, buttery pastry and that creamy cheese filling topped with sweet cherries, it truly is a crowd-pleaser. Imagine serving these to your family or friends, watching their faces light up with joy! Not only does this recipe satisfy your sweet cravings, but it also allows you to share a piece of homemade love—because nothing says care like a freshly baked treat made from the heart!
Print
Cherry Cheese Danish
- Total Time: 40 minutes
- Yield: 4 servings 1x
- Diet: Vegetarian
Description
A delightful and easy-to-make Cherry Cheese Danish that combines a flaky pastry with a creamy cheese filling and sweet cherry topping.
Ingredients
- 1 sheet puff pastry (thawed)
- 1 cup cherry pie filling (canned)
- 8 oz cream cheese (softened)
- 1/4 cup granulated sugar
- 1 tsp vanilla extract
- 1 egg (for egg wash)
Instructions
- Preheat the oven to 375°F (190°C).
- Roll out the thawed puff pastry on a floured surface and cut into four 4×4-inch squares.
- In a bowl, mix softened cream cheese, sugar, and vanilla until smooth.
- Place a spoonful of cream cheese mixture in the center of each square and add a dollop of cherry pie filling on top.
- Fold the corners of the pastry over the filling to create pockets and pinch to seal.
- Brush each danish with beaten egg for a golden finish.
- Bake for 20-25 minutes or until golden brown.
Notes
- Ensure the puff pastry is fully thawed for better rolling.
- You can substitute fresh cherries for the pie filling if desired.
- Prep Time: 15 minutes
- Cook Time: 25 minutes
- Category: Dessert
- Method: Baking
- Cuisine: American
Nutrition
- Serving Size: 1 danish (85g)
- Calories: 290
- Sugar: 12g
- Sodium: 180mg
- Fat: 18g
- Saturated Fat: 10g
- Unsaturated Fat: 7g
- Trans Fat: 0g
- Carbohydrates: 26g
- Fiber: 1g
- Protein: 4g
- Cholesterol: 45mg