Introduction to Chicken Fajita Sliders
Hey there, fellow food enthusiasts! If you’re like me, juggling a busy schedule while trying to whip up something delicious can feel like a high-wire act. That’s where my Chicken Fajita Sliders come to the rescue! These little gems are not just a treat for the taste buds; they’re also a quick solution for those hectic evenings when the family is starving. Imagine tender chicken, colorful peppers, and melty cheese all nestled in soft Hawaiian rolls—it’s a dish that brings smiles and satisfaction, turning any meal into a family fiesta!
Why You’ll Love This Chicken Fajita Sliders
Let’s face it, finding the perfect balance between flavor and convenience can be a real challenge. That’s why I adore these Chicken Fajita Sliders! They’re a breeze to whip up, meaning less time in the kitchen and more time with family. Plus, the taste is absolutely fantastic—spicy, savory, and oh-so-satisfying. Whether it’s a casual weeknight or a gathering with friends, these sliders are sure to impress while keeping things simple!
Ingredients for Chicken Fajita Sliders
Now, let’s dive into what you’ll need to create these delectable Chicken Fajita Sliders. I promise, the ingredient list is straightforward—no need to stress! Here’s what you’ll require:
- Boneless Skinless Chicken Breasts: Tender and easy to work with, they soak up flavors beautifully.
- Chicken Seasoning: A flavorful mix—this kicks up the taste without overwhelming the dish.
- Olive Oil: Used for marinating and sautéing, it adds richness to the sliders.
- Yellow Onion: Sweet and slightly caramelized, onions bring a fantastic depth of flavor.
- Mixed Bell Peppers: Their vibrant colors not only brighten up the dish but also add a sweet crunch.
- Kosher Salt: Enhances and balances flavors perfectly—just a pinch will do!
- Tomato Paste: Gives body and richness to the chicken, creating a luscious sauce.
- Chili Powder and Red Pepper Flakes: Adjust these to your heat preference; they pack a spicy punch!
- Hawaiian Rolls: Soft and sweet, these rolls are the perfect vessel for all that delicious filling.
- Pepper Jack Cheese: Creamy and with a little kick, it elevates the sliders to cheesy perfection.
- Shredded Mozzarella Cheese: Provides that essential melty goodness—who doesn’t love extra cheese?
- Unsalted Butter: Melts over the top for a golden, buttery finish that’s hard to resist.
- Fresh Parsley: Adds a pop of color and a fresh, earthy taste to complement the sliders.
- Garlic Powder: A little sprinkle gives that wonderful garlic aroma and flavor!
Don’t worry about memorizing everything. You’ll find the exact quantities for these ingredients at the bottom of the article, ready for easy printing. When you set out to make these sliders, feel free to swap out ingredients based on your preferences. For instance, ground turkey or a plant-based protein makes a great substitute for chicken! If you love heat, experiment with different types of cheese or add jalapeños. The possibilities are endless!
How to Make Chicken Fajita Sliders
Marinate the Chicken
First things first: marinating the chicken is key for robust flavor. In a large bowl, toss your sliced chicken with olive oil and chicken seasoning. Make sure every piece is well coated. Cover the bowl and let it chill in the fridge for at least 30 minutes. If you can wait overnight, even better! The longer it sits, the more the spices penetrate, resulting in unbelievably flavorful Chicken Fajita Sliders.
Sauté the Vegetables
Now, let’s channel our inner chef! Heat some olive oil in a large skillet over medium-high heat. Toss in your sliced onions and colorful bell peppers with a pinch of salt. Stir them around for about 5 to 7 minutes, until they’re softened and lightly caramelized. The goal is sweet veggies that add a fantastic depth of flavor. Once they’re perfect, remove them and set aside.
Cook the Chicken
In the same skillet, it’s time for the chicken to shine! Add the marinated chicken (you may need to do this in batches). Cook until it’s no longer pink and has a few crispy edges, approximately 6 to 8 minutes. Keep an eye on the internal temperature, aiming for 165°F to ensure it’s fully cooked. This little char adds wonderful flavor, setting the stage for fantastic sliders.
Combine Ingredients
Now comes the fun part! Return the sautéed peppers and onions to the skillet with the chicken. Stir in the tomato paste, chili powder, and red pepper flakes. This combination is where the magic happens. Cook everything together for 2 to 3 minutes until it’s all nice and incorporated. The aroma? Out of this world!
Prepare for Baking
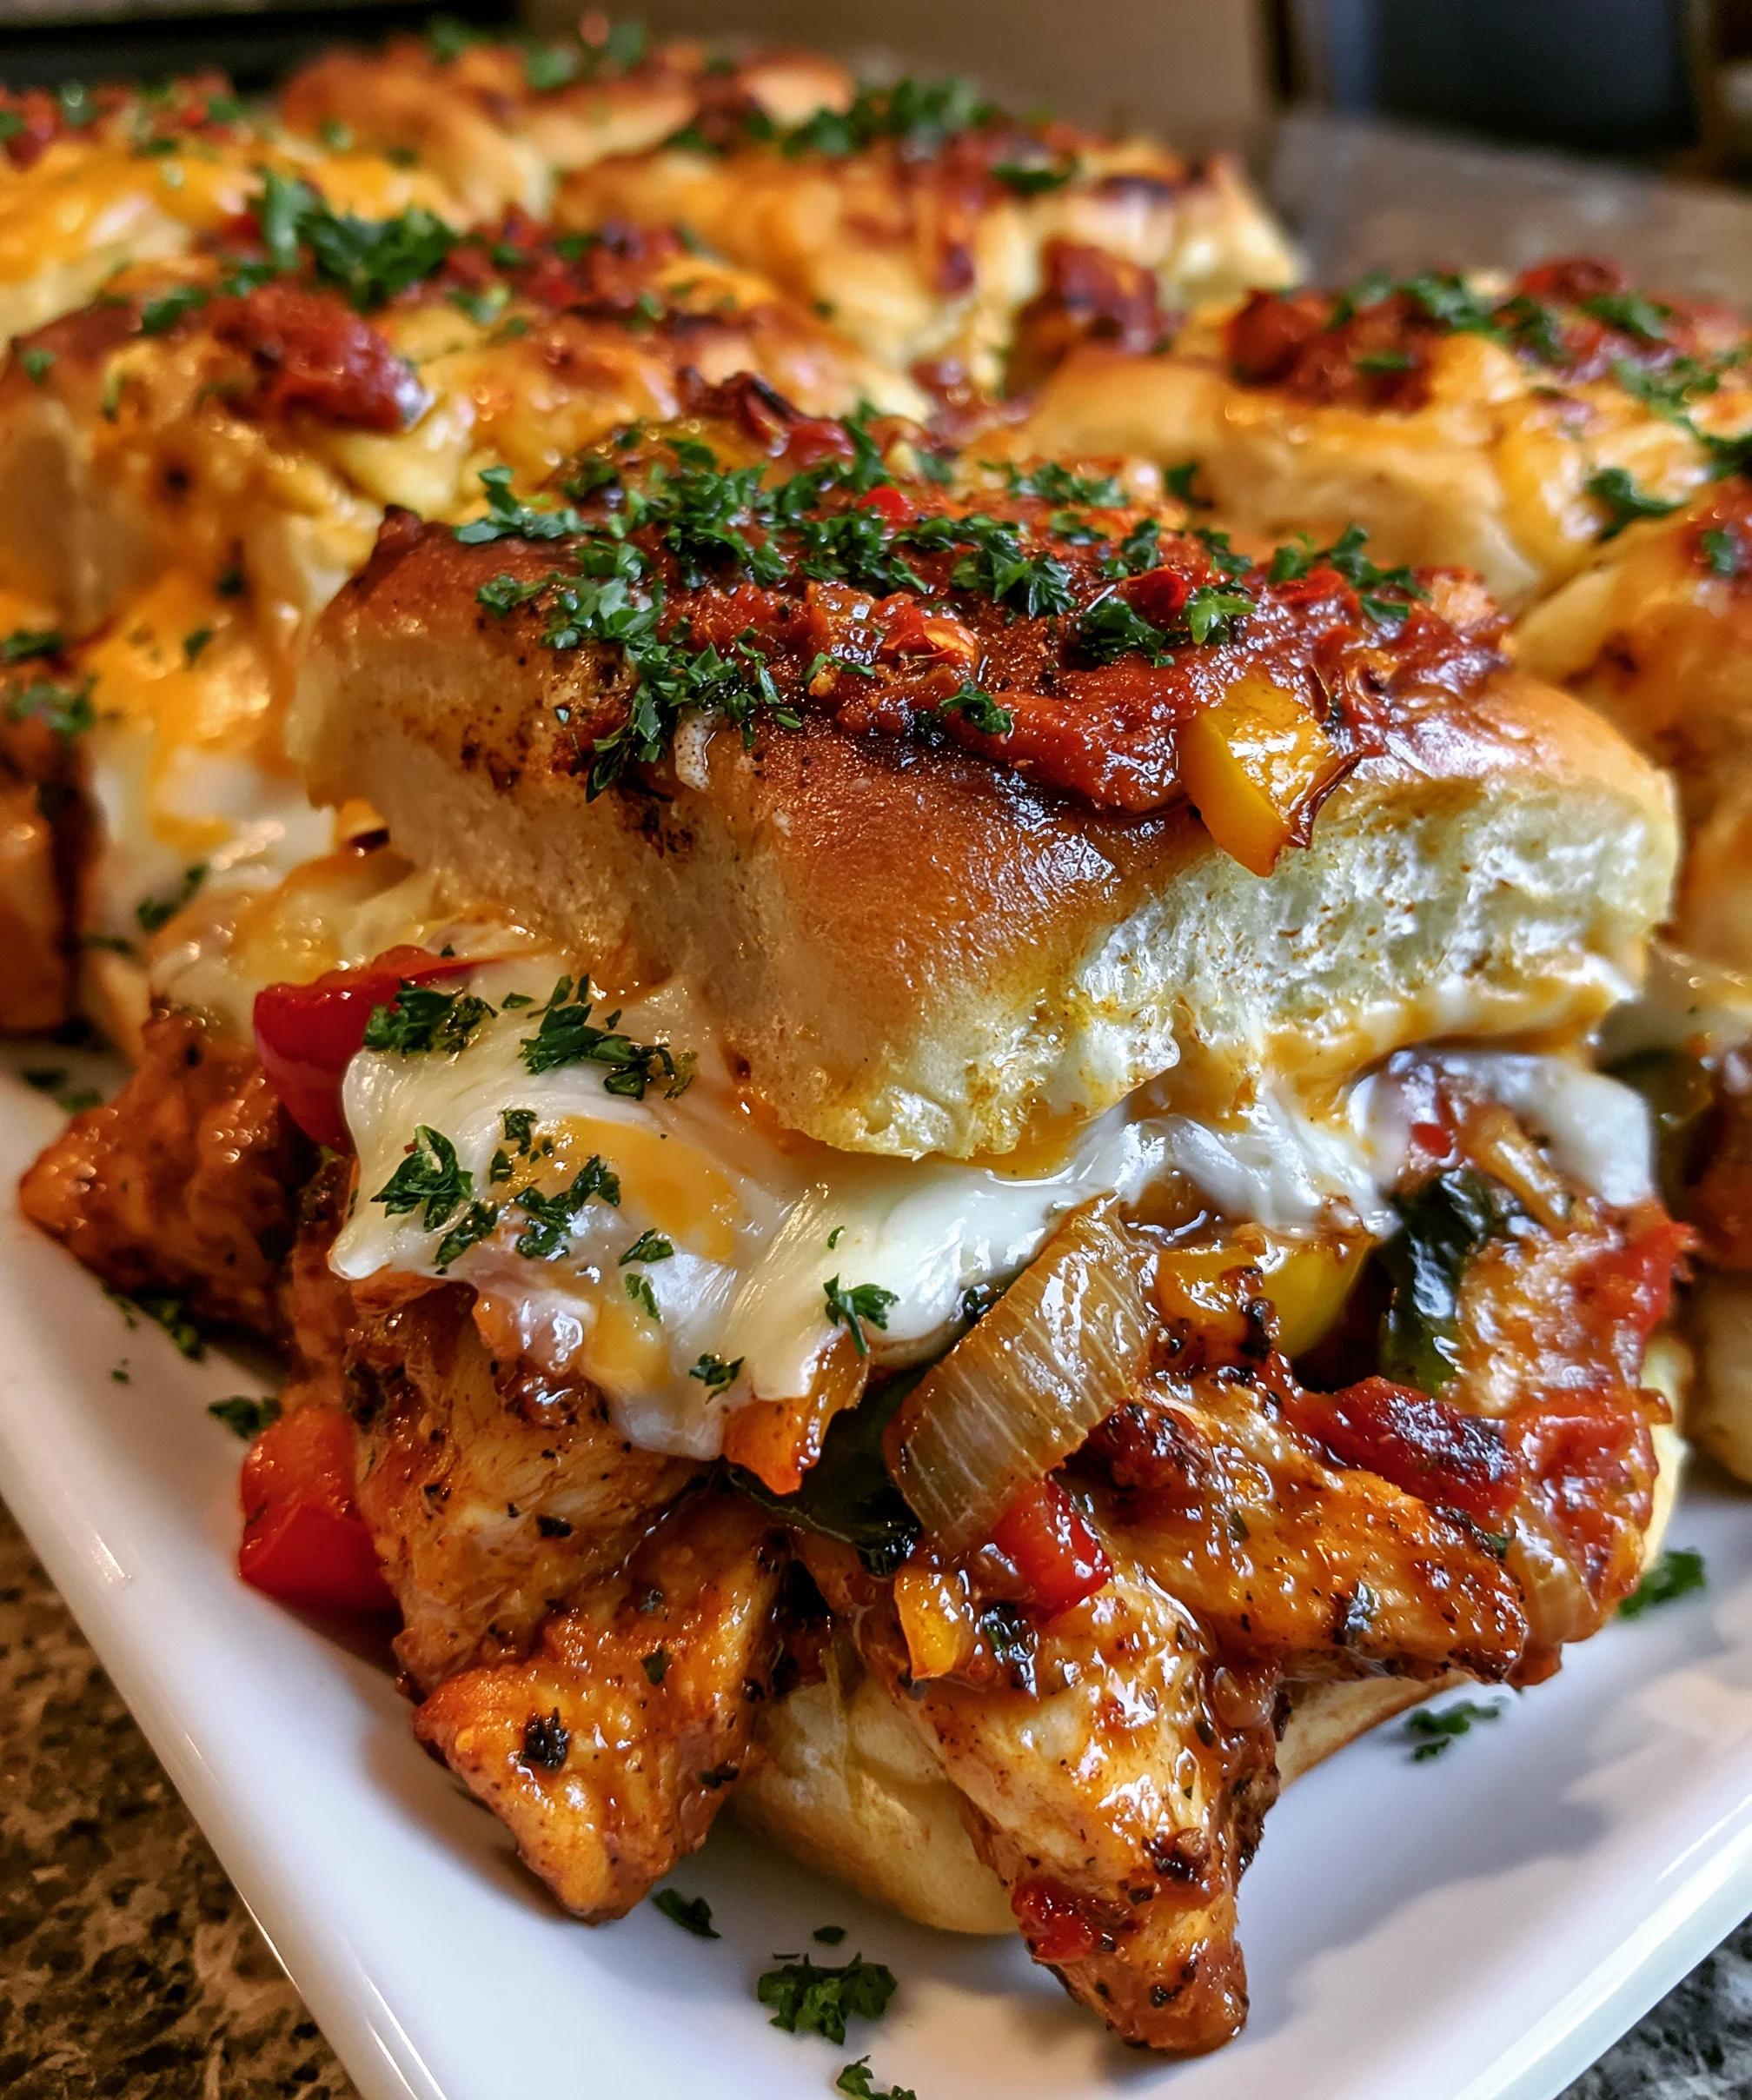
It’s time to assemble your sliders! Without separating the rolls, slice the package of Hawaiian rolls in half horizontally. Place the bottom half in a baking dish. Layer with Pepper Jack cheese followed by half a cup of mozzarella. Spoon the chicken fajita mixture evenly over this cheesy base. Finally, top with the remaining mozzarella and gently place the top half of the rolls back on.
Bake the Sliders
Preheat your oven to 375°F (190°C) as you finish assembling. Brush the tops of the rolls with a mixture of melted butter, parsley, and garlic powder. Cover the baking dish with foil, and bake for 15 to 20 minutes until the cheese melts beautifully. Remove the foil for the last 5 to 8 minutes to get that delightful golden brown finish. Timing is everything for these sliders to turn out perfect!
Tips for Success
- For best results, marinate the chicken overnight—it’s worth the wait!
- Make sure to slice your veggies thin for even cooking and that perfect texture.
- Keep the chicken in a single layer while cooking to achieve that nice char.
- Don’t skip the garlic butter on top—it truly elevates the sliders!
- Experiment with cheeses for a personalized flavor twist!
Equipment Needed
- Large bowl for marinating chicken.
- Skillet for sautéing—try a cast iron for even cooking.
- Baking dish (9×13-inch) for assembling the sliders.
- Knife and cutting board for slicing ingredients.
- Pastry brush for applying garlic butter.
Variations on Chicken Fajita Sliders
- Spicy Kick: Add diced jalapeños or use habanero cheese instead of Pepper Jack for an extra heat boost.
- Vegetarian Delight: Swap chicken for black beans or sautéed mushrooms for a hearty, meat-free option.
- Low-Carb Version: Use lettuce wraps instead of Hawaiian rolls for a gluten-free or keto-friendly treat.
- Latin Flare: Incorporate chorizo along with the chicken for a richer, more robust flavor profile.
- Cheesy Overload: Mix in a variety of cheeses such as cheddar or gouda for a creamy, cheesy result.
Serving Suggestions for Chicken Fajita Sliders
- Pair these sliders with crispy tortilla chips and a side of fresh salsa for the ultimate fiesta vibe.
- Serve with a refreshing margarita or a zesty limeade to balance the flavors.
- Garnish the sliders with fresh cilantro and a slice of lime for a bright touch.
FAQs about Chicken Fajita Sliders
Got questions about these delectable Chicken Fajita Sliders? You’re in the right place! Here are some common queries I’ve encountered, along with my answers to help you create the best sliders ever.
Can I prepare Chicken Fajita Sliders in advance?
Absolutely! You can marinate the chicken a day ahead and even assemble the sliders without baking them. Just cover the dish and pop it in the fridge. When you’re ready to eat, bake them straight from the fridge—just add a few minutes to the cook time!
What can I serve with Chicken Fajita Sliders?
These sliders pair incredibly well with sides like grilled corn, guacamole, or a fresh garden salad. For drinks, consider a light beer or sparkling water with lime to complement the flavors.
Can I use leftover chicken for this recipe?
Definitely! Leftover rotisserie chicken or any cooked chicken works perfectly. Just chop it up and follow the same steps for mixing with the peppers and spices. It saves time and keeps everything delicious!
Are Chicken Fajita Sliders gluten-free?
If you use gluten-free Hawaiian rolls, yes! This recipe can easily be adapted to fit a gluten-free diet, making it an excellent option for gatherings.
How do I store leftover Chicken Fajita Sliders?
Store any leftovers in an airtight container in the fridge for up to three days. For best results, enjoy them cold or reheat in the oven to retain their crispy texture!
Final Thoughts
Making Chicken Fajita Sliders is more than just cooking; it’s an opportunity to gather loved ones and create cherished memories. As the aroma fills your kitchen, you can’t help but smile, knowing you’re about to serve something truly special. Each bite combines tender chicken, vibrant veggies, and gooey cheese, creating a flavor explosion that everyone will adore. Whether you’re enjoying a casual family dinner or hosting friends for a game night, these sliders simplify mealtime while delivering big on taste. So, gather your ingredients and get ready for a culinary adventure that brings joy to your table!

CookingLayer Recipes
Discover delicious recipes, meal plans and save your favorites with our free iPhone app.


Chicken Fajita Sliders
- Total Time: 55 minutes
- Yield: 12 sliders 1x
- Diet: Gluten Free
Description
Chicken Fajita Sliders are a delicious twist on traditional sliders, combining marinated chicken, sautéed vegetables, and melted cheese in sweet Hawaiian rolls, topped with garlic butter.
Ingredients
- 1 ½ pounds boneless skinless chicken breasts, thinly sliced
- 2 tablespoons chicken seasoning
- 2 tablespoons olive oil, divided
- 1 medium yellow onion, thinly sliced
- 2 medium bell peppers, mixed colors, thinly sliced
- 1 pinch Kosher salt
- 2 tablespoons tomato paste
- 1 teaspoon chili powder, or more to taste
- ½ teaspoon red pepper flakes, adjust for heat
- 1 package (12-count) Hawaiian rolls, such as King’s Hawaiian
- 6 slices Pepper Jack cheese
- 1 cup (113 g) mozzarella cheese, shredded
- ¼ cup (½ stick / 57 g) unsalted butter, melted
- 2 tablespoons fresh parsley, chopped
- 1 teaspoon garlic powder
Instructions
- In a large bowl, toss the sliced chicken with 1 tablespoon olive oil and the chicken seasoning until evenly coated. Cover and marinate for at least 30 minutes (or overnight for a deeper flavor).
- Heat the remaining 1 tablespoon olive oil in a large skillet over medium-high heat. Add the sliced onions and bell peppers with a pinch of salt. Cook for 5 to 7 minutes, until softened and lightly caramelized. Remove from the pan and set aside.
- In the same skillet, cook the chicken (in batches if needed) until fully cooked through to an internal temperature of 165°F and lightly charred, about 6 to 8 minutes.
- Stir in the tomato paste, chili powder, and red pepper flakes. Cook for 2 to 3 minutes, until the tomato paste darkens and coats the chicken.
- Return the cooked peppers and onions to the skillet. Toss everything together until well combined. Remove from heat.
- Preheat oven to 375°F (190°C).
- Without separating the rolls, slice the entire package of Hawaiian rolls in half horizontally. Place the bottom half in a 9×13-inch baking dish.
- Layer with Pepper Jack cheese, then sprinkle with ½ cup of the mozzarella cheese.
- Spoon the chicken fajita mixture evenly over the cheese. Top with remaining mozzarella, then place the top half of the rolls on.
- Mix melted butter, parsley, and garlic powder. Brush generously over the tops of the rolls.
- Cover with foil and bake for 15 to 20 minutes, until cheese is melted.
- Remove foil and bake an additional 5 to 8 minutes, until tops are golden brown.
- Brush with any remaining butter if desired, then slice and serve warm.
Notes
- Marinating the chicken overnight enhances the flavor.
- Adjust the amount of chili powder and red pepper flakes according to your heat preference.
- For extra cheese lovers, add more mozzarella on top.
- Prep Time: 30 minutes
- Cook Time: 25 minutes
- Category: Appetizer
- Method: Baking and Sautéing
- Cuisine: Mexican-American
Nutrition
- Serving Size: 1 slider
- Calories: 305
- Sugar: 2g
- Sodium: 680mg
- Fat: 16g
- Saturated Fat: 8g
- Unsaturated Fat: 4g
- Trans Fat: 0g
- Carbohydrates: 26g
- Fiber: 1g
- Protein: 16g
- Cholesterol: 60mg