Introduction to Chocolate Peanut Butter Poke
Welcome, fellow food lovers! If you’ve ever found yourself craving something sweet and indulgent after a long day, let me introduce you to my personal favorite: Chocolate Peanut Butter Poke. This dessert is like a warm hug on a plate, combining rich chocolate cake with creamy, dreamy peanut butter. Whether you’re a busy mom or a professional juggling countless responsibilities, this recipe is perfect for you. It’s simple, satisfying, and guaranteed to make your family’s taste buds do a joyful dance with every bite. Let’s dive in and make dessert time a sweet escape!
Why You’ll Love This Chocolate Peanut Butter Poke
This Chocolate Peanut Butter Poke is not just a dessert; it’s a celebration of flavors and convenience. With easy-to-follow steps, you won’t need hours in the kitchen. The combination of chocolate and peanut butter is a classic that never disappoints, satisfying cravings in one delicious bite. Plus, it’s perfect for any occasion, whether it’s a family gathering or a just-because treat. Trust me, you’ll be back for seconds!
Ingredients for Chocolate Peanut Butter Poke
Gathering the right ingredients is the first step in making this delightful Chocolate Peanut Butter Poke, and I promise, it’s worth it! Here’s what you’ll need:
- Devil’s Food Chocolate Cake Mix: This forms the perfect base with its rich chocolatey goodness. You can also use a gluten-free chocolate cake mix if needed.
- Creamy Peanut Butter: This is the heart and soul of our poke cake. Opt for natural peanut butter for a healthier twist or stick with the classic creamy type for that indulgent finish.
- Sweetened Condensed Milk: This adds a luscious sweetness that complements the peanut butter perfectly. Look for cans with easy-open tops to save time!
- Instant Vanilla Pudding Mix: This ingredient helps create a creamy filling that enhances the overall texture. Go for the instant mix to ensure the process is quick and easy.
- Whole Milk: Room temperature milk blends smoothly into the pudding mix, ensuring a delightful consistency that’s key to this treat’s success.
- Cream Cheese: Softened to a spreadable consistency, it adds a tangy richness to the whipped topping. Use full-fat for the best results.
- Powdered Sugar: It sweetens the cream cheese mixture and helps achieve that light, fluffy texture. Adjust the sweetness to your liking!
- Heavy Whipping Cream: Whipping this will give you that dreamy topping that makes every slice irresistible. You can substitute with a dairy-free option if needed.
- Vanilla Extract: Just a splash enhances all the flavors, adding depth to the dessert.
- For Garnish: Melted peanut butter, chopped Reese’s Cups, and Reese’s Pieces elevate the presentation and flavor. Feel free to get creative with your toppings!
All these ingredients come together to create a culinary masterpiece. Need exact quantities? Don’t worry—they’re listed at the bottom of the article and are available for printing. Let’s move on to the fun part: making this decadent dessert!
How to Make Chocolate Peanut Butter Poke
Now we’re getting to the good stuff! Making this Chocolate Peanut Butter Poke is as delightful as eating it. Let’s go through the steps together, so you’ll feel confident in the kitchen.
Step 1: Bake the Chocolate Cake
First things first, preheat your oven to 350°F (175°C). This is crucial for getting that cake to rise perfectly. Grab a 9×13-inch baking dish and coat it with cooking spray or butter to prevent sticking. Follow the package instructions for the Devil’s Food cake mix, mixing in the needed eggs, oil, and water. Once you have a smooth batter, pour it into the prepared baking dish, spreading it evenly. Bake it as directed until a toothpick comes out clean. After baking, let it cool for about 10 minutes on a wire rack. The aroma of chocolate will fill your kitchen, making it irresistible!
Step 2: Poke Holes in the Cake
Next, we need to create those iconic “pokes” in the cake! While the cake is still warm, take the handle of a wooden spoon and gently poke holes about 2 cm apart all over the surface. These holes are the gateway for our creamy peanut butter mixture to seep in. Let the cake cool further while you prepare the other ingredients. This is the moment when the anticipation really starts to build!
Step 3: Prepare Peanut Butter Mixture
Now it’s time for that creamy goodness! In a microwave-safe bowl, melt about 360 ml of creamy peanut butter. Heat it in 15-second intervals, stirring each time until silky and smooth. Once melted, fold in a can of sweetened condensed milk, mixing until you have a rich, creamy mixture that’s simply dreamy. You’ll want to taste it—just a little—because it’s utterly divine!
Step 4: Whisk the Pudding
In a sizable mixing bowl, add the instant vanilla pudding mix and pour in 415 ml of room temperature milk. Whisk until just combined, making sure it’s not too thick yet. Quickly add your warm peanut butter mixture and mix until fully blended. This creamy concoction will enhance the poke cake’s deliciousness. The combination of flavors is simply magical!
Step 5: Fill the Poked Cake
Time to fill those holes! Transfer half of the peanut butter filling into a piping bag or a ziplock bag—just snip the corner off for easy piping. Generously squeeze the filling into each hole, allowing the creamy mixture to absorb into the cake. Spread the remaining mixture evenly over the top of the cake. Now, chill the cake in the refrigerator for about 2 hours until everything is wonderfully set.
Step 6: Make the Cream Cheese Topping
While the cake is chilling, let’s whip up a luscious cream cheese topping. Start by beating 170 g of softened cream cheese and a splash of vanilla extract in a bowl for about 1 minute until creamy. Gradually add in 60 g of powdered sugar and one-third of the heavy cream. Mix on low speed to keep it smooth. Then, pour in the remaining cream and beat until stiff peaks form. This fluffy topping will add the perfect finishing touch to your Chocolate Peanut Butter Poke. It’s like cloud nine in a bowl!
Step 7: Final Touches
Once your cake is nicely chilled, it’s time to dress it up! Spread the cream cheese topping evenly over the chilled cake, smoothing it out as you go. Melt a bit more peanut butter for garnish and drizzle it artistically over the surface. For the grand finale, sprinkle chopped Reese’s Cups and some Reese’s Pieces on top for that delightful crunch and color. This step adds a fun, festive flair to your dessert. Now, cover it and keep your delicious creation refrigerated until it’s time to serve!
Tips for Success
- Make sure to poke the holes in the cake while it’s warm for better absorption of the peanut butter filling.
- Chill the cake for at least 2 hours to allow the filling to set properly.
- Use a hand mixer for the cream cheese topping to achieve that perfect fluffy texture.
- Don’t skip the garnishes; they add flavor and a fun touch to the dessert.
- Experiment with different toppings like crushed nuts or a drizzle of chocolate for variety!
Equipment Needed
- Baking Dish: A 9×13-inch dish is ideal, but any similar-sized dish will work.
- Mixing Bowls: Use a large bowl for the batter and a smaller one for the toppings.
- Whisk: A standard whisk works well, or you can use an electric mixer for the cream.
- Piping Bag/Ziploc Bag: Either can be used to fill in the cake holes easily.
- Measuring Cups and Spoons: Essential for measuring out your ingredients accurately.
Variations
- Vegan Option: Swap dairy ingredients with plant-based alternatives, such as almond milk and coconut cream, and choose a vegan chocolate cake mix.
- Nut-Free Twist: Substitute peanut butter with sunbutter or another seed butter to make it nut-free and still delicious!
- Flavor Infusion: Add a splash of chocolate or coffee extract to the cream cheese topping for an extra pop of flavor.
- Fruit Add-ins: Layer in banana slices or strawberries between the cake and topping for a fruity twist.
Serving Suggestions
- Pair with a scoop of vanilla ice cream for a rich, creamy delight.
- Serve alongside fresh berries for a refreshing contrast.
- Drizzle with chocolate sauce for an extra layer of indulgence.
- Enjoy with a cup of coffee or a glass of milk for the ultimate treat.
FAQs about Chocolate Peanut Butter Poke
Have questions about this tempting Chocolate Peanut Butter Poke? You’re not alone! Here are some answers to help you navigate your baking journey:
Can I make this dessert ahead of time? Absolutely! In fact, it tastes even better the next day, allowing the flavors to meld together beautifully.
How should I store leftovers? Keep any uneaten slices covered in the refrigerator for up to 3 days. It’s an excellent treat for late-night cravings!
Can I use a different cake mix? Yes! Feel free to switch it out for a chocolate fudge cake mix or even a gluten-free option.
What if I have a nut allergy? You can replace peanut butter with sunbutter or soy nut butter to create a nut-free version.
Is this dessert suitable for parties? Definitely! Its rich flavors and attractive presentation make it a crowd-pleaser at any gathering.
Final Thoughts
As you can see, this Chocolate Peanut Butter Poke isn’t just a dessert; it’s a delightful experience that brings joy to both the cook and the eaters. Every slice is an explosion of sweet, creamy, and chocolatey goodness, a much-needed treat after a busy day. I love that it’s simple enough for anyone to make yet impressive enough to wow your family and friends!
So roll up your sleeves, embrace the chocolatey bliss, and make this dessert your new go-to for any occasion. I can’t wait for you to relish every forkful!
Print
Chocolate Peanut Butter Poke
- Total Time: 2 hours 30 minutes
- Yield: 12 servings 1x
- Diet: Vegetarian
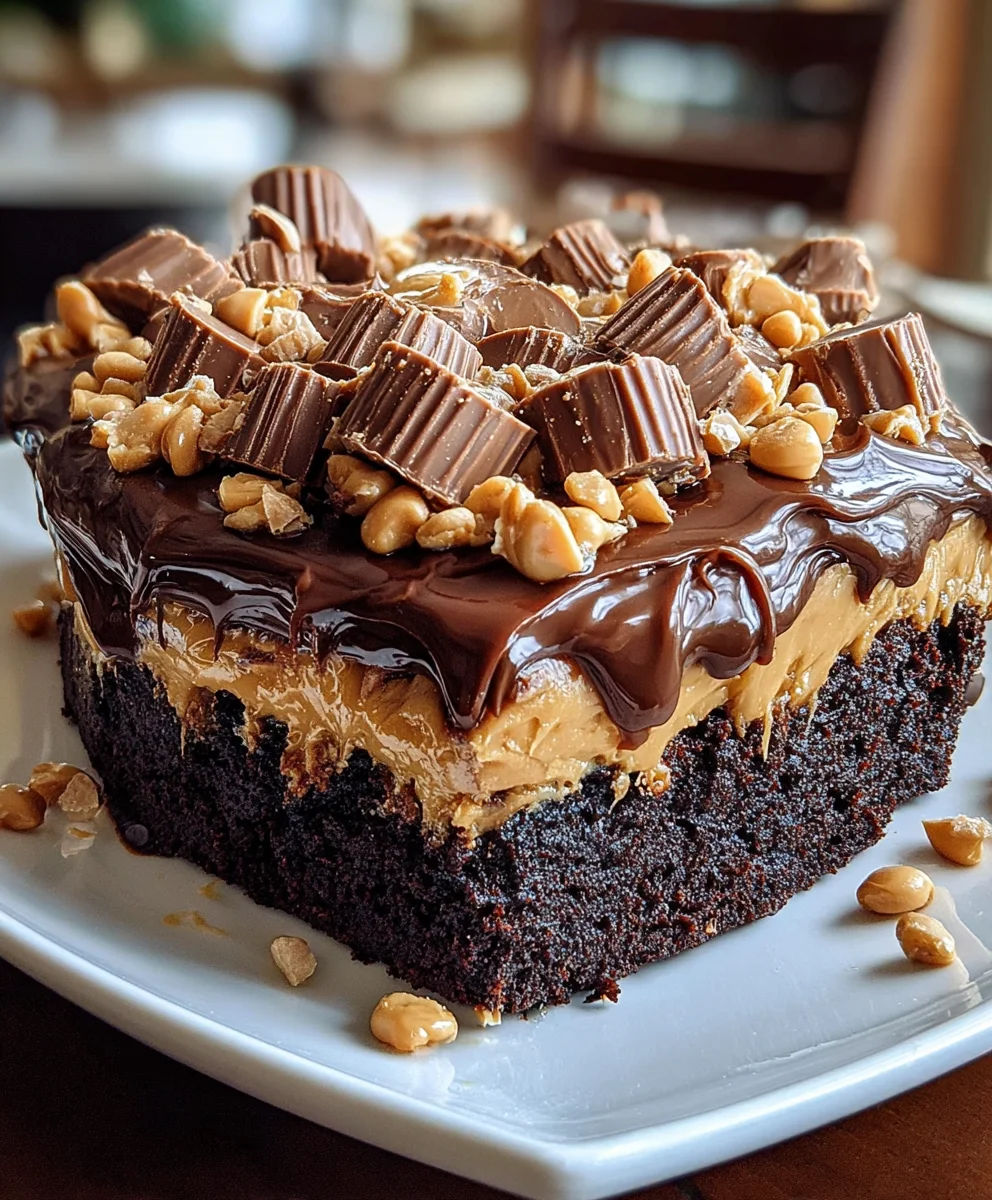
Description
A rich and indulgent dessert combining chocolate cake, creamy peanut butter, and a whipped topping, perfect for any occasion.
Ingredients
- 432 g box Devil’s Food chocolate cake mix, plus ingredients as listed on package (eggs, oil, water as specified)
- 360 ml creamy peanut butter, melted
- 1 x 397 g can sweetened condensed milk
- 96 g box instant vanilla pudding mix
- 415 ml whole milk, room temperature
- 170 g cream cheese, softened
- 60 g powdered sugar, plus more to taste
- 360 ml heavy whipping cream
- 5 ml vanilla extract
- 60 ml creamy peanut butter, melted (for garnish)
- 4–5 Reese’s Cups, chopped (for garnish)
- Reese’s Pieces, as desired (for garnish)
Instructions
- Preheat oven to 175°C. Prepare chocolate cake batter according to package instructions. Pour into a 23×33 cm baking dish and bake as directed. Remove from oven and cool for 10 minutes.
- Using the handle of a wooden spoon, poke holes approximately 2 cm apart across the surface of the warm cake. Allow the cake to cool further while preparing the filling.
- Microwave peanut butter in a microwave-safe bowl in 15-second intervals, stirring between, until completely melted and smooth. Stir in sweetened condensed milk until fully combined.
- In a separate large bowl, whisk together vanilla pudding mix and milk until just smooth but not thickened. Quickly whisk in the melted peanut butter mixture until fully blended.
- Transfer half of the peanut butter filling into a piping bag or ziplock bag with a snipped corner. Generously pipe filling into each hole. Spread remaining mixture evenly over the cake surface. Refrigerate cake for 2 hours until filling is set.
- Beat softened cream cheese and vanilla extract for 1 minute. Add powdered sugar and one third of heavy cream; beat on low until combined. Gradually add remaining cream, increase speed to medium-high, and whip until stiff peaks form.
- Spread cream cheese whipped topping evenly over the chilled cake. Ensure the surface is smooth.
- Melt peanut butter and drizzle over the frosted cake, swirling with a skewer for a marbled effect. Garnish with chopped Reese’s Cups and Reese’s Pieces. Store covered in the refrigerator.
Notes
- This dessert can be made a day ahead for best results.
- Store leftovers in the refrigerator for up to 3 days.
- For a gluten-free version, use a gluten-free chocolate cake mix.
- Prep Time: 30 minutes
- Cook Time: 30 minutes
- Category: Dessert
- Method: Baking
- Cuisine: American
Nutrition
- Serving Size: 1 slice
- Calories: 450
- Sugar: 35g
- Sodium: 200mg
- Fat: 25g
- Saturated Fat: 10g
- Unsaturated Fat: 5g
- Trans Fat: 0g
- Carbohydrates: 50g
- Fiber: 2g
- Protein: 6g
- Cholesterol: 30mg