Introduction to Christmas Magic Layer Brownie Bars
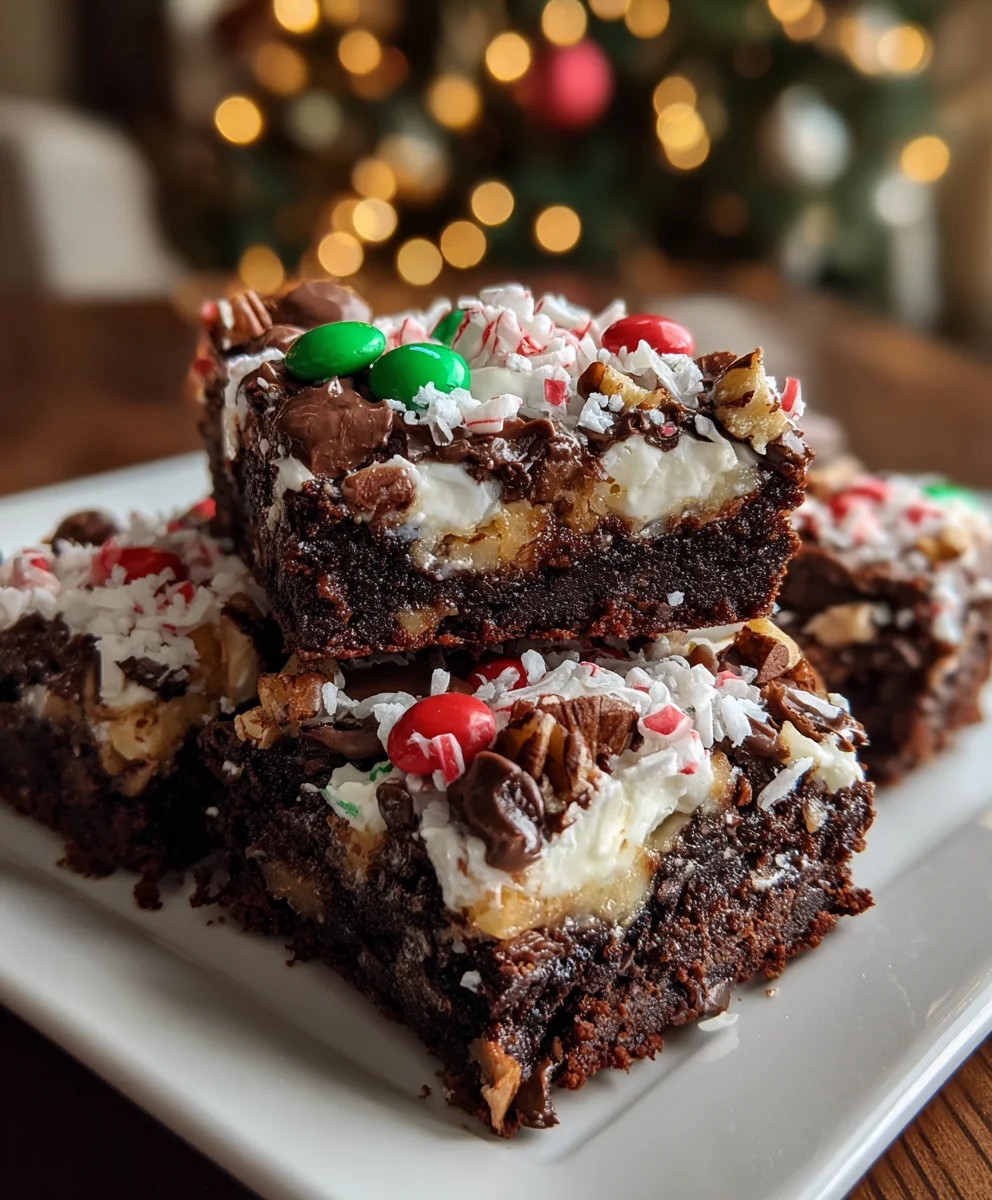
As the holiday season approaches, we all want to sprinkle a little magic into our celebrations. That’s where my Christmas Magic Layer Brownie Bars come in! This delightfully layered treat not only dazzles your guests but also stands as a quick solution for busy days when you need a festive touch. You can whip these up in no time, making them perfect for family gatherings, work parties, or just a cozy night in. Trust me, this recipe will become your go-to for spreading holiday cheer while keeping the stress at bay!
Why You’ll Love These Christmas Magic Layer Brownie Bars
When it comes to entertaining or simply indulging, these Christmas Magic Layer Brownie Bars check all the boxes. They’re incredibly easy to make, giving you more time to enjoy the season with loved ones. Plus, the layers of gooey chocolate and festive colors create a mouthwatering experience that no one can resist. Whether you’re a seasoned baker or a novice, these treats will make your holiday baking stress melt away!
Ingredients for Christmas Magic Layer Brownie Bars
Gather your holiday spirit and get ready to dive into these delicious layers! Below is a list of what you’ll need to create these Christmas Magic Layer Brownie Bars. For exact measurements, scroll down to the end of the article where you can print the recipe.
- Semi-sweet chocolate chips: The star ingredient adds rich chocolate flavor. You can also use dark chocolate for a more intense taste.
- Salted butter: It lends moisture and richness. Unsalted butter works too; just add a pinch of salt!
- Granulated sugar: This sweetener balances the chocolate, creating that lovely gooey texture.
- Large eggs: Eggs provide the structure and help bind the brownie layers together.
- All-purpose flour: It gives the bars their delightful chewy texture. Switch to a gluten-free flour blend if needed!
- Vanilla extract: A splash enhances the overall flavor with warm notes.
- Nuts: Chopped nuts like walnuts or pecans can add crunch and richness, though these are optional.
- Mini holiday M&Ms: These colorful candies add a pop of joy and sweetness, perfect for the festive season.
- Regular holiday M&Ms: More M&Ms means more fun! Feel free to mix and match colors for a unique touch.
- Sweetened flaked coconut: This adds a chewy texture that compliments the chocolate wonderfully.
- Sweetened condensed milk: It brings the layers together, adding creaminess and depth to every bite.
- Holiday sprinkles: Just a sprinkle gives a festive flair, making these bars visually delightful.
With these ingredients, you’re set to create a batch of magic! So let’s get started on whipping up something truly special this holiday season.
How to Make Christmas Magic Layer Brownie Bars
Ready to create some holiday magic? Let’s dive into these deliciously layered brownie bars! Follow these straightforward steps to ensure your Christmas Magic Layer Brownie Bars turn out perfectly every time.
Step 1: Preheat and Prepare Pan
First, preheat your oven to 350 degrees F. While it warms up, line a 9-inch baking pan with foil or parchment paper. This little trick makes the brownies easier to lift out once they’re baked. Don’t forget to spray the lining with nonstick cooking spray!
Step 2: Melt Chocolate and Butter
Next, gather a large, microwave-safe bowl. Add your salted butter and semi-sweet chocolate chips. Microwave them on high for 30 seconds, then stir well. Keep microwaving in 30-second bursts until everything is smooth and melted. This is the foundation of those rich brownie layers!
Step 3: Mix Wet Ingredients
Now, it’s time to add the sweetness! Beat granulated sugar into your melted chocolate mixture. Then, mix in the vanilla extract along with your two whole eggs and one egg yolk. Beat this until it’s silky smooth; that right there is pure magic!
Step 4: Add Flour
Gently fold in the all-purpose flour to avoid overmixing. We want these bars to stay tender and luscious. Once mixed, pour the batter into your prepared pan, spreading it evenly. This is where the deliciousness begins!
Step 5: Bake the Brownie Base
Pop the pan into the preheated oven and bake for 20 minutes. You’ll notice the brownies set on top but still jiggle gently in the center. Trust me, this is perfect because they’ll finish cooking in the next steps!
Step 6: Add Toppings Layer
After 20 minutes, take the pan out. Now, sprinkle half of your nuts, chocolate chips, mini M&Ms, and regular M&Ms over the brownie base. Add the sweetened flaked coconut next. Pour that magical sweetened condensed milk evenly over everything, then sprinkle the remaining toppings on top. Can you feel the holiday spirit already?
Step 7: Finish Baking
Return the pan to the oven and bake for an additional 25 minutes. Watch as the edges become golden and the center begins to set. If it browns too quickly, loosely cover with foil to keep it from burning. The aroma will be heavenly!
Step 8: Cool and Serve
Once baked, take the pan out and let it cool completely. Patience is key! Once cool, cut into 9 squares with a sharp knife. Bite into one of these and you’ll experience pure bliss!
Step 9: Store Properly
Keep your cooled brownie bars in a tightly sealed container at room temperature. They will stay fresh for up to a week, allowing you to savor or share the Christmas Magic Layer Brownie Bars as you please!
Tips for Success
- Use room temperature eggs for better mixing and texture.
- Mix ingredients gently to keep brownies from becoming tough.
- Check for doneness with a toothpick; it should come out with a few moist crumbs.
- Let the brownies cool completely before cutting for clean squares.
- Experiment with different nuts or toppings for unique variations!
Equipment Needed for Christmas Magic Layer Brownie Bars
- 9-inch baking pan: Essential for shaping your bars. A glass pan works well too!
- Mixing bowls: At least two, one for wet ingredients and another for dry. Any size will do!
- Microwave-safe bowl: For melting chocolate and butter—versatility at its best!
- Spatula: A silicone or rubber spatula is fantastic for folding in ingredients.
- Sharp knife: Use a good knife for cutting neat squares once cooled.
Variations of Christmas Magic Layer Brownie Bars
- Nut-free option: Simply omit the nuts or substitute them with crushed graham crackers for a different texture.
- Gluten-free: Use a gluten-free flour blend in place of all-purpose flour for a delicious gluten-free treat.
- Dark chocolate lovers: Swap semi-sweet chocolate chips for dark chocolate chips for a richer flavor.
- Minty twist: Add crushed peppermint candies or use mint-flavored M&Ms to give your bars a festive minty flavor.
- Coconut lovers: Increase the flaked coconut for a more pronounced coconut flavor, or use coconut milk for a different creaminess.
Serving Suggestions for Christmas Magic Layer Brownie Bars
- Pair with a dollop of whipped cream or a scoop of vanilla ice cream for extra indulgence.
- Serve warm with a drizzle of chocolate sauce for a decadent dessert experience.
- Accompany with a hot cup of cocoa or a festive spiced tea.
- Decorate your serving plate with fresh holiday berries for a colorful presentation.
FAQs about Christmas Magic Layer Brownie Bars
Can I use different types of chocolate chips?
Absolutely! Feel free to swap semi-sweet chocolate chips with dark or even white chocolate chips. Each will give a unique flavor to your Christmas Magic Layer Brownie Bars.
How do I store leftover brownie bars?
Store your cooled bars in a tightly sealed container at room temperature. They’ll stay fresh and delicious for up to a week, perfect for tasty treats anytime!
Can I freeze these brownie bars?
Yes! Wrap individual bars tightly in plastic wrap and place them in an airtight container. They can be frozen for about three months. Just thaw them at room temperature when you’re ready to indulge!
What can I use instead of condensed milk?
If you need a substitute, a combination of coconut cream and a bit of sugar works well. It offers a similar sweet creaminess for your delicious layered bars.
Are these brownie bars suitable for potlucks or gatherings?
Definitely! These festive brownies not only look beautiful but are also a crowd-pleaser. Bring them to your next gathering, and watch them disappear!
Final Thoughts on Christmas Magic Layer Brownie Bars
As you embark on your baking adventure with these Christmas Magic Layer Brownie Bars, I hope you find joy in every layer and flavor. There’s something truly special about indulging in a delicious homemade treat that brings friends and family together. The laughter, the stories shared, and the smiles on their faces as they savor each bite—it’s all part of the magic. So, roll up your sleeves and let the holiday spirit guide you. I promise, these brownie bars will be a cherished memory and an irresistible addition to your festive celebrations!
Print
Christmas Magic Layer Brownie Bars
- Total Time: 1 hour
- Yield: 9 brownie bars 1x
- Diet: Vegetarian
Description
Deliciously layered chocolate brownie bars perfect for Christmas celebrations.
Ingredients
- 1½ cups semi-sweet chocolate chips
- ½ cup salted butter (1 stick)
- 1 cup granulated sugar
- 2 large eggs
- 1 large egg yolk
- 1 cup all-purpose flour
- ½ teaspoon vanilla extract
- ¾ cup nuts (optional, divided)
- ¼ cup mini holiday M&Ms (divided)
- ¾ cup regular holiday M&Ms (divided)
- ½ cup semi-sweet chocolate chips (divided)
- 1 cup sweetened flaked coconut
- ¾ cup sweetened condensed milk (from a 14-ounce can)
- ¼ cup holiday sprinkles
Instructions
- Preheat and Prepare Pan: Preheat your oven to 350 degrees F. Line a 9-inch baking pan with foil or parchment paper, then spray with nonstick cooking spray to ensure easy removal of the brownies.
- Melt Chocolate and Butter: Place the butter and semi-sweet chocolate chips in a large, microwave-safe bowl. Microwave on high for 30 seconds, then stir. Continue microwaving in 30-second intervals, stirring in between, until the mixture is completely melted and smooth.
- Mix Wet Ingredients: Beat granulated sugar into the chocolate mixture. Then add the vanilla and eggs (two whole eggs plus one yolk), beating until the mixture is well combined and smooth.
- Add Flour: Stir in the all-purpose flour just until combined; avoid overmixing to keep the brownies tender. Pour the batter into the prepared baking pan, spreading evenly.
- Bake the Brownie Base: Bake in the preheated oven for 20 minutes. The brownies will still jiggle slightly but will be set on top.
- Add Toppings Layer: Remove the pan from the oven. Evenly layer half of the nuts, half of the chocolate chips, half of the mini and regular holiday M&Ms, and then all the sweetened shredded coconut over the brownie base. Pour the sweetened condensed milk evenly over the toppings and gently spread to distribute it evenly. Sprinkle the remaining chocolate chips, M&Ms, nuts, and finally the holiday sprinkles on top.
- Finish Baking: Return the pan to the oven and bake for an additional 25 minutes, or until the edges turn golden and the center is set and beginning to brown. If the top starts browning too quickly, loosely cover with foil to prevent burning.
- Cool and Serve: Remove from oven and allow the bars to cool completely in the pan before cutting into 9 squares with a sharp knife.
- Store Properly: Store the cooled bars in a tightly sealed container at room temperature for up to one week to maintain freshness.
Notes
- For added flavor, consider using different types of nuts like walnuts or pecans.
- These bars can be decorated with extra sprinkles for festive occasions.
- Prep Time: 15 minutes
- Cook Time: 45 minutes
- Category: Dessert
- Method: Baking
- Cuisine: American
Nutrition
- Serving Size: 1 bar
- Calories: 250
- Sugar: 20g
- Sodium: 150mg
- Fat: 12g
- Saturated Fat: 7g
- Unsaturated Fat: 5g
- Trans Fat: 0g
- Carbohydrates: 33g
- Fiber: 1g
- Protein: 3g
- Cholesterol: 50mg