
Introduction to Classic Buttermilk Pancakes
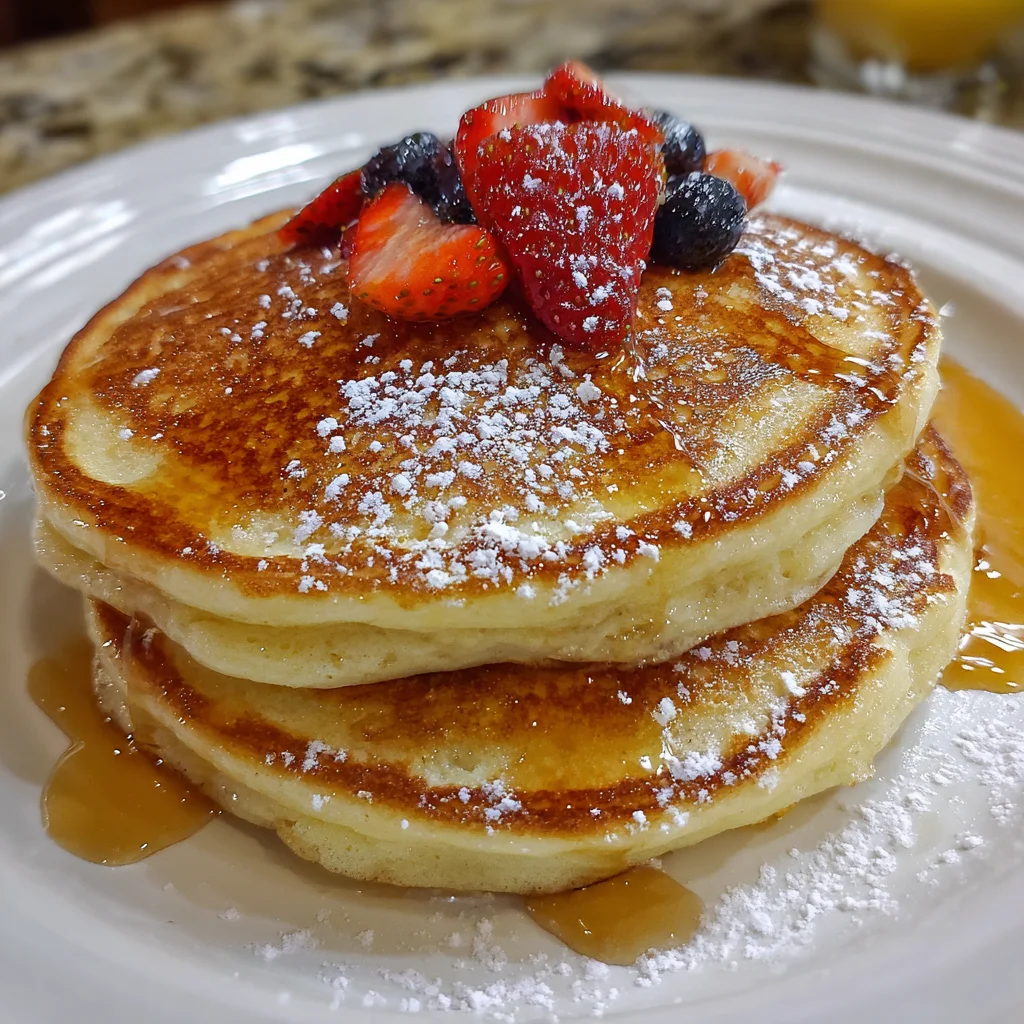
There’s something magical about waking up to the smell of Classic Buttermilk Pancakes wafting through the kitchen. It instantly turns any morning into a cozy celebration! I know how hectic life can be, especially for busy moms and professionals. Whether you’re trying to whip up a quick breakfast before school or impressing loved ones at brunch, this recipe is your go-to solution. The fluffy texture and rich flavor of these pancakes will make your mornings brighter and your stomachs happier. Trust me, once you try them, you’ll want to make them a regular part of your routine!
Why You’ll Love This Classic Buttermilk Pancakes
Let’s face it—mornings can feel like a chaotic race against the clock. That’s where these Classic Buttermilk Pancakes shine! They’re not only easy to whip up, but they also taste amazing. With just a few simple ingredients, you can have a dozen fluffy pancakes ready in no time. Plus, they offer a comforting taste that leaves everyone craving more. Who wouldn’t love a recipe that brings smiles all around the breakfast table?
Ingredients for Classic Buttermilk Pancakes
To make the perfect Classic Buttermilk Pancakes, you’ll need a handful of basic yet essential ingredients that are likely already in your pantry.
- All-purpose flour: This is the foundation of your pancakes, giving them structure and that delightful fluffiness.
- Granulated sugar: Just a touch to enhance sweetness and flavor, perfect for balancing the tanginess of buttermilk.
- Baking soda: This is your rising agent, helping the pancakes grow tall and fluffy as they cook.
- Baking powder: Works in tandem with baking soda to give those pancakes an extra lift, ensuring they’re light and airy.
- Salt: A pinch goes a long way, enhancing all the flavors and bringing everything together.
- Buttermilk: The star of the show! It contributes to that rich flavor and tender texture we all love.
- Large eggs: These help bind the ingredients together and add moisture and richness.
- Unsalted butter: The melted butter makes your pancakes irresistibly moist and adds a buttery flavor.
- Vanilla extract: Just a splash for a warm, lovely aroma and a hint of sweetness.
- Maple syrup: A must for serving, it gives your pancakes that classic breakfast finish.
- Fresh fruits: Optional but recommended! Strawberries, bananas, or blueberries add a fresh twist that your family will adore.
- Butter for topping: Optional too, but who can resist a little extra butter on a warm pancake?
The specific amounts of these ingredients can be found at the bottom of the article for your convenience. Feel free to experiment and make substitutions as you please; after all, cooking is about creativity and adapting to what you have on hand!
How to Make Classic Buttermilk Pancakes
Making Classic Buttermilk Pancakes is as easy as pie—or should I say pancake? With these simple steps, you’ll have fluffy goodness on your plate in no time.
Step 1: Mix Dry Ingredients
Start by grabbing a large mixing bowl. In it, combine the all-purpose flour, granulated sugar, baking soda, baking powder, and salt. Whisk them together until they’re well blended, like a cozy mix of flavors waiting for their moment in the spotlight. This step is crucial for ensuring even distribution of the dry ingredients.
Step 2: Prepare Wet Ingredients
Now, let’s move on to the wet ingredients. In a separate bowl, whisk the lightly beaten eggs. Then, add the buttermilk, melted butter, and vanilla extract. Give this mixture a good stir until everything is well combined. You’ll love how the aroma begins to fill the kitchen, making your excitement grow for the pancakes ahead!
Step 3: Combine Dry and Wet Ingredients
Time to bring it all together! Gently fold the wet ingredients into the dry mixture. It’s important not to overmix; just stir until you see a few lumps here and there. These lumps are like little air pockets that contribute to the pancakes’ fluffiness. Remember, we want our batter to be more on the lumpy side than smooth!
Step 4: Heat the Skillet
While you’re folding, it’s a good idea to heat up your skillet or griddle. Set it over medium heat and lightly grease it with butter or cooking spray. A well-heated skillet is the secret to getting that delicious golden-brown crust on your pancakes. Just make sure it’s not too hot. We’re going for a gentle sizzle, not a frantic snap, crackle, and pop!
Step 5: Cook the Pancakes
Once the skillet is ready, it’s time to cook! Pour about ¼ cup of the pancake batter onto the skillet for each pancake. Watch closely as the pancakes cook! Bubbles will start to appear on the surface, and the edges will look set—a sure sign they’re ready to flip. This typically takes about 2-3 minutes. Flip them gently and cook for another 1-2 minutes until golden brown. Even my picky eater loves watching this part!
Step 6: Serve and Enjoy
Your Classic Buttermilk Pancakes are now ready to be devoured! Stack them high on a plate and serve warm with a pat of butter and a drizzle of maple syrup. Don’t forget to add those fresh fruits on top if you like! Each bite is a fluffy cloud of joy, perfect for kicking off a busy day or enjoying a leisurely brunch with family.
Tips for Success
- Always use room temperature buttermilk for the best texture.
- Don’t overmix your batter! A few lumps are perfectly fine.
- Preheat your skillet properly—this is key for that golden crust.
- Keep pancakes warm in a low oven while you cook the rest.
- Customize with chocolate chips or nuts for a fun twist!
Equipment Needed
- Large mixing bowl: A medium bowl works too if that’s all you have.
- Whisk: A fork can do the trick in a pinch.
- Skillet or griddle: A non-stick frying pan is a great alternative.
- Ladle or measuring cup: Use any cup for pouring batter.
- Spatula: A regular serving spatula works just fine.
Variations on Classic Buttermilk Pancakes
- Whole Wheat Pancakes: Swap some all-purpose flour for whole wheat flour for a nuttier flavor and added fiber.
- Banana Pancakes: Mash ripe bananas and fold them into the batter for added moisture and sweetness—perfect for banana lovers!
- Blueberry Pancakes: Stir in fresh or frozen blueberries for bursts of fruity flavor in every bite.
- Vegan Pancakes: Replace eggs with flaxseed meal combined with water and use plant-based milk for a delicious vegan option.
- Chocolate Chip Pancakes: A handful of chocolate chips mixed into the batter makes for a delightful treat everyone will love!
- Cinnamon Roll Pancakes: Swirl a mixture of cinnamon and brown sugar into the batter while cooking for a fun twist on the classic!
Serving Suggestions for Classic Buttermilk Pancakes
- Maple Syrup: Drizzle warm maple syrup over the pancakes for that classic sweetness.
- Fresh Fruits: Serve with a side of mixed berries or sliced bananas for a refreshing touch.
- Bacon or Sausage: Crispy bacon or savory sausage links are perfect for a hearty breakfast.
- Coffee or Tea: Pair with a cup of your favorite coffee or herbal tea to complete the meal.
- Presentation: Stack pancakes high and dust with powdered sugar for a lovely brunch display!
FAQs about Classic Buttermilk Pancakes
Can I make Classic Buttermilk Pancakes ahead of time?
Absolutely! You can prepare the batter the night before and refrigerate it. Just give it a gentle stir before cooking. If you have leftover pancakes, they can be stored in the fridge and reheated in the toaster or microwave.
What can I substitute for buttermilk?
If you’re out of buttermilk, don’t fret! You can make a quick homemade version by mixing 1 cup of milk with 1 tablespoon of vinegar or lemon juice. Let it sit for about 5-10 minutes, and you’ve got yourself a buttermilk alternative!
How do I keep pancakes warm while cooking?
Simply place cooked pancakes on a baking sheet in a low oven (around 200°F). This keeps them warm and fluffy while you finish up the batch. It’s a lifesaver for busy mornings!
Can I freeze Classic Buttermilk Pancakes?
Yes! Let the pancakes cool completely, then stack them with parchment paper in between. Place them in a freezer bag or container. They’ll stay good for about a month. Reheat directly from frozen; they’ll taste as good as fresh!
How do I make my pancakes extra fluffy?
To achieve that irresistible fluffiness, make sure to use room temperature buttermilk and eggs. Also, remember: when mixing the batter, less is more! Stir just until combined for the most tender pancakes.
Final Thoughts
There’s a certain joy wrapped in the aroma of Classic Buttermilk Pancakes on a lazy Sunday morning. Each fluffy bite promises comfort, nostalgia, and a sense of togetherness. Whether you’re sharing them with family or indulging solo, these pancakes elevate any breakfast into a cherished moment. They’re more than just a meal; they’re a delightful experience that invites laughter and warmth. So grab your whisk and start flipping; these pancakes will soon become a beloved tradition in your home—one that fills hearts as much as it fills bellies. Cheers to delicious mornings ahead!
Print
Classic Buttermilk Pancakes: Discover the Perfect Fluff!
- Total Time: 25 minutes
- Yield: 4 servings 1x
- Diet: Vegetarian
Description
Delicious and fluffy classic buttermilk pancakes perfect for breakfast or brunch.
Ingredients
- 2 cups all-purpose flour, sifted
- 2 tbsp granulated sugar
- 1 tsp baking soda
- 2 tsp baking powder
- 0.5 tsp salt
- 2 cups buttermilk, room temperature
- 2 large eggs, lightly beaten
- 0.25 cup unsalted butter, melted
- 1 tsp vanilla extract
- Maple syrup, to taste (for serving)
- Butter, for topping (optional)
- Fresh fruits such as strawberries, bananas, or blueberries (optional)
Instructions
- In a large mixing bowl, whisk together the flour, sugar, baking soda, baking powder, and salt.
- In another bowl, whisk the eggs, then add buttermilk, melted butter, and vanilla extract.
- Gently fold the wet ingredients into the dry ingredients, stirring just until combined. Do not overmix; the batter should be slightly lumpy.
- Heat a non-stick skillet or griddle over medium heat and lightly grease with butter or cooking spray.
- Using a ladle or measuring cup, pour ¼ cup of batter onto the skillet for each pancake. Cook until bubbles appear on the surface and the edges look set, about 2-3 minutes.
- Flip the pancakes and cook for another 1-2 minutes, until golden brown and cooked through.
- Remove from heat and serve warm with butter, maple syrup, and fresh fruits.
Notes
- Make sure the buttermilk is at room temperature for best results.
- Do not overmix the batter to ensure fluffy pancakes.
- Adjust cooking time based on skillet temperature to avoid burning.
- Prep Time: 10 minutes
- Cook Time: 15 minutes
- Category: Breakfast
- Method: Pan-frying
- Cuisine: American
Nutrition
- Serving Size: 1 pancake
- Calories: 200
- Sugar: 5g
- Sodium: 300mg
- Fat: 8g
- Saturated Fat: 4g
- Unsaturated Fat: 2g
- Trans Fat: 0g
- Carbohydrates: 30g
- Fiber: 1g
- Protein: 5g
- Cholesterol: 50mg