Introduction to Classic Pickled Eggs
There’s something incredibly satisfying about making Classic Pickled Eggs. It brings back memories of my grandmother’s kitchen, with the tangy aroma wafting through the air. If you’re like me—busy juggling family and work—you’ll appreciate this recipe. It’s not just easy; it creates a delicious snack that you can grab on the go. These pickled eggs are perfect for impressing guests at brunch or simply enjoying as a midnight treat. Trust me, you’ll love how quick and rewarding it feels to whip up this delightful culinary gem!
Why You’ll Love This Classic Pickled Eggs
One of the best things about Classic Pickled Eggs is their simplicity. In just a few easy steps, you’ve got a mouthwatering snack ready to enjoy! They pack a punch with flavor, making them a delicious addition to any meal or a perfect on-the-go bite. Plus, they can be tailored to suit your taste buds, ensuring every bite takes you on a delightful adventure. Who knew preserving flavor could be this easy?
Ingredients for Classic Pickled Eggs
Creating these Classic Pickled Eggs is both delightful and straightforward. Here’s what you’ll need:
- Eggs: Fresh eggs are ideal for that classic flavor. Aim for organic or farm-fresh when possible for the best results.
- White vinegar: This is the key ingredient that adds that punchy flavor! Make sure it has a 5-7% acetic acid content for effective pickling.
- Water: The perfect partner for the vinegar, aiding in brining without overpowering the eggs.
- Salt: Just a pinch enhances the taste and is essential for the pickling process.
- Pickling spice: This blend typically includes mustard seed, bay leaves, peppercorns, and coriander seeds. It adds complexity to the brine.
- Yellow onion (optional): Thin slices of onion can impart a savory depth, but feel free to skip or substitute with shallots for a milder taste.
For precise measurements, check out the bottom of the article or grab a printable version to keep handy in the kitchen!
How to Make Classic Pickled Eggs
Step 1: Prepare the Instant Pot
To start, position the rack at the bottom of your Instant Pot insert. This keeps the eggs elevated and prevents them from touching the bottom. Next, add 1 cup of water to the pot. It’s the perfect amount to create steam and cook those eggs beautifully. Lay the eggs on the rack, ensuring they are not overcrowded. This setup is simple, and trust me, it makes the cooking process much smoother!
Step 2: Cook the Eggs
Now it’s time to cook the eggs! Gently place the lid on the Instant Pot. Make sure to seal it tightly, or you’ll be in for a spaghetti fountain of pressure! Set the valve to the sealing position and select the high-pressure setting for 5 minutes. You can imagine the anticipation as the eggs quietly cook, absorbing all that lovely steam.
Step 3: Cool the Eggs
When the timer goes off, allow the eggs to sit for 3 minutes. This step helps them finish cooking gently. After that, release the pressure by carefully moving the valve. Safety first! Once the pressure has released completely, use tongs to transfer the eggs to a bowl of cold water. This cooling process is crucial, as it helps stop the cooking and ensures that your yolks stay vibrant yellow.
Step 4: Pack the Jar
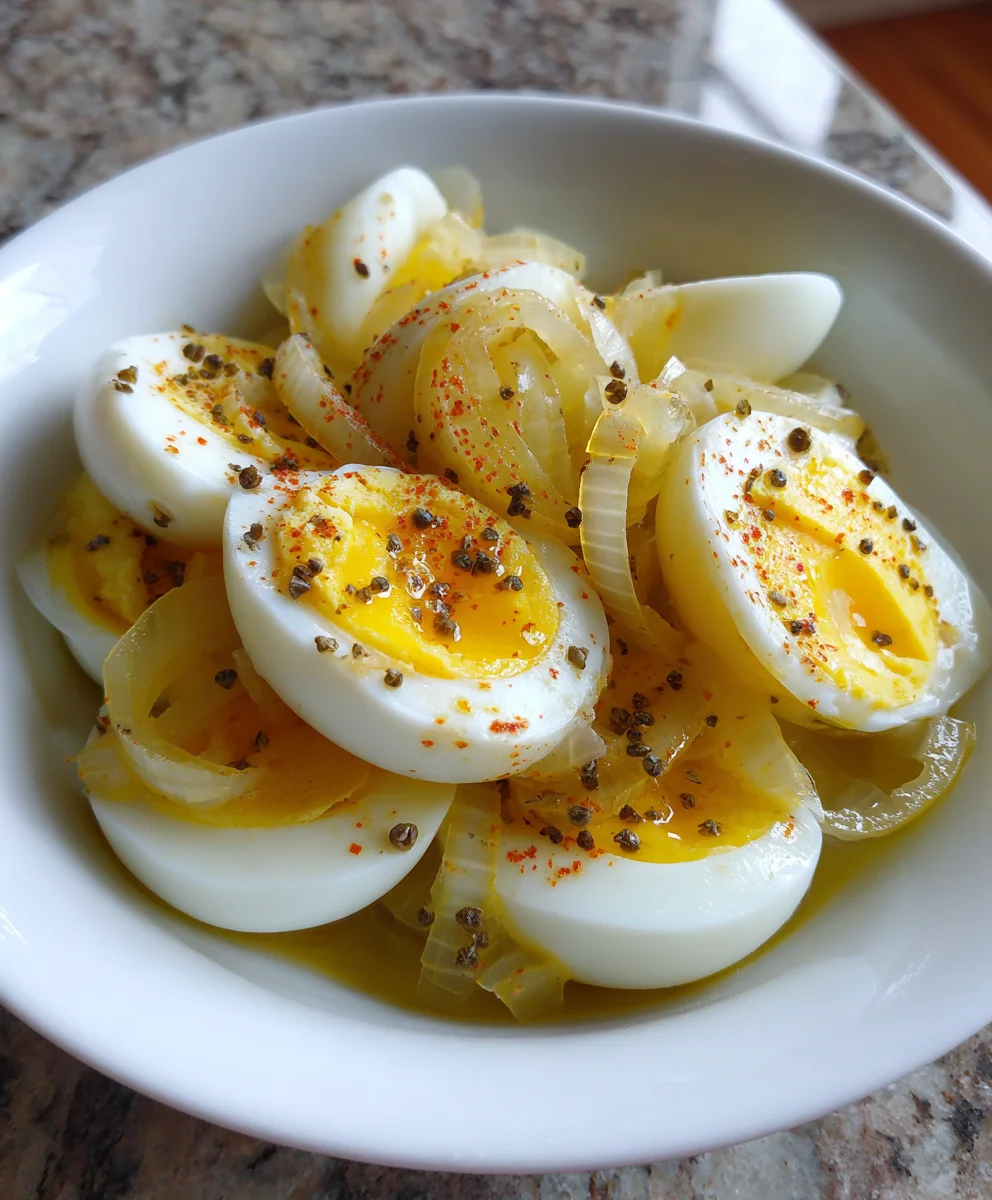
Now, let’s pack our eggs and onions into a jar! Start by layering the cooled eggs into a clean quart-sized jar. If you decided to use onions, alternate the layers with thin slices for added flavor. The visual appeal is just as important as taste, and a colorful jar of Classic Pickled Eggs looks stunning on any table!
Step 5: Add the Brine
Time to mix the magic! Sprinkle in your pickling spice and salt directly over the eggs. Then, fill the jar with about 1/4 water. Finish filling it to the top with white vinegar. This brine is what gives your pickled eggs that zingy flavor! Make sure all the eggs are submerged, as this ensures even pickling throughout.
Step 6: Seal and Store
Seal the jar tightly with the lid. Here’s a crucial tip—gently invert the jar a couple of times to mix the brine and dissolve the salt. It’s like a little dance for the jar! This step is essential for evenly distributing the flavors. Once mixed, place it upright in your fridge.
Step 7: Wait for Brining
Patience is key! Leave the jar in the fridge for 4 to 5 days. This waiting period allows the brine to work its magic, transforming those eggs into flavorful treats. Store the jar in the back of the fridge, as it tends to be colder there. Once the time is up, you’ll have a delectable snack ready to enjoy!
Tips for Success
- Use fresh eggs for the best taste and texture.
- Don’t skip the cooling step; it helps keep your yolks bright and creamy.
- Feel free to adjust the spice mix based on your preferences.
- Let the pickled eggs brine for the full 5 days for maximum flavor.
- Label your jar with the date so you know when they’ll be ready!
Equipment Needed for Classic Pickled Eggs
- Instant Pot: This makes cooking eggs fast and easy. A regular pot works, but it takes longer.
- Jar: A clean quart-sized jar is ideal. You can also use a glass container with a lid.
- Measuring cups: For accurate brine ratios.
- Tongs: Great for safely transferring the eggs to cool.
Variations of Classic Pickled Eggs
- Beet-Pickled Eggs: Add cooked beet juice to the brine for a vibrant color and a touch of sweetness.
- Spicy Pickled Eggs: Incorporate sliced jalapeños or crushed red pepper flakes for an extra kick!
- Herbed Pickled Eggs: Add fresh herbs like dill or thyme to the brine for an aromatic twist.
- Garlic Lover’s Pickled Eggs: Toss in whole garlic cloves to infuse a robust flavor.
- Sugar & Spice: Adjust the brine by adding a bit of sugar for a sweet and tangy flavor profile.
Serving Suggestions for Classic Pickled Eggs
- Serve with a side of crispy crackers for a satisfying crunch.
- Pair with a light salad drizzled with vinaigrette for a refreshing contrast.
- Enjoy alongside a cold beer or a bright cocktail for a delightful pairing.
- Garnish on top of deviled eggs for an eye-catching twist.
FAQs about Classic Pickled Eggs
How long will Classic Pickled Eggs last?
These delectable Classic Pickled Eggs can safely be kept in the fridge for up to 3 months. Just make sure they remain submerged in the brine for optimal flavor preservation!
Can I use brown eggs instead of white?
Absolutely! Brown eggs can be used just like white eggs. The flavor remains the same, but they will lend a beautiful, rustic appearance to your pickles.
Can I adjust the spiciness of the brine?
Yes! Feel free to alter the spice levels. If you love heat, toss in some red pepper flakes or slice up jalapeños for that extra kick!
Are Classic Pickled Eggs suitable for meal prep?
Definitely! These tasty little snacks are perfect for meal prep. You can make them in advance and have them on hand for quick snacks or salads throughout the week.
How do I know when the eggs are fully pickled?
After brining in the fridge for 4 to 5 days, you’ll notice that the eggs will have taken on a lovely hue and flavor from the brine. A quick taste test can confirm they’re ready to enjoy!
Final Thoughts
Making Classic Pickled Eggs is more than just cooking; it’s a joyful experience. The process brings back warm memories of family gatherings and kitchen adventures. As you witness the transformation of simple eggs into vibrant, zesty treats, you can’t help but smile. These delightful snacks are a testament to how a little patience and creativity can yield big flavors. Plus, they’re perfect for busy days or unexpected guests. So dive into this recipe and relish the simple joy of preserving flavor. Your taste buds and your loved ones will thank you!
Print
Classic Pickled Eggs
- Total Time: 5 days (for brining)
- Yield: 8–12 servings 1x
- Diet: Vegetarian
Description
A classic recipe for pickling eggs that preserves their flavor and offers a delicious snack.
Ingredients
- 8–12 eggs
- White vinegar (5-7% acetic acid)
- Water
- 1/2 tsp salt
- 1 tbsp pickling spice (includes mustard seed, bay leaves, peppercorns, coriander seeds, allspice, etc.)
- 1/3 to 1/2 yellow onion; thinly sliced in rounds (optional)
Instructions
- Position the rack in the bottom of the Instant Pot insert. Add 1 cup of water and place as many eggs as you like on the rack.
- Place the lid on, ensure the valve is closed and set the timer for 5 minutes on high pressure.
- Once the eggs have been cooking for 5 minutes, allow them to sit a further three minutes then release the pressure by moving the valve.
- Remove the eggs and place them in a bowl of cold water.
- Pack eggs and onions (if using) in a clean quart size or larger jar depending on how many you are using.
- Add pickling spice and salt.
- Fill 1/4 jar with water, then top up with vinegar.
- Seal with the jar lid, then gently invert the jar a couple of times so the vinegar and water are mixed and the salt dissolves.
- Place in the fridge for 4-5 days to allow the brine to penetrate the eggs, then enjoy!
Notes
- Ensure the eggs are fresh for the best flavor.
- You can adjust the vinegar and spice levels to suit your taste.
- Pickled eggs can be stored in the refrigerator for up to 3 months.
- Prep Time: 15 minutes
- Cook Time: 10 minutes
- Category: Snack
- Method: Instant Pot and pickling
- Cuisine: Preserved
Nutrition
- Serving Size: 1 egg
- Calories: 70
- Sugar: 0g
- Sodium: 120mg
- Fat: 5g
- Saturated Fat: 1.5g
- Unsaturated Fat: 3.5g
- Trans Fat: 0g
- Carbohydrates: 1g
- Fiber: 0g
- Protein: 6g
- Cholesterol: 186mg