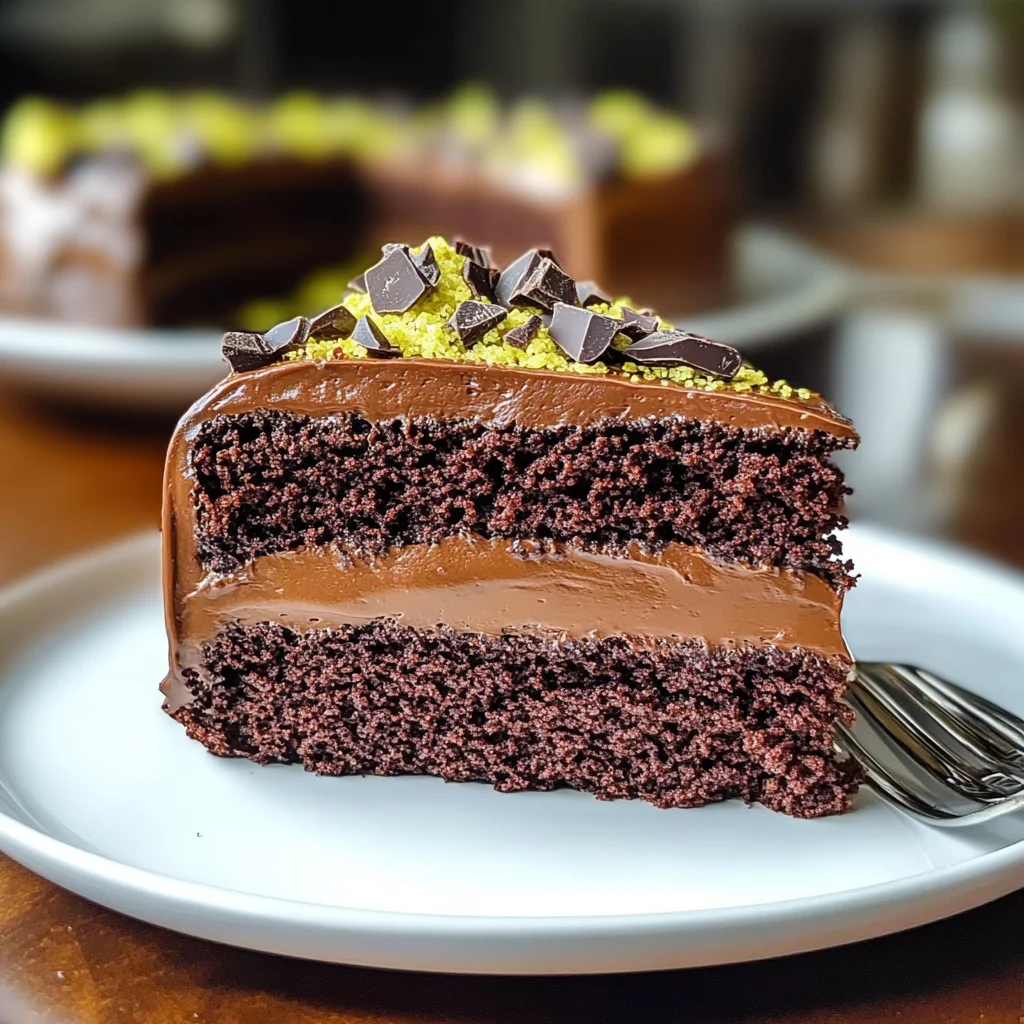
Introduction to Dubai Chocolate Cake
Welcome to a slice of paradise with the irresistible Dubai Chocolate Cake! If you’re anything like me, you understand that life can get hectic. Between juggling family, work, and everything in between, the last thing you want is a complicated dessert recipe. That’s where this decadent cake shines! With its rich, moist layers and luscious chocolate frosting, it’s perfect for any occasion—be it a family gathering or a sweet treat for yourself. Grab your apron because I’m about to take you on a tasty adventure that will impress your loved ones without breaking a sweat!
Why You’ll Love This Dubai Chocolate Cake
This Dubai Chocolate Cake is not just a cake; it’s a heartfelt treat! It’s incredibly easy to whip up, making it perfect for busy days when time flies by. Plus, this recipe offers a guaranteed crowd-pleaser with its rich, chocolatey flavor that leaves everyone asking for more. No need for fancy techniques or ingredients—just pure joy in every bite! Who wouldn’t love that?
Ingredients for Dubai Chocolate Cake

Gathering your ingredients is half the fun of baking! For this sumptuous Dubai Chocolate Cake, you’ll need a combination of pantry staples and a few treats to make it truly special.
- All-purpose flour: This forms the base of the cake, creating a light yet sturdy structure.
- Granulated sugar: This sweetens the cake, providing that delightful contrast to the rich cocoa.
- Unsweetened cocoa powder: The star player here! It gives the cake its intense chocolate flavor.
- Whole milk: This adds moisture and richness, making every bite luscious.
- Vegetable oil: It keeps the cake super moist and tender, unlike butter which can dry it out.
- Large eggs: These act as the binding agents, giving the cake structure and a fluffy texture.
- Baking powder: This is essential for leavening, helping the cake rise beautifully in the oven.
- Salt: Just a pinch enhances all the flavors in your cake, balancing the sweetness.
- Vanilla extract: A dash of this magical extract brings depth and warmth to the chocolate flavor.
- Boiling water: Adding boiling water to the batter ensures a moist cake and intensifies the chocolate flavor.
- Semi-sweet chocolate chips (optional): These provide delicious chocolate bursts throughout the cake! Who can resist?
- Chocolate frosting: Store-bought or homemade, it adds a decadent layer of sweetness on top.
- Shaved chocolate or sprinkles (optional): These add a lovely decorative touch, making your cake picture-perfect.
For details on exact measurements, just scroll down to the end of the article where you’ll find everything neatly organized for printing!
How to Make Dubai Chocolate Cake
Now that we have our ingredients ready, let’s dive into the fun part—baking! Making this Dubai Chocolate Cake is a delightful journey. Follow these simple steps, and before you know it, you’ll have a masterpiece waiting to be tasted.
Step 1: Preheat Your Oven
Start by preheating your oven to 350°F (175°C). This step is crucial for a perfectly baked cake. While it warms up, you can get everything else ready. It’s like giving the oven a “heads-up” that something delicious is coming its way!
Step 2: Mix Your Dry Ingredients
In a large mixing bowl, whisk together the all-purpose flour, granulated sugar, unsweetened cocoa powder, baking powder, and salt. It’s essential to blend these well—this is where your cake gets its structure and flavor. Just imagine: the rich aroma of cocoa filling your kitchen!
Step 3: Combine Wet Ingredients
In another bowl, mix the whole milk, vegetable oil, large eggs, and vanilla extract until smooth. This mixture brings a lovely moistness to our Dubai Chocolate Cake. Just picture combining those shiny, velvety ingredients into a luscious blend!
Step 4: Combine Wet and Dry Mixtures
Now, gently pour the wet mixture into the dry ingredients. Stir until everything comes together smoothly. Avoid overmixing; we want a soft, tender cake, not a dense one! Think of it as nurturing your batter—a little love goes a long way!
Step 5: Incorporate Boiling Water
Here comes the magic! Slowly stir in the boiling water. This tricky step not only enhances the chocolate flavor but also ensures your cake stays moist and fluffy. It’s almost like a warm hug for your batter!
Step 6: Add in Chocolate Chips (Optional)
If you’re feeling adventurous, fold in the semi-sweet chocolate chips. They’ll melt slightly while baking, creating delightful pockets of chocolate goodness throughout the cake. It’s like gifting your cake extra layers of love!
Step 7: Bake the Cake
Pour the batter evenly into your prepared cake pans. Slide them into the oven and bake for 30-35 minutes. Use a toothpick to check for doneness; it should come out clean when the cakes are ready. The scent wafting through your house will make it hard to wait!
Step 8: Cool the Cakes
Once baked, allow the cakes to cool in the pans for 15-20 minutes. Then carefully transfer them to wire racks to cool completely. It’s important to ensure they’re cooled before frosting; nobody wants a melty mess!
Step 9: Frost the Cake
When the cakes are completely cool, place one layer on a serving plate. Generously frost the top with your chocolate frosting. Add the second layer on top, then frost the top and sides. Is there anything more satisfying than slathering on that rich frosting?
Step 10: Add Decorative Touches
To finish your Dubai Chocolate Cake, sprinkle some shaved chocolate or colorful sprinkles on top. This adds that perfect touch of elegance. Just like that—your cake transforms into a stunning dessert that’s ready to impress!
Tips for Success

- Use room temperature ingredients for better mixing and a smoother batter.
- Don’t open the oven door too soon; it can cause your cake to sink.
- Consider using parchment paper in the cake pans for easy removal.
- Make sure to cool cakes completely before frosting to avoid melting.
- Experiment with different toppings to personalize your Dubai Chocolate Cake!
Equipment Needed
- Two 9-inch round cake pans (you can use one pan and bake in batches).
- Mixing bowls (any size works, but a large one is best for batter).
- Whisk or electric mixer (a whisk is perfect if you’re in a workout mood!).
- Measuring cups and spoons (precision matters in baking!).
- Cooling rack (if you don’t have one, a plate will do just fine).
Variations on Dubai Chocolate Cake
- Gluten-Free Option: Substitute all-purpose flour with a 1:1 gluten-free baking blend. Your cake will still be delicious!
- Chocolate Mint Twist: Add a few drops of peppermint extract to the batter for a refreshing minty flavor.
- Nutty Delight: Fold in chopped nuts like walnuts or pecans for added crunch and texture.
- Vegan Version: Replace eggs with flaxseed meal and use almond milk instead of whole milk.
- Espresso Infusion: Mix in a teaspoon of espresso powder to enhance the chocolate flavor even more.
Serving Suggestions for Dubai Chocolate Cake
- Pair your Dubai Chocolate Cake with a scoop of vanilla ice cream for a delightful contrast.
- Serve it alongside fresh berries to add a refreshing touch.
- Drizzle some chocolate or caramel sauce on top for an extra indulgence.
- Enjoy with a cup of strong coffee or tea to elevate the flavors.
- Presentation tip: Use a cake stand to showcase your masterpiece beautifully!
FAQs about Dubai Chocolate Cake
Can I make the Dubai Chocolate Cake ahead of time?
Absolutely! This cake actually tastes even better the next day as the flavors meld together. Just store it in an airtight container at room temperature. You can frost it right before serving for the best presentation!
How do I know when the cake is done baking?
Check for doneness by inserting a toothpick into the center of the cake. If it comes out clean or with a few crumbs attached, your Dubai Chocolate Cake is ready to come out of the oven. If it’s wet, give it a few more minutes and recheck.
Can I freeze Dubai Chocolate Cake?
Yes, this cake freezes beautifully! Just wrap the unfrosted layers in plastic wrap and aluminum foil before freezing. To serve, simply thaw it in the refrigerator overnight and frost it when it’s fully thawed. It’s like magic!
What can I substitute for eggs in this recipe?
If you’re looking for a vegan-friendly option, I recommend using flaxseed meal. Mix one tablespoon of flaxseed meal with three tablespoons of water for each egg. Let it sit for a few minutes until it’s gel-like. Easy peasy!
Can I use different types of frosting?
For sure! While chocolate frosting is divine, feel free to get creative. Vanilla buttercream, cream cheese frosting, or even a light whipped ganache can complement the rich flavors of your Dubai Chocolate Cake. The choice is yours!
Final Thoughts on Baking the Dubai Chocolate Cake
Baking the Dubai Chocolate Cake is more than just following a recipe; it’s about creating moments filled with joy and delicious flavors. This cake is a celebration of rich cocoa, delectable frosting, and the warmth of home. Each slice is a reminder of life’s simple pleasures, bringing smiles to family faces after a long day. When you bake this luscious cake, it’s not just about satisfying a sweet tooth—it’s about making memories. I hope this recipe becomes a cherished staple in your kitchen, just as it has in mine. So, roll up your sleeves and enjoy every moment of this delightful baking adventure!
Print
Dubai Chocolate Cake
- Total Time: 55 minutes
- Yield: 12 servings 1x
- Diet: Vegetarian
Description
A rich and moist Dubai Chocolate Cake that is perfect for any occasion, indulgently topped with chocolate frosting and optional decorations.
Ingredients
- 1 ¾ cups all-purpose flour
- 1 ½ cups granulated sugar
- ¾ cup unsweetened cocoa powder
- 1 cup whole milk
- ½ cup vegetable oil
- 3 large eggs
- 1 tablespoon baking powder
- ½ teaspoon salt
- 2 teaspoons vanilla extract
- ½ cup boiling water
- 1 cup semi-sweet chocolate chips (optional)
- Chocolate frosting (store-bought or homemade)
- Shaved chocolate or sprinkles for decoration (optional)
Instructions
- Preheat your oven to 350°F (175°C). Grease and flour two 9-inch round cake pans.
- In a large bowl, whisk together the flour, sugar, cocoa powder, baking powder, and salt until well combined.
- In a separate bowl, combine the milk, vegetable oil, eggs, and vanilla extract. Mix until smooth.
- Gradually mix the wet ingredients into the dry ingredients, stirring until the batter is smooth and free of lumps.
- Slowly stir in the boiling water until well blended. This step makes the cake moist.
- If desired, fold in the chocolate chips for an extra chocolate boost.
- Evenly pour the batter into the prepared cake pans.
- Place the pans in the preheated oven and bake for 30-35 minutes. Check with a toothpick; it should come out clean when the cake is ready.
- Once baked, allow the cakes to cool in the pans for 15-20 minutes. Then, carefully transfer them to wire racks to cool completely.
- Once the cakes have cooled, place one layer on a serving plate. Frost the top with your chocolate frosting. Add the second layer and frost the top and sides of the cake.
- Lastly, add shaved chocolate or sprinkles to the top of your Dubai Chocolate Cake for an elegant finish.
Notes
- Store any leftovers in an airtight container at room temperature.
- For a more intense chocolate flavor, consider adding espresso powder to the batter.
- Feel free to customize with your favorite frosting or toppings.
- Prep Time: 20 minutes
- Cook Time: 35 minutes
- Category: Dessert
- Method: Baking
- Cuisine: Middle Eastern
Nutrition
- Serving Size: 1 slice
- Calories: 350
- Sugar: 30g
- Sodium: 200mg
- Fat: 15g
- Saturated Fat: 3g
- Unsaturated Fat: 10g
- Trans Fat: 0g
- Carbohydrates: 50g
- Fiber: 2g
- Protein: 5g
- Cholesterol: 40mg