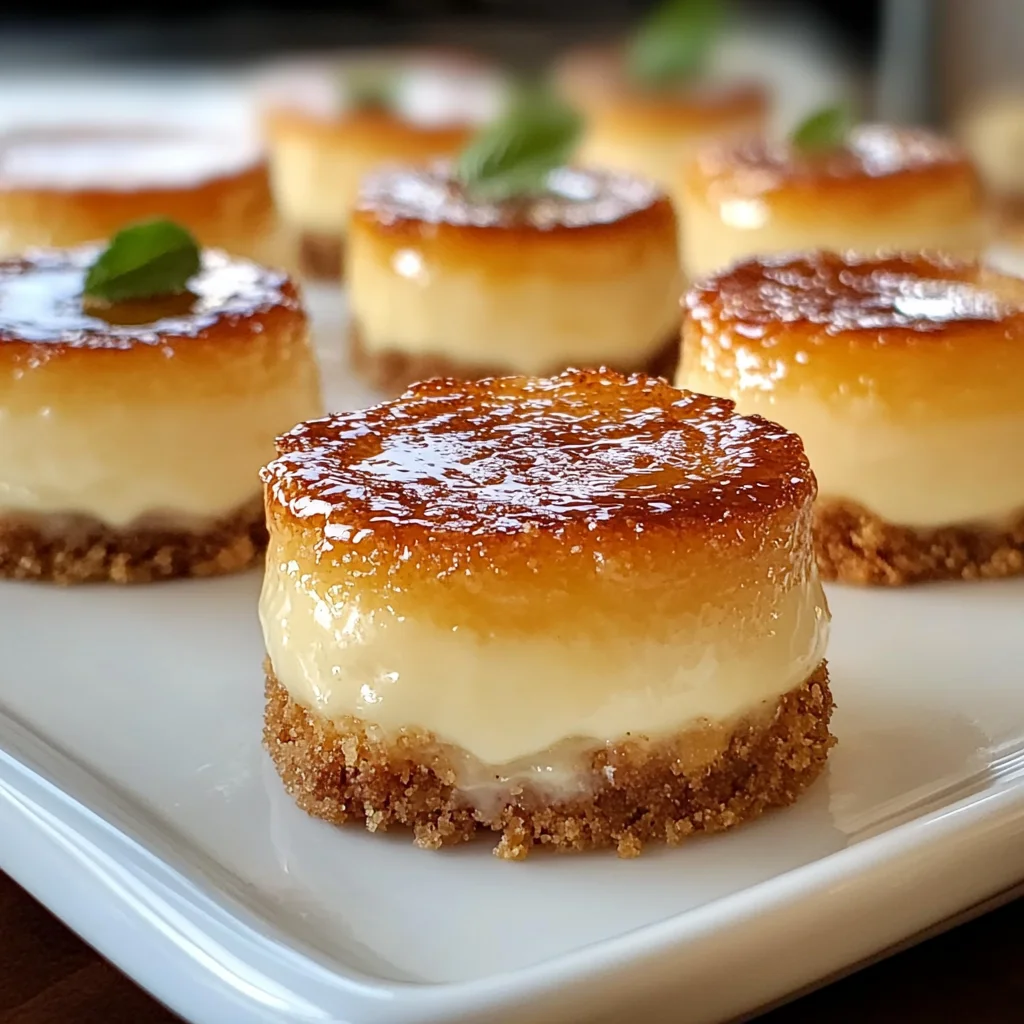
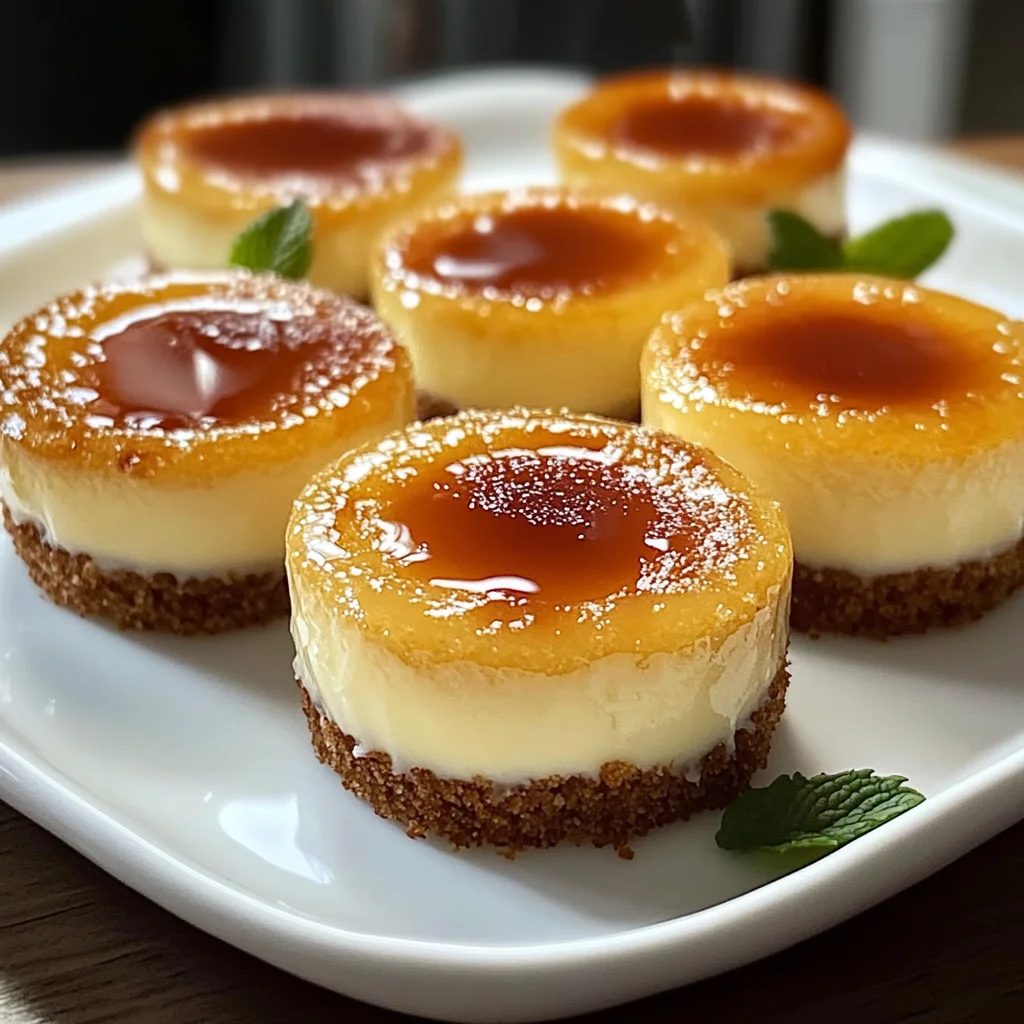
Introduction to MINI CREME BRULEE CHEESECAKES
There’s something mesmerizing about tiny desserts, isn’t there? These MINI CREME BRULEE CHEESECAKES are the perfect solution for both quick treats and impressive gatherings. As a busy mom, I’ve often found myself juggling schedules and meal plans, and this recipe is a lifesaver. Imagine a creamy, rich cheesecake topped with a crunchy caramel layer, all packed into a delightful mini version. Whether it’s a special occasion or just a regular Tuesday evening, these little gems will satisfy your sweet tooth and leave your family smiling.
Why You’ll Love This MINI CREME BRULEE CHEESECAKES
One of the best things about these MINI CREME BRULEE CHEESECAKES is their effortless elegance. Not only do they come together quickly, but they also impress with their stunning presentation. The creamy filling and crispy topping create a delightful contrast in every bite. Perfect for busy weeknights or festive occasions, these mini treats are a crowd-pleaser. Plus, they’re just the right size for indulging without guilt—and who doesn’t love that?
Ingredients for MINI CREME BRULEE CHEESECAKES

Gathering all the ingredients for these MINI CREME BRULEE CHEESECAKES is half the fun! Here’s what you’ll need:
- Graham cracker crumbs – These make up the delectable crust. You can crush your own or buy pre-made crumbs for convenience.
- Unsalted butter – It binds the crumbs together. Feel free to substitute it with coconut oil for a dairy-free option.
- Sugar – A little sweetness enhances the crust and filling. You can use coconut sugar for a more caramel flavor.
- Cream cheese – This brings that smooth, creamy richness to the cheesecakes. Make sure it’s softened to room temperature for the best results.
- Vanilla extract – A must for a lovely aromatic flavor. Real vanilla is preferable, but pure vanilla extract works just fine.
- Salt – Just a pinch helps to balance the sweetness beautifully.
- Eggs – They provide structure and creaminess. Room temperature eggs blend better into the mixture.
- Sour cream – This adds a tangy touch that makes the cheesecake incredibly rich and moist. Greek yogurt can be a nice substitute!
- Granulated sugar (for caramelizing) – This is what you’ll sprinkle on top for that iconic, crispy brûlée finish.
- Fresh berries or mint leaves (optional) – These not only add a pop of color but a refreshing flavor that complements the cheesecakes perfectly.
For exact quantities, don’t forget to check out the bottom of this article where everything is listed for easy printing!
How to Make MINI CREME BRULEE CHEESECAKES
Let’s dive into the delightful process of making MINI CREME BRULEE CHEESECAKES. Follow these simple steps, and you’ll be well on your way to impressing your family and friends!
Step 1: Preheat the Oven
First things first, preheat your oven to 325°F (160°C). This ensures even baking. I always find it helpful to start with this step so the oven is ready to go when you are!
Step 2: Prepare the Muffin Pan
Grab your muffin pan or ramekins and give them a light spray with cooking spray or butter. This little tip ensures easy removal once your mini cheesecakes are done.
Step 3: Make the Crust
In a mixing bowl, combine graham cracker crumbs, sugar, and melted butter. Stir until the mixture resembles wet sand. Close your eyes and imagine the deliciousness to come!
Step 4: Press the Crust into the Muffin Cups
Spoon about one tablespoon of the crust mixture into each cup. Press it down firmly so it holds together nicely. Think of it as building the perfect little foundation for your cheesecakes!
Step 5: Beat the Cream Cheese
In another bowl, beat the softened cream cheese with an electric mixer until it’s smooth and creamy. Picture that luscious texture you’re building—it’s going to be divine!
Step 6: Mix in Sugar and Vanilla
Gradually add the sugar while mixing until well combined. Don’t forget to include the vanilla extract! It adds a delightful aroma that makes your kitchen smell heavenly.
Step 7: Add Eggs One by One
Next, add the eggs, one at a time. Allow each egg to fully incorporate before adding the next. This creates that velvety texture we love in cheesecakes.
Step 8: Incorporate Sour Cream
Now, gently fold in the sour cream. This step adds a wonderful richness. Just imagine how creamy this is going to be; your taste buds can’t wait!
Step 9: Fill the Muffin Cups
Pour the cheesecake filling into each muffin cup, filling them about 3/4 full. It’s like giving each mini cheesecake a cozy little bath of goodness.
Step 10: Bake the Cheesecakes
Place the muffin pan in the preheated oven and bake for 20-25 minutes. The centers should be set but still slightly jiggly when you take them out.
Step 11: Cooling Time
Once baked, turn off the oven and leave the cheesecakes inside for 30 minutes with the door slightly ajar. This cooling process helps prevent cracking. Think of it as giving your treats a well-deserved spa day!
Step 12: Prepare for Caramelization
After cooling, transfer the mini cheesecakes to a wire rack and allow them to cool completely. Then, pop them in the fridge for at least 4 hours (or overnight) to chill.
Step 13: Caramelize the Sugar
When you’re ready to serve, sprinkle about one teaspoon of granulated sugar on top of each cheesecake. Using a kitchen torch, carefully caramelize the sugar until it turns a golden brown. A few moments of magic and voilà!
Tips for Success
- Make sure your cream cheese is fully softened for a super smooth filling.
- Keep an eye on the baking time; every oven is a little different.
- Don’t rush the cooling process—allow the cheesecakes to cool gradually.
- Use a kitchen torch for caramelizing; it gives the best results!
- Feel free to experiment with toppings like chocolate or fruit for a twist.
Equipment Needed
- Muffin pan or ramekins – Use whichever you prefer; they both work beautifully.
- Mixing bowls – Any size will do, but I love using medium bowls for easy mixing.
- Electric mixer – A hand mixer works great, or use a stand mixer if you have one!
- Wire rack – Essential for cooling; you can also use a baking sheet in a pinch.
- Kitchen torch – This is perfect for caramelizing; if you don’t have one, a broiler will work!
Variations for MINI CREME BRULEE CHEESECAKES
- Chocolate Delight: Fold in melted dark chocolate into the filling for a rich chocolatey version.
- Berry Bliss: Add a swirl of raspberry or blueberry puree into the cheesecake batter for a fruity twist.
- Citrus Zest: Incorporate lemon or orange zest into the filling for a fresh, zesty flavor that brightens each bite.
- Dairy-Free Option: Substitute cream cheese with vegan cream cheese and use coconut milk in place of sour cream.
- Gluten-Free Crust: Use almond flour or gluten-free graham cracker crumbs to make a delicious gluten-free crust.
- Nutty Twist: Mix in finely chopped nuts like pecans or hazelnuts into the crust for a delightful added crunch.
Serving Suggestions for MINI CREME BRULEE CHEESECAKES
- Fresh Berries: Serve with a mix of raspberries, strawberries, or blueberries for a pop of color and flavor.
- Mint Leaves: Garnish each cheesecake with a sprig of fresh mint for an elegant touch.
- Whipped Cream: A dollop of homemade whipped cream adds a touch of creaminess.
- Pair with Coffee: These mini treats go perfectly with a hot cup of coffee or espresso.
- Presentation: Use clear dessert cups for a chic display at gatherings.
FAQs about MINI CREME BRULEE CHEESECAKES
Can I make these MINI CREME BRULEE CHEESECAKES ahead of time?
Absolutely! You can prepare them a day in advance and store them in the refrigerator. Just caramelize the sugar right before serving for that fresh crunch.
What can I use instead of cream cheese?
If you’re looking for a dairy-free option, consider using vegan cream cheese or a cashew cream. Both offer a delightful creaminess that works well in these mini cheesecakes.
How do I store leftovers?
Store any leftover MINI CREME BRULEE CHEESECAKES in an airtight container in the fridge. They should stay fresh for about 3-4 days, but good luck keeping them around that long!
Can I freeze these mini cheesecakes?
Yes! After they’ve cooled, you can freeze them without the caramel topping. Just wrap each cheesecake tightly and freeze for up to a month. Thaw them in the fridge when you’re ready to enjoy.
What’s the best way to serve these cheesecakes?
Serve these beauties chilled, topped with fresh berries or a dollop of whipped cream. You can also add a sprig of mint for an adorable pop of color. Enjoy!
Final Thoughts
Creating these MINI CREME BRULEE CHEESECAKES is more than just whipping up a sweet treat; it’s about sharing joy and delight with your loved ones. Each bite offers a creamy, dreamy texture that dances on your palate, while the caramelized topping adds an impressive crunch. I love seeing the smiles as family and friends take their first bites—it’s priceless! Whether it’s a special celebration or just a cozy evening at home, these mini desserts make every moment feel extraordinary. Trust me, taking that first taste is a moment you’ll cherish. Enjoy the sweetness!
Print
MINI CREME BRULEE CHEESECAKES
- Total Time: 4 hours 55 minutes (includes cooling time)
- Yield: 12 mini cheesecakes 1x
- Diet: Vegetarian
Description
Mini Creme Brulee Cheesecakes are delightful, bite-sized treats that combine the creamy texture of cheesecake with the classic crunchy caramelized topping of creme brulee.
Ingredients
- 1 cup graham cracker crumbs
- 4 tablespoons unsalted butter, melted
- 2 tablespoons sugar
- 16 oz cream cheese, softened
- 1 cup sugar
- 1 teaspoon vanilla extract
- 1/2 teaspoon salt
- 3 large eggs, at room temperature
- 1/2 cup sour cream
- 1/4 cup granulated sugar (for caramelizing)
- Fresh berries or mint leaves (for garnish, optional)
Instructions
- Preheat your oven to 325°F (160°C).
- Prepare your muffin pan or ramekins by lightly greasing them with cooking spray or butter.
- In a mixing bowl, combine the graham cracker crumbs, sugar, and melted butter. Mix until everything is evenly coated and resembles wet sand.
- Spoon about one tablespoon of this mixture into each muffin cup, pressing the crumbs down firmly.
- In another mixing bowl, beat the cream cheese until smooth and creamy using an electric mixer.
- Gradually add the sugar and continue mixing until well combined.
- Mix in the vanilla extract and salt, scraping down the sides of the bowl to ensure everything is incorporated.
- Add the eggs, one at a time, allowing each to fully incorporate before adding the next.
- Fold in the sour cream until the filling is smooth and creamy.
- Pour the cheesecake filling into each muffin cup, filling them about 3/4 full.
- Bake in the preheated oven for 20-25 minutes, or until the center is set but still slightly jiggly.
- Once baked, turn off the oven and leave the cheesecakes inside for an additional 30 minutes with the door slightly ajar.
- Remove from the oven and transfer to a wire rack to cool completely, then refrigerate for at least 4 hours (or overnight) before topping.
- Once chilled, sprinkle about one teaspoon of granulated sugar on top of each cheesecake layer.
- Using a kitchen torch, carefully caramelize the sugar by moving the flame over the sugar until it melts and turns a golden brown.
- Allow the caramelized topping to harden for a few minutes before serving.
Notes
- Ensure that the cream cheese is softened to room temperature for a smooth filling.
- Customize the garnish with fresh berries or mint leaves for an extra touch.
- For a more intense caramelization, use a kitchen torch rather than the broiler.
- Prep Time: 30 minutes
- Cook Time: 25 minutes
- Category: Dessert
- Method: Baking
- Cuisine: French
Nutrition
- Serving Size: 1 cheesecake
- Calories: 254
- Sugar: 16g
- Sodium: 180mg
- Fat: 16g
- Saturated Fat: 10g
- Unsaturated Fat: 6g
- Trans Fat: 0g
- Carbohydrates: 24g
- Fiber: 1g
- Protein: 4g
- Cholesterol: 90mg