Introduction to No Bake Oreo Pumpkin Cheesecake Cups
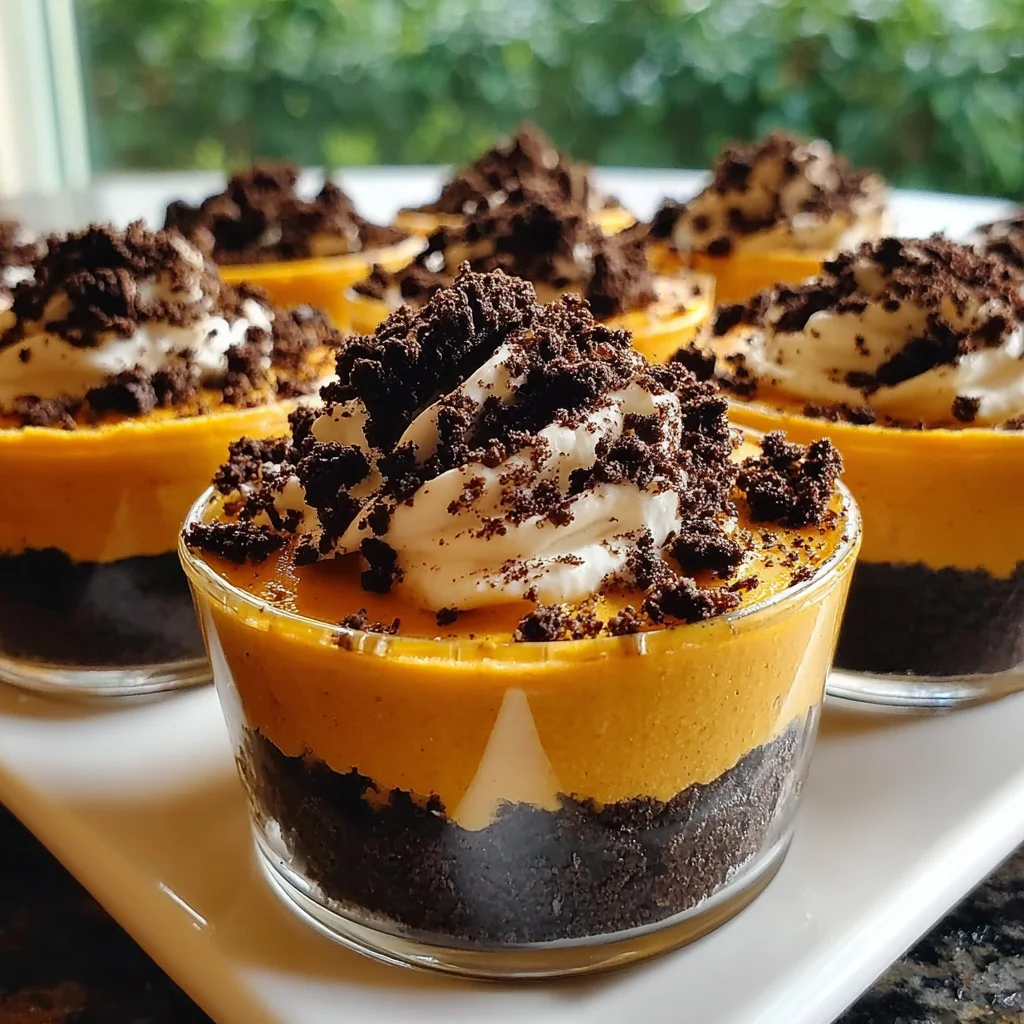
As the leaves turn crunchy and the air fills with the scent of cinnamon, I can’t help but crave cozy desserts that capture the essence of fall. One of my favorite treats is the No Bake Oreo Pumpkin Cheesecake Cups. These delightful little cups combine the rich creaminess of pumpkin cheesecake with a crunchy Oreo crust, and the best part? You don’t need to turn on the oven! Perfect for busy moms and hardworking professionals, these cups are a simple yet impressive dessert, ready to satisfy any sweet tooth while saving precious time in the kitchen.
Why You’ll Love This No Bake Oreo Pumpkin Cheesecake Cups
Let’s be honest: life can get hectic. With busy schedules and never-ending to-do lists, finding time to whip up a dessert can feel like a challenge. These No Bake Oreo Pumpkin Cheesecake Cups save the day! They’re a breeze to prepare, requiring no baking at all. Plus, the delightful blend of creamy pumpkin and rich chocolate crust makes each bite feel like a warm hug, perfect for those cozy fall gatherings.
Ingredients for No Bake Oreo Pumpkin Cheesecake Cups
To create these delightful No Bake Oreo Pumpkin Cheesecake Cups, you’ll need a handful of simple yet essential ingredients. Start with Oreo cookies, which provide a deliciously chocolatey crust. Unsalted butter helps bind the crushed cookies together, creating that perfect crunch. Cream cheese gives a rich and creamy texture, while pumpkin puree adds that warm fall flavor. Powdered sugar sweetens the mix, and vanilla extract enhances the overall taste. Pumpkin pie spice not only brings warmth but also complements the pumpkin flavor beautifully. Don’t forget the whipped cream for lightness and extra fluff! Exact quantities can be found at the end of the article for printing.

How to Make No Bake Oreo Pumpkin Cheesecake Cups
Ready to create this fantastic easy dessert? Let’s dive right into assembling your No Bake Oreo Pumpkin Cheesecake Cups! Follow these simple steps, and you’ll have a delectable treat that your family and friends will rave about.
Prepare the Oreo Crust
Mix Crushed Oreos and Butter
First things first, let’s whip up that crunchy Oreo crust. Take 12 Oreo cookies and crush them into fine crumbs. I love using a zip-lock bag for this; it’s a quick way to get those cookies crumbled without making a mess! Just toss the Oreos in, seal the bag, and go to town with a rolling pin. You want the texture to resemble damp sand.
Once you’ve got your cookie crumbs ready, transfer them to a mixing bowl and pour in the 4 tablespoons of melted unsalted butter. Give it a good mix until the crumbs are evenly coated and clump together. You’ll want a crumbly texture that holds its shape. Now, grab your serving cups and divide the Oreo mixture among them, pressing it down firmly to create a solid base. Trust me, this crunch will perfectly complement the creamy filling!
Create the Pumpkin Cheesecake Filling
Blend Ingredients for Smoothness
Now, let’s make that luscious pumpkin cheesecake filling! In a large mixing bowl, start by beating 8 ounces of softened cream cheese until it’s nice and smooth. Soften your cream cheese beforehand, as this is the key to avoiding lumps in your filling. Nothing’s worse than a lumpy cheesecake!
Next, add in 1 cup of pumpkin puree, ½ cup of powdered sugar, 1 teaspoon of vanilla extract, and 1 teaspoon of pumpkin pie spice. Mix everything together until it’s silky smooth. A whisk or hand mixer works wonders here—just make sure there are no visible lumps.
To achieve that fluffy finish, gently fold in 1 cup of whipped cream. This is where your filling will stand out, creating a light and airy texture. Tread lightly though; you want to keep all that lovely air in there!
Assemble the Cups
Layering for Presentation
Time to put it all together! Spoon your creaminess over the Oreo crust, filling the cups about three-quarters of the way full. This layering makes for a stunning presentation, plus it allows enough room for a little extra garnish later on!
For a lovely aesthetic, try to make the layers as even as possible. If you’re feeling fancy, you can even use a piping bag to pipe the cheesecake filling, giving it a beautiful swirl that will impress all your guests. And if you’re at home enjoying these cups with your family, don’t worry about perfection—just make sure they taste good!
Refrigeration Process
Chilling Time and Texture Tips
Once your cups are assembled, it’s time for the magic to happen in the fridge! Cover them and let them chill for at least 2-4 hours. This allows the filling to set and the flavors to meld together beautifully. If you prefer a firmer texture, consider letting them chill for a bit longer.
When it comes to serving, reaching for these beauties right out of the fridge is ideal, especially as the weather cools down. The contrast of that chilled filling against the crunchy Oreo thrives when it’s served cold. You can even prepare these cups a day in advance—talk about a stress-reducer for busy nights!
Tips for Success
- Always use softened cream cheese for a smooth filling.
- For an easier crust, crush Oreos in a zip-lock bag and use a rolling pin.
- Be gentle when folding in whipped cream to retain lightness.
- Adjust the chilling time based on your texture preference—longer for firmer cups!
- Keep extra crushed Oreos on hand for a delicious garnish.
Equipment Needed
- Mixing bowls for combining ingredients.
- Measuring cups for accurate ingredient portions.
- Hand mixer or whisk for smooth filling.
- Serving cups or glasses to showcase your dessert.
- Zip-lock bags for crushing Oreos, or a food processor if you have one.
Variations
- For a chocolate twist, add cocoa powder to the cheesecake filling.
- Top the cups with caramel sauce or drizzled chocolate for extra sweetness.
- Try using ginger snap cookies instead of Oreos for a spiced crust.
- Experiment with different flavors like maple or cinnamon in place of pumpkin.
- Switch up the toppings with nuts or seasonal fruits for added texture.
Serving Suggestions
- Pair these cups with a steaming cup of spiced chai or pumpkin spice latte for a cozy treat.
- Serve alongside fresh apple slices or caramel for a delightful contrast.
- For added elegance, garnish each cup with a sprig of mint or edible flowers.
- Present the cups on a beautiful platter for a stunning table display.
- Consider adding a dollop of extra whipped cream on top for that finishing touch!
FAQs about No Bake Oreo Pumpkin Cheesecake Cups
Like any good recipe, these No Bake Oreo Pumpkin Cheesecake Cups come with their share of questions! Here, I’ve compiled some common inquiries to help you navigate this delightful no bake dessert with ease.
Can I make these cups ahead of time?
Absolutely! These cups are a perfect make-ahead dessert. In fact, they taste even better after chilling overnight as the flavors meld beautifully. Just keep them covered in the fridge.
How long can I store the No Bake Oreo Pumpkin Cheesecake Cups?
These treats last about 3-5 days in the fridge when properly covered. Just be careful not to let them sit out too long to maintain that delicious creaminess!
Can I change up the flavors?
Of course! While the pumpkin flavor is a fall favorite, you can get creative with this no bake dessert. Try different pie fillings or chocolate flavors to switch things up and suit your taste!
What can I use instead of Oreos for the crust?
Great question! If Oreos aren’t your thing, you can substitute with graham crackers, chocolate wafer cookies, or even ginger snaps for a spiced twist. The options are endless!
Can I freeze these cheesecake cups?
Yes, but the texture might change after freezing. If you freeze them, allow them to thaw in the refrigerator before serving. The flavor will still be delicious, though!
Final Thoughts
As we gather around the table, sharing laughter and stories, these No Bake Oreo Pumpkin Cheesecake Cups bring a touch of joy to any occasion. They’re effortless to whip up, making them the perfect sweet treat for busy lives. Each delicious spoonful combines layers of creamy pumpkin cheesecake with a satisfying Oreo crunch that feels like a warm hug. Whether it’s a family gathering or a cozy night in, these delightful cups are sure to impress. So grab those ingredients and treat yourself to a dessert that’s as sweet as the memories you’ll create around the table!
Print
No Bake Oreo Pumpkin Cheesecake Cups: A Delightful Treat!
- Total Time: 2-4 hours
- Yield: 6–8 cups 1x
- Diet: Vegetarian
Description
A delicious and easy-to-make dessert featuring creamy pumpkin cheesecake layered over an Oreo crust, perfect for fall celebrations.
Ingredients
- 12 Oreo cookies, crushed
- 4 tablespoons unsalted butter, melted
- 8 oz cream cheese, softened
- 1 cup pumpkin puree
- 1/2 cup powdered sugar
- 1 teaspoon vanilla extract
- 1 teaspoon pumpkin pie spice
- 1 cup whipped cream (store-bought or homemade)
- Additional crushed Oreos for topping
Instructions
- In a mixing bowl, combine the crushed Oreo cookies and melted butter. Mix until the crumbs are evenly coated.
- Divide the Oreo mixture evenly among serving cups, pressing the crumbs down firmly to form a base layer.
- In another large bowl, beat the softened cream cheese until smooth and creamy.
- Add the pumpkin puree, powdered sugar, vanilla extract, and pumpkin pie spice to the cream cheese. Mix until fully incorporated and smooth.
- Gently fold in the whipped cream until no white streaks remain, creating a light and airy filling.
- Spoon the pumpkin cheesecake mixture over the Oreo crust in each cup, filling them about three-quarters full.
- Refrigerate the cups for at least 2-4 hours to allow them to set.
- Before serving, top each cheesecake cup with additional crushed Oreos for garnish.
Notes
- Ensure the cream cheese is softened for easier mixing.
- Let the cheesecake cups chill longer for a firmer texture if desired.
- Feel free to adjust the pumpkin pie spice according to your taste preference.
- Prep Time: 20 minutes
- Cook Time: 0 minutes
- Category: Dessert
- Method: No Bake
- Cuisine: American
Nutrition
- Serving Size: 1 cup
- Calories: 320
- Sugar: 15g
- Sodium: 200mg
- Fat: 22g
- Saturated Fat: 10g
- Unsaturated Fat: 0g
- Trans Fat: 0g
- Carbohydrates: 30g
- Fiber: 2g
- Protein: 3g
- Cholesterol: 40mg