
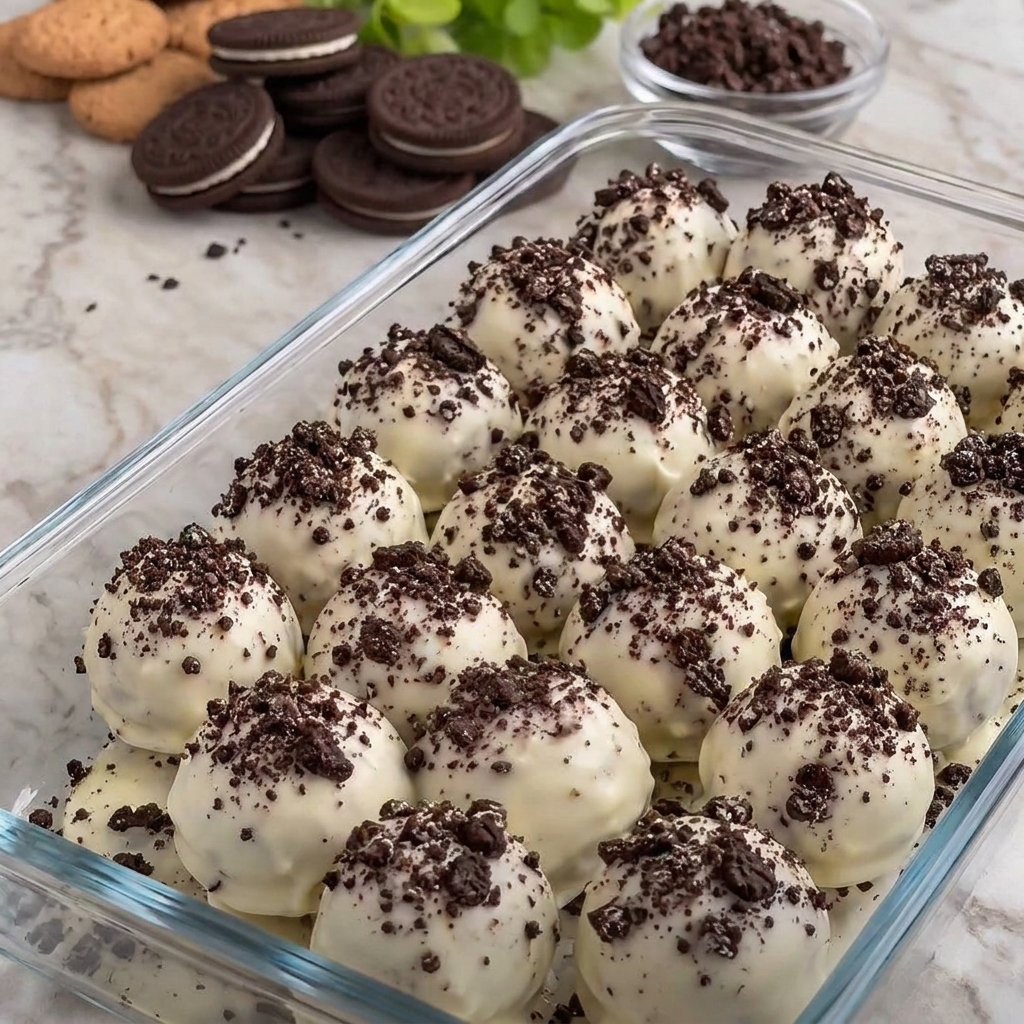
Introduction to No-Bake Oreo Truffles
Hey there, fellow dessert lovers! If you’re anything like me, you know that life can get pretty hectic. Between juggling work, family, and everything in between, finding time to whip up a delightful treat can feel impossible. That’s where these No-Bake Oreo Truffles come in! They’re a quick solution for a busy day, requiring minimal effort but delivering maximum flavor. Imagine indulging in rich, creamy bites of chocolatey goodness that will impress your loved ones. Trust me, these little gems are not just easy to make; they’re also a guaranteed crowd-pleaser!
Why You’ll Love This No-Bake Oreo Truffles
These No-Bake Oreo Truffles are a dream come true for busy moms and professionals alike. They come together in just 15 minutes, making them perfect for last-minute gatherings or sweet cravings. The combination of creamy cream cheese and crunchy Oreos creates a delightful texture that’s hard to resist. Plus, you can customize them with toppings or flavors, ensuring they’re always a hit at any occasion!
Ingredients for No-Bake Oreo Truffles
Let’s dive into the delicious components that make these No-Bake Oreo Truffles a reality! Each ingredient plays a vital role in creating that irresistible flavor and texture.
- Oreos: The star of the show! These chocolate sandwich cookies provide the perfect crunch and sweetness.
- Cream Cheese: This creamy delight binds everything together, adding richness and a smooth texture that balances the crunch of the Oreos.
- White Chocolate: Melted and used for coating, it adds a sweet, creamy layer that complements the chocolatey Oreos beautifully.
- Coconut Oil (optional): A little splash of this can help the chocolate melt smoothly and gives a subtle tropical flavor. Feel free to skip it if you prefer!
For those who might have dietary restrictions or preferences, you can easily swap the cream cheese for a vegan alternative or use gluten-free Oreos. The exact quantities for each ingredient are listed at the bottom of the article, ready for you to print out and take to the kitchen!
How to Make No-Bake Oreo Truffles
Now that we have our ingredients ready, let’s get to the fun part—making these No-Bake Oreo Truffles! Follow these simple steps, and you’ll have a delightful treat in no time.
Step 1: Crush the Oreos
Start by placing the Oreos in a food processor. Pulse them until they turn into fine crumbs. It should resemble sand, but with a chocolatey twist! If you don’t have a food processor, you can put the Oreos in a zip-top bag and crush them with a rolling pin. Just make sure to seal the bag tightly!
Step 2: Mix in Cream Cheese
Next, add the softened cream cheese to the Oreo crumbs. Pulse the mixture again until it forms a smooth, dough-like consistency. This step is crucial because the cream cheese binds everything together, creating that luscious texture we all love.
Step 3: Form the Truffles
Now it’s time to roll! Take small portions of the dough and roll them into balls, about one inch in size. Place each ball on a baking sheet lined with parchment paper. Don’t worry if they aren’t perfect; they’ll taste amazing regardless of their shape!
Step 4: Freeze the Truffles
Pop the baking sheet into the freezer for about 30 minutes. This step helps the truffles firm up, making them easier to dip in chocolate later. While you wait, you can daydream about how delicious they’ll be!
Step 5: Melt the Chocolate
While the truffles are chilling, it’s time to melt the white chocolate. Place the chopped chocolate and coconut oil (if using) in a microwave-safe bowl. Heat it in the microwave, stirring every 30 seconds until it’s smooth and creamy. Be careful not to overheat it; burnt chocolate is a sad fate!
Step 6: Dip the Truffles
Once the truffles are firm, take them out of the freezer. Dip each one into the melted chocolate, letting the excess drip off. Use a fork to help with this process. It’s a bit messy, but that’s part of the fun! Place them back on the parchment paper.
Step 7: Add Toppings
Before the chocolate sets, sprinkle some crushed Oreos on top of each truffle. This adds a lovely crunch and makes them look extra fancy. You can also get creative with toppings like sprinkles or chopped nuts if you’re feeling adventurous!
Step 8: Chill to Set
Finally, refrigerate the truffles for about 15 minutes to let the chocolate harden. Once they’re set, they’re ready to be devoured! Trust me, you’ll want to keep these little bites of joy all to yourself.
Tips for Success
- Make sure your cream cheese is softened for easy mixing.
- Use a microwave-safe bowl for melting chocolate to avoid burns.
- Don’t skip the freezing step; it helps the truffles hold their shape.
- Experiment with different toppings for a fun twist!
- Store leftovers in an airtight container in the fridge for up to a week.
Equipment Needed
- Food Processor: Essential for crushing Oreos. A zip-top bag and rolling pin work too!
- Microwave-Safe Bowl: Perfect for melting chocolate. A small saucepan can be used for stovetop melting.
- Baking Sheet: Needed for chilling truffles. A plate lined with parchment paper will do just fine!
- Parchment Paper: Keeps truffles from sticking. Wax paper is a good alternative.
Variations
- Peanut Butter Oreo Truffles: Swap out some cream cheese for creamy peanut butter for a nutty twist!
- Mint Chocolate Truffles: Add a few drops of peppermint extract to the cream cheese mixture for a refreshing flavor.
- Dark Chocolate Coating: Use dark chocolate instead of white chocolate for a richer taste.
- Vegan Option: Substitute cream cheese with a vegan cream cheese alternative and use dairy-free chocolate.
- Gluten-Free: Ensure you use gluten-free Oreos to make these truffles suitable for gluten-sensitive friends.
Serving Suggestions for No-Bake Oreo Truffles
- Pair these truffles with a glass of cold milk for a classic treat.
- Serve them on a decorative platter for a stunning dessert display at parties.
- For a fun twist, add a scoop of vanilla ice cream on the side.
- Drizzle some chocolate sauce over the truffles for an extra touch of indulgence.
- Garnish with fresh mint leaves for a pop of color and freshness.
FAQs about No-Bake Oreo Truffles
Can I make No-Bake Oreo Truffles ahead of time?
Absolutely! These truffles can be made a day or two in advance. Just store them in an airtight container in the fridge until you’re ready to serve. They’ll taste just as delicious!
How long do No-Bake Oreo Truffles last?
When stored properly in the fridge, these truffles can last up to a week. Just make sure they’re in an airtight container to keep them fresh and tasty!
Can I use different types of cookies?
Yes! While Oreos are the classic choice, feel free to experiment with other cookies like chocolate chip or peanut butter cookies. Just remember, the flavor will change, but it can be just as delightful!
What can I use instead of white chocolate?
If you’re not a fan of white chocolate, you can use milk chocolate or dark chocolate instead. Each will give a unique flavor to your No-Bake Oreo Truffles!
Are these truffles suitable for kids?
Definitely! These No-Bake Oreo Truffles are a hit with kids. Just keep an eye on the chocolate melting process, as it can get a bit hot. They’ll love helping to roll the truffles!
Final Thoughts
Making No-Bake Oreo Truffles is more than just a recipe; it’s an experience filled with joy and creativity. Each bite transports you to a world of chocolatey bliss, reminding us that simple pleasures can bring the greatest happiness. Whether you’re sharing them at a family gathering or sneaking a few for yourself, these truffles are sure to spark smiles and sweet memories. Plus, the ease of preparation means you can whip them up anytime the craving strikes. So, gather your ingredients and let the magic unfold—your taste buds will thank you!
Print
No-Bake Oreo Truffles
- Total Time: 45 minutes
- Yield: 24 truffles 1x
- Diet: Vegetarian
Description
A simple and delicious recipe for No-Bake Oreo Truffles that are perfect for any occasion.
Ingredients
- 4 oz (110 g) cream cheese, softened
- 13 oz (375 g) Oreos
- 8 oz (225 g) white chocolate, chopped
- 1 tsp coconut oil (optional)
Instructions
- In a food processor, blend the Oreos until finely crushed.
- Add the softened cream cheese and pulse until the mixture forms a smooth dough.
- Roll the dough into small balls, about 1 inch in size, and place them on a baking sheet lined with parchment paper.
- Freeze the truffles for about 30 minutes until firm.
- Meanwhile, melt the white chocolate and coconut oil together in a microwave-safe bowl, stirring every 30 seconds until smooth.
- Dip each frozen truffle into the melted chocolate, letting the excess drip off, then place them back on the parchment paper.
- Sprinkle crushed Oreos on top before the chocolate sets.
- Refrigerate for about 15 minutes to harden the chocolate.
Notes
- For extra flavor, try adding a pinch of sea salt to the melted chocolate before dipping!
- Prep Time: 15 minutes
- Cook Time: 0 minutes
- Category: Dessert
- Method: No-Bake
- Cuisine: American
Nutrition
- Serving Size: 1 truffle
- Calories: 120
- Sugar: 10g
- Sodium: 50mg
- Fat: 7g
- Saturated Fat: 4g
- Unsaturated Fat: 2g
- Trans Fat: 0g
- Carbohydrates: 14g
- Fiber: 1g
- Protein: 1g
- Cholesterol: 15mg