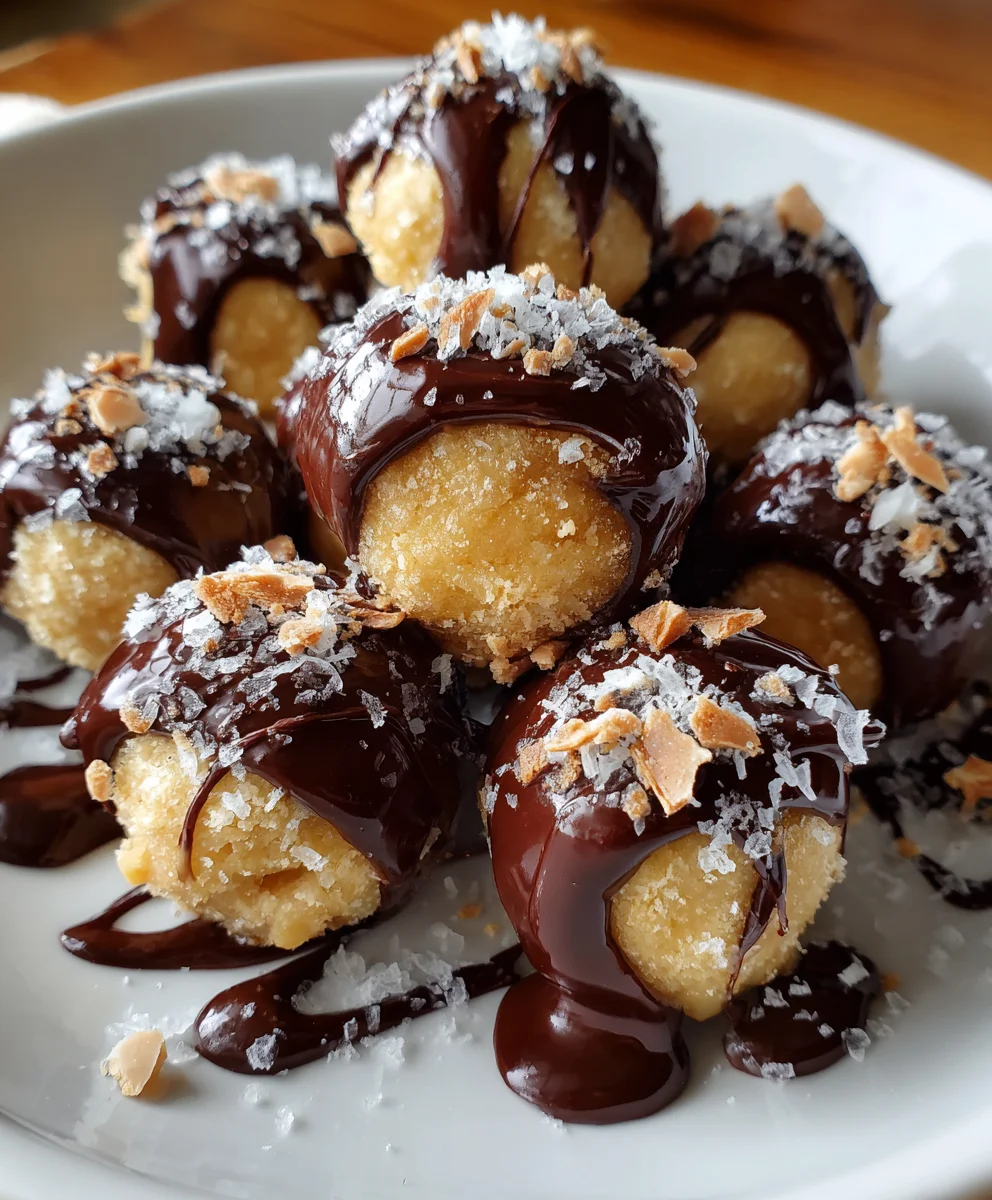
Introduction to No-Bake Peanut Butter Cheesecake Balls
Welcome, fellow kitchen adventurers! Today, I’m excited to share a delightful treat that will bring smiles to your family: No-Bake Peanut Butter Cheesecake Balls! As a busy mom myself, I sometimes wish I could whip up something sweet without the hassle of baking. These little gems are not only incredibly easy to make, but they’re also irresistibly creamy and packed with that luscious peanut butter flavor we all adore.
Imagine serving these bite-sized delights at your next gathering, helping you impress your loved ones without spending hours in the kitchen! Perfect for busy days or surprise guests, you’re going to love how simple they are!
Why You’ll Love This No-Bake Peanut Butter Cheesecake Balls
These No-Bake Peanut Butter Cheesecake Balls are a lifesaver for busy moms and professionals like you! They come together in just about 20 minutes, leaving you with extra time for the things that really matter. Plus, they combine the rich, creamy goodness of cheesecake with the nutty flavor of peanut butter, all without ever turning on the oven! What’s not to love?
Ingredients for No-Bake Peanut Butter Cheesecake Balls
To create these delicious No-Bake Peanut Butter Cheesecake Balls, you’ll need some simple yet fantastic ingredients. Each one plays a special role in achieving that creamy texture and indulgent flavor.
- Cream Cheese: This is the star of the show! Cream cheese gives our cheesecake balls that smooth, rich consistency. Be sure it’s softened for easy mixing.
- Creamy Peanut Butter: Ah, the nutty goodness! It not only adds flavor but also helps bind the mixture together. Choose your favorite brand for the best taste.
- Powdered Sugar: This ingredient sweetens the deal. It dissolves easily, ensuring a smooth texture without any gritty bits. If you’re reducing sugar, consider alternatives!
- Vanilla Extract: A splash of vanilla adds a depth of flavor. It enhances the sweetness and rounds out the overall taste beautifully.
- Graham Cracker Crumbs: These little crumbs give a nod to classic cheesecake. They add a delightful crunch and help firm up the mixture for rolling.
- Semi-sweet or Dark Chocolate Chips: This sweet coating is where the magic happens. You can decide between semi-sweet for a milder flavor or dark for a bolder touch.
- Coconut Oil or Butter (optional): If you want a shinier chocolate coating, a bit of coconut oil or butter helps! It’s not necessary, but it can make a difference.
For exact quantities of each ingredient, check the bottom of the article. And don’t worry; they’re ready for printing, so you can whip up these delightful treats with ease!
How to Make No-Bake Peanut Butter Cheesecake Balls
Step 1: Mix the Base
To kick things off, grab a large mixing bowl and beat together the softened cream cheese and peanut butter. I can’t stress enough how important it is to have that cream cheese at room temperature. It makes blending so much easier! You want a smooth, creamy base that screams decadence. Trust me, once you mix these two together, the aroma will leave you daydreaming about blissful bites ahead!
Step 2: Add Sweetness and Flavor
Now it’s time to sweeten the deal! Sprinkle in the powdered sugar and drizzle the vanilla extract into the creamy mixture. Mix continuously until everything comes together perfectly. The beauty of this step lies in the texture. If you get it right, it should be smooth and luscious, just like a dreamy frosting. This is where that signature cheesecake flavor really shines, so don’t rush it!
Step 3: Incorporate Graham Crackers
Ready for some crunch? Fold in the graham cracker crumbs gently. It’s amazing how these little bits give our cheesecake balls structure and nod to traditional cheesecake. Keep folding until the mixture is thick enough to hold its shape. You want it to feel like playdough, allowing you to roll it into balls easily. Just remember, it should still be slightly sticky—that’s the magic of it!
Step 4: Form the Balls
Using a tablespoon, scoop out small portions of this delightful mixture and roll them into balls. I find about an inch in diameter is perfect, but feel free to go bigger if you’re feeling adventurous! Place these adorable little gems on a baking sheet lined with parchment paper. The parchment keeps them from sticking. It’s the easiest way to ensure unharmed treats when it’s time to dive in!
Step 5: Chill the Balls
Let’s play the waiting game now! Pop the baking sheet in the fridge for at least 30 minutes. This step is vital because it helps the balls firm up and makes them easier to coat later. I know, waiting can be tough, but just imagine that first bite of a chilled, creamy treat. It’ll be worth every minute, I promise!
Step 6: Coat With Chocolate
While the balls chill, it’s time for the magic of coating! Melt the chocolate chips with a bit of coconut oil or butter in a microwave-safe bowl or double boiler. Stir until it’s luscious and smooth. Be cautious not to overheat! Dip each chilled ball in the melted chocolate using a fork or toothpick. Allow any excess chocolate to drip back into the bowl. This ensures you don’t end up with clumps like a chocolate monster!
Step 7: Final Chill for Coating
After all your hard work, it’s essential to give these beautiful balls another chill. Place the coated balls back on the parchment-lined sheet and refrigerate them again for about 20–30 minutes. This helps the chocolate set beautifully, ensuring that you get a perfect crunchy bite with each delicious morsel. You won’t want to skip this step—trust me!
Tips for Success
- Ensure cream cheese is softened for easy mixing; it makes a world of difference!
- Chill the balls thoroughly before dipping to prevent melting chocolate.
- Use a fork or toothpick to dip and keep fingers clean while coating.
- Store leftovers in an airtight container; they’ll stay fresh for up to a week.
- Feel free to experiment with different chocolate types for diverse flavors!
Equipment Needed
- Mixing Bowl: A large bowl works best, but any medium-sized bowl will do.
- Electric Mixer: A hand mixer is ideal, but you can also use a sturdy whisk.
- Baking Sheet: Any flat surface will work; just line it with parchment paper.
- Measuring Cups: Use any standard measuring cups for precise ingredients.
- Fork or Toothpick: Both are great for dips, so grab whatever’s handy!
Variations
- Crunchy Add-ins: Mix in chopped nuts or toffee bits for an extra crunch!
- Flavor Swaps: Replace peanut butter with almond or cashew butter for a new twist.
- Healthier Version: Use Greek yogurt instead of cream cheese for a lighter dessert.
- Fun Coatings: Roll the balls in crushed nuts, sprinkles, or shredded coconut for a decorative touch.
- Mini Versions: Make mini balls by scooping smaller portions for bite-sized delights!
Serving Suggestions
- Pair these irresistible No-Bake Peanut Butter Cheesecake Balls with a cup of coffee or a glass of cold milk for a delightful treat.
- Serve on a colorful platter, garnished with fresh fruits or sprigs of mint for an eye-catching presentation.
- Wrap them individually in clear cellophane for a charming party favor.
- For a special occasion, drizzle melted chocolate or caramel sauce on top just before serving.
FAQs about No-Bake Peanut Butter Cheesecake Balls
Are you curious about these delicious No-Bake Peanut Butter Cheesecake Balls? I understand you might have some questions, so let’s dig into a few common queries that I often hear!
Can I use crunchy peanut butter instead of creamy?
Absolutely! If you adore that extra crunch, feel free to swap out creamy peanut butter for crunchy. It’ll add a fun texture, making each bite even more enjoyable.
How long can I store these cheesecake balls?
You can store these delightful No-Bake Peanut Butter Cheesecake Balls in an airtight container in the refrigerator for up to a week. But they’re so tasty, I doubt they’ll last that long!
Can I freeze these cheesecake balls for later?
Yes, you can! They freeze wonderfully. Just ensure they’re in a sealed container with parchment between layers. When you’re ready, let them thaw in the fridge overnight before enjoying!
What can I use instead of graham cracker crumbs?
If you’re looking for alternatives, crushed vanilla wafers or digestive biscuits work great. You can even try oat flour for a gluten-free version!
Can I customize the chocolate coating?
Definitely! Feel free to experiment with different types of chocolate, like white chocolate or even yogurt-covered wafers. Each type will bring its unique flavor twist!
Final Thoughts
Creating these No-Bake Peanut Butter Cheesecake Balls is like wrapping your loved ones in a warm, sweet hug. With each bite, you experience the delightful combination of creamy peanut butter and rich cheesecake that everyone craves!
This recipe is perfect for busy days, surprise guests, or simply treating yourself. Plus, it’s built for creativity, allowing you to play with flavors and textures. I hope these little gems bring joy and sweet memories to your kitchen, just like they’ve brought to mine. Treasure those moments of sharing and laughter—life’s too short not to indulge!
Print
No-Bake Peanut Butter Cheesecake Balls
- Total Time: 50 minutes
- Yield: 24 balls 1x
- Diet: Vegetarian
Description
A delicious and easy-to-make no-bake dessert that combines the rich flavors of peanut butter and cheesecake in bite-sized balls, coated in chocolate.
Ingredients
- 225g cream cheese, softened
- 1 cup creamy peanut butter
- 1 cup powdered sugar
- 1 teaspoon vanilla extract
- 1 cup graham cracker crumbs
- 1½ cups semi-sweet or dark chocolate chips
- 1 tablespoon coconut oil or butter (optional)
Instructions
- In a large mixing bowl, beat together the softened cream cheese and peanut butter until smooth.
- Add powdered sugar and vanilla extract, and mix until well combined.
- Stir in the graham cracker crumbs until the mixture holds its shape and is easy to roll.
- Scoop out small portions (about 1 tablespoon each) and roll into balls.
- Place the balls on a baking sheet lined with parchment paper.
- Chill in the refrigerator for at least 30 minutes, or until firm.
- Melt the chocolate chips with the coconut oil in a microwave-safe bowl or using a double boiler.
- Stir until smooth.
- Dip each chilled ball into the melted chocolate using a fork or toothpick, allowing excess chocolate to drip off.
- Place coated balls back on the parchment-lined sheet.
- Refrigerate the coated balls for another 20–30 minutes, or until the chocolate has set.
- Store in an airtight container in the refrigerator for up to one week.
Notes
- Ensure the cream cheese is at room temperature for easier mixing.
- Experiment with different types of chocolate for coating.
- If you prefer a healthier option, use dark chocolate and reduce the amount of sugar.
- Prep Time: 20 minutes
- Cook Time: 0 minutes
- Category: Dessert
- Method: No-Bake
- Cuisine: American
Nutrition
- Serving Size: 1 ball
- Calories: 150
- Sugar: 8g
- Sodium: 60mg
- Fat: 10g
- Saturated Fat: 3g
- Unsaturated Fat: 5g
- Trans Fat: 0g
- Carbohydrates: 12g
- Fiber: 1g
- Protein: 3g
- Cholesterol: 15mg