
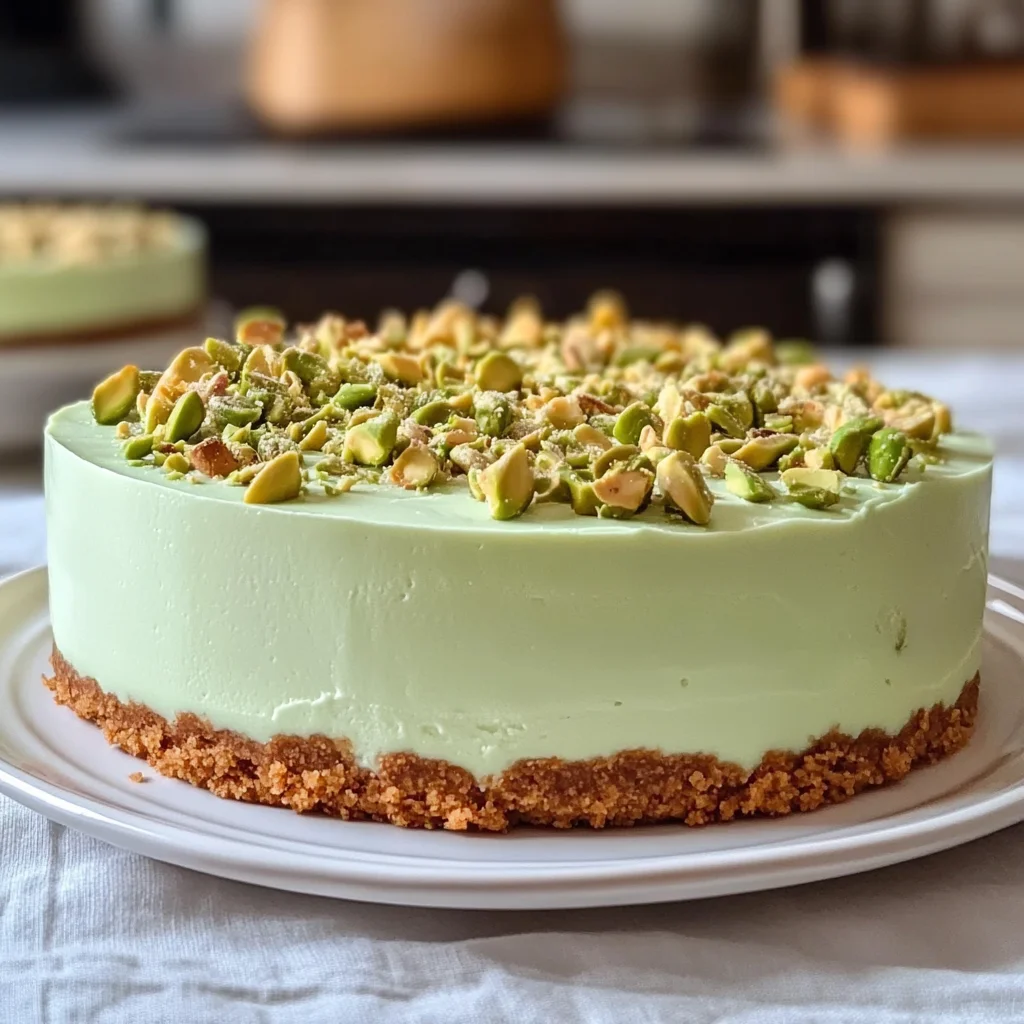
Introduction to Pistachio Cheesecake Without Baking
Hey there, fellow food lovers! If you’re anything like me, then life can get a bit hectic. That’s why I’m excited to share this wonderful recipe for Pistachio Cheesecake Without Baking. This delightful dessert is not only a breeze to whip up, but it also promises to impress friends and family alike. It’s perfect for those busy days when you want to treat yourself without spending hours in the kitchen. Creamy, nutty, and simply gorgeous, this cheesecake is sure to become a beloved staple in your home, just like it has in mine!
Why You’ll Love This Pistachio Cheesecake Without Baking
This no-bake dessert is the ultimate solution for busy moms and professionals seeking a delicious treat. It requires minimal prep time, allowing you to focus on more important things, like catching up with friends or enjoying family moments. The creamy texture paired with the crunch of pistachios makes every bite heavenly. Plus, it’s a showstopper at gatherings, leaving everyone wondering how you made such a fabulous dessert with so little effort!
Ingredients for Pistachio Cheesecake Without Baking

Gathering the right ingredients can make all the difference when creating your Pistachio Cheesecake Without Baking. Here’s what you’ll need:
- Butter cookies or graham crackers: These create a delightful and crunchy base. Feel free to mix and match based on what you have on hand!
- Unsalted butter: This binds the crust together. You could use margarine in a pinch, but butter adds a richer flavor.
- Sea salt: Just a pinch amplifies the sweetness and balances the flavors beautifully.
- Heavy whipping cream: Cold and whipped to stiff peaks, this ingredient adds the luscious texture we all crave in a cheesecake.
- Mascarpone cheese: At room temperature, mascarpone gives your cheesecake that creamy Italian touch. It’s great for a smooth consistency.
- Whipped cream stabilizer: While not mandatory, this helps your whipped cream maintain its shape for a longer time, especially in warmer weather.
- Granulated sugar: Adds sweetness. You can swap this with a sugar substitute if you’re watching your sugar intake.
- Vanilla sugar or extract: A hint of vanilla elevates the cheesecake flavor. If you can’t find it, plain vanilla extract works just as well!
- Cream cheese: Softened cream cheese adds structure and richness, balancing the lighter whipped ingredients.
- Pistachio cream spread: This luscious layer is what makes your cheesecake uniquely pistachio. Use store-bought for ease, or make your own if you’re feeling adventurous!
- Chopped pistachios: These are perfect for topping and add crunch. Opt for unsalted varieties to keep flavors harmonious.
You can find the exact measurements and printing options at the bottom of this article. Happy cooking!
How to Make Pistachio Cheesecake Without Baking
Step 1: Prepare the Crust
Begin by lining the bottom of an 8-inch springform pan with parchment paper. This simple step makes it easy to remove your cheesecake later. In a medium bowl, combine finely crushed butter cookies or graham crackers with melted butter and a pinch of sea salt. Mix until everything is evenly moistened.
Now, press this mixture firmly into the bottom of your prepared pan. Use the back of a measuring cup for an even layer. Then, pop it into the fridge while we whip up the delicious filling. This helps the crust firm up nicely.
Step 2: Make the Whipped Filling
Next up, grab your electric mixer and a large bowl. Beat together the cold heavy whipping cream, mascarpone cheese, granulated sugar, vanilla sugar, and whipped cream stabilizer. Whisk on high speed until you see those beautiful stiff peaks form. The key is to mix until it’s airy yet stable—it should not be runny! This creates that luscious texture we love in a creamy cheesecake.
Step 3: Combine and Fold Ingredients
In another bowl, mix the softened cream cheese with the pistachio cream spread until smooth. Make sure there are no lumps; we want a creamy blend!
Now comes the fun part—gently fold the cream cheese mixture into your whipped filling. Use a spatula and take your time. The goal is to keep as much air in the mix as possible. This is what makes your cheesecake light and fluffy!
Step 4: Assemble the Cheesecake
Spoon your luxuriously creamy pistachio filling onto the chilled cookie crust. Smooth out the top with an offset spatula to create an even surface. If you give the pan a gentle tap on the counter, it will release any pesky air bubbles hiding underneath.
Cover the cheesecake with plastic wrap and stash it in the fridge for at least 2-3 hours. This chilling time allows it to set beautifully, transforming it into a slice of paradise!
Step 5: Chill and Set
After the appropriate chilling time, it’s finally time to unveil your cheesecake! Make sure it’s set firmly—this is key for clean slices later. If you can, let it chill overnight for deeper flavors and a more delightful texture. Trust me, it’s worth the wait!
Step 6: Add Topping
When you’re ready to serve, it’s topping time! Gently warm the additional pistachio cream spread until it’s pourable. You can do this over a small bowl of hot water or in short bursts in the microwave.
Drizzle it over the chilled cheesecake like a delicious artist! Just before serving, sprinkle with roughly chopped pistachios for that perfect crunch. This simple touch makes it a showstopper just waiting to impress!
Tips for Success
- Always use cold heavy cream for the best whipping results.
- Ensure your cream cheese is softened for easy mixing; leave it out for about 30 minutes before use.
- Chill your cheesecake overnight for enhanced flavor and texture.
- When folding, use gentle motions to preserve the airiness of the whipped cream.
- Experiment with different nuts as toppings, such as almonds or walnuts, for a unique twist!
Equipment Needed
- 8-inch springform pan: This helps create the perfect shape. A regular pie dish works too, but slicing may be trickier.
- Mixing bowls: Have a few available for different steps. Any size will do!
- Electric mixer: A handheld version is great for convenience, but a stand mixer offers hands-free mixing.
- Spatula: Essential for folding the ingredients. A rubber spatula works best, but any mixing tool will suffice.
Variations for Pistachio Cheesecake Without Baking
- Chocolate Layer: Add a rich chocolate layer to the bottom of the crust before the pistachio filling. It creates a delightful contrast.
- Fruit Toppings: Top with fresh berries like raspberries or strawberries for a vibrant and tangy twist.
- Nut-Free Option: Swap out the pistachio cream for almond or cashew cream for a nut-free delight.
- Vegan Cheesecake: Use coconut whipped cream, vegan cream cheese, and a nut-free crust to cater to vegan eaters.
- Flavor Infusion: Experiment by adding a splash of almond extract or orange zest to enhance the cheesecake’s flavor profile.
Serving Suggestions
- Serve chilled slices on elegant dessert plates, garnished with whole pistachios for a pop of color.
- Pair with a dollop of whipped cream or a scoop of vanilla ice cream for extra indulgence.
- Complement with a refreshing mint tea or a crisp white wine for a delightful finish.
FAQs about Pistachio Cheesecake Without Baking
Can I make this cheesecake in advance?
Absolutely! This no-bake pistachio cheesecake can be made a day ahead. In fact, chilling it overnight enhances the flavors and texture, making each slice even more delightful!
What can I substitute for pistachio cream spread?
If you’re short on pistachio cream, try using almond or hazelnut spread. Both add a unique twist to the flavor while maintaining that creamy goodness we love!
How do I store leftover cheesecake?
Store any leftovers in an airtight container in the fridge for up to 3 days. Just remember to cover the top with plastic wrap or parchment paper to keep it fresh!
Can I freeze this cheesecake?
Yes, you can freeze the pistachio cheesecake without baking! Wrap it tightly in plastic wrap and then in foil. It can last up to 2 months in the freezer. Just allow it to thaw in the fridge before serving.
Is this cheesecake suitable for special diets?
This recipe can be adjusted for various dietary needs. For a gluten-free version, use gluten-free cookies. To make it vegan, swap out dairy ingredients for plant-based options, like cashew cream. Always check labels for allergies!
Final Thoughts
Creating this Pistachio Cheesecake Without Baking has been such a joy, and I hope it brings you just as much delight! This no-bake masterpiece allows you to indulge in creamy bliss without the fuss of traditional baking. It’s versatile, easy to make, and a guaranteed crowd-pleaser. Imagine serving this stunning cheesecake at your next gathering, watching smiles bloom with every slice! Whether you enjoy it on a quiet evening or during a celebration, I know it will become a cherished recipe in your home, just like it has in mine. Happy baking!
Print
Pistachio Cheesecake Without Baking
- Total Time: 2-3 hours (plus chilling time)
- Yield: Serves 8
- Diet: Vegetarian
Description
A delicious no-bake pistachio cheesecake that combines creamy layers of mascarpone and cream cheese with a crunchy cookie base, topped with rich pistachio cream and chopped pistachios.
Ingredients
- 120g butter cookies or graham crackers, finely crushed
- 75g unsalted butter, melted
- A pinch of sea salt
- 200g heavy whipping cream, cold
- 300g mascarpone cheese, at room temperature
- 2 packets whipped cream stabilizer (about 16g total)
- 30g granulated sugar
- 1 packet vanilla sugar (or 1 teaspoon vanilla extract)
- 200g cream cheese, softened
- 150g pistachio cream spread (store-bought or homemade)
- 150g pistachio cream spread for drizzling
- 3 tablespoons pistachios, roughly chopped
Instructions
- Line the bottom of an 8-inch (20cm) springform pan with parchment paper. In a medium bowl, combine the finely crushed cookies with melted butter and a pinch of salt until evenly moistened. Press the mixture firmly into the bottom of the prepared pan to create an even layer. Refrigerate while preparing the filling.
- In a large bowl, use an electric mixer to whip the heavy cream, mascarpone, sugar, vanilla sugar, and whipped cream stabilizer until stiff peaks form.
- In a separate bowl, mix the cream cheese and pistachio cream until smooth. Gently fold the pistachio mixture into the whipped cream mixture using a spatula, maintaining as much air as possible for a light texture.
- Spoon the pistachio cream filling onto the chilled crust and smooth the top with an offset spatula. Tap the pan gently on the counter to remove any air bubbles. Cover with plastic wrap and refrigerate for at least 2-3 hours until the filling is set.
- When ready to serve, gently warm the pistachio cream for the topping in a small bowl over hot water or in short bursts in the microwave until just pourable. Drizzle or spread over the top of the chilled cheesecake, then immediately sprinkle with chopped pistachios. Return to the refrigerator for 30 minutes to set the topping before slicing.
Notes
- For best results, use an 8-inch (20cm) springform pan for the perfect height-to-width ratio.
- The cheesecake needs at least 2 hours of chilling time to properly set, but overnight refrigeration will yield the best flavor and texture.
- Prep Time: 30 minutes
- Cook Time: 0 minutes
- Category: Dessert
- Method: No-Bake
- Cuisine: American
Nutrition
- Serving Size: 1 slice
- Calories: 350
- Sugar: 15g
- Sodium: 150mg
- Fat: 25g
- Saturated Fat: 15g
- Unsaturated Fat: 5g
- Trans Fat: 0g
- Carbohydrates: 30g
- Fiber: 1g
- Protein: 5g
- Cholesterol: 80mg