Introduction to The Joy of Perfecting Oven Spring in Sourdough Baking
Welcome to the wonderful world of sourdough baking! The Joy of Perfecting Oven Spring in Sourdough Baking is not just about creating a loaf; it’s about the magic that happens while your bread is baking. Picture it: the aroma wafting through your home, your family gathering in the kitchen, eager for a taste. This recipe is perfect for busy moms and professionals looking to make a delicious bread that impresses without overwhelming your schedule. Whether crafting a cozy weekend treat or whipping up something special for a gathering, this guide is here to make your baking journey enjoyable and rewarding.
Why You’ll Love This The Joy of Perfecting Oven Spring in Sourdough Baking
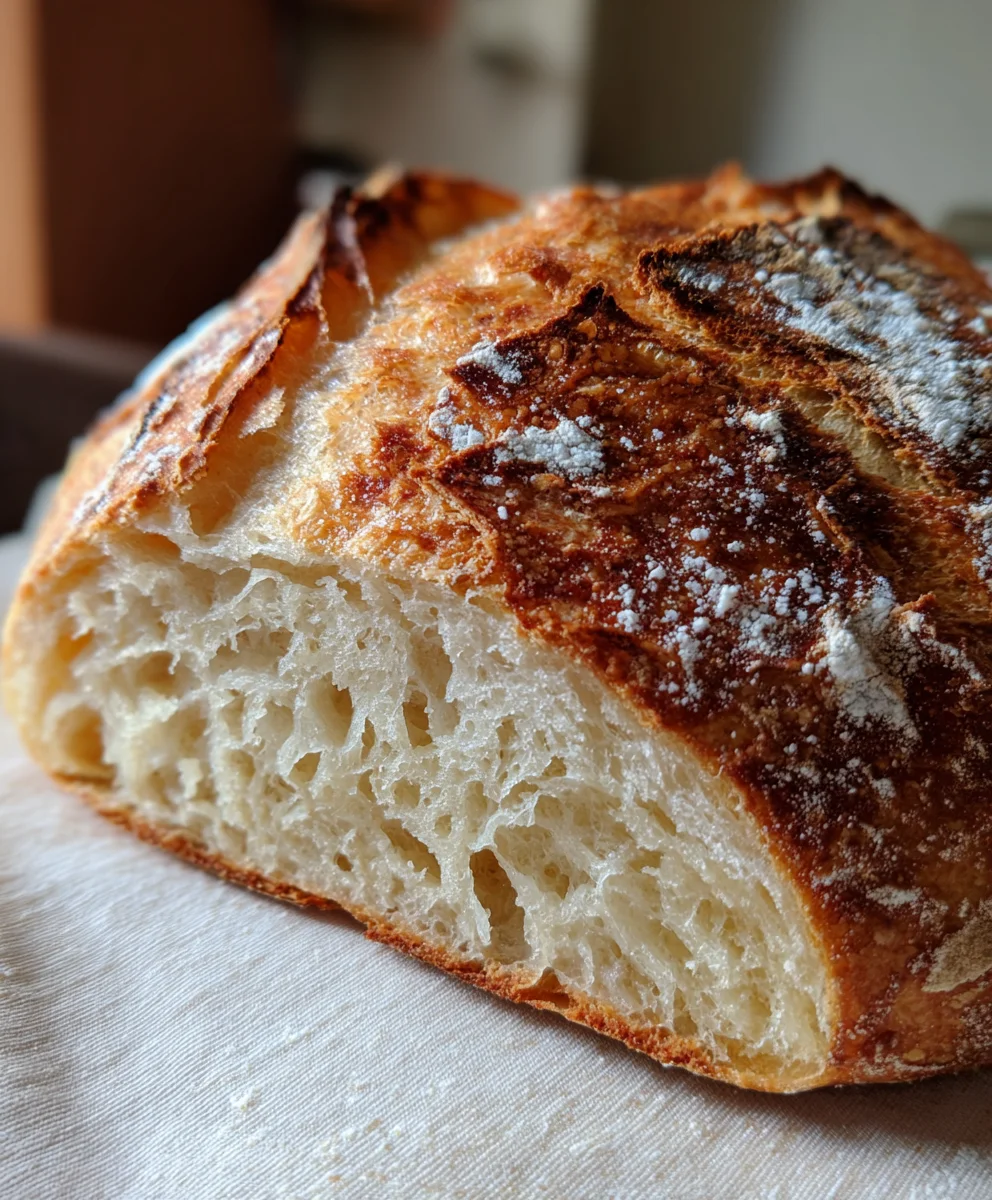
The Joy of Perfecting Oven Spring in Sourdough Baking brings you flavors that dance on your palate while allowing you to be in and out of the kitchen. You’ll savor a crusty exterior that gives way to soft, warm bread inside. This recipe is not only straightforward but also forgiving, making it perfect for super busy days or when you want to impress without fuss. It’s the best of both worlds!
Ingredients The Joy of Perfecting Oven Spring in Sourdough Baking
Let’s dive into the essential ingredients for The Joy of Perfecting Oven Spring in Sourdough Baking. Here’s what you will need:
- Flour: A combination of artisan and special patent flour creates the perfect dough texture. I love using King Arthur flour for its dependable quality.
- Water: Hydration is key to achieving that beautiful oven spring. Use filtered water for the best results.
- Sourdough Starter: An active starter brings life to your bread. Make sure it’s bubbly and ready to go before you start.
- Kosher Salt: This enhances flavor and strengthens gluten. Choose a coarser salt for the best textural experience.
These ingredients provide a solid foundation for your sourdough. If you’re feeling adventurous, consider adding herbs or seeds to your dough for added flavor. You can also substitute part of the flour with whole wheat for a nuttier taste. For exact measurements and a convenient printable list, scroll down to the end of the article!
How to Make The Joy of Perfecting Oven Spring in Sourdough Baking
Step 1: Prepare the Dough
To kick things off, weigh all your dry ingredients accurately. I like to do this in a big mixing bowl for ease. Next, tare the scale and spray water into the bowl. Mix everything until it transforms into a rough dough. Thorough mixing is essential as it ensures every bit of flour gets hydrated. This is the foundation that will support that heavenly oven spring.
Step 2: Stretch and Fold Technique
Next up is the stretch and fold technique. Over the next two hours, perform ten sets of this magical move. Just grab a corner of the dough, stretch it up, and fold it back down, repeating in all four directions. This builds strength and develops the gluten structure. Trust me, a little bit of effort here rewards you with a fantastic rise later.
Step 3: Bulk Fermentation
After your stretch and fold session, it’s time for bulk fermentation. Cover your dough with a damp tea towel and let it rest for about 2.5 hours. During this time, flavor builds up, and gas creates air pockets that will give you that oven spring. If your kitchen is warm, check the dough sooner. You want it to rise nicely, but don’t rush this step.
Step 4: Shaping the Loaves
Now comes the fun part: shaping! Gently turn your dough onto a lightly floured surface, and give it a quick pinch. Use the stitching technique on the bottom to trap air inside. This will help your loaves rise beautifully and create that stunning crust we all love. Remember, don’t press too hard; we want to keep as much air as possible!
Step 5: Proofing Overnight
After shaping, place the loaves in flour-dusted tea towels inside bannetons. Cover them with plastic wrap and pop them in the fridge overnight. Refrigeration is the secret sauce here; it enhances flavor and texture. The longer, slower proofing allows the dough to develop a richness that’s simply irresistible.
Step 6: Baking the Bread
Finally, it’s showtime! Preheat your Dutch ovens to a sizzling 500°F for at least 30 minutes. While they’re heating, sprinkle some cornmeal on the base. When ready, transfer your loaves using slings, score the tops with a sharp blade, and mist them with water. This steam helps create that perfect crust and enhances the coveted oven spring. Bake covered for 20 minutes and then uncover for another 20 minutes at 450°F. You’re almost there!
Tips for Success
- Always use an active, bubbly sourdough starter for best results.
- Invest in a kitchen scale for precise measurements; it makes a world of difference.
- Practice patience during fermentation; your dough needs time to develop flavor.
- Keep your work surface lightly floured to avoid sticking but avoid excess flour in the dough.
- Don’t skip the cooling step; it allows the bread to finish setting up.
Equipment Needed
- Kitchen Scale: Essential for accurate measurements. A simple measuring cup works, but you’ll miss precision.
- Mixing Bowl: A large bowl for mixing. If you don’t have one, any deep dish will do.
- Dutch Oven: Perfect for baking bread. If you lack one, a heavy pot with a lid can suffice.
Variations
- Herb-Infused: Add dried herbs like rosemary or thyme to the dough for an aromatic twist.
- Cheesy Delight: Incorporate shredded cheese into the dough for a rich, savory flavor that pairs perfectly with soup.
- Whole Wheat Option: Substitute a portion of the all-purpose flour with whole wheat flour for a nuttier, heartier bread.
- Seed Scatter: Top your loaves with sesame, poppy seeds, or sunflower seeds before baking for added texture and crunch.
- Sweet Addition: Consider mixing in raisins or dried cranberries with a dash of cinnamon for a delightful breakfast bread.
Serving Suggestions
- Golden Butter: Serve warm slices with a slather of creamy butter for a comforting treat.
- Cheese Pairing: Enjoy alongside a sharp cheddar or a rich brie for a delicious cheese platter.
- Soup Mate: This bread is perfect for dipping into your favorite soups like tomato or minestrone.
- Salad Companion: Pair with a fresh side salad for a light and satisfying meal.
FAQs about The Joy of Perfecting Oven Spring in Sourdough Baking
What is oven spring and why is it important?
Oven spring refers to the quick rise of the bread during the first few minutes of baking. This critical phase helps define the texture and structure of your sourdough, resulting in that sought-after light and airy crumb. A good oven spring is what gives your loaves their height and beautiful crust!
Can I use any type of flour for The Joy of Perfecting Oven Spring in Sourdough Baking?
While you can experiment with different flours, using a mix of artisan and special patent flour is recommended for the best results. They provide the right balance of protein and gluten for a strong rise.
How do I know if my sourdough starter is active enough?
An active sourdough starter should be bubbly and have doubled in size within 4 to 6 hours after feeding. If it has fallen flat or doesn’t show much activity, it may need more time or another feeding before using it in your bake.
What do I do if my dough feels too sticky?
If your dough is sticky, avoid adding too much extra flour. Instead, ensure your hands and work surface are lightly floured, and consider allowing it to rest a bit more. This can help the gluten relax and make handling easier.
Can I bake The Joy of Perfecting Oven Spring in Sourdough Baking without a Dutch oven?
Absolutely! If you don’t have a Dutch oven, use a heavy pot with a lid or a baking sheet with a pan of water placed at the bottom of your oven. This will help create the steam necessary for that perfect crust and oven spring.
Final Thoughts
As you embrace The Joy of Perfecting Oven Spring in Sourdough Baking, you’ll find that each loaf becomes a cherished moment in your kitchen. The satisfaction of pulling a beautifully risen, golden-brown loaf from the oven is unmatched. It’s not just about baking; it’s the joy of creating something that nourishes both body and soul. Your family will gather round, excited to taste the fruits of your labor. So, roll up your sleeves, gather your ingredients, and let the magic unfold. Your baking adventure awaits, bringing warmth and happiness into your home with every slice!
Print
The Joy of Perfecting Oven Spring in Sourdough Baking
- Total Time: 13 hours
- Yield: 2 loaves 1x
- Diet: Vegetarian
Description
A comprehensive guide to achieving the perfect oven spring in sourdough baking.
Ingredients
- 1000 g flour (mix of 1/3 artisan and 2/3 special patent flour from King Arthur)
- 800 g water
- 150 g active sourdough starter
- 20 g kosher salt
Instructions
- Weigh all dry ingredients in a bowl, then tare the scale and spray water directly into the bowl until everything is combined into a rough dough.
- Perform ten sets of stretch and folds over two hours, focusing on the first few sets for strength.
- Cover the bowl with a damp tea towel and allow the dough to sit for about 2.5 hours for bulk fermentation.
- Shape the loaf and let it rest for 15 minutes before using a stitching technique on the bottom to trap air and moisture.
- Place the loaves in flour-dusted tea towels inside bannetons, cover with plastic, and refrigerate overnight for proofing.
- Preheat Dutch ovens to 500°F for at least 30 minutes. Sprinkle cornmeal on the base, transfer loaves using slings, score the tops, and mist with water.
- Bake for 20 minutes at 500°F covered, then 20 minutes at 450°F uncovered. Cool completely on a wire rack before slicing.
Notes
- Skipping the autolyse step simplifies the mixing process.
- The tea towel method for proofing prevents sticking.
- Allowing dough to rest adequately during fermentation builds flavor and gas.
- Be patient and allow the loaves to cool completely before slicing for better texture.
- Prep Time: 30 minutes
- Cook Time: 40 minutes
- Category: Bread
- Method: Baking
- Cuisine: Artisan
Nutrition
- Serving Size: 1 slice
- Calories: 210
- Sugar: 0.2 g
- Sodium: 250 mg
- Fat: 1 g
- Saturated Fat: 0 g
- Unsaturated Fat: 0 g
- Trans Fat: 0 g
- Carbohydrates: 44 g
- Fiber: 2 g
- Protein: 6 g
- Cholesterol: 0 mg