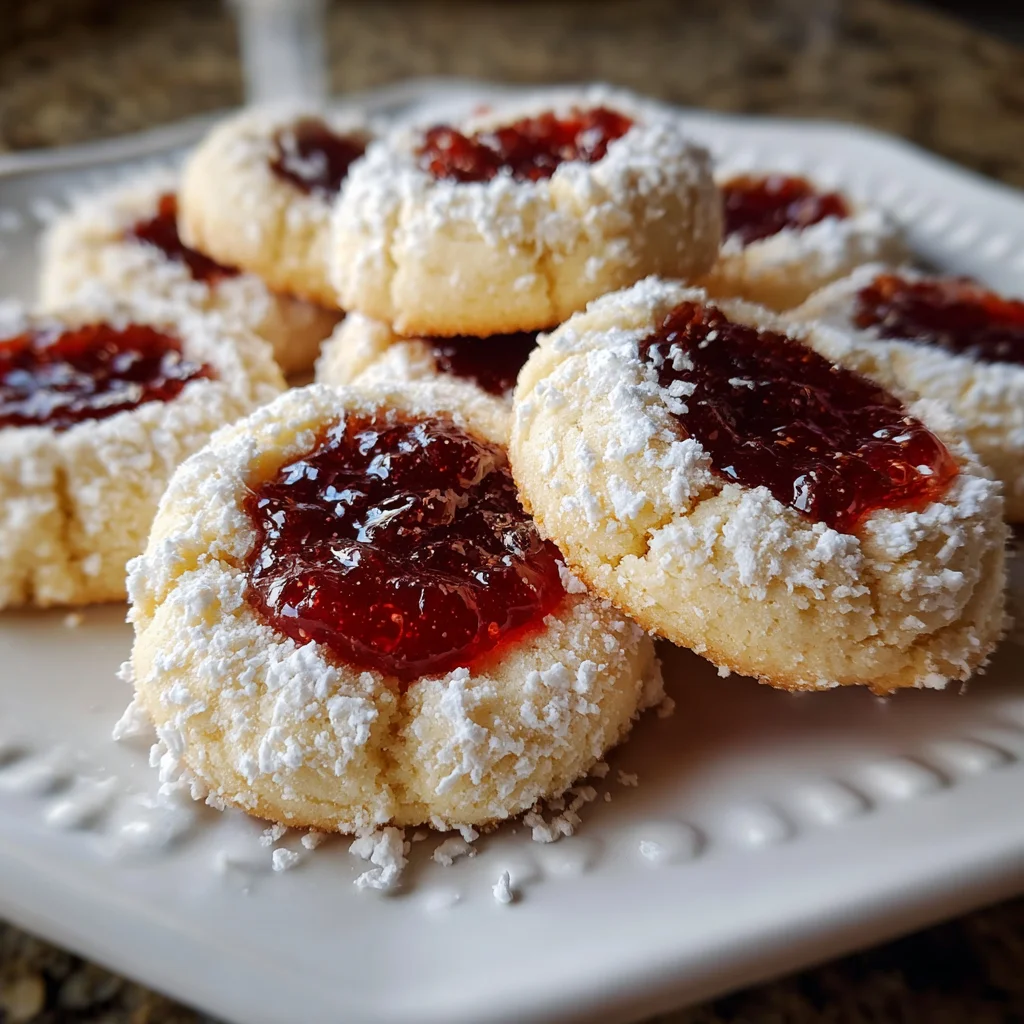
Introduction to Best Jelly Thumbprint Cookies
Welcome to a little slice of cookie heaven! If you’re like me, juggling family, work, and life’s never-ending to-do list, finding the time to bake can feel like a Herculean task. But fear not, because the best jelly thumbprint cookies are here to save the day! These delightful treats are not only irresistibly delicious, but they also offer a quick and easy solution for satisfying your sweet tooth. Plus, the joy of sharing these soft, buttery bites with your loved ones is simply unmatched. Trust me, they’ll love every gooey, jelly-filled moment!
Why You’ll Love This Best Jelly Thumbprint Cookies
These best jelly thumbprint cookies are a dream come true for busy families. They’re quick to whip up and bake, perfect for those days when time races by. The buttery texture melts in your mouth, while the sweet jelly adds a burst of flavor that everyone adores. Plus, these cookies are customizable, making them a sure hit with picky eaters. Bake a batch, and your kitchen will smell like a hug!
Ingredients for Best Jelly Thumbprint Cookies
Gathering the right ingredients makes your baking adventure so much smoother. Here’s what you’ll need to create these delightful thumbprint cookies:
- Unsalted butter: Softened and creamy, it forms the rich base of these cookies.
- Granulated sugar: This sweetens your cookies and contributes to that perfect, soft texture.
- Vanilla extract: Just a splash elevates the flavor, bringing warmth and sweetness.
- All-purpose flour: The backbone of your dough, giving it structure while keeping it tender.
- Salt: It balances the sweetness, allowing flavors to shine.
- Fruit jelly or jam: Pick your favorite! Think strawberry, raspberry, or apricot to add a fruity burst.
- Powdered sugar: Optional for dusting, it adds a touch of elegance at the end.
Remember, these ingredients can be easily customized based on what you have on hand! You can even blend different jellies for a unique twist. For exact quantities, scroll down to the end of the article—they’re all neatly listed and ready for printing!
How to Make Best Jelly Thumbprint Cookies
Let’s dive into the baking magic! Making the best jelly thumbprint cookies is a joy, especially when you follow these easy steps. So, roll up your sleeves, and let’s create some delicious moments together.
Step 1: Preheat Your Oven
First things first, let’s get that oven fired up! Preheat it to 350°F (175°C). This way, your cookies will bake evenly and come out perfectly golden.
Step 2: Cream the Butter and Sugar
In a large mixing bowl, add your softened unsalted butter and granulated sugar. Using a hand mixer or stand mixer, cream the two together until the mixture is light and fluffy—about 2-3 minutes. This step is crucial, as it creates the dreamy texture in your cookies!
Step 3: Incorporate the Vanilla
Now, let’s add a splash of love! Beat in the vanilla extract until it’s fully incorporated. The aroma will already start to make your kitchen feel like home.
Step 4: Mix in the Flour and Salt
Next up, gently add the all-purpose flour and salt to your mixing bowl. Keep your mixer on low speed to combine the ingredients. Aim for a soft, cohesive dough. This part is important—over-mixing can lead to tough cookies, and we want melt-in-your-mouth goodness!
Step 5: Shape the Cookie Dough
Using a tablespoon or a small cookie scoop, portion out the dough and roll each piece into a smooth ball. Place these dough balls about 2 inches apart on your prepared baking sheets. They need a little room to spread out while baking.
Step 6: Create Indentations
Time for some fun! Take your thumb (or the back of a teaspoon) and gently press into the center of each dough ball to create an indentation. Be careful not to press all the way through; we need a little well for the jelly!
Step 7: Fill with Jelly
Now, here’s where the magic happens! Spoon about 1/2 teaspoon of your favorite fruit jelly or jam into each indentation. But don’t overfill—trust me, nobody wants a lava mess in the oven!
Step 8: Bake the Cookies
Pop those cookie sheets into the preheated oven and bake for about 12-14 minutes. Watch them closely; you’re waiting for those edges to turn lightly golden. The smell wafting from your oven will drive you wild!
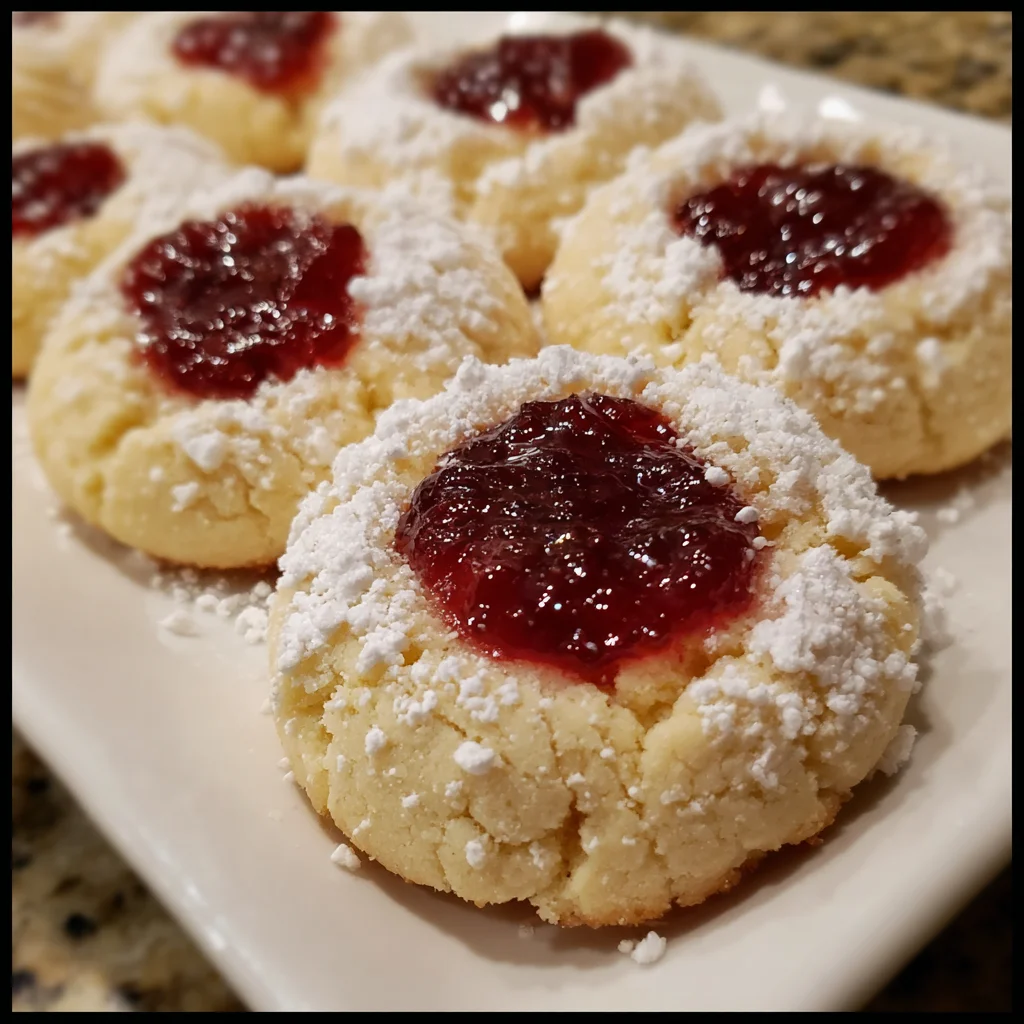
Step 9: Cool and Dust with Powdered Sugar
Once baked, let the cookies cool on the baking sheets for about 5 minutes. Then, transfer them to a wire rack to cool completely. If you like, dust them with a sprinkle of powdered sugar for a sweet, snowy finishing touch!
Tips for Success
- Use room temperature butter for better creaming—cold butter does not mix well.
- Keep your jelly or jam slightly warm for easy filling; it spreads more effortlessly.
- Chill the cookie dough for 15-20 minutes if it feels too soft to handle.
- Experiment with different jams for unique flavor profiles!
- Store cookies in an airtight container to keep them fresh and delicious.
Equipment Needed
- Baking sheets: If you don’t have these, a flat oven-safe tray will work.
- Parchment paper: A silicone baking mat is a great alternative.
- Mixing bowls: Any size will do; just make sure they’re deep enough to avoid spills.
- Hand mixer or stand mixer: A whisk can work in a pinch if you’re feeling strong!
- Cookie scoop or tablespoon: A spoon can coat your dough, just be ready to roll those balls!
Variations of Best Jelly Thumbprint Cookies
- Try using flavored almond or hazelnut extract instead of vanilla for a nutty twist.
- Substitute half of the all-purpose flour with almond flour for a gluten-free option.
- Use a mixture of raspberry and chocolate hazelnut spread for a delightful surprise!
- For a healthier spin, use natural fruit preserves with no added sugars.
- Add a pinch of lemon or orange zest to the cookie dough for a refreshing citrus kick.
Serving Suggestions for Best Jelly Thumbprint Cookies
- Pair your cookies with a steaming cup of tea or coffee for a cozy afternoon treat.
- For a festive look, arrange cookies on a decorative platter and sprinkle with fresh berries.
- Serve alongside a scoop of vanilla ice cream to create a delightful dessert sundae.
- Wrap cookies in cellophane bags for a thoughtful, homemade gift.
- Enjoy them with a glass of milk for that classic childhood feel!
FAQs about Best Jelly Thumbprint Cookies
Can I use different types of jelly for these cookies?
Absolutely! The beauty of the best jelly thumbprint cookies lies in their flexibility. You can use any fruit jelly or jam that tickles your taste buds. Think raspberry, blueberry, or even a vibrant orange marmalade for a fun twist!
How do I store my thumbprint cookies?
To keep your cookies fresh, store them in an airtight container. Layering parchment paper between the cookies will help avoid sticking. They can last up to a week—if they don’t get eaten first!
Can I freeze the cookie dough?
You bet! You can freeze the unbaked cookie dough for up to three months. Just shape the balls, place them on a baking sheet, and freeze until solid. Once frozen, transfer them to a freezer-safe bag. Bake straight from the freezer—just add a couple of extra minutes to the baking time.
Why do my cookies spread too much when baking?
Cookies may spread if the dough is too warm or if there’s too much butter. Ensure you’re using softened butter, not melted. If the dough feels too soft, chill it for about 30 minutes before baking to help control spreading.
Can I make these cookies vegan?
You can indeed! Simply substitute the butter with a plant-based alternative and use a flax egg for binding. The taste might differ a bit, but the spirit of the best jelly thumbprint cookies will remain delicious!
Final Thoughts
As I think back on my own baking adventures, I can’t help but smile at the joy that the best jelly thumbprint cookies bring. These sweet treats are more than just a delicious dessert; they’re a reason to gather, share, and create memories. Whether it’s a cozy afternoon with a warm cup of tea or a vibrant family gathering, these cookies wrap everyone in a delightful hug of flavor. So, make a batch, and let the aroma fill your kitchen with happiness. Your loved ones are bound to enjoy every little buttery, fruity moment!
Print
Best Jelly Thumbprint Cookies: Irresistibly Delicious Treats!
- Total Time: 34 minutes
- Yield: 24 cookies 1x
- Diet: Vegetarian
Description
The Best Jelly Thumbprint Cookies are irresistibly delicious treats with a soft, buttery texture and a sweet filling of fruit jelly.
Ingredients
- 1 cup unsalted butter, softened
- 2/3 cup granulated sugar
- 1 teaspoon vanilla extract
- 2 cups all-purpose flour
- 1/2 teaspoon salt
- 1/2 cup fruit jelly or jam (such as strawberry, raspberry, apricot, or your favorite)
- 1 tablespoon powdered sugar (optional, for dusting)
Instructions
- Preheat your oven to 350°F (175°C). Line two baking sheets with parchment paper for easy cleanup.
- In a large mixing bowl, cream together the softened butter and granulated sugar using a hand mixer or stand mixer until the mixture is light and fluffy (about 2-3 minutes).
- Beat in the vanilla extract until fully incorporated.
- Add the flour and salt to the bowl. Mix on low speed until you achieve a soft, cohesive dough. Avoid over-mixing to keep the cookies tender.
- Using a tablespoon or small cookie scoop, portion out the dough and roll each piece into a smooth ball. Arrange the dough balls about 2 inches apart on the prepared baking sheets.
- Using your thumb (or the back of a teaspoon if you prefer), gently create an indent in the center of each dough ball, being careful not to press all the way through.
- Fill each indentation with about 1/2 teaspoon of your chosen jelly or jam, taking care not to overfill.
- Bake in the preheated oven for 12-14 minutes, or until the edges are just lightly golden.
- Let the cookies cool on the baking sheets for 5 minutes before transferring them to a wire rack to cool completely.
- Once cooled, dust with powdered sugar if desired, and enjoy!
Notes
- Cookies can be made with various fruit jellies to suit your taste.
- For an added touch, experiment with different flavors of jam.
- Prep Time: 20 minutes
- Cook Time: 14 minutes
- Category: Dessert
- Method: Baking
- Cuisine: American
Nutrition
- Serving Size: 1 cookie
- Calories: 120
- Sugar: 8g
- Sodium: 50mg
- Fat: 7g
- Saturated Fat: 4g
- Unsaturated Fat: 2g
- Trans Fat: 0g
- Carbohydrates: 14g
- Fiber: 0g
- Protein: 1g
- Cholesterol: 30mg