
Introduction to Cheesy Garlic Pesto Chicken Sliders
Hey there, fellow home cooks! If you’re anything like me, juggling family, work, and life keeps your plate full. That’s why I’m excited to share my recipe for Cheesy Garlic Pesto Chicken Sliders. These sliders are not just a tasty treat; they’re a quick solution for busy days when you crave something comforting yet simple. Packed with delicious flavors, they’ll impress your loved ones and make any gathering more special. Plus, I promise, once you pull these beauties out of the oven, the heavenly aroma alone will have everyone rushing to the table!
Why You’ll Love This Cheesy Garlic Pesto Chicken Sliders
These Cheesy Garlic Pesto Chicken Sliders tick all the right boxes for busy moms and professionals alike. They’re quick to prepare, requiring just 15 minutes of prep time, yet they boast mouthwatering flavors that make them feel gourmet. Each slider is a gooey, cheesy hug of comfort food that even picky eaters can’t resist. Plus, the ease of baking them all in one dish means less mess and more time to enjoy with your family!
Ingredients for Cheesy Garlic Pesto Chicken Sliders

Gathering the right ingredients is key to making these Cheesy Garlic Pesto Chicken Sliders a success. Here’s what you need:
- Slider buns: Soft and slightly sweet, they cradle all that deliciousness. You can use whole wheat or gluten-free buns for a healthier twist.
- Cooked shredded chicken: The star of the show! Leftover rotisserie chicken works beautifully or you can easily cook your own.
- Basil pesto: This is what gives the sliders their herbaceous punch. You can buy it pre-made or try making it fresh at home for a personal touch.
- Shredded mozzarella cheese: For that melty goodness that stretches with every bite. Feel free to mix in other cheeses like provolone for surprise flavors.
- Shredded Parmesan cheese: Adds a nice salty kick. Using fresh cheese will give you that distinctive rich flavor and texture.
- Unsalted butter: This helps to create a golden, buttery crust on top. If you’re watching your sodium, opt for unsalted to control the saltiness of the sliders.
- Garlic: Minced garlic elevates the flavor, creating that irresistible aroma. You can increase or decrease the amount based on your love for garlic.
- Fresh parsley: A sprinkle of this vibrant herb gives a fresh note and a pop of color to your sliders. Dried parsley could be a quick substitute if fresh isn’t available.
- Salt and black pepper: Essential for seasoning. A pinch here and there enhances all the flavors present.
For detailed ingredient quantities, check out the bottom of the article where they’re listed and ready for printing. Happy cooking!
How to Make Cheesy Garlic Pesto Chicken Sliders
Step 1: Preheat the Oven
First things first, preheating your oven to 350°F (175°C) is crucial. It ensures the sliders bake evenly, resulting in perfectly melted cheese and a golden crust. Imagine that delightful cheese bubbling to perfection! So, don’t skip this step; set that oven and let it warm up while you prepare the rest.
Step 2: Prepare the Chicken Mixture
Now, grab your mixing bowl and combine the shredded chicken with the basil pesto. Use a spatula or fork to mix until every shred of chicken is coated with the vibrant green pesto. This step is essential! It ensures each slider burst with fantastic flavor. If you’re feeling adventurous, don’t hesitate to add extra herbs or spices to elevate the taste even more.
Step 3: Assemble the Sliders
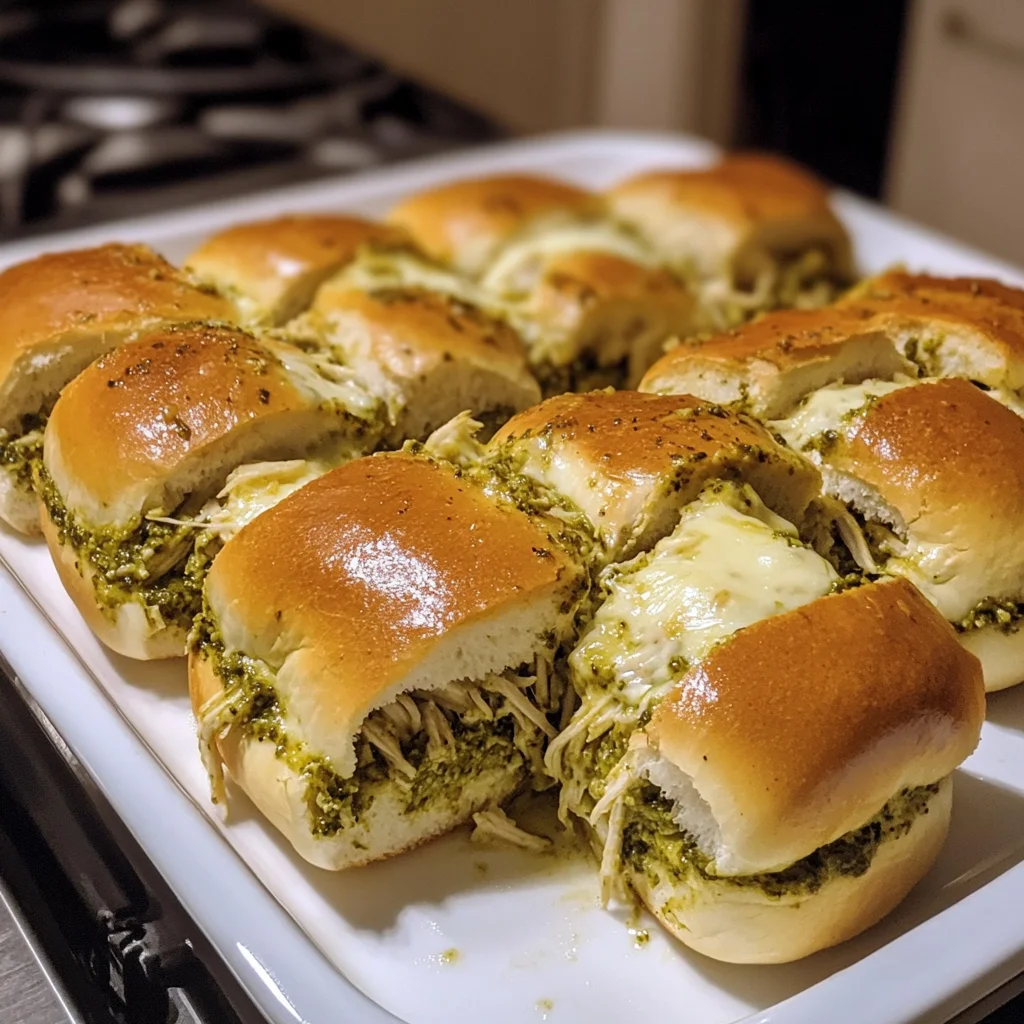
Next, take those slider buns and slice them in half horizontally, creating a top and bottom for each slider. Place the bottom halves in a baking dish, like a welcoming bed for your fillings. Now layer the pesto chicken evenly over these buns, followed by a generous sprinkle of shredded mozzarella and Parmesan cheese. Finally, cap them off with the top buns. This layering is where magic happens, as the cheeses meld beautifully when baked!
Step 4: Brush with Garlic Butter
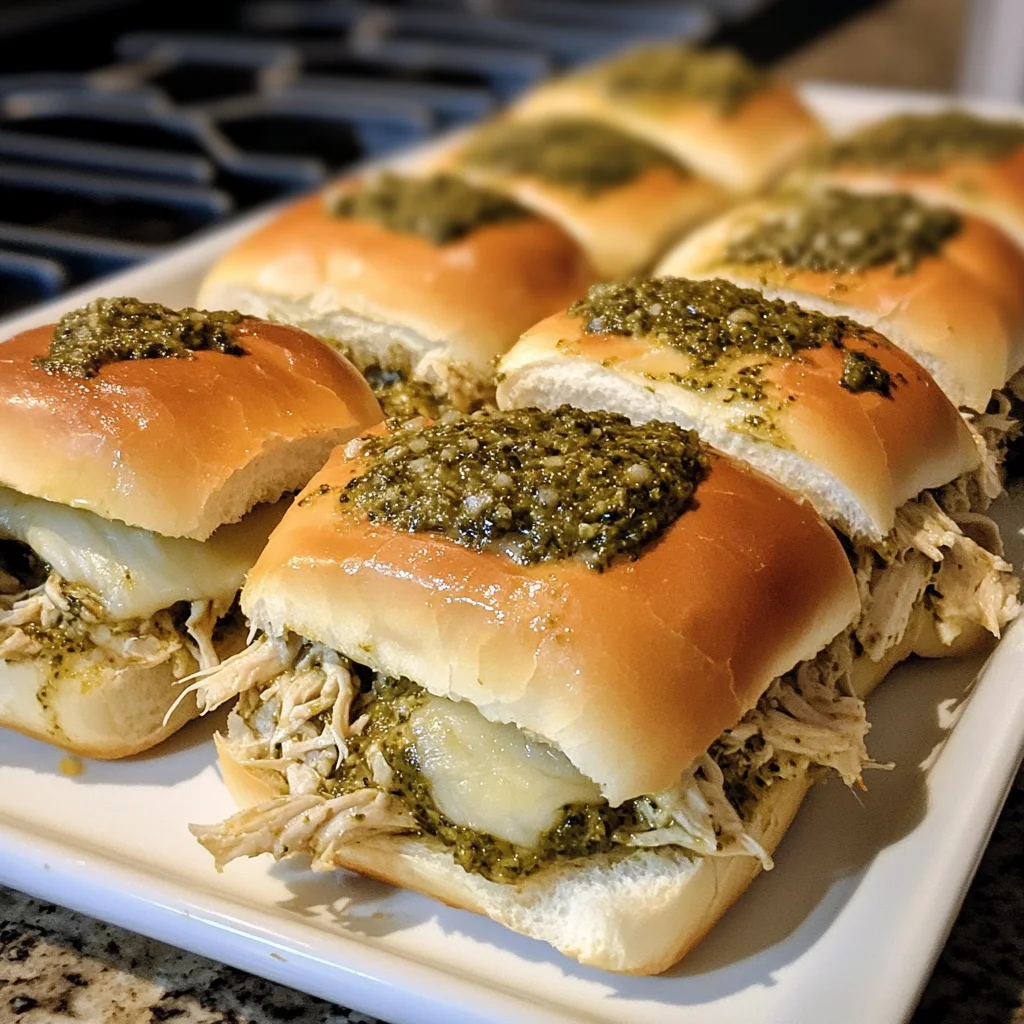
In a small bowl, combine the melted butter, minced garlic, and chopped parsley. Using a pastry brush, generously apply this mixture over the tops of the slider buns. This glorious garlic butter adds richness and flavor, creating an irresistible aroma that will have everyone’s mouths watering in anticipation!
Step 5: Bake the Sliders
Cover the baking dish with foil and pop it into your preheated oven. Let the sliders bake for 15 minutes. After that, remove the foil and bake for another 5-7 minutes until the tops are golden brown and the cheese is bubbling. Keep an eye on them! You want that perfect melt without burning.
Step 6: Serve Warm
Once done, allow the sliders to rest for a few minutes. This helps them set and makes slicing easier. When you’re ready, cut them into beautiful portions and serve them warm. Trust me, everyone will be clamoring for seconds!
Tips for Success
- Use rotisserie chicken for a quick, flavorful shortcut.
- Prepare the slider assembly in advance; just bake when ready to serve.
- Don’t skimp on the garlic butter; it’s the secret to a crispy, flavorful top.
- Experiment with different cheeses for unique flavor combinations.
- For extra crunch, add sliced olives or jalapeños to the chicken mixture.
Equipment Needed
- Baking dish: A 9×13-inch dish is perfect, but a smaller dish works too.
- Mixing bowl: Any large bowl will do for mixing your chicken and pesto.
- Pastry brush: Use it to apply the garlic butter; a spoon works in a pinch!
- Knife: For slicing the slider buns — a serrated knife makes it easier.
- Aluminum foil: Essential for covering the dish while baking.
Variations on Cheesy Garlic Pesto Chicken Sliders
- Vegetarian Option: Replace shredded chicken with roasted vegetables or sautéed mushrooms for a delightful twist. Add extra cheese for richness!
- Spicy Kick: Incorporate diced jalapeños or red pepper flakes into the chicken mixture for sliders that pack a punch!
- Herbed Mayonnaise: Spread some herbed mayo on the buns before assembly for extra creaminess and flavor. Try a garlic aioli for an exciting flavor boost!
- Low-Carb Alternative: Use lettuce wraps instead of buns. This lightens the dish while still delivering those amazing flavors!
- Pesto Variations: Experiment with different pesto varieties, like sun-dried tomato or spinach, to create a unique flavor experience.
Serving Suggestions for Cheesy Garlic Pesto Chicken Sliders
- Pair with a crisp green salad drizzled with balsamic vinaigrette for a fresh contrast.
- Serve alongside sweet potato fries or garlic roasted potatoes for a hearty meal.
- Offer a side of marinara sauce for dipping; it adds an Italian flair!
- A glass of iced tea or lemonade complements the flavors beautifully.
- Display sliders on a vibrant platter with fresh parsley sprigs for a pop of color.
FAQs about Cheesy Garlic Pesto Chicken Sliders
Can I use store-bought shredded chicken for these sliders?
Absolutely! Using store-bought shredded chicken is a fantastic time-saver. A rotisserie chicken from your local grocery store works wonderfully and is delicious in these Cheesy Garlic Pesto Chicken Sliders.
How can I store leftovers?
If you happen to have leftovers, store them in an airtight container in the refrigerator. They’ll stay fresh for about three days. Just reheat in the oven to keep that melty cheese intact!
Can I freeze these sliders?
Yes, you can! Freezing the assembled but unbaked sliders is an excellent option for meal prep. Just thaw them overnight in the fridge and bake as directed when you’re ready for a cheesy treat.
What can I serve with these sliders?
These sliders pair fabulously with a fresh green salad, crunchy veggies, or sweet potato fries. Adding a tangy dipping sauce like marinara or ranch can elevate your sliders even further!
Are these sliders suitable for a gluten-free diet?
Yes, simply use gluten-free slider buns! The other ingredients are naturally gluten-free, making these Cheesy Garlic Pesto Chicken Sliders a perfect option for those with gluten sensitivities.
Final Thoughts
Creating these Cheesy Garlic Pesto Chicken Sliders brings back joyful memories of family gatherings and cozy evenings at home. They instill a sense of comfort while also being a quick and rewarding meal option. Each bite is a wave of bold flavors and nostalgia, reminding us of the simple pleasures of shared meals. Plus, they have that magical ability to turn a normal weeknight into a festive occasion! So gather your loved ones, serve these sliders warm, and watch as laughter and happy chatter fill the room. Trust me, you’ll cherish every delicious moment!
Print
Cheesy Garlic Pesto Chicken Sliders: A Mouthwatering Delight!
- Total Time: 35 minutes
- Yield: 6 servings 1x
- Diet: Gluten Free
Description
Cheesy Garlic Pesto Chicken Sliders are a mouthwatering delight made with shredded chicken, pesto, and melted cheese, perfect for any occasion.
Ingredients
- 12 slider buns
- 2 cups cooked shredded chicken
- 1/2 cup prepared basil pesto
- 1 1/2 cups shredded mozzarella cheese
- 1/2 cup shredded Parmesan cheese
- 4 tablespoons unsalted butter, melted
- 3 cloves garlic, minced
- 1 tablespoon chopped fresh parsley
- Salt and black pepper, to taste
Instructions
- Preheat your oven to 350°F (175°C).
- In a mixing bowl, combine the shredded chicken with the basil pesto. Mix until the chicken is evenly coated.
- Slice the slider buns in half horizontally (keeping the top and bottom halves intact as single sheets).
- Place the bottom half of the buns in a 9×13-inch baking dish.
- Evenly spread the pesto chicken over the bottom buns, then top with mozzarella and Parmesan cheeses.
- Place the top half of the buns over the filling.
- In a small bowl, mix the melted butter, minced garlic, and chopped parsley. Brush this mixture generously over the tops of the buns.
- Cover with foil and bake for 15 minutes.
- Remove the foil and bake for another 5-7 minutes, or until the tops are golden and cheese is melted.
- Let rest for a few minutes before slicing and serving warm.
Notes
- Feel free to use rotisserie chicken for convenience.
- These sliders are best served warm and fresh out of the oven.
- Adjust the amount of garlic according to your taste.
- Prep Time: 15 minutes
- Cook Time: 20 minutes
- Category: Appetizer
- Method: Baking
- Cuisine: Italian-American
Nutrition
- Serving Size: 1 slider
- Calories: 320 kcal
- Sugar: 1 g
- Sodium: 600 mg
- Fat: 18 g
- Saturated Fat: 10 g
- Unsaturated Fat: 6 g
- Trans Fat: 0 g
- Carbohydrates: 24 g
- Fiber: 1 g
- Protein: 20 g
- Cholesterol: 60 mg