
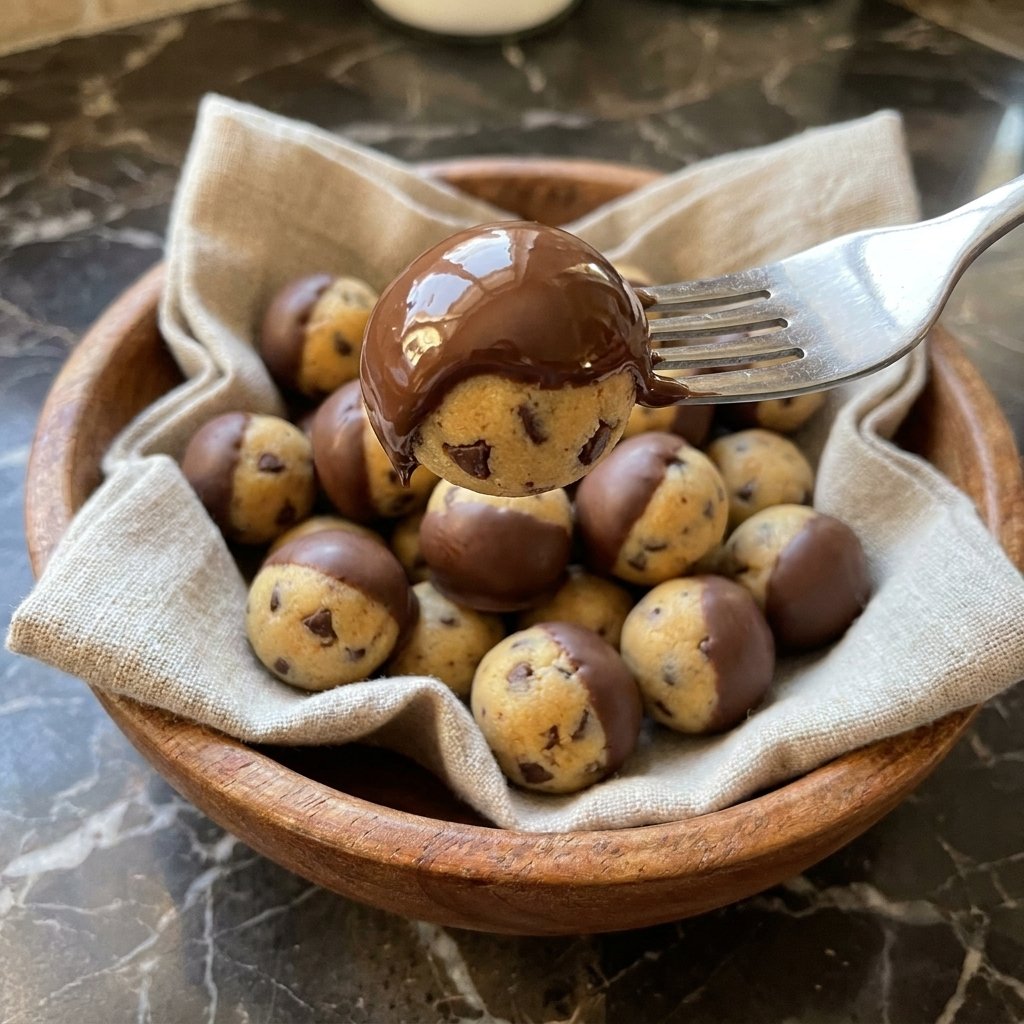
Introduction to Chocolate-Dipped Mini Cookie Balls
Hey there, fellow chocolate lovers! If you’re anything like me, you know that life can get pretty hectic. Between juggling work, family, and everything in between, finding time to whip up a delightful treat can feel impossible. That’s where these Chocolate-Dipped Mini Cookie Balls come in! They’re not just delicious; they’re a quick solution for those busy days when you want to impress your loved ones without spending hours in the kitchen. Trust me, these little bites of joy will have everyone asking for seconds!
Why You’ll Love This Chocolate-Dipped Mini Cookie Balls
These Chocolate-Dipped Mini Cookie Balls are a dream come true for busy moms and professionals alike. They’re incredibly easy to make, taking just about 28 minutes from start to finish. Plus, the combination of rich chocolate and soft cookie is simply irresistible! Whether you’re hosting a gathering or just need a sweet pick-me-up, these delightful treats will satisfy your cravings and impress your guests.
Ingredients for Chocolate-Dipped Mini Cookie Balls
Let’s dive into the delicious components that make up these Chocolate-Dipped Mini Cookie Balls. Each ingredient plays a vital role in creating that perfect balance of flavor and texture. Here’s what you’ll need:
- Unsalted Butter: This is the base of our cookie dough, providing richness and moisture. Make sure it’s softened for easy mixing.
- Brown Sugar: Packed with flavor, brown sugar adds a hint of caramel sweetness and helps keep the cookie balls soft.
- Egg: A crucial binding agent, the egg helps hold everything together while adding moisture and richness.
- Vanilla Extract: This little splash of flavor elevates the taste, making your cookie balls even more delightful.
- All-Purpose Flour: The backbone of our cookie dough, flour gives structure to the cookie balls. Be careful not to overmix!
- Dark Chocolate Chips: These add a rich, intense chocolate flavor that perfectly complements the sweetness of the cookie.
- Milk Chocolate Chips: For a touch of sweetness, milk chocolate chips balance the darker chocolate and create a delightful contrast.
- Milk Chocolate (for dipping): Melted milk chocolate forms a luscious shell around the cookie balls, making them irresistible.
For those looking to mix things up, consider adding a sprinkle of sea salt on top of the chocolate before it sets for an extra crunch! You can find the exact measurements for each ingredient at the bottom of the article, ready for printing.
How to Make Chocolate-Dipped Mini Cookie Balls
Now that we have our ingredients ready, let’s dive into the fun part—making these Chocolate-Dipped Mini Cookie Balls! Follow these simple steps, and you’ll have a batch of delightful treats in no time.
Step 1: Preheat the Oven
First things first, preheat your oven to 350°F (180°C). Preheating is crucial because it ensures even baking. If you skip this step, your cookie balls might end up unevenly cooked. Trust me, no one wants a gooey center when they’re expecting a soft, chewy treat!
Step 2: Cream Butter and Sugar
In a mixing bowl, cream together the softened butter and brown sugar until smooth. This step is key for achieving that light and fluffy texture. You want to beat them together until they’re well combined and a bit airy. This will help your cookie balls rise beautifully in the oven!
Step 3: Add Egg and Vanilla
Next, beat in the egg and vanilla extract. The egg acts as a binding agent, holding everything together while adding moisture. The vanilla? It’s like a warm hug for your taste buds, enhancing the overall flavor of your cookie balls. Don’t skip this step; it makes a world of difference!
Step 4: Mix in Flour and Chocolate Chips
Gradually mix in the all-purpose flour until just combined. Be careful not to overwork the dough; otherwise, your cookie balls might turn out tough. Once the flour is incorporated, gently fold in both dark and milk chocolate chips. This is where the magic happens—chocolate galore!
Step 5: Shape the Cookie Balls
Now it’s time to roll the dough into tiny balls. I like to use a small cookie scoop for uniformity, but your hands work just fine too! Aim for about one inch in diameter. This ensures they bake evenly and look adorable when finished.
Step 6: Bake the Cookie Balls
Place the cookie balls on a baking sheet lined with parchment paper. Bake for about 13 minutes or until they’re lightly golden. Keep an eye on them; you want them soft but not doughy. A light golden color is your cue that they’re ready!
Step 7: Prepare Chocolate Shells
While the cookie balls cool, it’s time to prepare the chocolate shells. Melt the milk chocolate in a microwave-safe bowl, heating in 30-second intervals and stirring in between. This method prevents scorching. You want it smooth and silky for dipping!
Step 8: Assemble the Cookie Balls
Once the cookie balls are cool, spoon a little melted chocolate into each cavity of your silicone mold. Gently press one cookie ball into each chocolate-filled cavity, leaving the top exposed. This creates a delightful chocolate shell around your cookie balls!
Step 9: Freeze and Unmold
Finally, freeze the assembled cookie balls briefly until the chocolate shells are firm. This usually takes about 10-15 minutes. Once set, carefully unmold them. The result? Beautifully coated Chocolate-Dipped Mini Cookie Balls that are ready to be devoured!
Tips for Success
- Make sure your butter is softened for easy mixing; it should be at room temperature.
- Use a cookie scoop for uniform cookie balls; this ensures even baking.
- Don’t overmix the dough after adding flour; this keeps your cookie balls tender.
- Let the cookie balls cool completely before dipping to prevent melting the chocolate.
- Experiment with different chocolate types for unique flavors!
Equipment Needed
- Mixing Bowl: A large bowl for combining ingredients. A sturdy plastic or glass bowl works well.
- Cookie Scoop: For uniform cookie balls. If you don’t have one, use your hands!
- Baking Sheet: A flat tray for baking. Line it with parchment paper for easy cleanup.
- Silicone Mold: For shaping the chocolate shells. If unavailable, use muffin tins.
- Microwave-Safe Bowl: For melting chocolate. Any heat-safe bowl will do!
Variations
- Nutty Delight: Add chopped nuts like walnuts or pecans to the dough for a crunchy texture.
- Gluten-Free Option: Substitute all-purpose flour with a gluten-free flour blend for a gluten-free treat.
- Flavor Infusion: Experiment with different extracts like almond or hazelnut for a unique twist.
- Vegan Version: Replace the egg with a flaxseed egg and use vegan chocolate for a plant-based treat.
- Seasonal Spices: Add a pinch of cinnamon or nutmeg for a warm, cozy flavor during the holidays.
Serving Suggestions
- Pair these Chocolate-Dipped Mini Cookie Balls with a glass of cold milk for a classic treat.
- Serve them on a decorative platter for a stunning presentation at parties.
- For a fun twist, add a scoop of vanilla ice cream on the side.
- Dust with powdered sugar for an elegant touch!
FAQs about Chocolate-Dipped Mini Cookie Balls
As a passionate home cook, I often get questions about my favorite recipes. Here are some common queries about these delightful Chocolate-Dipped Mini Cookie Balls that might help you out!
Can I use different types of chocolate for dipping?
Absolutely! While I love using milk chocolate for a creamy shell, you can experiment with dark or white chocolate for a different flavor profile. Each type brings its own unique taste!
How should I store the cookie balls?
Store your Chocolate-Dipped Mini Cookie Balls in an airtight container at room temperature for up to a week. If you want to keep them longer, refrigerate them for up to two weeks. Just make sure they’re well-protected from moisture!
Can I freeze these cookie balls?
Yes, you can! These cookie balls freeze beautifully. Just place them in a single layer on a baking sheet until frozen, then transfer them to a freezer-safe container. They’ll last for about three months!
What can I do if my chocolate is too thick for dipping?
If your melted chocolate is too thick, simply add a teaspoon of vegetable oil or coconut oil. This will help thin it out, making it easier to coat your cookie balls smoothly.
Can I make these cookie balls ahead of time?
Definitely! You can prepare the cookie balls and dip them in chocolate a day or two in advance. Just store them in an airtight container until you’re ready to serve. They’ll be just as delicious!
Final Thoughts
Making these Chocolate-Dipped Mini Cookie Balls is more than just a baking project; it’s a delightful experience that brings joy to both the cook and the lucky recipients. The aroma of freshly baked cookies fills your kitchen, creating a warm atmosphere that feels like a hug. Each bite is a perfect blend of soft cookie and rich chocolate, making them a hit at any gathering. Whether you’re treating yourself or sharing with loved ones, these little bites of happiness are sure to create sweet memories. So, roll up your sleeves and enjoy the magic of baking!
Print
Chocolate-Dipped Mini Cookie Balls
- Total Time: 28 minutes
- Yield: Approximately 24 cookie balls 1x
- Diet: Vegetarian
Description
Delicious chocolate-dipped mini cookie balls that are perfect for any occasion.
Ingredients
- 7 tbsp (100 g) unsalted butter, softened
- ⅔ cup packed (130 g) brown sugar
- 1 large egg
- 1 tsp vanilla extract
- 1¾ cups + 2 tbsp (230 g) all-purpose flour
- ½ cup + 1 tbsp (100 g) dark chocolate chips
- ½ cup + 1 tbsp (100 g) milk chocolate chips
- 7 oz (200 g) milk chocolate, melted
Instructions
- Preheat your oven to 350°F (180°C).
- In a mixing bowl, cream together the softened butter and brown sugar until smooth.
- Beat in the egg and vanilla extract until well combined.
- Gradually mix in the all-purpose flour until just combined, then fold in both dark and milk chocolate chips.
- Roll the dough into tiny balls and place them in a silicone half-sphere mold.
- Bake for about 13 minutes or until lightly golden. Let them cool completely.
- Clean the mold, then spoon a little melted chocolate into each cavity.
- Gently press one cookie ball into each chocolate-filled cavity, leaving the top exposed.
- Freeze briefly until the chocolate shells are firm, then carefully unmold.
Notes
- For an extra crunch, sprinkle a little sea salt on top of the chocolate before it sets!
- Prep Time: 15 minutes
- Cook Time: 13 minutes
- Category: Dessert
- Method: Baking
- Cuisine: American
Nutrition
- Serving Size: 1 cookie ball
- Calories: 120
- Sugar: 10g
- Sodium: 50mg
- Fat: 7g
- Saturated Fat: 4g
- Unsaturated Fat: 2g
- Trans Fat: 0g
- Carbohydrates: 14g
- Fiber: 1g
- Protein: 1g
- Cholesterol: 20mg