Introduction to Chocolate Rice Krispie Treats
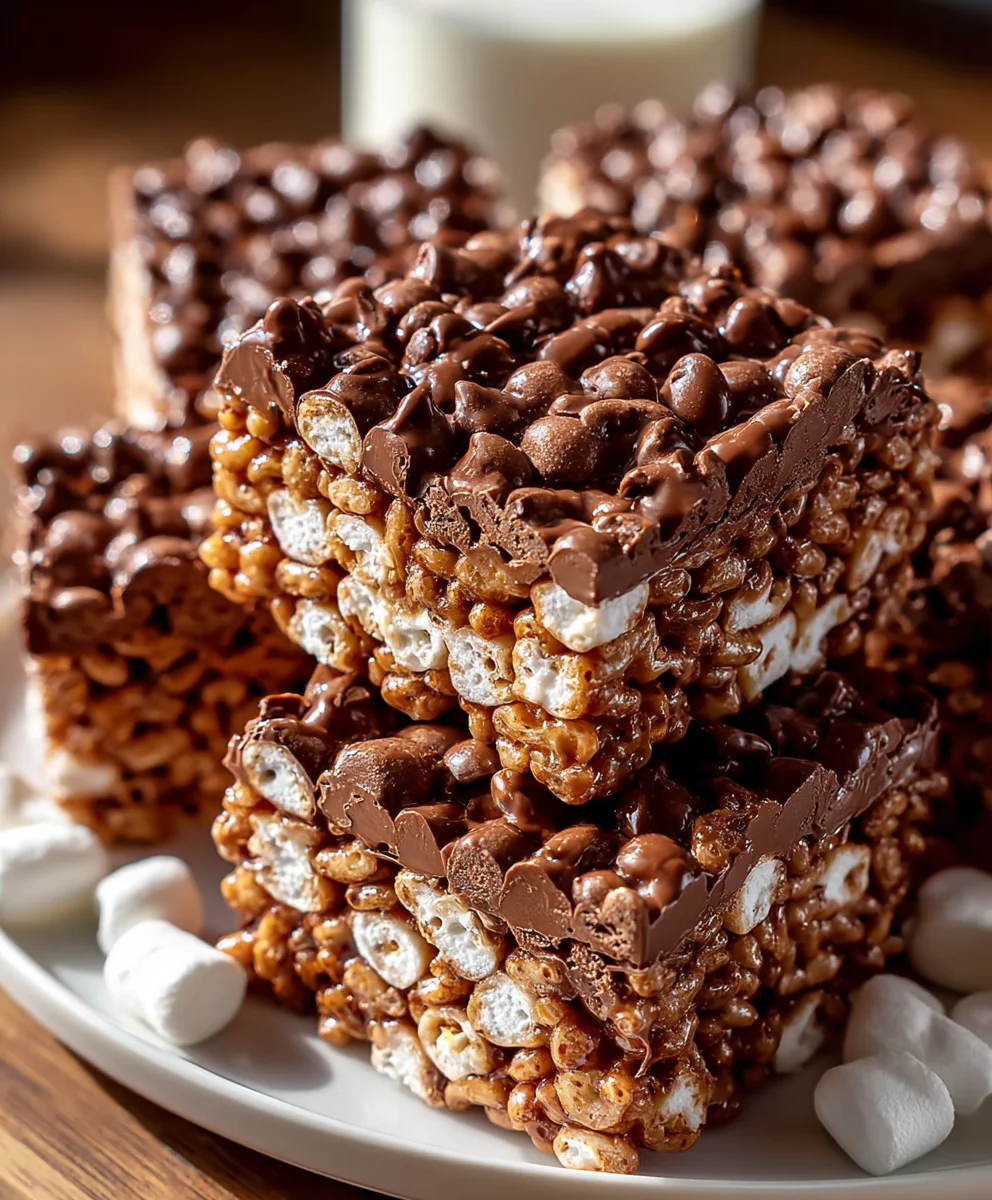
Ah, the joy of Chocolate Rice Krispie Treats! If you’re anything like me, you know that finding a quick and delightful dessert can feel like hunting for treasure. These treats are the ultimate solution, blending mouth-watering chocolate with the crispiness of cereal and the sweetness of marshmallows.
Perfect for busy weekdays or spontaneous get-togethers, they require no baking—just a handful of ingredients and a few simple steps! I can already sense the smiles awaiting as you present these delectable bites to your family. Trust me; they’ll disappear faster than you can say “Chocolate Rice Krispie Treats!”
Why You’ll Love This Chocolate Rice Krispie Treats
Chocolate Rice Krispie Treats are not just easy to make; they’re a delightful embrace of flavor and nostalgia all in one bite. In just 25 minutes, you can whip up this scrumptious dessert, making it perfect for busy moms and professionals alike. The combination of crispy rice and gooey chocolate marshmallows feels like a warm hug after a long day. Plus, kids will love helping out in the kitchen!
Ingredients for Chocolate Rice Krispie Treats
Gathering the right ingredients is the first step towards creating your delightful Chocolate Rice Krispie Treats! Here’s what you will need:
- Rice Krispies cereal: This is the classic crunchy base that adds that essential texture. Think of them as the sturdy building blocks for your treat!
- Cocoa Pebbles cereal: This chocolatey addition takes the flavor to a whole new level, ensuring each bite is rich and satisfying. Who can resist more chocolate?
- Salted butter: Used for melting with the marshmallows, the butter adds creaminess, while the salt enhances the overall sweetness. If you’re watching sodium, unsalted butter works too!
- Mini marshmallows: These sweet, squishy treats create that signature gooeyness. They’re the glue that holds everything together. If you’ve got leftovers, they make a tasty snack, too!
- Sea salt: Just a touch to balance the sweetness and bring out the flavors. It’s like a secret ingredient that everyone loves!
- Semi-sweet chocolate chips: Essential for that delicious chocolatey goodness. You could switch for milk chocolate if you prefer a sweeter option.
Feel free to add in some nuts or dried fruit for a little extra texture and flavor. Just remember, the ingredient quantities are at the bottom of this article and are available for printing!
How to Make Chocolate Rice Krispie Treats
Let’s dive into the step-by-step process of making these delightful Chocolate Rice Krispie Treats. Each step is quick and simple, making it easier for even the busiest of you to whip up this delicious dessert!
Step 1: Prepare the Pan
First things first, you need to prep your baking pan. Line a 23×33 cm rectangular baking pan with parchment paper. This step ensures your treats don’t stick. If you don’t have parchment, grease the pan thoroughly with butter. Trust me, you don’t want a sticky mess!
Step 2: Combine the Cereals
In a large heatproof bowl, gently combine the Rice Krispies and Cocoa Pebbles cereals. This mix creates the base of your treats. Don’t worry if it looks a little messy; that’s the beauty of building something delightful!
Step 3: Melt the Marshmallow Mixture
Next, grab a large saucepan and melt your salted butter over low to medium-low heat. As it starts melting, add 320 g of mini marshmallows. Stir constantly, and watch as they magically blend together into a smooth, gooey mixture—about 5 minutes should do the trick!
Step 4: Add Chocolate and Combine
Once the marshmallows are melty and smooth, it’s time to introduce 260 g of chocolate chips and the sea salt. Give it another two minutes of stirring until everything combines beautifully. This chocolate-marshmallow mixture is pure heaven!
Step 5: Fold in the Remaining Ingredients
Pour this glorious mixture over the bowl of cereals. Gently fold to combine, ensuring that every crunchy piece gets its sweet coating. When it cools a bit, use clean hands to mix thoroughly. It’s messy, but oh-so-fun! After that, fold in the remaining 104 g of mini marshmallows and 80 g of chocolate chips.
Step 6: Transfer and Cool
Finally, transfer your mixture to the prepared pan. Press it down gently into the corners. You want it to hold its shape, but don’t press too hard or it’ll become dense. Let it cool for 30–60 minutes before cutting into squares. Patience is key, but I promise it’s worth it!
Tips for Success
- Make sure all your ingredients are ready before you start. It keeps the process smooth!
- Be gentle when folding your mixture to keep that lovely crispy texture.
- Don’t rush the cooling time. Good things come to those who wait!
- Experiment with flavors! Add in some nuts or dried fruits for a twist.
- Store your treats in an airtight container to keep them fresh for longer.
Equipment Needed for Chocolate Rice Krispie Treats
- Baking pan: A 23×33 cm rectangular pan is ideal; a square pan works too!
- Heatproof bowl: Use a large one for mixing cereals; any mixing bowl works in a pinch.
- Large saucepan: Essential for melting the butter and marshmallows; a non-stick option makes cleanup easier.
- Spatula: A sturdy spatula helps mix everything together; a wooden spoon is fine as well.
- Parchment paper: Great for lining the pan; aluminum foil can be used if that’s what you have.
Variations of Chocolate Rice Krispie Treats
- Nutty Delight: Add a handful of chopped nuts like almonds or walnuts for a satisfying crunch and added nutrition.
- Fruity Twist: Toss in some dried fruit, such as cranberries or raisins, for a chewy texture that contrasts wonderfully with the crispy cereal.
- Peanut Butter Bliss: Swirl in a bit of creamy peanut butter to the melted marshmallow mixture for a rich flavor and extra creaminess.
- Gluten-Free Option: Use gluten-free Rice Krispies and Cocoa Pebbles to ensure everyone can enjoy these delicious treats!
- Minty Fresh: Add a few drops of peppermint extract to the marshmallow mixture for a refreshing minty flavor that’s perfect for the holidays!
Serving Suggestions for Chocolate Rice Krispie Treats
- Pair your treats with a tall glass of cold milk for the ultimate classic combo!
- Serve with fresh berries for a pop of color and a touch of tartness to balance the sweetness.
- For a fun presentation, cut them into fun shapes using cookie cutters!
- Top with a drizzle of melted white chocolate for an elegant touch.
FAQs about Chocolate Rice Krispie Treats
Can I make these treats ahead of time?
Absolutely! Chocolate Rice Krispie Treats can be made a day in advance. Just store them in an airtight container to keep them fresh.
What can I substitute for the semi-sweet chocolate chips?
If you prefer a sweeter taste, you can use milk chocolate chips. Dark chocolate also works if you enjoy a richer flavor.
Can I freeze Chocolate Rice Krispie Treats?
Yes, you can freeze these treats! Just wrap them tightly in plastic wrap and place them in an airtight container. They’ll stay fresh for about a month.
Why are my treats too hard?
If your treats turned out too hard, it might be because they were pressed too firmly into the pan. Gentle pressure is key to keeping them light and crispy!
How can I add extra flavor to these treats?
Consider mixing in ingredients like vanilla extract or a pinch of cinnamon to enhance the flavor profile. Sprinkle some sea salt on top for a touch of contrast!
Final Thoughts on Chocolate Rice Krispie Treats
Indulging in Chocolate Rice Krispie Treats is like unwrapping a cozy memory wrapped in sweetness and crunch. Each bite transports me back to my childhood, where simple pleasures were golden moments. The best part? This recipe invites everyone into the kitchen, allowing kids to spark their creativity while helping out. Whether you’re treating yourself after a hectic day or surprising a loved one, these no-bake delights bring joy with minimal effort. So, gather your family, create some laughs, and enjoy these delicious treats together. Trust me, it’s a bite of happiness you won’t want to miss!
Print
Chocolate Rice Krispie Treats
- Total Time: 25 minutes
- Yield: 12 servings 1x
- Diet: Vegetarian
Description
Chocolate Rice Krispie Treats are a delightful and easy no-bake dessert combining the crispiness of cereal with the sweetness of marshmallows and chocolate.
Ingredients
- 400 g Rice Krispies cereal
- 400 g Cocoa Pebbles cereal
- 57 g salted butter
- 424 g mini marshmallows, divided
- 0.5 teaspoon sea salt
- 340 g semi-sweet chocolate chips, divided
Instructions
- Line a 23×33 cm rectangular baking pan with parchment paper or grease thoroughly; set aside.
- Combine Rice Krispies and Cocoa Pebbles in a large heatproof bowl; set aside.
- Melt salted butter in a large saucepan over low to medium-low heat. Add 320 g mini marshmallows. Stir constantly until mixture is nearly melted and smooth, about 5 minutes.
- Add 260 g chocolate chips and sea salt to the melted marshmallow mixture. Continue stirring for 2 minutes until fully melted and homogeneous.
- Pour chocolate marshmallow mixture over the cereals. Gently fold to combine until evenly coated. When slightly cooled, use clean hands to finish blending for uniform coverage.
- Fold in the remaining 104 g mini marshmallows and 80 g chocolate chips until gently distributed.
- Transfer mixture to the prepared pan. Press gently and evenly into all corners. Allow to cool completely for 30–60 minutes before slicing into squares.
Notes
- For extra flavor, you can add nuts or dried fruit.
- Make sure not to press the mixture too hard into the pan, or it may become too dense.
- These treats can be stored in an airtight container for up to one week.
- Prep Time: 15 minutes
- Cook Time: 10 minutes
- Category: Dessert
- Method: No-bake
- Cuisine: American
Nutrition
- Serving Size: 1 square
- Calories: 200
- Sugar: 15 g
- Sodium: 100 mg
- Fat: 7 g
- Saturated Fat: 4 g
- Unsaturated Fat: 2 g
- Trans Fat: 0 g
- Carbohydrates: 30 g
- Fiber: 1 g
- Protein: 2 g
- Cholesterol: 15 mg