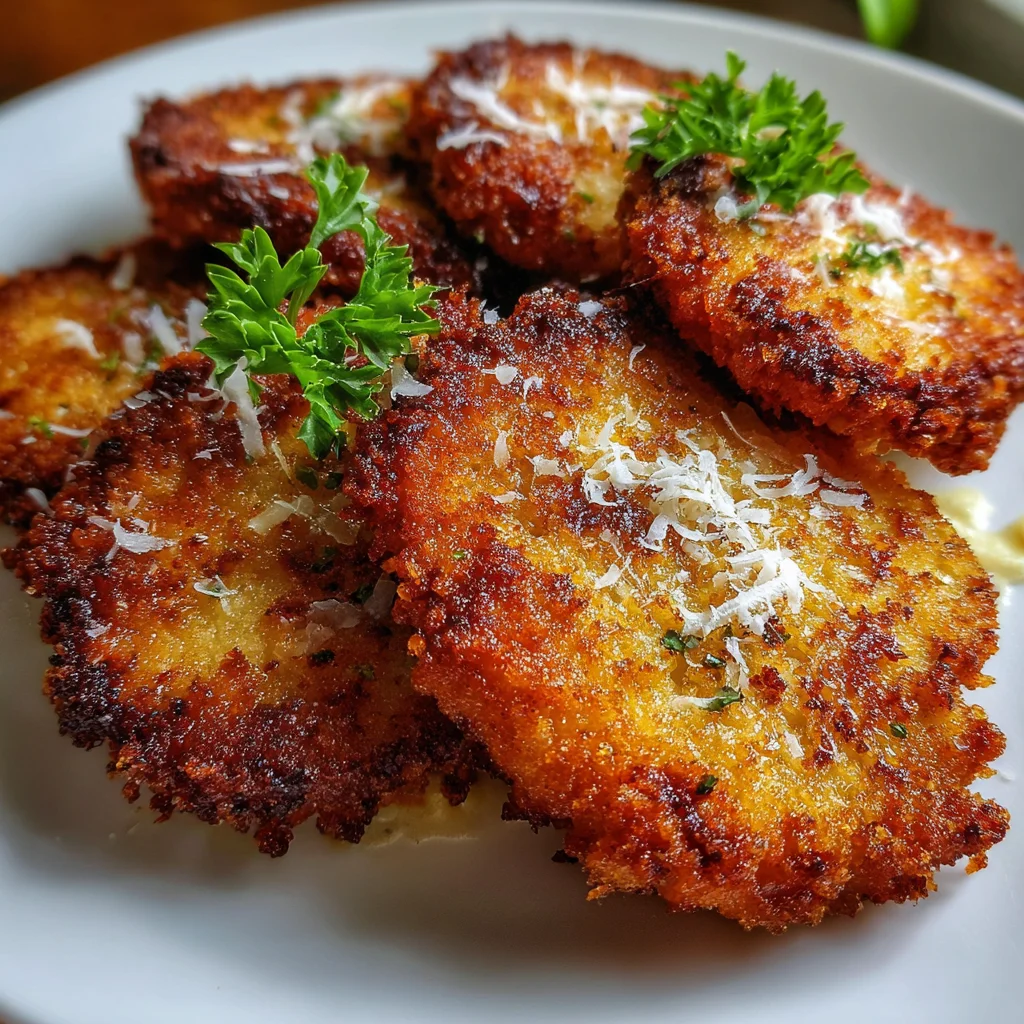
Introduction to Crispy Beef Cutlets
Welcome to the delightful world of Crispy Beef Cutlets! If you’re like me, juggling work, family, and countless daily commitments, you’re in search of a meal that’s both quick and delicious. These crispy cutlets are just the answer to impress your loved ones without spending hours in the kitchen. Imagine serving up something crunchy and flavorful that captures both sweet and savory notes. Whether it’s a busy weeknight or a special occasion, this recipe will surely become your go-to. Let’s dive into this culinary adventure, and I’ll share my secrets for achieving that perfect crunch!
Why You’ll Love This Crispy Beef Cutlets
Every busy mom knows the struggle of getting dinner on the table. With Crispy Beef Cutlets, you can whip up something quick and satisfying! They are not only fast to prepare, but they also boast a delicious crunch that your family will rave about. Plus, these cutlets are incredibly versatile! Pair them with your favorite sides or serve them as appetizers for a crowd. Trust me; these cutlets will earn you serious kitchen cred!
Ingredients for Crispy Beef Cutlets
Gathering the right ingredients is a breeze for making Crispy Beef Cutlets. Here’s what you’ll need for an unforgettable treat:
- Salted Butter: This adds richness and depth to the cutlets, providing a flavorful base.
- Granulated Sugar: Balances the savory notes while helping to achieve that delightful crunch.
- Vanilla Extract: A splash enhances the overall flavor, making the cutlets taste irresistible.
- Egg White: Acts as a binding agent, ensuring everything holds together perfectly while giving a lovely texture.
- All-Purpose Flour: This forms the backbone of the cutlet, giving it structure and that delightful crunch.
- Baking Powder: The secret to making your cutlets puff up just right so they’re light and crispy.
- Caramels: Unwrap these little pieces of joy for that sweet, gooey layer that takes the cutlets to a new level.
- Milk: Just a tablespoon helps the caramel smoothen out, creating a creamy topping.
- Milk Chocolate Chips: Melting these luscious chips creates a divine coating, adding a perfect finishing touch.
Feel free to get creative! Consider adding nuts or colorful sprinkles for extra texture and flair. For exact measurements, scroll down to the bottom of the article where everything is laid out for you. Happy cooking!
How to Make Crispy Beef Cutlets
Making Crispy Beef Cutlets is simple and fun! With these step-by-step instructions, you’ll find yourself whipping up something delicious in no time. Let’s get cooking!
Step 1: Preheat the Oven
The first step is vital: preheat your oven to 350°F. A proper temperature is key for achieving that golden crunch we all adore. It also helps the cookies maintain their shape. Trust me, this little step makes a world of difference!
Step 2: Cream Butter and Sugar
Next, grab a mixing bowl and cream together the salted butter and granulated sugar. This step is essential for creating a light, airy texture. As you mix, the sugar breaks down the butter, forming tiny air pockets that make for fluffy cutlets. So, don’t rush; this step takes about 3-4 minutes until it’s creamy and smooth!
Step 3: Mix in Egg and Vanilla
Now it’s time to add in the egg white and vanilla extract. The egg serves as a binder, helping everything come together. And that splash of vanilla? It brings an aromatic warmth to your cutlets that’s simply irresistible. Mix it all until well combined!
Step 4: Combine Dry Ingredients
In a separate bowl, combine the all-purpose flour and baking powder. Gradually add this mixture to your wet ingredients. Mixing thoroughly here ensures an even distribution of the flour, creating a base that is both crunchy and delightful. Your dough will start to come together nicely!
Step 5: Roll and Cut the Dough
Dust your countertop with flour, and roll out your dough to about 1/4 to 1/2 inch thick. Use a round cookie cutter to create the perfect circles. Remember, the thickness of your cutlets impacts the crunch factor, so don’t roll too thin. This step adds fun and creativity to the process!
Step 6: Bake the Cookies
Transfer your cutouts to an ungreased pan. Bake at 350°F for 6-8 minutes. Watch for the moment they puff up and lose that glossy sheen. They should have lightly golden edges. That’s when you know they’re ready!
Step 7: Cool and Prepare Caramel
Once out of the oven, let the cookies cool on a wire rack completely. This is key! Warm cookies can’t hold the gooey caramel topping. In the meantime, melt the caramels with a splash of milk in the microwave for about a minute, stirring as needed until it’s smooth and creamy.
Step 8: Assemble the Cutlets
Now for the fun part! Spoon a few teaspoons of caramel onto each cookie, spreading it gently until nearly covered. This layer of gooey goodness is what makes these cutlets special. Don’t rush; take your time with the assembly!
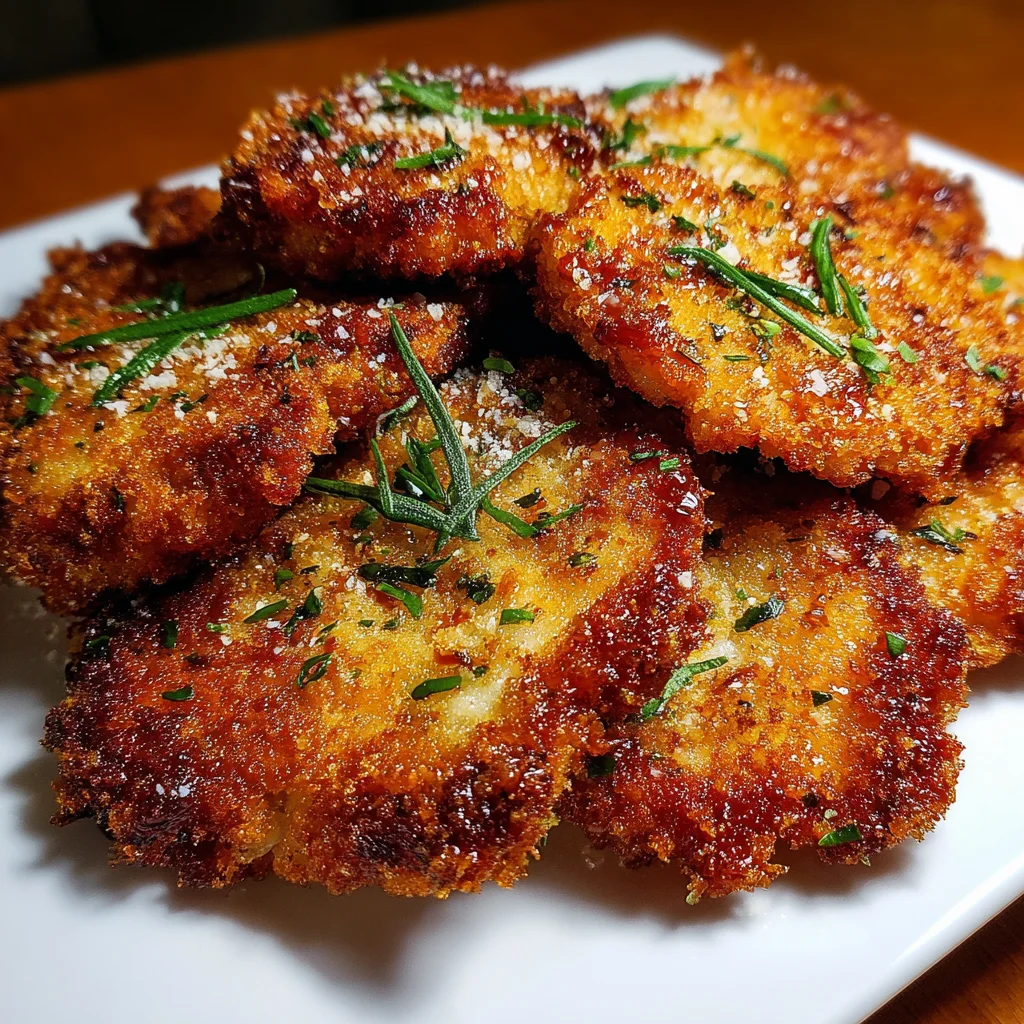
Step 9: Let Chocolate Set
Finally, melt the milk chocolate chips and spread a small amount over each caramel-covered cookie. Allow them to cool until the chocolate sets. When the cutlets are firm to the touch, they’re ready to serve. Patience here rewards you with that beautiful finish!
Tips for Success
- Make sure your butter is at room temperature for easy creaming.
- Don’t skip the cooling step; it’s crucial for caramel adherence.
- Use a light hand when rolling the dough for even cutlets.
- Keep an eye on the baking time to avoid overbaking.
- Consider using sprinkles immediately after spreading the chocolate for an extra festive touch!
Equipment Needed
- Mixing Bowl: A large bowl for mixing ingredients; a sturdy pot works too!
- Whisk or Mixer: Use a hand whisk or electric mixer for creaming; either gets the job done.
- Rolling Pin: A classic choice; a wine bottle can serve in a pinch!
- Cookie Cutters: Round cutters make perfect shapes; any glass can work if you’re in a bind.
- Baking Sheet: A basic sheet pan is perfect; line it with parchment for easy cleanup!
Variations of Crispy Beef Cutlets
- Nuts Galore: Add chopped nuts like pecans or walnuts into the dough for a crunchy texture and nutty flavor.
- Spiced Up: Sprinkle in a pinch of cinnamon or nutmeg to add a warm, aromatic vibe to your cutlets.
- Gluten-Free Option: Substitute the all-purpose flour with a gluten-free blend to accommodate those with dietary restrictions.
- Chocolate Delight: Swap milk chocolate chips for dark chocolate for a rich, decadent twist that complements the sweetness.
- Colorful Sprinkles: Top the chocolate with colorful sprinkles to make them visually appealing for kids and parties alike.
Serving Suggestions for Crispy Beef Cutlets
- Fresh Salad: Pair with a crisp green salad tossed in a light vinaigrette for a refreshing balance.
- Dipping Sauces: Serve with tangy barbecue sauce or zesty ranch for added flavor and fun.
- Garnish: Dust with powdered sugar for a sweet touch or drizzle with extra caramel for decadence.
- Drinks: Enjoy with iced tea or a chilled lemonade to round out the meal.
FAQs about Crispy Beef Cutlets
Do you have burning questions about these delightful Crispy Beef Cutlets? Fear not! I’ve got you covered with some answers to common queries that might pop up in your mind.
Can I make Crispy Beef Cutlets ahead of time?
Absolutely! You can prepare the cutlets and store them in an airtight container once they’re cool. They’ll maintain their crunchiness for a few days. However, I recommend adding the caramel and chocolate coating just before serving to keep it fresh.
What if I don’t have salted butter?
No worries! If you only have unsalted butter on hand, just add a pinch of salt to the recipe. That way, you’ll still achieve that wonderful balance of flavors in your crispy cutlets.
How can I store leftovers?
To keep your cutlets fresh, place them in an airtight container. This prevents moisture from ruining their delightful crunch. They’ll last about three days on the counter, or you can freeze them for up to a month.
Can I freeze Crispy Beef Cutlets?
Yes! You can freeze unassembled cutlets before adding the toppings. Just wrap them individually in plastic wrap and place them in a freezer bag. When you’re ready to enjoy, thaw and add your caramel and chocolate.
What are some easy sides to pair with Crispy Beef Cutlets?
These cutlets are incredibly versatile! They pair wonderfully with a fresh green salad, crispy sweet potato fries, or even a light vegetable platter. You can get creative!
FAQs about Crispy Beef Cutlets
Wondering about Crispy Beef Cutlets? I’ve got answers! Here are some common questions that might be on your mind.
Can I make Crispy Beef Cutlets ahead of time?
Absolutely! You can prepare the cutlets and store them in an airtight container after they’ve cooled. Keeping the caramel and chocolate toppings separate until serving will help maintain that perfect crunch!
What if I don’t have salted butter?
No worries if unsalted butter is all you have! Simply add a pinch of salt to replicate the flavor. Your cutlets will still turn out delectable!
How should I store leftovers?
To keep your cutlets fresh, stash them in an airtight container. This keeps moisture at bay and ensures they remain crunchy for up to three days. If you want to save them longer, consider freezing!
Can I freeze Crispy Beef Cutlets?
Yes indeed! If you freeze unassembled cutlets, wrap each one in plastic and place them in a freezer bag. When you’re ready to enjoy a treat, just thaw them out and add the caramel and chocolate. Easy peasy!
What are some sides to pair with Crispy Beef Cutlets?
These cutlets are versatile! Pair them with a refreshing salad, crispy sweet potato fries, or even some roasted veggies. The options are endless, so get creative!
Final Thoughts
Making Crispy Beef Cutlets brings joy and satisfaction to my kitchen. It’s more than just a recipe; it’s a delightful experience filled with crunchy textures and rich flavors. Whether I’m preparing them for a weekday dinner or a weekend treat, I love seeing my family’s smiles as they take that first bite. The versatility and ease of this recipe remind me that cooking can be a beautiful escape, even amid the chaos of daily life. So why not treat yourself? Dive into this culinary adventure, and enjoy every crispy moment with your loved ones!
Print
Crispy Beef Cutlets: Unlock the Secret to Perfect Crunch!
- Total Time: 35 minutes
- Yield: 24 cookies 1x
- Diet: Vegetarian
Description
Crispy Beef Cutlets are delicious, crunchy treats that blend sweet and savory flavors, perfect for any occasion.
Ingredients
- 1/2 cup (111g) salted butter
- 1/2 cup (115g) granulated sugar
- 1 tsp vanilla extract
- 1 egg white
- 1 1/2 cups (228g) all-purpose flour
- 1 tsp baking powder
- 20 caramels unwrapped
- 1 tbsp milk
- 2 cups (400g) milk chocolate chips
Instructions
- Preheat oven to 350°.
- Cream together the butter and sugar.
- Add in the egg and vanilla. Mix until well combined.
- Add the flour and baking powder. Mix thoroughly.
- Roll the dough out until 1/4 to 1/2 inch thick. Use a round cookie cutter to cut out circles. Transfer to an ungreased pan.
- Bake at 350° for 6-8 minutes. Pull out of the oven when the cookies are puffy and no longer glossy.
- Transfer to a wire rack and allow to cool completely.
- While the cookies are cooling, microwave the caramels and milk for 1 minute. Stir at the 30 second mark. Stir until smooth and creamy.
- Carefully spoon a few teaspoons of caramel onto each cookie, spreading until it almost covers the cookie.
- Place the cookies and caramel into the fridge for 10-15 minutes or until completely cold.
- Melt the chocolate chips for 30 second intervals until completely melted and incorporated.
- Spread a small amount of chocolate onto each cookie. Let the chocolate layer cool and set up before serving.
Notes
- Ensure the cookies are completely cool before adding the caramel.
- Store any leftovers in an airtight container to maintain crunchiness.
- For a variation, try adding nuts or sprinkles on top of the chocolate layer.
- Prep Time: 20 minutes
- Cook Time: 15 minutes
- Category: Dessert
- Method: Baking
- Cuisine: American
Nutrition
- Serving Size: 1 cookie
- Calories: 150
- Sugar: 10g
- Sodium: 70mg
- Fat: 6g
- Saturated Fat: 4g
- Unsaturated Fat: 2g
- Trans Fat: 0g
- Carbohydrates: 23g
- Fiber: 1g
- Protein: 2g
- Cholesterol: 15mg