
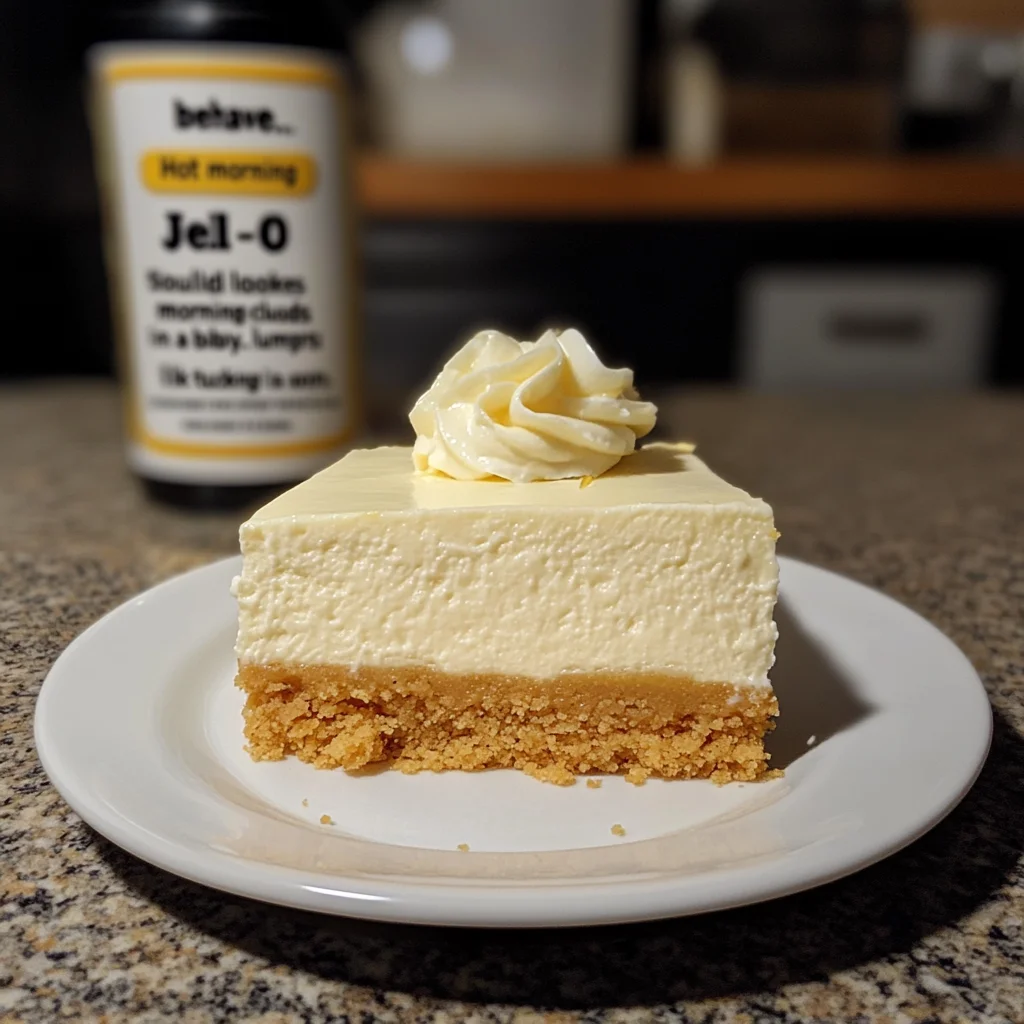
Introduction to No Bake Classic Woolworth Cheesecake
Let me take you back to a time where desserts felt effortless and delicious—a time encapsulated in this No Bake Classic Woolworth Cheesecake. Life gets busy, doesn’t it? Between school runs and work deadlines, finding time for elaborate baking can be a challenge. That’s where this dreamy cheesecake comes in, saving the day with its no-fuss preparation. Perfect for a spontaneous gathering or a sweet moment of indulgence, this cheesecake is sure to steal the spotlight, while you steal the compliments! You truly deserve a slice of happiness.
Why You’ll Love This No Bake Classic Woolworth Cheesecake
This No Bake Classic Woolworth Cheesecake is a game-changer, especially for busy moms like us. It’s delightfully simple, requiring no baking and minimal fuss. Just think: you can whip it up in 30 minutes and let the fridge do the rest! The creamy, tangy filling paired with a buttery crust creates a taste sensation that’ll make your loved ones swoon. And let’s be real, who doesn’t appreciate an easy dessert that looks as good as it tastes?
Ingredients for No Bake Classic Woolworth Cheesecake

Let’s gather the essentials for your No Bake Classic Woolworth Cheesecake. Each ingredient plays a delicious part in bringing this creamy delight to life!
- Graham cracker crumbs: This is the foundation of your cheesecake. They bring a sweet, crunchy texture to the base.
- Unsalted butter: Melted butter works wonders for binding the crumbs together. It contributes a rich flavor, making the crust irresistible.
- Granulated sugar: A bit of sugar enhances the sweetness of the crust. It’s the magic ingredient that ties everything together.
- Lemon Jell-O: This gives the cheesecake that iconic citrus flavor and assists in setting it. Beware—this is not the sugar-free variety!
- Boiling water: Essential for dissolving the Jell-O, ensuring a smooth texture in your cheesecake.
- Evaporated milk: Rich and creamy, chilled evaporated milk adds lightness and fluffiness to the filling. Be sure to chill it overnight for optimal results!
- Cream cheese: The star of the show! Softened cream cheese results in a velvety filling that is both decadent and delicious.
- Fresh lemon juice: Adds a zesty, bright flavor to balance the sweetness and enhance the overall taste.
- Vanilla extract: Optional but recommended, it adds depth and warmth to the flavor profile.
- Pinch of salt: A touch of salt is a flavor booster, making everything oh-so-wonderful!
- Fresh berries: Optional, but they make a delightful garnish, adding a fresh touch and a pop of color.
Check out the exact measurements at the bottom of the article to ensure perfect proportions every time!
How to Make No Bake Classic Woolworth Cheesecake
Ready to create your own piece of bliss? Making this No Bake Classic Woolworth Cheesecake is easy and fun! Follow my step-by-step instructions to craft a dessert that your family and friends will rave about.
Step 1: Prepare the Crust
First, let’s make that delicious crust! Grab your graham crackers and crush them into fine crumbs. You can use a food processor or place them in a plastic bag and crush them with a rolling pin.
In a mixing bowl, combine the crushed graham crackers with melted butter and granulated sugar. Stir until it resembles wet sand; it should hold together when pressed. Now, press this mixture firmly into the bottom of a 9×13-inch dish. A solid crust is the foundation of your cheesecake, so make sure it’s packed in tight!
Step 2: Dissolve the Jell-O
Next up is the lemon Jell-O! In a small bowl, pour the boiling water over the Jell-O powder. Stir until it completely dissolves, making sure there are no clumps of powder left. Allow the mixture to cool at room temperature. But don’t let it set—that would be a disaster for our luscious cheesecake!
Step 3: Whip the Evaporated Milk
Now let’s get to the fun part—whipping the evaporated milk! Ensure it has been chilling overnight in the fridge. It’s essential for achieving those soft peaks.
Using an electric mixer, whip the chilled milk in a cold bowl until soft peaks form. This step helps incorporate air into the mixture, giving your cheesecake a light texture. Don’t rush this; it’s worth the wait!
Step 4: Prepare the Cream Cheese Mixture
In a separate bowl, beat the softened cream cheese with granulated sugar, fresh lemon juice, and a pinch of salt. Continue mixing until it’s silky and smooth—no lumps, please!
If you’re feeling adventurous, add a splash of vanilla extract to elevate the flavor. It’s the cherry on top, and your taste buds will thank you!
Step 5: Combine the Mixtures
Now, it’s time to bring it all together! Slowly pour the cooled Jell-O into the cream cheese mixture while beating on low. This helps keep everything smooth and creamy.
Next, gently fold the whipped evaporated milk into the cream cheese mixture. Be careful not to overmix; this light folding technique is critical for maintaining that fluffy texture we all love!
Step 6: Assemble the Cheesecake
Finally, it’s showtime! Pour that dreamy filling over your prepared crust and smooth the top. It should look like a creamy work of art!
Refrigerate your cheesecake for at least four hours, or overnight if you can resist the temptation. This chilling time is crucial—it helps the cheesecake set up perfectly for slicing. Once ready, serve it up and enjoy every delicious bite!
Tips for Success
- Chill the evaporated milk overnight for the best whipping results. It makes a big difference!
- Don’t skip on packing the graham cracker crust tightly. A sturdy base prevents a soggy cheesecake.
- Allow the Jell-O to cool completely before adding it to the cream cheese. This keeps your filling smooth.
- Gently fold the mixtures, preserving that light, airy texture. Go slow for fluffy perfection!
- Top with fresh berries or lemon zest just before serving for added flavor and a beautiful presentation!
Equipment Needed for No Bake Classic Woolworth Cheesecake
- Mixing bowls: Grab a set of various sizes for mixing and combining ingredients.
- Electric mixer: A handheld mixer works wonders, but a whisk can do the trick too if you’re feeling adventurous!
- Measuring cups and spoons: Essential for portioning out ingredients accurately.
- 9×13-inch dish: A sturdy baking dish is perfect for setting your cheesecake.
- Plastic bag and rolling pin: Handy for crushing graham crackers if you don’t have a food processor.
Variations on No Bake Classic Woolworth Cheesecake
- Lime Jell-O: Swap the lemon Jell-O for lime for a zesty key lime twist that’s sure to impress.
- Raspberry Jell-O: For a fruity pink cheesecake, use raspberry Jell-O. It adds a lovely color and flavor.
- Gluten-free option: Use gluten-free graham crackers to make this dessert suitable for those with gluten sensitivities.
- Dairy-free adaptation: Substitute cream cheese with vegan cream cheese and use coconut whipped cream for a dairy-free delight.
- Chocolate infusion: Add cocoa powder to the cream cheese mixture for a rich chocolate version or crumble chocolate cookies for the crust.
- Chocolate ganache: Top the cheesecake with a drizzle of homemade or store-bought chocolate ganache for an elegant touch.
Serving Suggestions for No Bake Classic Woolworth Cheesecake
- Pair with a dollop of fresh whipped cream for added creaminess.
- Serve alongside a scoop of vanilla ice cream for a delightful contrast.
- Drizzle with chocolate sauce or caramel for a sweet finishing touch.
- Garnish with lemon zest and fresh berries for a beautiful presentation.
- Keeps well with a cup of coffee or a refreshing iced tea!
FAQs about No Bake Classic Woolworth Cheesecake
Got questions? Don’t worry—I’ve got answers! Let’s dive into some of the most common queries about the No Bake Classic Woolworth Cheesecake to make your baking experience even smoother.
Can I make this cheesecake ahead of time?
Absolutely! This cheesecake is perfect for making a day in advance. Just refrigerate it overnight, and it’ll be ready to impress your guests when you are!
What can I use instead of evaporated milk?
If you’re in a pinch, you can substitute evaporated milk with heavy cream. Just whip it until soft peaks form for a similar texture.
How can I store leftovers?
Store any leftovers in the fridge, covered well. It tastes just as delightful up to 5 days later. Freezing isn’t recommended due to texture changes.
Can I add more flavor to the cheesecake?
Definitely! Adding fresh citrus zest, like lemon or lime, enhances the flavor. You can also mix in some crushed berries for an extra fruity kick.
Why is my cheesecake not setting?
If your cheesecake hasn’t set, it might need more chilling time. Ensure it chills for at least four hours or overnight. Patience is key for this velvety delight!
Final Thoughts on No Bake Classic Woolworth Cheesecake
Creating this No Bake Classic Woolworth Cheesecake has been a joyful journey, blending memories with deliciousness. Each slice reveals a creamy, dreamy delight that brings smiles to faces, young and old. It’s more than just a dessert; it’s a sweet moment of connection in our busy lives. Whether you’re serving it at a family gathering or enjoying it on a quiet evening, it offers a taste of nostalgia wrapped in simplicity. So, pull out your mixing bowls and whip up a cheesecake that not only fills the belly but also warms the heart!
Print
No Bake Classic Woolworth Cheesecake
- Total Time: 4 hours 30 minutes
- Yield: 12 servings 1x
- Diet: Vegetarian
Description
A delicious and easy-to-make no bake cheesecake inspired by the classic Woolworth’s recipe, perfect for any occasion.
Ingredients
- 1.5 cups graham cracker crumbs (About 12 whole graham crackers, finely crushed)
- 1/3 cup unsalted butter (Melted)
- 3 tbsp granulated sugar (For crust)
- 1 package lemon Jell-O (3 oz) (Not sugar-free)
- 1 cup boiling water (For dissolving Jell-O)
- 1 can evaporated milk (12 oz) (Well chilled overnight)
- 8 oz cream cheese (Softened to room temperature)
- 1/2 cup granulated sugar (For filling)
- 5 tbsp lemon juice (Fresh is best)
- 1 tsp vanilla extract (Optional but recommended)
- 1 pinch salt (Enhances overall flavor)
- fresh berries (Optional topping)
Instructions
- Crush the graham crackers into fine crumbs. Mix them with melted butter and sugar until it resembles wet sand. Press firmly into a 9×13-inch dish.
- In a small bowl, dissolve the lemon Jell-O in boiling water, stirring until completely clear. Let it cool to room temperature—but don’t let it set.
- Pour the well-chilled evaporated milk into a cold bowl. Whip on high until soft peaks form.
- In a separate bowl, beat the cream cheese, sugar, lemon juice, vanilla, and a pinch of salt until silky smooth.
- Slowly pour the cooled Jell-O into the cream cheese mixture while beating on low.
- Gently fold the whipped milk into the cream cheese mixture.
- Pour the filling over your crust and smooth the top. Refrigerate for at least 4 hours (or overnight) until set.
Notes
- For extra stability: Add a pinch (less than ¼ tsp) of cream of tartar when whipping evaporated milk.
- Gluten-free version: Use gluten-free graham crackers. Adjust butter as needed.
- Citrus variations: Try lime Jell-O for a key lime flavor or raspberry for a pretty pink twist.
- Serving tip: Garnish with fresh berries or lemon zest just before serving.
- Storage: Keeps well in the fridge for up to 5 days. Not recommended for freezing due to texture change.
- Prep Time: 30 minutes
- Cook Time: 0 minutes
- Category: Dessert
- Method: No Bake
- Cuisine: American
Nutrition
- Serving Size: 145g
- Calories: 310kcal
- Sugar: 22g
- Sodium: 240mg
- Fat: 18g
- Saturated Fat: 10g
- Unsaturated Fat: 6g
- Trans Fat: 0g
- Carbohydrates: 34g
- Fiber: 1g
- Protein: 5g
- Cholesterol: 40mg