
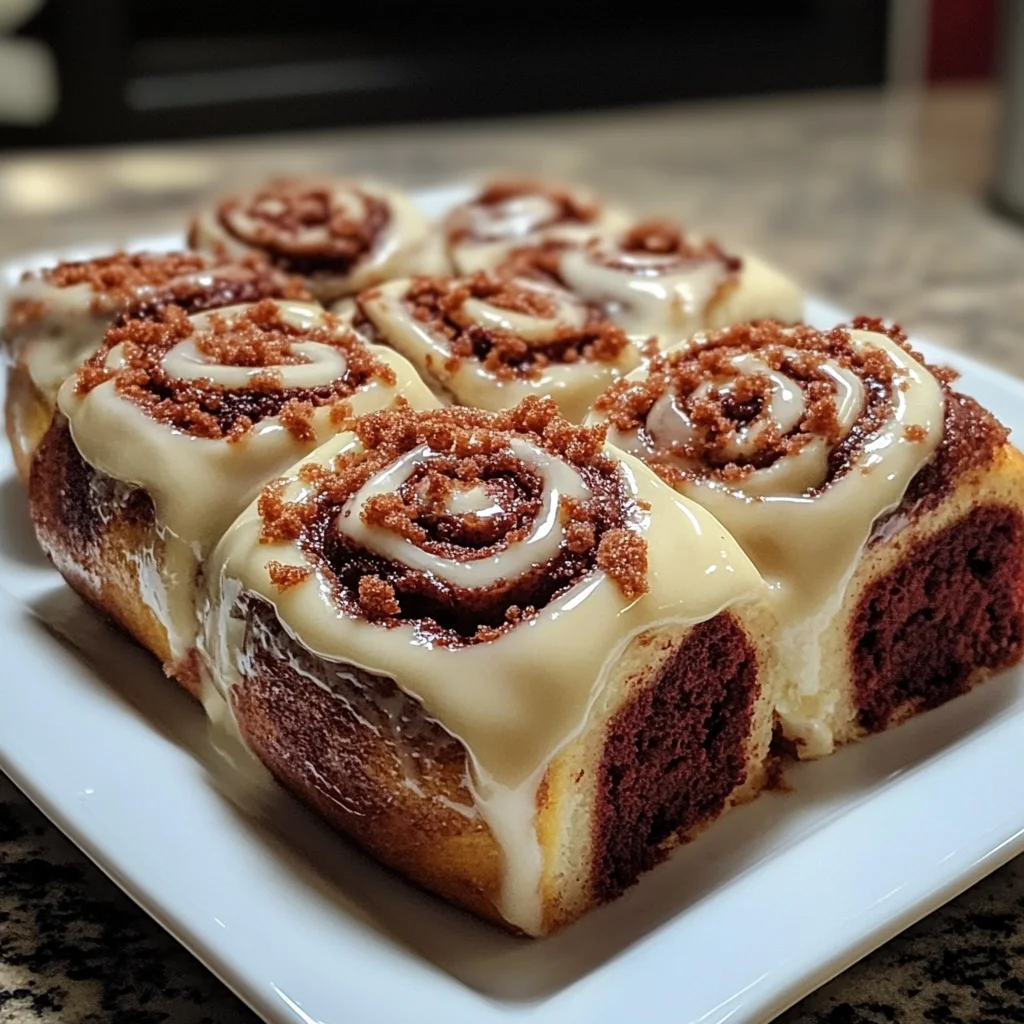
Introduction to Red Velvet Cinnamon Rolls
Welcome to the world of Red Velvet Cinnamon Rolls! As a busy mom, I know how hectic mornings can be. Finding a breakfast treat that brightens your day without adding to the chaos is like discovering a hidden treasure. These deliciously fluffy rolls, dripping with cream cheese frosting, are perfect for breakfast or even dessert. Imagine starting your day with the sweet aroma of cinnamon wafting through your home. And the best part? Everyone will think you spent hours in the kitchen, when really, it’s an easy, delightful recipe that fits seamlessly into your hectic schedule!
Why You’ll Love This Red Velvet Cinnamon Rolls
These Red Velvet Cinnamon Rolls are not just a treat for the taste buds; they’re a breath of fresh air in your busy routine. They come together quickly, making them ideal for a last-minute brunch or a cozy family breakfast. The joy of rolling cinnamon swirls, paired with a rich cream cheese frosting, turns any ordinary day into a special occasion. Trust me, they’ll disappear faster than you can say “yum!”
Ingredients for Red Velvet Cinnamon Rolls

When whipping up these delightful Red Velvet Cinnamon Rolls, having the right ingredients is key to achieving that fluffy, flavorful goodness. Here’s what you’ll need:
- All-purpose flour: The backbone of your rolls; it gives them structure and fluffiness.
- Granulated sugar: Sweetens the dough and helps achieve that golden crust.
- Unsweetened cocoa powder: Adds a touch of richness to the flavor, giving your rolls a hint of chocolate.
- Active dry yeast: Essential for rising! It helps your rolls become light and airy.
- Warm milk: Activates the yeast and adds moisture for a soft texture.
- Unsalted butter: Enhances flavor and tenderness in the rolls.
- Large eggs: Acts as a binder and contributes to the overall richness.
- Red food coloring: Optional but gives those beautiful velvety hues. You can skip it if you prefer a more traditional cinnamon roll look.
- Salt: Balances sweetness and amplifies the flavors in the dough.
- Brown sugar: For the filling, it adds a lovely caramel note and extra moisture.
- Ground cinnamon: The warm spice that takes these rolls to the next level.
- Softened butter for filling: Helps everything stick together while adding flavor.
- Cream cheese: For the frosting, it brings creaminess and a tangy note that pairs perfectly with sweetness.
- Powdered sugar: Sweetens the frosting while giving it that smooth texture.
- Vanilla extract: Enhances the overall flavor with a warm, inviting aroma.
- Heavy cream or milk: Used to achieve the right frosting consistency; keep it creamy and smooth!
For exact quantities, you can check the bottom of the article where they are listed clearly for printing. Now, let’s get ready to roll up our sleeves and create some magic with these ingredients!
How to Make Red Velvet Cinnamon Rolls
Creating your own Red Velvet Cinnamon Rolls is a delightful and rewarding experience. Each step brings you closer to that warm, gooey goodness. Trust me, the smell alone is worth it! Let’s dive right in and make some magic!
Step 1: Prepare the Yeast Mixture
Start by adding warm milk, granulated sugar, and yeast to a mixing bowl. Give it a gentle stir and let it sit for about 5–10 minutes. This time allows the yeast to bloom, becoming frothy. It’s like waking up your little yeast soldiers, ready to rise and shine!
Step 2: Combine Wet Ingredients
Once your yeast mixture is frothy, add melted butter, eggs, and red food coloring. Mix these ingredients in until everything is well combined. The red food coloring is optional but makes everything look like a party! Don’t forget to include the unsweetened cocoa powder and salt; they enhance the flavor.
Step 3: Form the Dough
Gradually add the all-purpose flour while mixing. Your goal here is to form a soft dough. If using a stand mixer, knead it for about 8–10 minutes until it becomes smooth and elastic. If kneading by hand, it’s a great stress reliever—work those muscles! It’s alright if the dough is slightly sticky; that’s what makes it fluffy.
Step 4: Let it Rise
Once your dough is kneaded, cover it with a clean kitchen towel. Place it in a warm area and let it rise for about 1 hour, or until it doubles in size. This is the perfect moment to tidy your kitchen or enjoy a cup of coffee. Time flies when magic is happening!
Step 5: Shape the Rolls
After the dough has risen, punch it down gently. Roll the dough out onto a floured surface into a large rectangle. Spread softened butter over the surface, and then sprinkle a mixture of brown sugar and ground cinnamon evenly on top. Roll the dough tightly into a log, and slice it into 12 equal pieces. Place them in a greased baking dish. It’s like making little velvet pillows of joy!
Step 6: Second Rise
Cover the rolls again and let them rise for another 30–45 minutes. This step allows the rolls to puff up even more. Preheat your oven to 350°F (175°C) while you wait. The anticipation is half the fun!
Step 7: Bake the Rolls
Once your rolls have risen, it’s time to bake! Slide them into the oven and bake for 25–30 minutes until they’re golden and cooked through. Keep an eye on them—overbaking can turn them from fluffy clouds into hard rocks!
Step 8: Make the Cream Cheese Frosting
While the rolls bake, let’s whip up some frosting! In a mixing bowl, beat softened cream cheese, powdered sugar, vanilla extract, and enough heavy cream or milk to achieve your desired consistency. It’s the luscious crown your rolls deserve!
Step 9: Frost and Serve
As soon as the rolls come out of the oven, generously spread the cream cheese frosting over the warm rolls. The frosting will melt into every crevice, making every bite an explosion of flavor. Serve them warm, and watch as everyone gathers around the table, smiles on their faces. What a sweet finish to your culinary adventure!
Tips for Success
- Make sure your milk is warm, not hot, to protect the yeast.
- Don’t rush the rising times; they’re crucial for fluffy rolls.
- If you’re short on time, prepare the dough a day ahead and refrigerate.
- Experiment with fillings—nuts or mini chocolate chips can elevate flavors.
- For a quicker cleanup, line your baking dish with parchment paper!
Equipment Needed
- Mixing Bowl: A large one for mixing your ingredients, or use a stand mixer for less effort.
- Rolling Pin: If you don’t have one, a sturdy wine bottle works just as well!
- Baking Dish: Any oven-safe dish will do; just ensure it’s greased well.
- Measuring Cups and Spoons: Kitchen essentials; using a scale can help for precision.
- Kitchen Towel: To cover the dough while it rises; a light blanket can substitute.
Variations of Red Velvet Cinnamon Rolls
- Nutty Delight: Add chopped walnuts or pecans to the filling for a crunchy twist.
- Chocolate Lovers: Sprinkle mini chocolate chips into the cinnamon-sugar mixture for extra sweetness.
- Healthier Option: Substitute half of the all-purpose flour with whole wheat flour for a nutty flavor and added fiber.
- Gluten-Free: Use a gluten-free flour blend and ensure the other ingredients are gluten-free.
- Maple Twist: Replace granulated sugar with maple sugar or maple syrup for a unique flavor profile.
- Fruit Infusion: Add dried cranberries or cherries to the filling for a fruity pop.
Serving Suggestions for Red Velvet Cinnamon Rolls
- Fresh Fruit: Pair with sliced strawberries or blueberries for a refreshing contrast.
- Coffee or Tea: Serve alongside a warm cup of coffee or herbal tea for a delightful morning treat.
- Presentation: Dust with extra powdered sugar or cinnamon for a pretty finishing touch.
- Ice Cream: For dessert, serve warm rolls with a scoop of vanilla ice cream for indulgence.
FAQs about Red Velvet Cinnamon Rolls
Can I make the dough ahead of time?
Absolutely! You can prepare the dough a day ahead of time. Just let it rise once, then refrigerate. When you’re ready to bake, let it come back to room temperature before rolling and shaping.
What can I substitute for cream cheese in the frosting?
If you’re not a fan of cream cheese, you can use mascarpone cheese for a similar texture. Alternatively, a whipped buttercream made with softened butter and powdered sugar works wonderfully too.
How do I store leftovers?
Keep any leftover Red Velvet Cinnamon Rolls in an airtight container at room temperature for up to 3 days. You can also refrigerate them for a week, just reheat in the microwave for a few seconds to enjoy them warm again.
Can I freeze these cinnamon rolls?
Yes! These delightful rolls freeze beautifully. After baking, let them cool completely. Wrap them tightly in plastic wrap and foil, and they can be stored in the freezer for up to 2 months. Thaw and reheat before serving!
Are Red Velvet Cinnamon Rolls just for special occasions?
Not at all! While they do make an impressive treat for special occasions, they’re also perfect for lazy weekend brunches or a sweet surprise any day of the week. Treat yourself—you deserve it!
Final Thoughts
There’s something truly magical about the process of making Red Velvet Cinnamon Rolls. From the moment the yeast begins to bubble, to the fantastic aroma that fills your home as they bake, each step is a joyful experience. These rolls have the power to transform an ordinary meal into something extraordinary. Whether it’s a Sunday brunch with family or a quiet breakfast treat for yourself, I hope these delightful rolls bring as much joy to your kitchen as they have to mine. So roll up your sleeves, savor the moment, and enjoy every last bite!
Print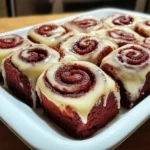
Red Velvet Cinnamon Rolls
- Total Time: 2 hours
- Yield: 12 rolls 1x
- Diet: Vegetarian
Description
Deliciously fluffy Red Velvet Cinnamon Rolls topped with cream cheese frosting, perfect for breakfast or dessert.
Ingredients
- 4 cups all-purpose flour
- 1/2 cup granulated sugar
- 2 tbsp unsweetened cocoa powder
- 2 1/4 tsp active dry yeast (1 packet)
- 1 cup warm milk (110°F/45°C)
- 1/3 cup unsalted butter, melted
- 2 large eggs
- 1–2 tbsp red food coloring
- 1/2 tsp salt
- 1/2 cup brown sugar (for filling)
- 2 tbsp ground cinnamon
- 1/4 cup unsalted butter, softened (for filling)
- 4 oz cream cheese, softened
- 1 cup powdered sugar
- 1 tsp vanilla extract
- 2–3 tbsp heavy cream or milk (for frosting consistency)
Instructions
- In a mixing bowl, combine warm milk, granulated sugar, and yeast. Let it sit for 5–10 minutes until frothy.
- Add melted butter, eggs, red food coloring, cocoa powder, and salt. Mix until combined.
- Gradually add flour and mix to form a soft dough. Knead by hand or with a mixer for 8–10 minutes until smooth and elastic.
- Cover and let rise in a warm place until doubled, about 1 hour.
- Roll dough into a large rectangle on a floured surface.
- Spread softened butter over the dough. Mix brown sugar and cinnamon and sprinkle evenly on top.
- Roll tightly into a log and cut into 12 equal pieces. Place in a greased baking dish.
- Cover and let rise again for 30–45 minutes.
- Preheat oven to 350°F (175°C) and bake for 25–30 minutes until golden and cooked through.
- While rolls bake, make frosting: beat cream cheese, powdered sugar, vanilla, and cream until smooth.
- Spread frosting over warm rolls before serving.
Notes
- Do not overbake to keep rolls soft and moist.
- You can prepare the dough a day ahead and refrigerate after the first rise.
- Frosting can be made ahead and stored in the fridge.
- Add nuts or mini chocolate chips for extra texture.
- Red food coloring is optional; the flavor remains delicious without it.
- Prep Time: 30 minutes
- Cook Time: 30 minutes
- Category: Dessert, Breakfast
- Method: Baking
- Cuisine: American
Nutrition
- Serving Size: 1 roll
- Calories: 280
- Sugar: 18g
- Sodium: 190mg
- Fat: 10g
- Saturated Fat: 5g
- Unsaturated Fat: 3g
- Trans Fat: 0g
- Carbohydrates: 43g
- Fiber: 1g
- Protein: 5g
- Cholesterol: 45mg